Microsoft Word is one of the most used office applications today by millions of people for the creation, editing and management of professional documents thanks to its multiple and varied tools for formatting, personalizing and structuring the data to be registered. It is a versatile tool since it is not only possible to enter text, but it facilitates the integration of images , audio and multimedia elements or other applications such as Excel. One of the easiest ways to protect the information hosted in Microsoft Word is to establish a read-only file that will allow users to access it, preventing changes such as new formats, insertion or deletion of text and more..
Thanks to the read-only mode we will check that the reviewing users cannot alter the content by accident, thus modifying the document. If our Word file is read-only mode, the content can be read or copied, but the option to modify will not be enabled . If someone tries to make changes to a file marked as read-only, they can be saved by granting a new name or a new save path to the document.
Through this tutorial we will learn to establish and subsequently eliminate the read-only mode in a Microsoft Word 2019 document but the same process applies to Word 2016..
To keep up, remember to subscribe to our YouTube channel! SUBSCRIBE
1. Set the read-only mode in Word 2019, 2016
Step 1
For this, once the text has been entered in the document, we go to the “File†menu and there we go to the “Information†section and click on the “Protect document†field and select the option “Always open as read only ":
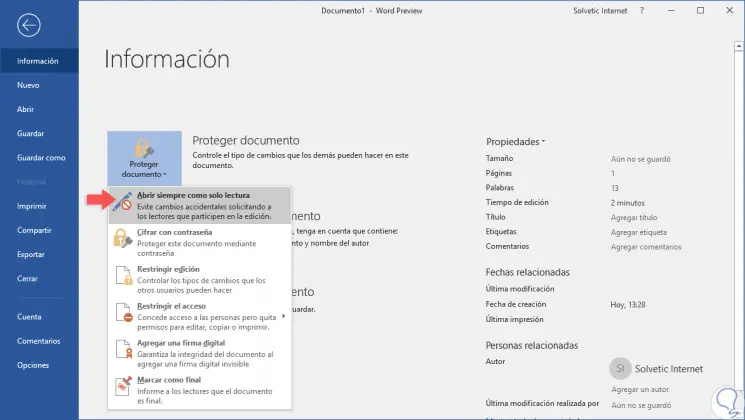
Step 2
By doing this we can see that this section is highlighted. There we proceed to save the changes and close the current document.
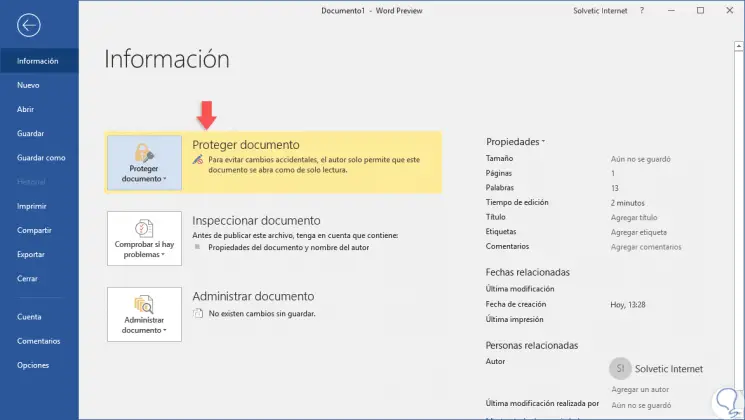
Step 3
Now, when you try to access this file, the following message will be displayed:
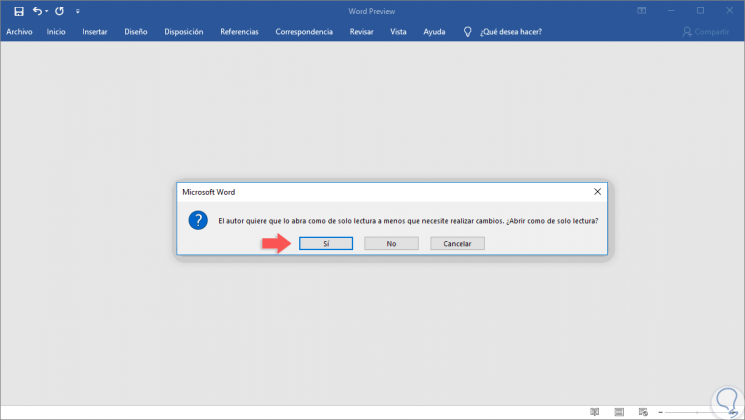
Step 4
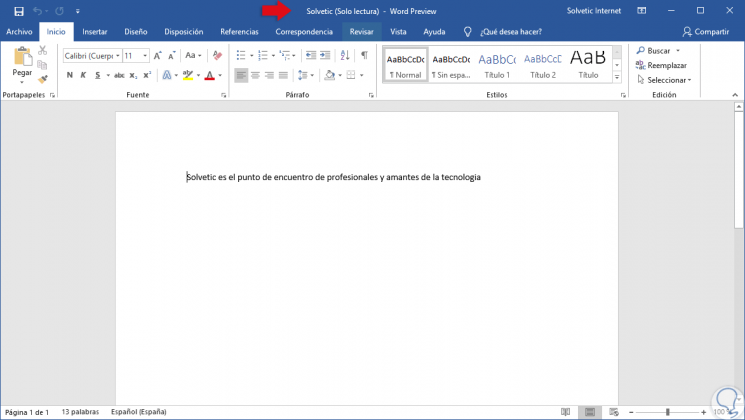
As we can see there, it is indicated that the author of the file has established the read-only mode, by clicking on Yes, we access the content of the document and at the top of it we will see the legend “Read onlyâ€:
Step 5
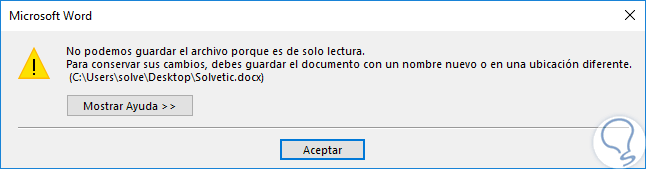
In case of making any changes to the file, if we try to save the document again we will see the following. As we can see, it is impossible to save the changes in the current document.
2. Remove read-only mode in Word 2019, 2016
Step 1
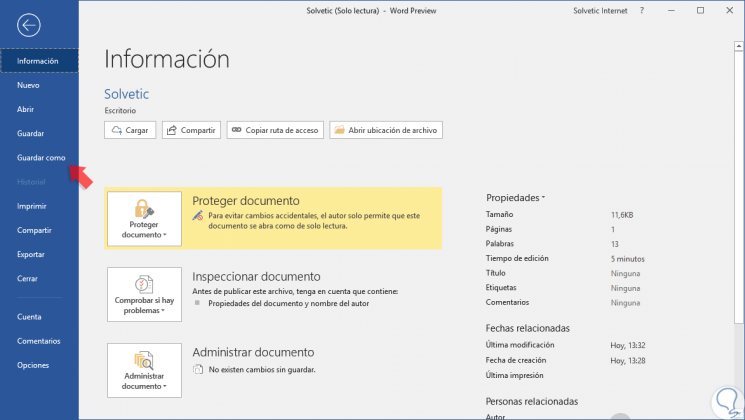
To delete this mode and to be able to edit the file, we go back to the "File" menu and there we select the "Save as" option:
Step 2
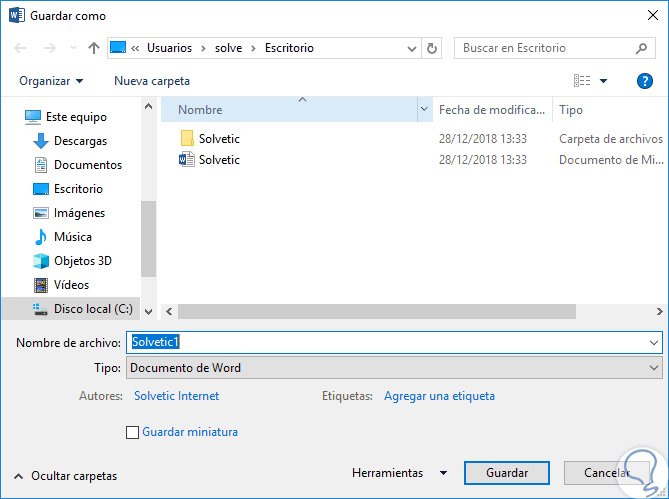
In the displayed window we enter a different name for the open file and define the path in which it will be saved:
Step 3
Thus, when we save this file with a new name, we will see that it is possible to edit its content. We can see that the legend Read only is not available.
Thus, we have learned to protect our Word 2019 or 2016 documents using read-only mode.