Usually the Mac saves screenshots directly to the desktop. However, if you'd rather save your screenshots in a separate folder, that's no problem either. The best way to do this depends on which macOS version you are using: Since macOS Mojave (from 2018), the change has been significantly simplified. We will show you which settings you have to make in the different versions in order to automatically save your screenshots in any location.
Set folder for Mac screenshots - macOS Mojave or newer
With the introduction of macOS Mojave, the screenshot function on the Mac has been significantly simplified. This also included the selection of a new folder in which screenshots are saved. So if you are using a macOS version of 2018 or newer, we recommend that you follow these instructions.
Follow our step-by-step instructions or take a look at the quick start guide ..
1st step:
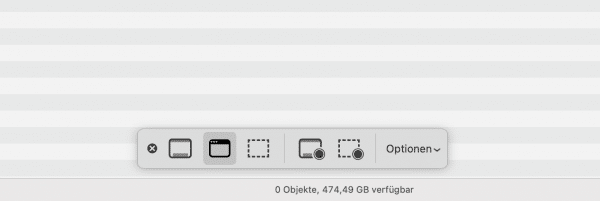 First press the key combination [Cmd] + [Shift] + [5] to open the macOS screenshot menu.
 2nd step:
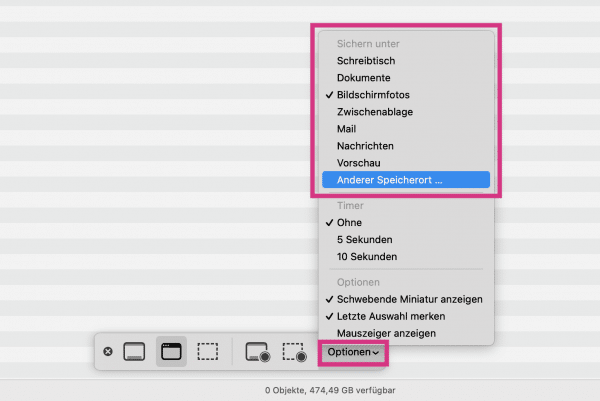 Click on " Options " in the menu bar . Here you can now select in the " Save as " area where your screenshots should be saved. There are some suggested locations to do this . If the folder you want is not in the list, click on " Other storage location ... ".
 3rd step:
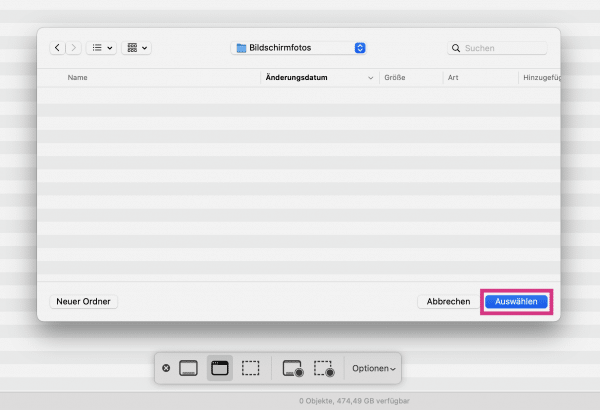 Navigate to the folder where you want to save your screenshots. Then click on “ Select ”. In the future, all screenshots will now be saved in this folder.
 Set folder for Mac screenshots - macOS High Sierra or earlier
You can also change the folder for screenshots with older macOS versions: Simply with the terminal. You can read exactly how this works here.
Follow our step-by-step instructions or take a look at the brief instructions ..
1st step:
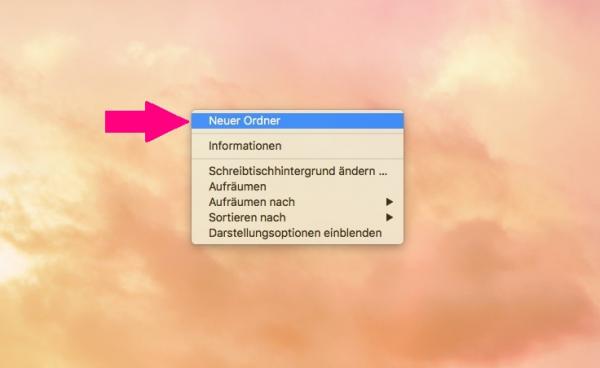 First create a new folder with a right click > " New folder ". It does not matter whether it is on the desktop or in another location.
 3rd step:
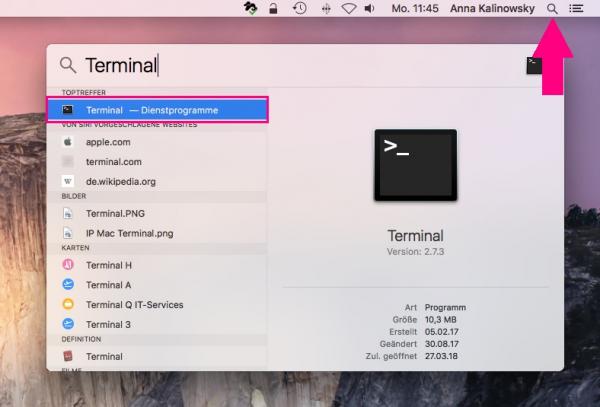 Now open the terminal by entering the search term in the spotlight search (small magnifying glass at the top right) and clicking on the first result.
 4th step:
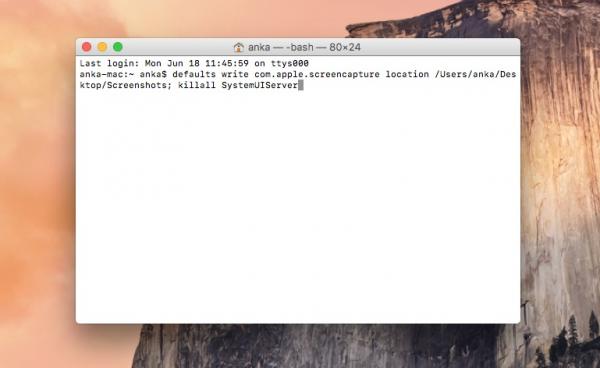 Enter the following command in the terminal: defaults write com.apple.screencapture location / Users / your username / location / folder name; killall SystemUIServer
 Enter your Mac user name for " Your Username ", the correct path to your screenshot folder for " Location " and the name of your screenshot folder for " Folder Name ". If you are not sure where your folder is stored, select the folder, click on " Edit " in the menu bar at the top , hold down the [ alt ] or [ option ] key and click to " Copy 'folder' as path name ". Then paste the path in the Terminal command.
If you then press the [ Enter ] key, all screenshots are then automatically saved in the new folder.
Tip : In this article, we will explain how to take screenshots on a Mac.
You can also take a screenshot with the tool . As a rule, this is already installed on your Mac and can be called up via the program folder (via " Utilities " or via the Spotlight search). With this program you not only have the opportunity to take a simple screenshot, but also to edit it When editing, you can, for example, change the size or activate a time-delayed self-timer.
Quick guide: Set folder for Mac screenshots - macOS Mojave or newer
- Press the shortcut [Cmd] + [Shift] + [5] .
- Click on " Options " and select one of the suggested locations.
- If, however, you would like to specify an individual folder, select “ Another storage location ... ”. Then navigate to the folder you want and click " Select ".
Quick start guide: Set folder for Mac screenshots - macOS High Sierra or earlier
- Create a new folder anywhere on your Mac and give it a new name .
- Then open the terminal , for example using the Spotlight search.
- Enter the following command there: defaults write com.apple.screencapture location / Users / your username / location / folder name; killall SystemUIServer
- Replace "Your Username", "Location" and "Folder Name" with the path for the desired folder.
- Then press the [ Enter ] key. All screenshots are then automatically saved in the newly created folder.