With Windows Movie Maker you can create animated "slide shows" from pictures and / or videos. Read here how to use animations, editing tools, effects and so on correctly. You will also learn how you can continue to use the program under Windows 10.
The classic
Windows Movie Maker was introduced with Windows Essentials 2012 - and has now been officially discontinued. But the tool continues to run on a number of computers and can still be found in many download portals. Important: There have been infected versions in circulation before, so only use reputable download portals that you know! You can also find the Movie Maker for download from us, for example. The installation works like any other program: just download the file and run it. Then just follow the instructions of the installation wizard. If necessary, you will be asked in between to download the ".NET Frameworks 3.5" runtime environment. So you can still use Windows Movie Maker with Windows 10.
The reason for its continued popularity: Movie Maker may be less capable than many other free programs, but it makes the job incredibly easy. Regardless of whether it is transitions, photo filters or rudimentary video editing, everything runs here from a single source and with just a few clicks. And the program certainly covers 90 percent of the functions that most users need for quick results.
In the following we will work our way through the functions on the tabs of the program from left to right - Movie Maker does not prescribe a fixed workflow. Simply working through the tabs works very well!
Home page
The main purpose of the "start page" is to bring content to the project. You can insert videos, pictures and pieces of music for the background music or record videos directly in the program via a connected webcam. You can rearrange the imported media with the mouse and carry out some functions directly via the context menu - but this is easier later via the individual tabs. The zoom behavior is interesting here: By default, images are displayed as individual thumbnails. If you zoom in further with [+], however, they will appear several times. Logical, because after all, the image is displayed (by default) for seven seconds. Imported videos appear directly as a series of thumbnails.
After the media has been completely imported, you can insert additional modules using the "Title", "Image title" and "Credits" buttons. The title and credits slowly show or hide different text modules, for the latter there are templates for director, actor, location and soundtrack. Image titles are simply text overlay for individual images. You can edit videos, images and texts by double-clicking - but more on that later in the "Edit" tab.
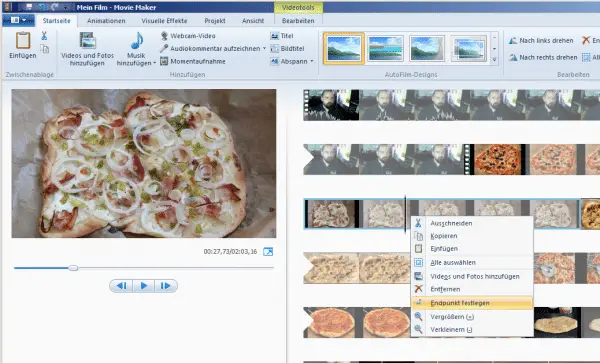 Editing directly via the context menu.
 Animations
In the "Animations" tab you can now define two types of effects: transitions and "pan and zoom" effects. The transitions simply fade from the previous to the current element, just as you may be familiar with from slide presentations. If you want to make it easy for yourself, you can click on "Apply to all" to apply the selected transition to the entire project. Tip: don't do this - it's boring. By the way: As soon as the mouse pauses over an effect, you can see a preview of it.
You probably also know "Pan and Zoom" as an effect: Images are moved during their display time while zooming at the same time - this brings static photos to life. In this case, with the first effect "Automatic pan and zoom", there is also an option that you can confidently transfer to the entire project, as each image is then randomly assigned a variant. But be careful: the effect will then also be applied to videos in the project, which is not necessarily pretty..
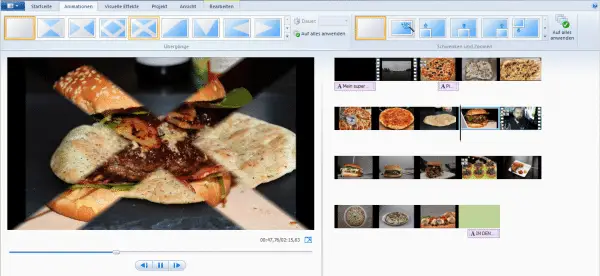 There are plenty of animations to choose from for transitions.
 Visual effects
The area "visual effects" should be self-explanatory, here filters are simply placed over images and videos. Tip: Even if you only see one line with a few effects here, there are significantly more - unfortunately you have to scroll over the small arrows to do so. Unfortunately, Microsoft has also chosen a very impractical, single-line view for the animations, thanks to which you can quickly overlook the mass of animations.
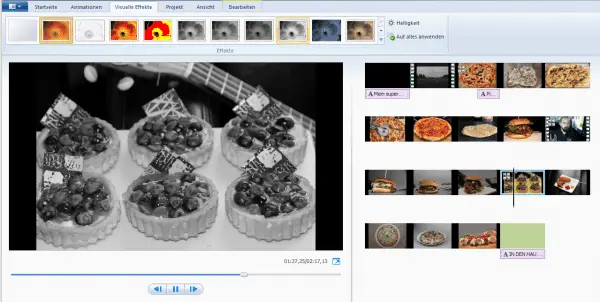 Effects can also be applied to all elements at the same time.
 Project
There are two important settings under "Project": On the one hand, you can specify whether the sound of videos, recorded comments or background music should be emphasized. You should definitely adapt this depending on the project. On the other hand, you determine the format here, whereby the "4: 3" option is certainly more due to the age and should no longer be used..
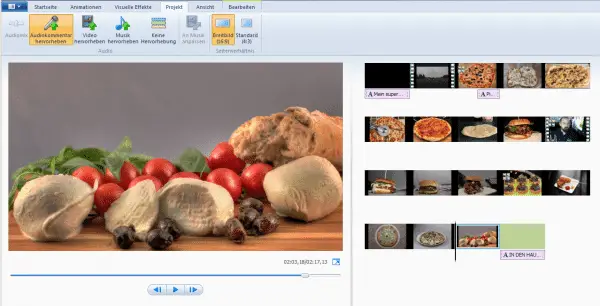 Still available today: The 4: 3 format - Movie Maker is no longer the youngest.
 To edit
It gets really exciting in the "Edit" tab, where you will probably spend some time. Depending on which element is selected, you get different options here. The "display time" is essential for images. You can mark several images in the project with [SHIFT] + [click] or [CTRL] + [click] in order to assign the same duration to all of them. Or mark all with [CTRL] + [A] and then deselect individual images with [CTRL] + [click] .
At this point, videos can be faded in and out, the playback speed can be manipulated or a simple editor can be called up using the "trim tool", which you can use to cut out unwanted parts of the video. It is also possible to split a clip, for example to apply two different effects to a video.
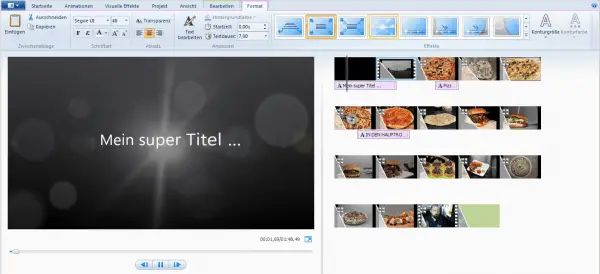
If you select an element, regardless of whether it is a picture, video or opening / closing credits, that also contains a text, you will see another tab to edit this text - the "Format" tab.
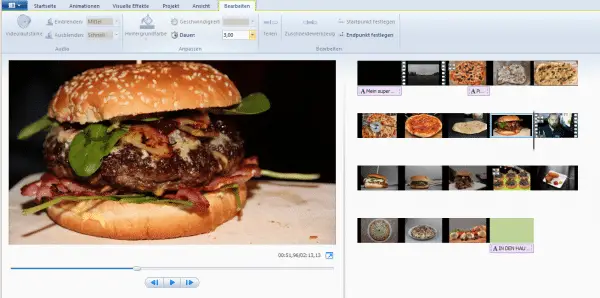 Central question: How long are pictures shown in the video?
 format
The usual text tools are available under "Format" to determine the font and appearance. And again there is a whole range of effects to allow the affected texts to be faded into the clip in a rotating movement, for example, or to give them a certain degree of transparency.
export
When you are finished with all settings, you can export the video via "Save movie". The given profiles should provide something suitable for most purposes, otherwise you can also make your own settings. Ultimately, however, only the image and bit rate, resolution and audio format are set - you do not have to worry about complicated code options.
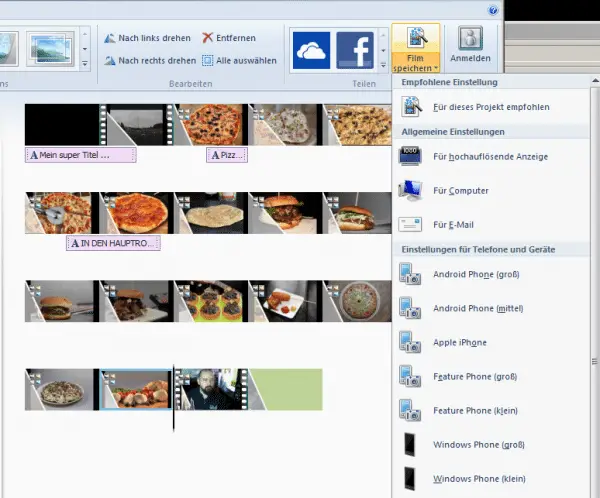 There are easy-to-use templates for export.
 Tips
Probably the most important tip for a successful project: Don't overdo it with effects. If, for the sake of convenience, you want to apply an effect to the entire project, use at least one that is as simple as possible. After all, you don't want your film to look like a failed 90s PowerPoint presentation.
When importing music in the "Home" tab, you can not just select local files, you can also record using a microphone yourself (for example to comment on the video) or search for pieces on the Free Music Archive website that you can use legally free of charge. The "Vimeo" option offered no longer works because the Vimeo Music Store has not existed since 2016.
Instead of exporting videos locally, they can also be shared directly from the start page via Facebook, Flickr and other services - however, you need to log in with a Microsoft account.
Once you are familiar with the functions, some tasks can probably be done better directly on the start page: With the context menu of videos you can do rudimentary video editing even faster than with the "Edit" tab.
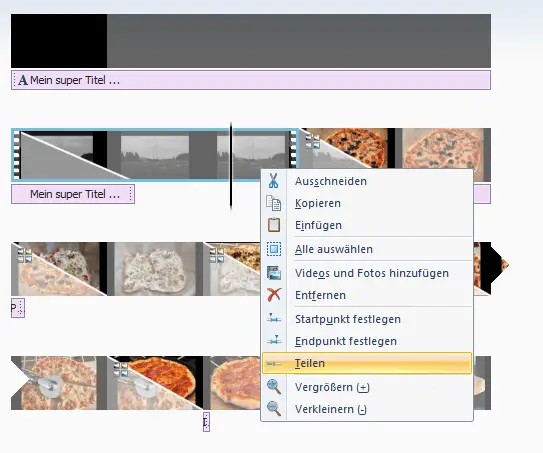 You can also share videos directly via the context menu.
 Alternatives
Windows Movie Maker is one of the most entry-level video editing programs out there. However, if you don't want to wallow in the past with the program that Microsoft has discontinued, here are some alternatives for you:
Video editor
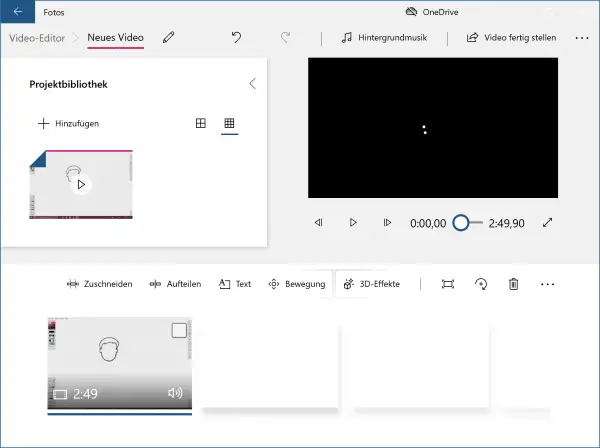
Although Windows Movie Maker is no longer available, as a Windows 10 user, you can still create simple videos on your computer. This is thanks to the video editor built into Microsoft Photos.
To access it, you can simply search for "Video Editor" on your computer or open Microsoft Photos and select "Video Project" to get started anytime. The video editor allows you to do basic editing tasks like cropping, speed, movement, text, filters, background music and even 3D effects! If you enjoyed working with Movie Maker, then you will definitely be happy with Video Editor.
Avidemux
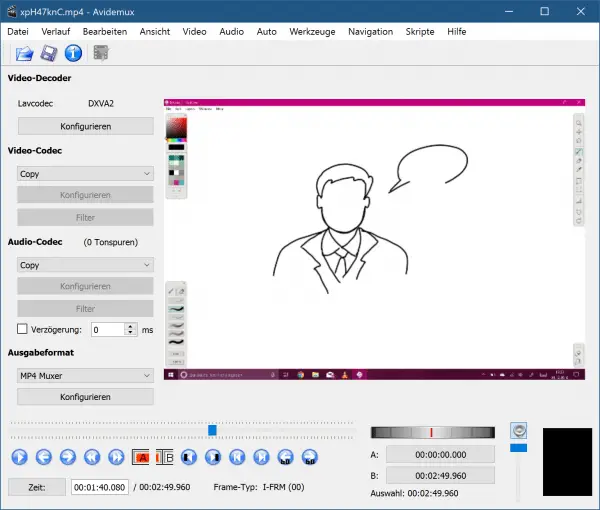
Avidemux is an open source video editing software with pretty basic features that is completely free. With this tool, you can easily cut, filter and encode your videos. Its greatest strength is its ability to handle different types of files like AVI, MP4, ASF, etc.
Avidemux is not only available for Windows, but also for Linux and Mac OS. The user interface isn't as fancy as you might want it to be, but this tool definitely serves as a Movie Maker alternative.
Ezvid
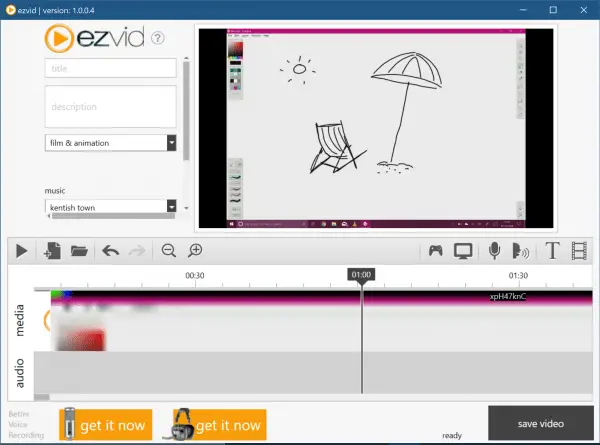
Ezvid is a suitable alternative to Movie Maker due to its simplicity, but it goes one better when it comes to video editing and should be an excellent upgrade for Movie Maker users.
While only available for Windows, Ezvid is a well-equipped video editor and screen recorder. Since its introduction in 2011, it has been upgraded with more cool features like facecam, speed control, screen drawing and speech synthesis. Thanks to the uncomplicated user interface, even a beginner will feel like a professional in just a few minutes.
