In the year 2000, Microsoft launched within its Windows operating system the Windows Movie Maker application with which it was possible to create and edit videos thanks to certain functions included for this purpose. Over time, improvements such as Xbox 360 playback and support for the DVR-MS file format were integrated.
So far everything went very well but since Windows implemented the Live Essentials suite and integrated into the Movie Maker, some key functions were eliminated and others were integrated such as the ease of exporting videos to DVD or YouTube from the app and additionally Windows Movie Maker supports formats such as WMV / .ASF, .MPG (MPEG-1), .AVI (DV-AVI), .WMA, .WAV and .MP3 as well as the functionality to capture video directly from the camera or other device..
Movie Maker Features
The main features of Movie Maker are:
- Add title slides with text
- Add text captions in photos
- Possibility of making movies from video clips or photos
- Add or edit background music
- It will be possible to superimpose text subtitles, emoticons, sound clips in video clips and more
- Integrate photo enhancement filters
- Includes a music editor with audio trim, fade effects and more for professional effects
- HD video quality and much more
Now we will see how to install Windows Movie Maker on Windows 10 since in the current editions it is not present.
To keep up, remember to subscribe to our YouTube channel! SUBSCRIBE
How to install Windows Movie Maker on Windows 10
Step 1
For this process we must go to the following link in order to download Windows Live Essentials:
Note
Within the link you can see on the right several download options, notice that there is one that says "WINDOWS EXECUTABLE" click and download that file that is the direct setup of Windows Live Essentials with Windows Movie Maker.
Windows Live Essentials
Step 2
We will see the following:

Step 3
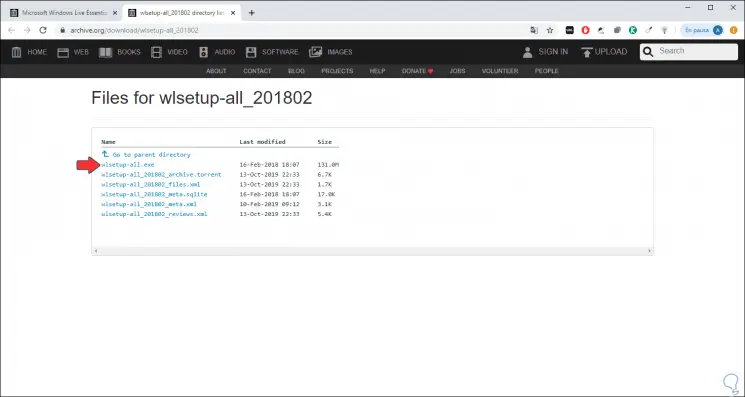
We click on the “Show all files†button and we will see this:
Step 4
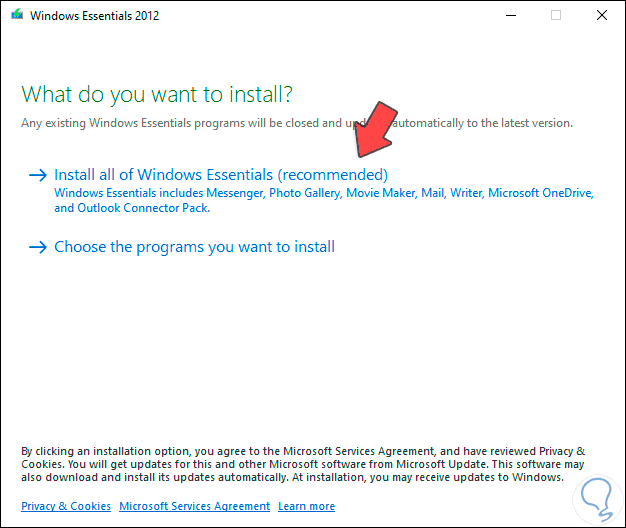
We click on the line “wlsetup-all.exe†to download the executable which once it is downloaded, we will double click on it to start the installation process in Windows 10 which will have the following appearance:
Step 5
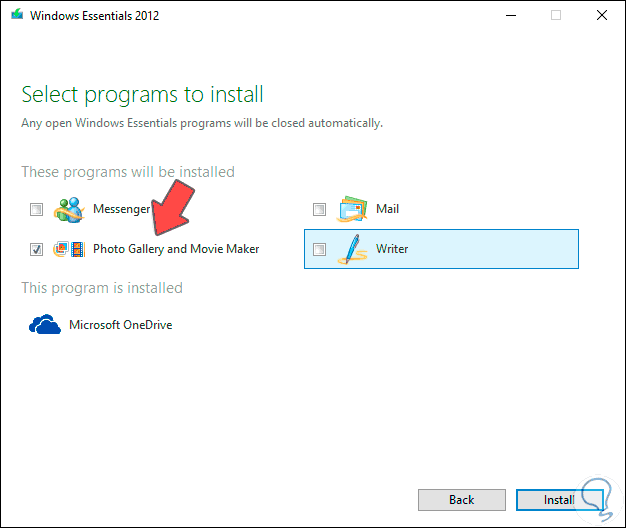
There we click on the option “Choose the programs you want to install†in order to select the programs ourselves and not install the entire suite, when clicking there we must activate only the “Photo Gallery and Movie Maker†box:
Step 6
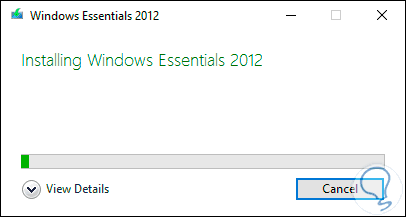
We click on “Install†to proceed with the installation process of Windows Movie Maker on Windows 10:
Step 7
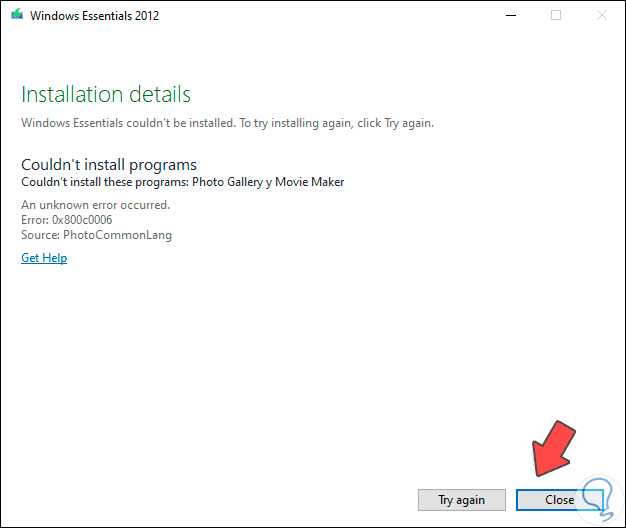
In the current versions of Windows 10 we will see that the following error is launched when the installation process is finished:
Step 8
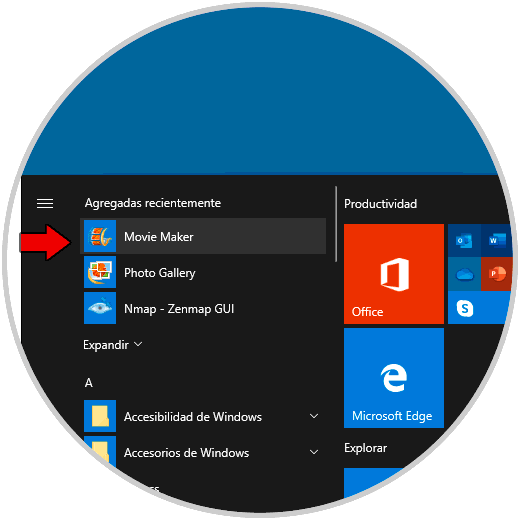
Although this normally implies a non-installation of the application, in this case it is not so because if we go to the Start menu or use the search engine there we will find the available Movie Maker application:
Step 9
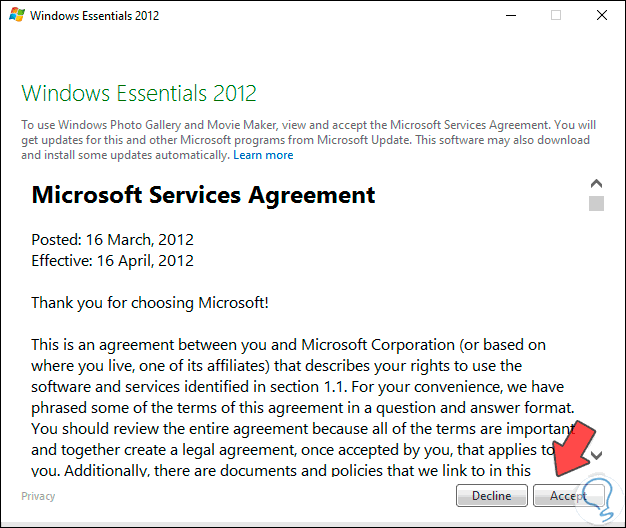
When opening it, we must accept the Windows Essentials license terms:
Step 10
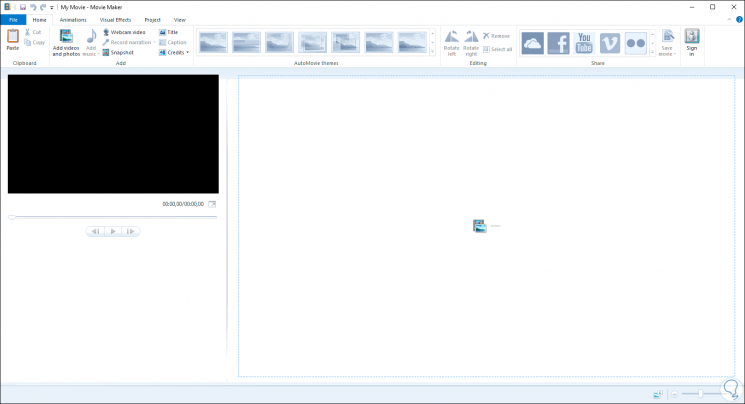
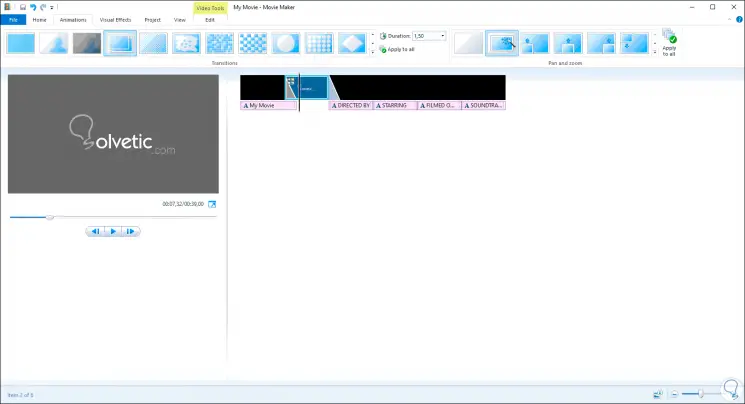
We click on Accept and in this way we will access Windows Movie Maker in Windows 10:
Step 11
There we will be ready to use Movie Maker fully. We have various animations, visual effects, editing tools and much more.
With this method it will be possible to install Windows Movie Maker on Windows 10 and bring to our memory everything that this popular application offers us to edit videos and others..