The processes in Linux play a fundamental role within all the actions to be executed since these allow what services, applications and roles to be executed correctly. When a process presents some type of error, this is likely to trigger many other tasks to be affected resulting in a negative impact on many other areas. Sometimes it can happen that we find processes that suddenly stop and that we must find in order to finish it. Therefore, it is useful to know how to see the processes that are running and thus choose which ones we want to kill to avoid further failures..
As Linux system administrators we must make use of the integrated tools to manage the processes and through the terminal it will be possible to show a running process, change the level of priorities, eliminate processes and more actions on them.
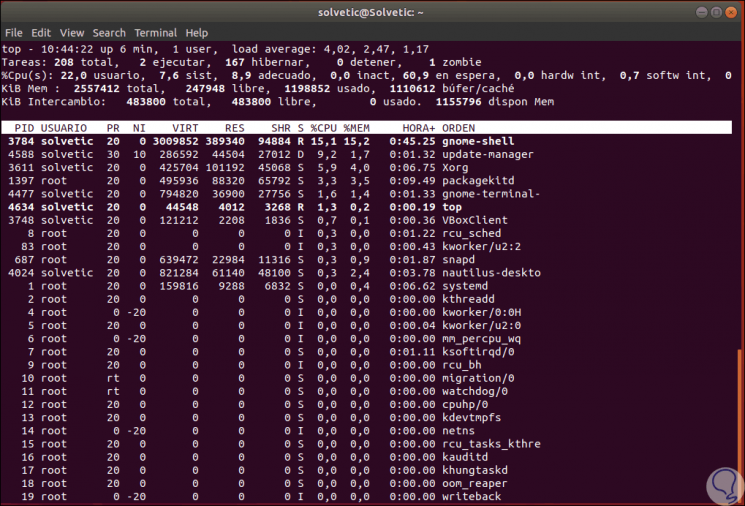
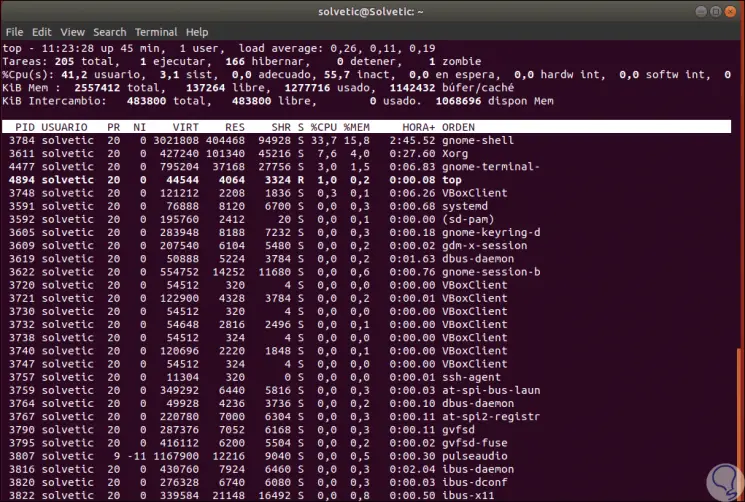
Normally, when we want to see the processes in execution in Linux we use the “top†command that generates a complete list of the processes with details such as:
- User who has the process.
- CPU, memory and other use.
TechnoWikis will explain other methods how we can validate and manage processes in Linux..
To keep up, remember to subscribe to our YouTube channel! SUBSCRIBE
1. Manage processes using PS in Ubuntu
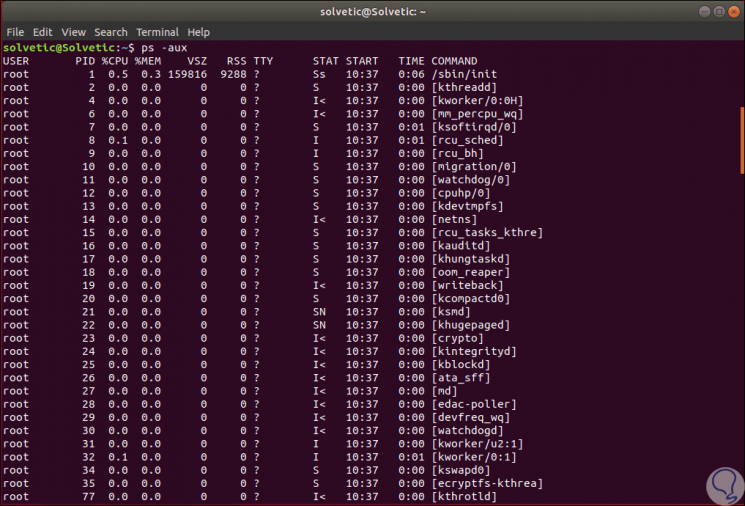
The ps (process status) command is one of the most common since this command lists the running processes in real time.
Step 1
The basic execution of ps is as follows:
ps -aux
Step 2
As a result we obtain the following values:
- CPU and RAM memory usage.
- Start time of the process.
Step 3
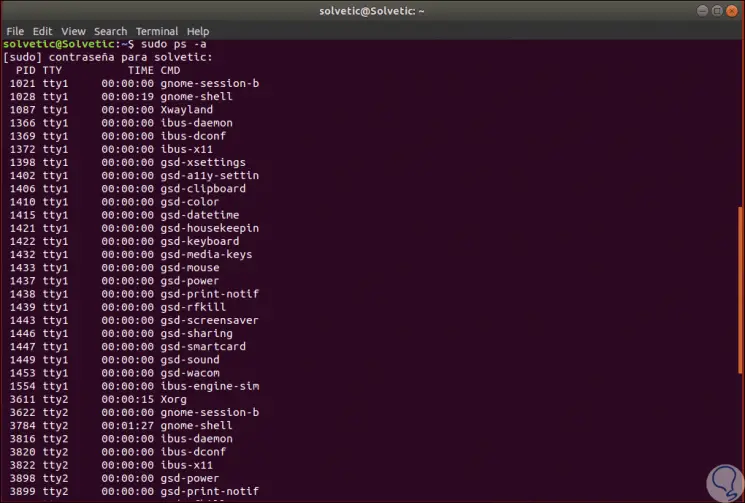
Another option to use ps is as follows:
sudo ps -a
Step 4
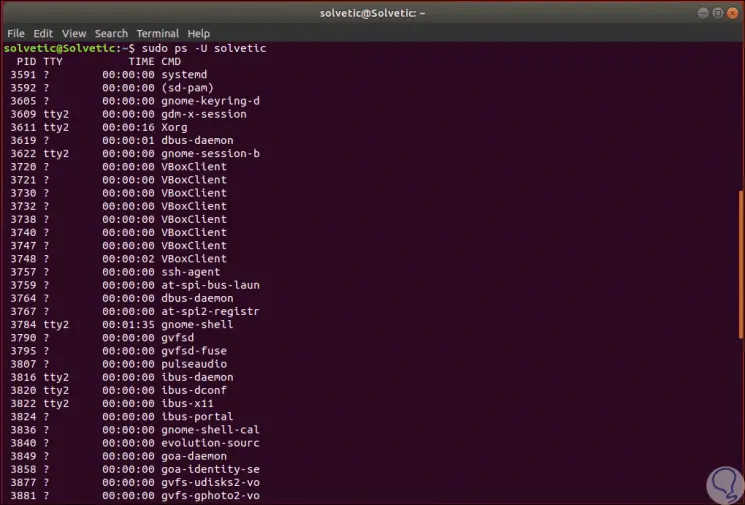
We could see the processes of a particular user:
sudo ps -U TechnoWikis
Step 5
If the system has too many processes, it is possible to use the less and more command as a pipe to display the process on one screen at a time.
ps -aux | more sudo ps -aux | them
Step 6
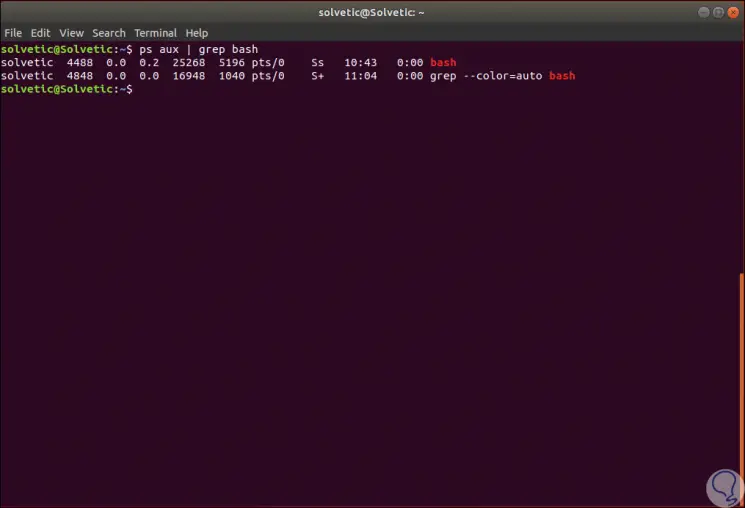
It is also possible to search for a particular process using the following syntax:
ps aux | grep "process"
Step 7
Some of the parameters to use with the ps command are:
-TO
Shows all processes (of all users in the system).
-to
It shows all the processes of a given [tty].
-d
Show everything except the session leaders.
T
It shows all the processes of the current terminal.
to
It shows all the processes of the current terminal including those of other users.
g
Show all processes including leading groups.
r
Show only current processes.
x
It shows the processes in a BSD style (without controlling [TTY]).
2. Use the PGREP command in Ubuntu
Step 1
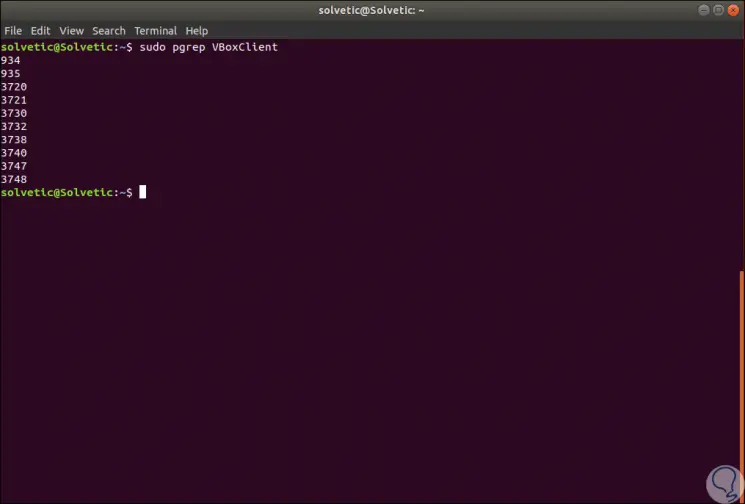
The pgrep command is a utility which takes a regular expression from the command line and is responsible for returning the ID of the processes whose name matches the indicated regular expression, its use syntax is:
pgrep process
Step 2
When executed, the result will be the PID of the processes associated with the search:
Step 3
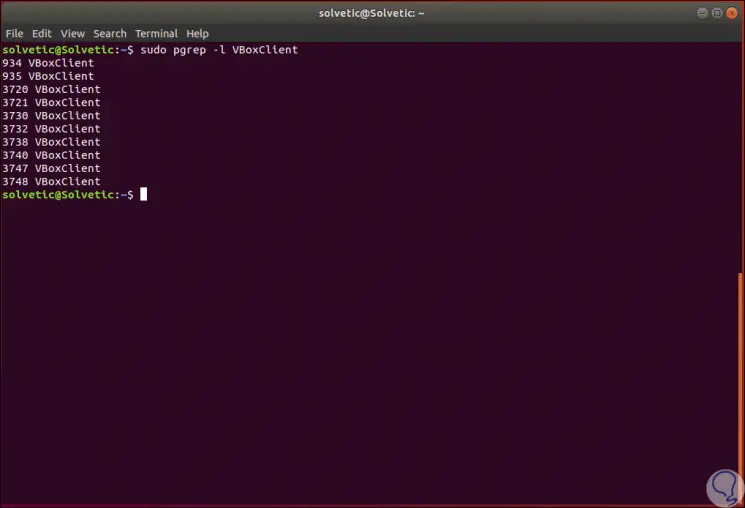
If we want to list both the PID and the process name we add the
-l parameter
: sudo pgrep -l process
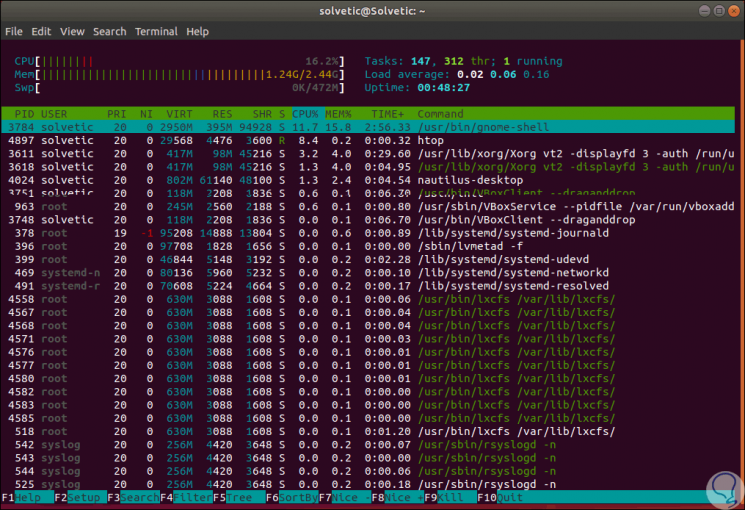
3. Use the top and htop command in Ubuntu
As we have mentioned, they are the most used commands for the whole process management issue in Linux, since both top and htop list the processes in real time with a series of analysis attributes.
Step 1
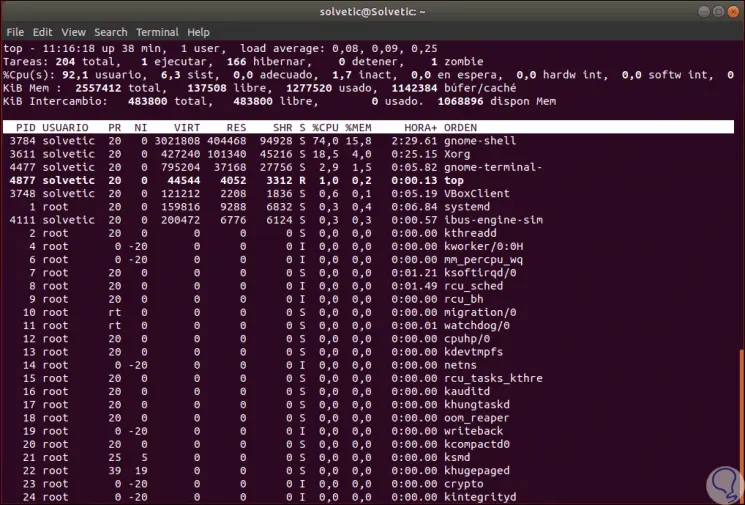
The basic top syntax is to execute:
Top
Step 2
As a result we will obtain all the processes with their attributes:
Step 3
Something important about this top command is that vital information is displayed at the top for administrators such as:
- Number of tasks in real time.
- How many processes are in hibernation or detained.
- Memory and disk usage, etc.
Step 4
When using the top command, we will see summary information of the system, as well as a list of the tasks currently managed by the Linux kernel, something to keep in mind is that all the summary information of the system can be configurable by the user. Some of the parameters to use with top are:
-to
Sort by memory usage.
c
command line / program name.
-d
delay time interval with values ​​such as -d ss.tt.
-or
User analysis For example:
top -u solvetic
Step 5
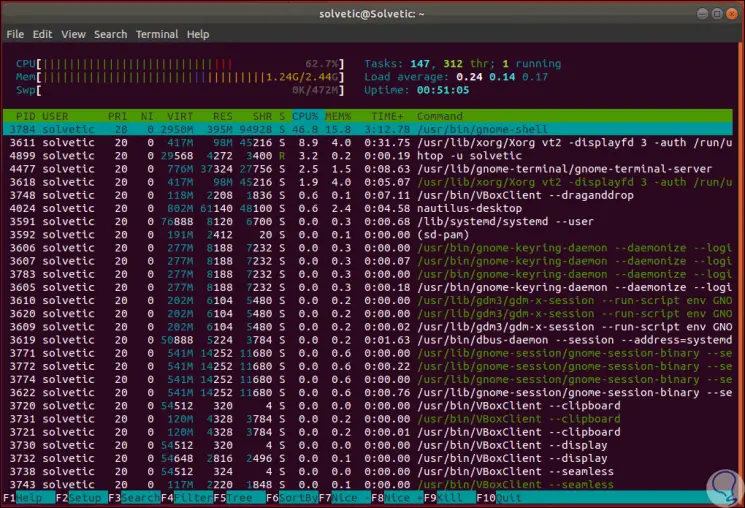
Now, the htop command is a free process viewer (GPL) based on ncurses for Linux systems. Its operation is identical to top at the top, but the difference is that it will be possible to move vertically and horizontally in order to visualize all the processes running in the system. The associated command lines are displayed. For use, just run htop:
Step 6
There we see the processes in an interactive way and some of the parameters we can use are:
-d –delay
Delay in between updates, in tenths of a second.
-d –delay
-C --no-color --no-color
Start htop in monochrome mode.
-C --no-color --no-color
-h –help
Access htop help.
-h –help
-u --user = USERNAME
Deploy only the processes of a specific user.
-u --user = USERNAME
-p Pag
This option works with threads for page map memory statistics.
-p Pag
-s --sort-key
Sort the data by the indicated column.
-s --sort-key
-v –version
Display htop help.
-v –version
Step 7
In addition to this, we can use the function keys like this:
F7 / F8
Increase process priority.
/ F8 F7 / F8
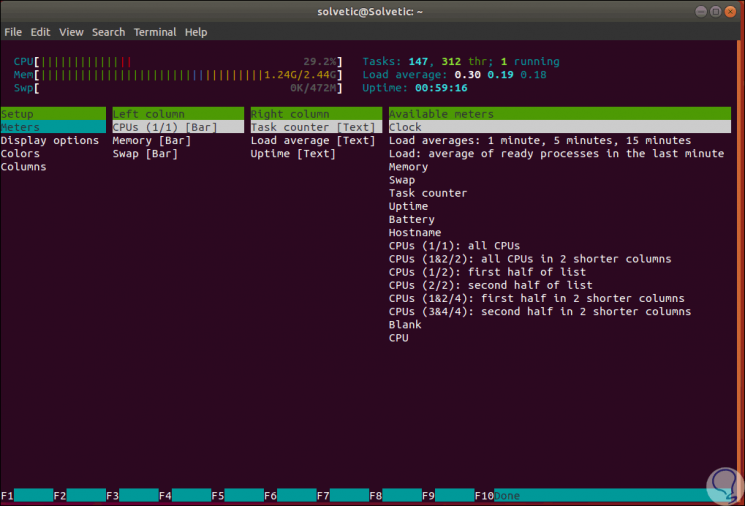
Step 8
For example, if we use F2 we access all the configuration variables:
4. Manage processes with KILL in Ubuntu
Step 1
The kill command has basically been developed to kill a conflicting process, its syntax is:
kill pid kill -signal pid
Step 2
For example:
Kill 4220

Step 3
The kill command sends a signal to a process, in case of not defining which signal to send, by default the TERM signal is sent which terminates the process. Some of the parameters to use are:
Show name
It is the name, the abbreviated name or the number of the signal to be sent, preceded by a hyphen.
-s signal
List names
See the list of available signal names.
-l, --list [= signal]
Signal Information
List the names and numbers of signals available in a table.
-L, --table
Step 4
The signs, along with their number are:
Step 5
For example, to finish a process we can execute:
kill -15 4220
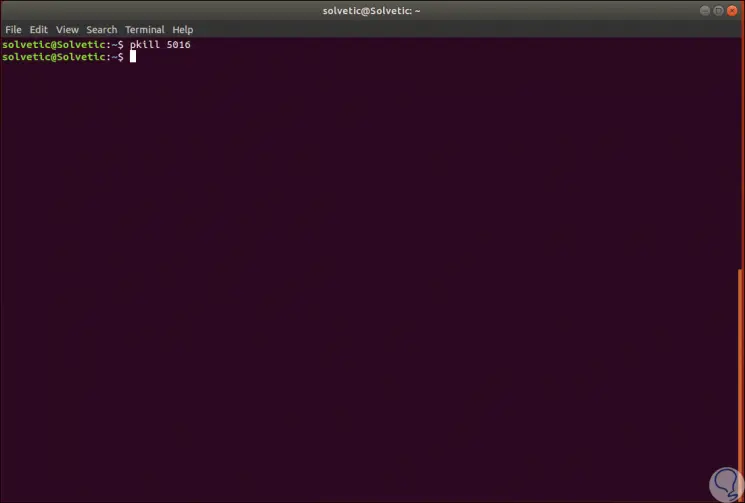
5. Use the PKILL command in Ubuntu
The pkill command searches for or signals processes based on name and other attributes.
Step 1
Its general syntax is:
pkill [-signal] [-fvx] [-n | -o] [-P ppid, ...] [-g pgrp, ...] [-s sid, ...] [-u euid, ...] [-U uid, ...] [-G gid, ...]
Step 2
The pkill command is responsible for sending the specified signal which is by default SIGTERM, to each process instead of listing them on the standard output. Its basic execution is:
pkill "process"
Step 3
Some of the parameters to use are:
Delimit ID
defines the string used to delimit each process ID in the output.
-d delimiter
Compare pattern
Makes the pattern only compare to the name of the process.
-F
Match processes
Makes the processes match in the process group identifications listed.
-g pgrp
Processes with real ID
Only the processes whose real group ID is listed are the same.
-G gid
List process
List the process name, as well as the process ID.
-l
Killed process
display which process has been killed.
-I have done
Count the same processes
Count the matching processes.
-c count
Use whole name
makes use of the full name of the process for matches.
-f full
New processes
Select the most recent processes.
-n newest
Old processes
Select the oldest processes.
or oldest
Match ID
Match the session IDs.
-s session
Choose order
Select with the indicated sort name and more.
-x exact
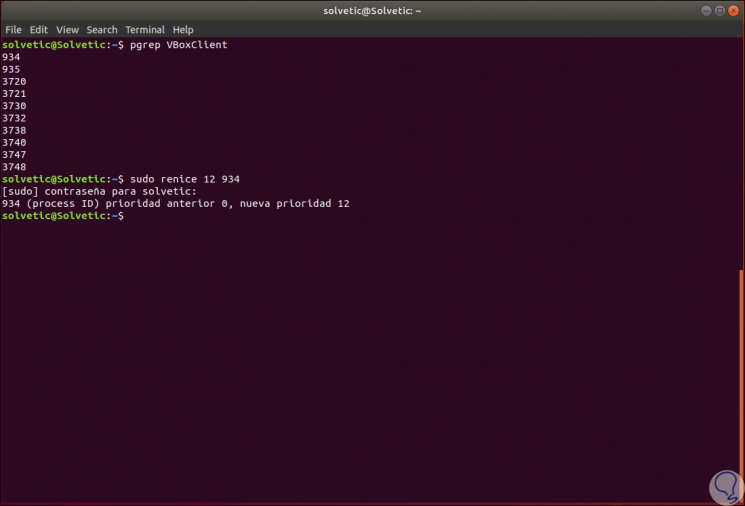
6. Use the NICE and RENICE commands in Ubuntu
The main purpose of the nice command is to execute a process or command with a lower or higher priority than the default one, while with the renice command, the original nice value can be altered.
Step 1
Values ​​can vary from -20 to 19, with 19 being the lowest priority. The syntax to use is:
renice {Priority} -p {PID} Step 2
For example, we will identify the processes with pgrep and then assign priority with renice. As we can see, the new priority for the selected process has been established.
pgrep VBoxClient sudo renice 934 12
As we can see, the options to manage, manage and control the processes in Ubuntu will be a relatively simple task thanks to each of the commands described and each of them will display valuable information for each administrative support task.