It is normal for our operating system to present some type of failure both at hardware and software level. These problems directly affect the stability and performance of the system . Therefore, as administrators and IT personnel we must be attentive to provide an immediate solution to these types of errors to allow the operation to continue normally. For this, Windows operating systems, in this case Windows 7, have a function called "Safe Mode" thanks to which the support tasks will be simpler to perform..
Safe mode starts the Windows system in a basic state, that is, only with a limited set of files and drivers. By using this mode, it will be possible to solve equipment problems and thus rule out errors . In case the problem is not generated in safe mode, it is an indication that the default configuration and basic device drivers are not the root of the problem.
The safe mode has two functions that are Safe mode and Safe mode with network functions. Although they are identical, Safe Mode with network features includes the network drivers and services necessary to access the Internet and other computers on the local network..
We will learn how to access the safe mode of Windows 7 through this tutorial.
1. Enter Safe Mode during Windows 7 boot
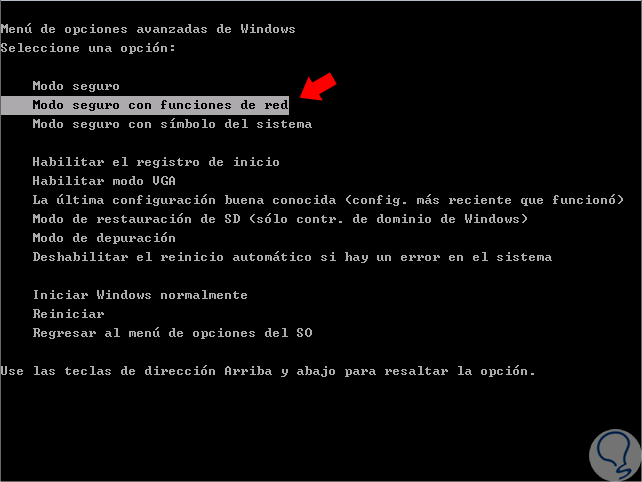
It is one of the most practical methods of accessing the Safe Mode because when the device has errors to start normally, just press and hold the F8 key on our keyboard during the computer startup process immediately after turning it on.
When using this key, the following will be displayed. There we will access the Advanced Boot Options window, where it will be possible to start Windows 7 in Safe Mode, Safe Mode with network functions and Safe Mode with command prompt and some more options. To select the appropriate option we must use the arrow keys to select the option to use and then press Enter to access there..
2. Enter Safe Mode using Windows 7 System Settings
Windows 7 integrates a system configuration command called msconfig thanks to which it will be possible to perform various configurations on startup, services, startup and other system components.
Step 1
To access this functionality we go to the Windows 7 search box and enter “msconfigâ€:

Step 2
We click on this line and the following window will be displayed where we will go to the “Start†tab and there we activate the “Error-proof start†box and at the bottom we define the type of boot to use:
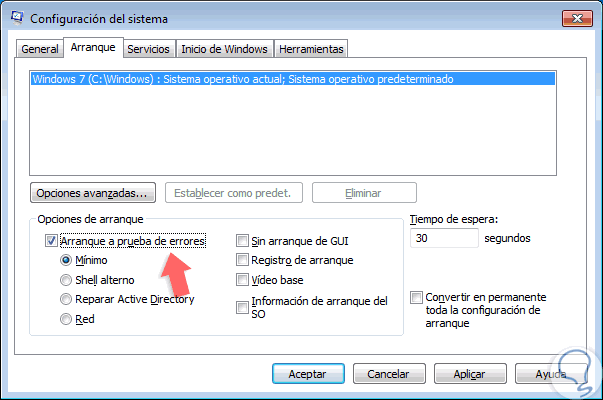
Step 3
Once defined click on “Accept†and the following will be displayed:

Step 4
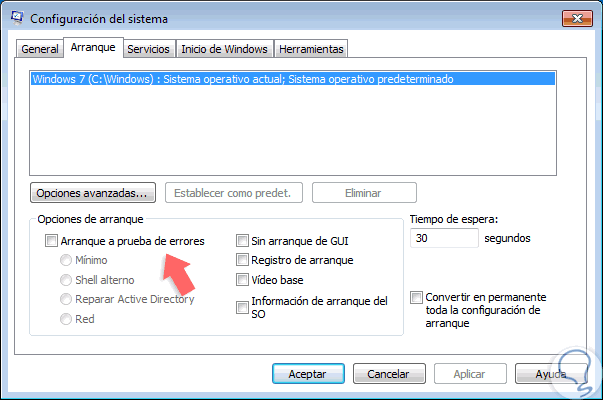
There we define whether we restart the system immediately or wait until the next reboot to access it. To allow Windows 7 to start normally, we must access the system settings again and in the "Startup" tab, uncheck the "Safe start" box. Otherwise, the system will continue to boot in the selected safe mode.
3. Enter Safe Mode using the Windows 7 Command Prompt
Safe Mode in Windows 7 is integrated into a series of commands which allow setting both the priority and the operating system's boot mechanism.
Step 1
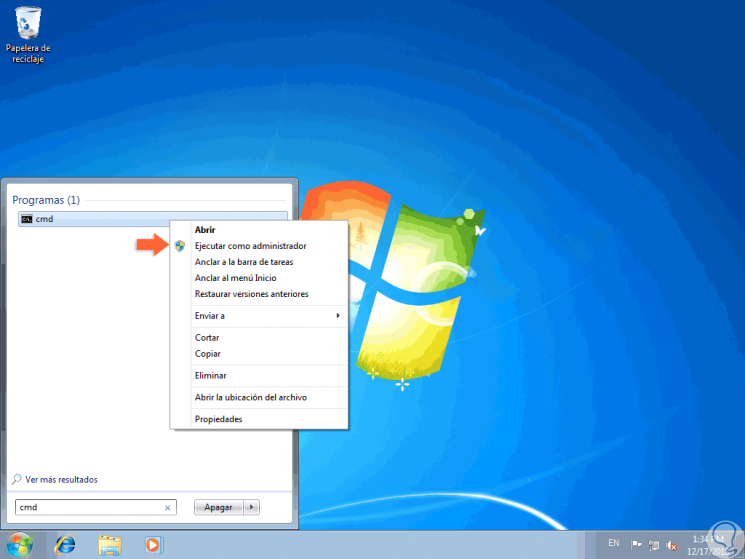
To use this method, we must access as administrators the command prompt looking for cmd in the Windows 7 search box and in the results, right click on the correct option and there select “Run as administratorâ€:
Step 2
Now, in the terminal we can execute one of the following options:
Safe Mode
bcdedit / set {default} safeboot minimal Safe mode with networking
bcdedit / set {default} safeboot network Safe mode with command line
"bcdedit / set {default} safebootalternateshell yes Step 3
We execute the desired option in the command prompt and press Enter:
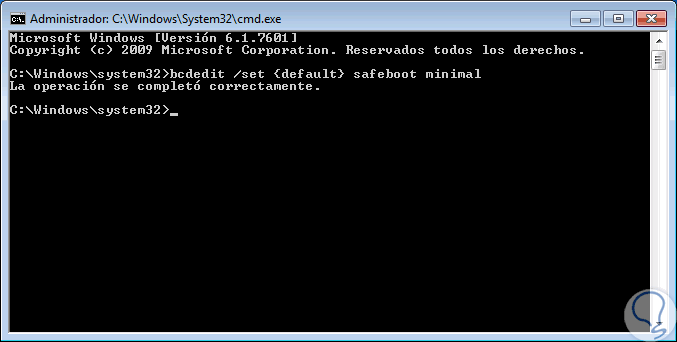
Step 4
We restart the operating system to access this mode, once we complete the administration tasks, we go back to the command prompt and execute the following so that Windows 7 starts normally:
bcdedit / deletevalue {default} safeboot 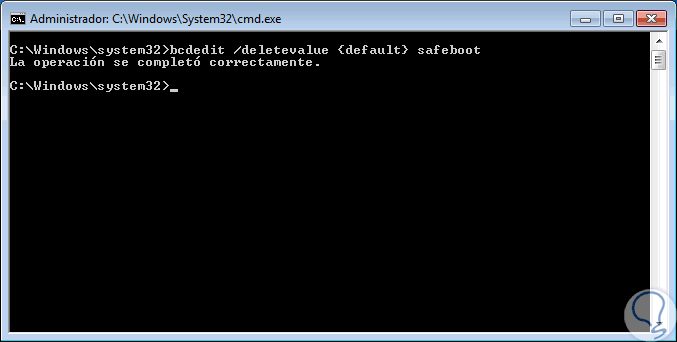
4. Enter Safe Mode using Windows 7 installation media
Through the physical installation medium of Windows 7 it will be possible to access the command prompt to execute any of the above mentioned commands.
Step 1
For this, we must burn the image of Windows 7 to a DVD, or use the original disk, configure the BIOS to boot from there and then we will see this:

Step 2
Click on Next and the following will be displayed:

Step 3
There we will use the following keys to access the command prompt and there we will execute the following. Pressing Enter will complete the process and execute the “exit†command to exit the command prompt and continue the restart in Windows 7 safe mode.
+ F10 Shift + F10
bcdedit / set {default} safeboot minimal 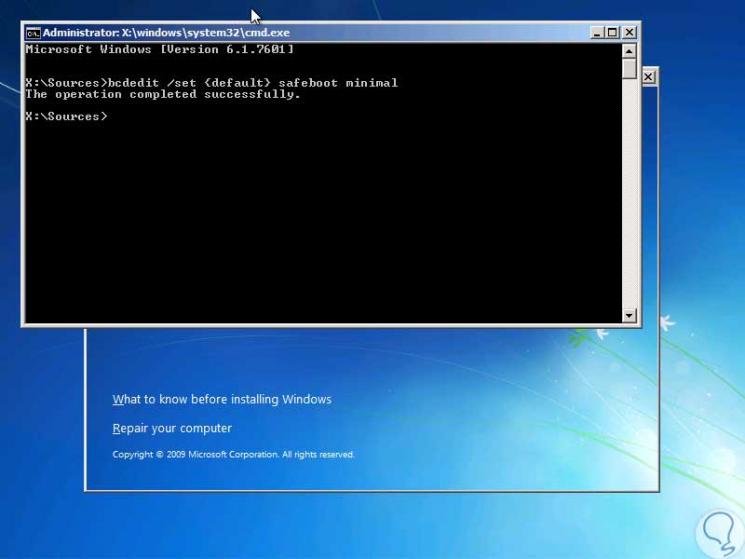
Step 4
As in the previous process, after completing the support tasks we must execute the following line in the terminal so that Windows 7 starts normally:
bcdedit / deletevalue {default} safeboot
5. Enter Safe Mode using Windows 7 recovery disc
Windows 7, like all Windows systems, gives us the opportunity to create a recovery disk thanks to which it will be possible to access certain tools from boot, such as:
- Recovery using a system image.
Step 1
For this method we must create the disk from the operating system, then start Windows 7 from it and there select “Command Line†and once we access the terminal execute any of the following options:
Safe Mode
bcdedit / set {default} safeboot minimal Safe mode with networking
bcdedit / set {default} safeboot network Safe mode with command line
"bcdedit / set {default} safebootalternateshell yes Step 2
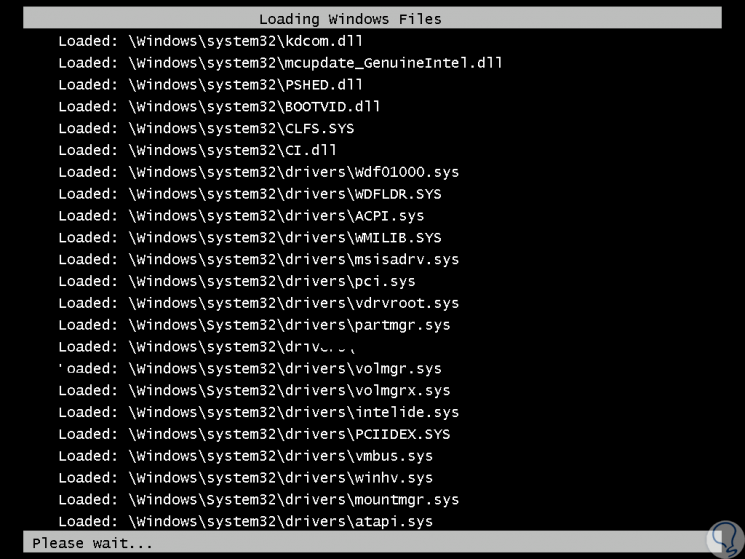
When Windows 7 is restarted in Safe Mode, regardless of the option selected, we will see that the basic drivers are loaded first:
Step 3
Then we access the Safe Mode to carry out the required tasks:

As we can see, there are several options to access this mode in Windows 7 and thus work more directly on system problems. With the safe mode we can make modifications or solve errors of the equipment when it does not start or does not work optimally.