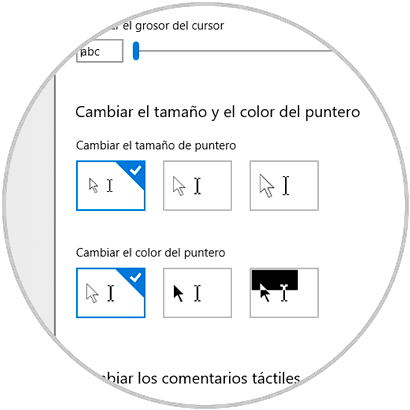
Windows 10 is a versatile system that gives us the possibility to change and configure various aspects of its environment in order to make the system more personal based on the taste of each user and one of the configurations that few may know: the mouse pointer . Customizing our equipment makes us more comfortable with our user interface as it is configured according to our preferences. Sometimes the default configuration may fail or we find it inconvenient to use. When, for example, we record the screen of our team, we want the mouse pointer to have an original design. By default its colors are black and white, but from Windows 10 we can modify it and give it a more vital look. By default, Windows 10 only offered black and white color schemes so it was necessary to use third-party applications for this customization:

As we see, by default we only have dark tones. Now, with the new Windows 10 update in its 18298 version (available for now only in the Insider program), the Microsoft development group has added a new feature to the system. This option gives us the possibility of establishing a custom color for the mouse pointer and cursor without the need to use third-party utilities which is very practical to avoid unnecessary installations in the system. In this way we will have our custom mouse with an original color. We can not only change the color and it is that the mouse can be customized in other aspects such as speed or change left-handed mode..
TechnoWikis will explain how we can make use of this new function in Windows 10 version 18298.
To keep up, remember to subscribe to our YouTube channel! SUBSCRIBE
How to change the color of the mouse pointer in Windows 10
Step 1
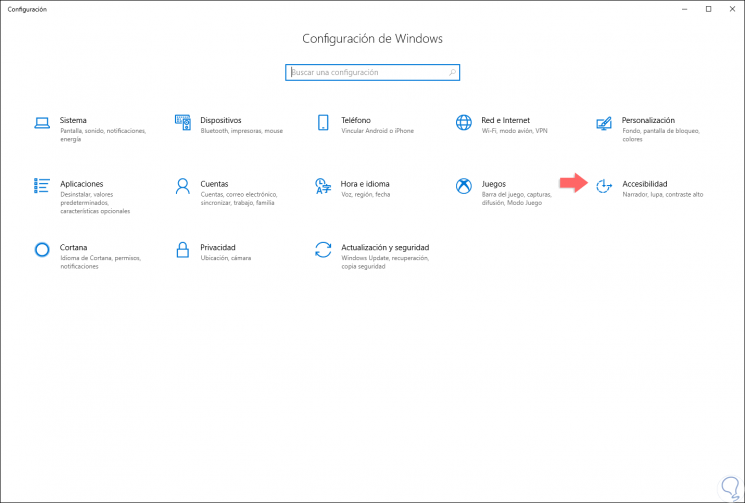
To start this process we go to the Start menu and there we select the “Configuration†utility, the following will be displayed:

Step 2
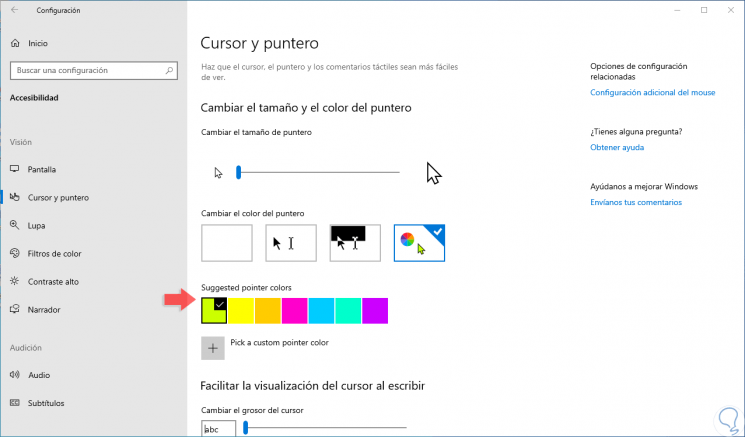
There we go to the “Accessibility†category and in the next window we will go to the “Cursor and pointer†section and there we select the last option at the bottom and there it will be possible to select one of the eight available colors:

Step 3
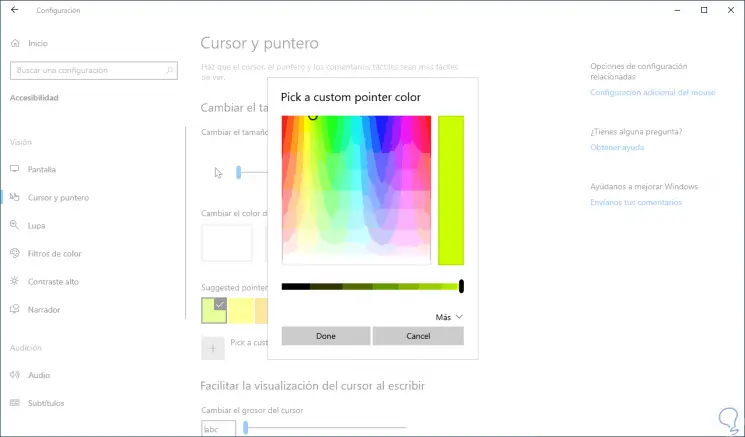
If it is necessary to set a custom color, we will click on the option “Choose a custom pointer color (Pick a custom pointer color)â€, select the desired color and then click on the “Done (Done)†button to apply the changes:

It's that simple Windows 10 integrates this new functionality to allow us to have a totally different pointer and cursor. Changing the color of the pointer will give a more dynamic and original look with which to distinguish your Windows 10..