One of the most essential components of all computer equipment is the mouse which allows us to carry out hundreds of actions in both files and applications either by selecting text, opening menus, executing commands and more. There are several mouse options , colors, shapes, styles, etc., but all of them have unique and identical characteristics in the execution process in Windows 10, being the sensitivity one of the most critical for its level of use within it..
The resolution or dpi (dots per inch) is a standard designed to measure the sensitivity of the mouse, hence its expression is like the number of dpi detected in a device. Sensitivity helps us to define with what precision the orders that we give will be executed with the right click or with the left mouse click without affecting the general productivity of the work environment, thus, the higher the ppp number , the greater the sensitivity of the device and the greater the speed of the mouse pointer in Windows 10.
In some types of mouse, such as those of gamers , they integrate within their structure a DPI button thanks to which it will be possible to change their style to a sensitivity configuration according to the needs..
In case of not having this type of mouse, TechnoWikis will explain how we can edit the sensitivity of our mouse in Windows 10.
To stay up to date, remember to subscribe to our YouTube channel! SUBSCRIBE
1. Edit the sensitivity of the mouse from the Control Panel in Windows 10
Step 1
For this option we must go to the following route:
- All the elements of Control Panel
Step 2
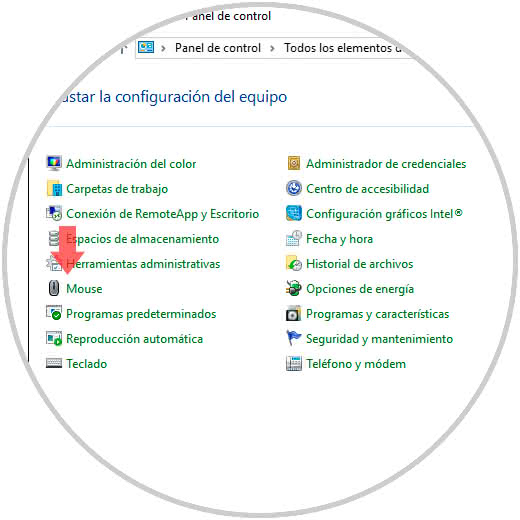
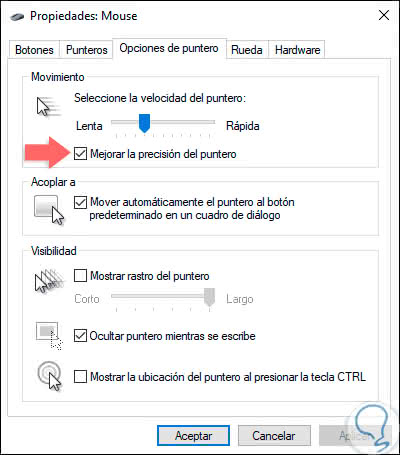
There we can go to the field "See by" and select "small icons" or "large icons". We double-click on the "Mouse" option and in the expanded window we will go to the "Pointer Options" tab where we will see the following:
Step 3
There we will define the sensitivity in the "Movement" section using the slide bar and for better results we can activate the "Improve the pointer accuracy" box. Once this is done, click Apply and Accept to save the changes.
2. Edit the sensitivity of the mouse from the Windows Registry Editor 10
Before using this option TechnoWikis recommends creating a backup or a restore point to count on the integrity of the files.
Step 1
To access the record editor, we will use the following keys and execute the regedit command:
+ R
Regedit

Step 2
In the displayed window we will go to the following route:
HKEY_CURRENT_USER \ Control Panel \ Mouse

Step 3
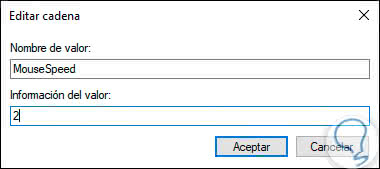
There we place the value "MouseSpeed", we double click on it and in the field "Value information" set the number 2. Click OK to save the changes.
Step 4
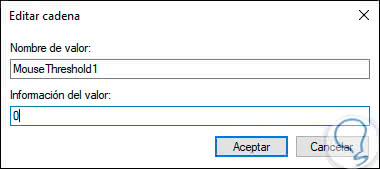
Now we open the "MouseThreshold1" value and set its value to zero. Click OK to apply the changes.
Step 5
We also define the value "MouseThreshold2" at zero. Again click on OK to apply the changes.
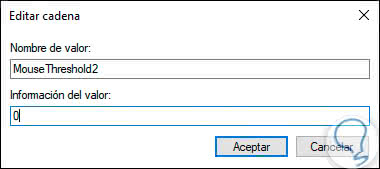
Always the value of MouseThreshold2 must be greater than or equal to MouseThreshold1. With some of these methods, it will be possible to significantly improve the sensitivity of our mouse in Windows 10..