Linux is one of the operating systems that offers more distributions for its users worldwide and each of them has a special focus, either for desktop or server environments. Each functionality allows us to scale in various areas such as databases, graphics, texts and others..
One of the most outstanding distributions of Linux, speaking of the corporate environment, is undoubtedly Red Hat , also known as RHEL (Red Hat® Enterprise Linux®) which focuses on increasing the capabilities of applications run in various ways as informal, virtual , containerized and private and public clouds. All this with the support of RHEL.
Red Hat Versions
Red Hat offers distributions that we can implement according to the type of organization and thus be specific in the use of these, for example, Red Hat offers us versions such as:
- Red Hat Enterprise Linux Atomic Host.
- Red Hat Enterprise Linux Server for High-Performance Computing (HPC).
- Red Hat Enterprise Linux for Power.
- Red Hat Enterprise Linux for IBM z Systems.
- Red Hat Enterprise Linux for SAP Applications and more.
The beta version of Red Hat Enterprise Linux 8 Beta is currently available, which provides a stable, secure and consistent basis for the entire hybrid cloud deployment issue through practical tools focused on getting workloads managed in a much more centralized
Red Hat news
Some of the news and improvements that we will find in Red Hat 8 are:
- It supports the most versatile platforms such as virtualized, private and public.
- It offers more versions and better updates of compatible open source language frameworks and databases.
- Integrates a secure platform in cloud-based and special infrastructure for emerging workloads.
- It has alliances with Oracle, SAP Hana, Microsoft SQL Server, Postgres for machine learning workloads.
- It has been optimized to support and manage critical workloads of databases, as well as for ISV applications and workloads.
- Improves the transition and adoption of workloads based on containers.
Red Hat features
Red Hat 8 is based on Fedora 28 and kernel 4.18, this allows users to have a stable and secure system which gives us specific features such as:
- The content is available through the BaseOS and Application Stream (AppStream) repositories.
- The AppStream repository supports a new extension of the traditional RPM format which are the modules, thanks to this it will be possible that several major versions of a component are available for installation.
- The YUM package manager is based on DNF technology and provides support for modular content.
- Python 3.6 is the default Python implementation in RHEL 8 and limited support for Python 2.7 is offered.
- RHEL 8 offers the following database servers, MariaDB 10.3, MySQL 8.0, PostgreSQL 10, PostgreSQL 9.6 and Redis 4.0.
- The GNOME Shell has been updated to version 3.28.
- The GNOME session and the GNOME Screen Manager make use of Wayland as the default screen server.
- The Anaconda installer can use LUKS2 disk encryption and install the system on NVDIMM devices.
- The Composer tool has been integrated which allows users to create customized images of the system in multiple formats, including images prepared for cloud deployment from various providers.
- Installation from a DVD can be performed using the Hardware Management Console (HMC) and the Support Element (SE) on IBM Z.
- The Stratis local storage manager has been introduced which allows you to perform complex storage tasks and manage the storage stack through a unified interface.
- The LUKS version 2 (LUKS2) format replaces the LUKS legacy format (LUKS1), likewise the dm-crypt subsystem and the cryptsetup tool use LUKS2 as the default format for encrypted volumes.
- Compatibility with IPVLAN virtual network controllers.
- The firewalld daemon now uses nftables as its default backend.
- The nftables framework replaces iptables in the function of the packet filtering service.
- The new update-crypto-policy command is added, thanks to which the administrator can easily switch between default, inherited, future and fips modes.
- Support for smart cards and hardware security modules (HSM) with PKCS.
- The QEMU emulator uses the sandboxing function, which offers configurable limitations for the QEMU calls of the systems, with this the virtual machines will be safer.
- Virtual machines can now be created and managed through the Cockpit web interface.
- The pcs configuration system is compatible with Corosync 3, knet and node names.
- The Pacemaker cluster resource manager has been updated to version 2.0.0.
- Kernel support for tracking eBPF through tools such as BCC, PCP and SystemTap.
- Support for the DWARF5 debug information format.
- The GCC compiler is based on version 8.2 which offers support for more recent standard versions of the C ++ language.
- The glibc libraries have been updated to version 2.28 giving better support for Unicode 11, more recent Linux system calls, improvements to the DNS code solver, additional security reinforcement and improved performance.
1. Install Red Hat 8
Step 1
Red Hat 8 is available for download in beta in the following link. Remember that for download we must create or access with the Red Hat ID that can be created for free.
Red hat 8
Step 2
Once we download the Red Hat8 ISO image, we proceed to burn it to a bootable DVD or USB and we must configure the device in the BIOS or UEFI to boot from there.
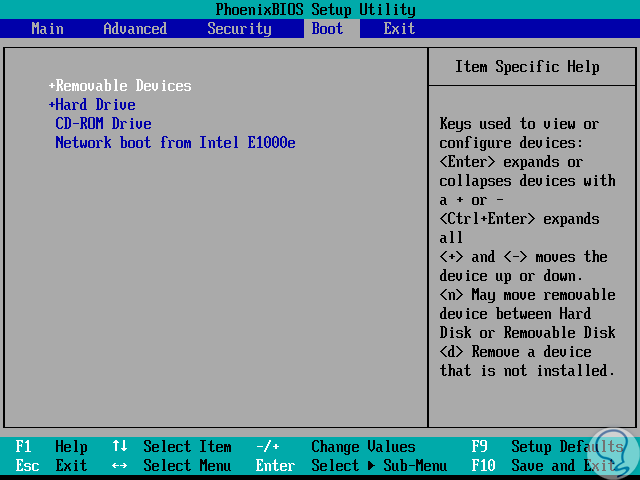
Step 3
Defined this, we turn on or restart the computer and the first window we will see will be the following:
Step 4
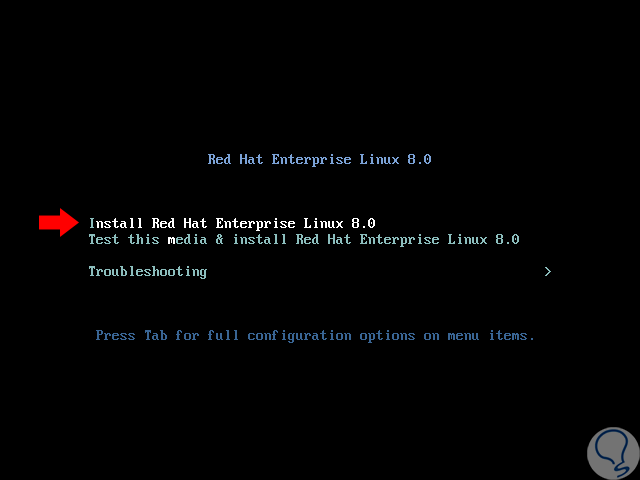
There we have the following options:
Install Red Hat Enterprise Linux 8.0
This option redirects us directly to the Red Hat 8.0 installation process.
Test this media & install Red Hat Enterprise Linux 8.0
This option performs a previous analysis of the hardware components before installing Red Hat and then proceeds with the installation.
Troubleshooting
Solve installation problems.
Step 5
We select the first option and in the next window we will select the language to use for Red Hat 8.0 (Spanish is not available):
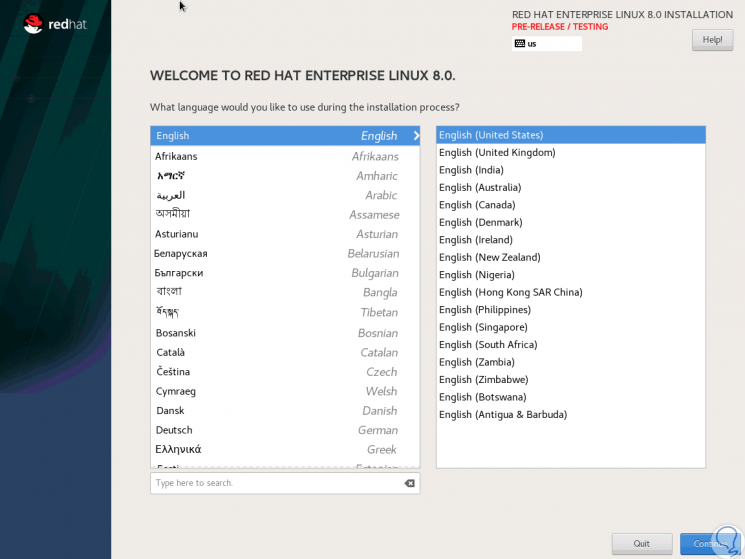
Step 6
Once we select the language click on Continue and we will receive the following warning as it is a beta version:

2. Configure Red Hat 8
Step 1
Click on "I want to proceed" and then access the configuration panel where we can configure aspects such as:
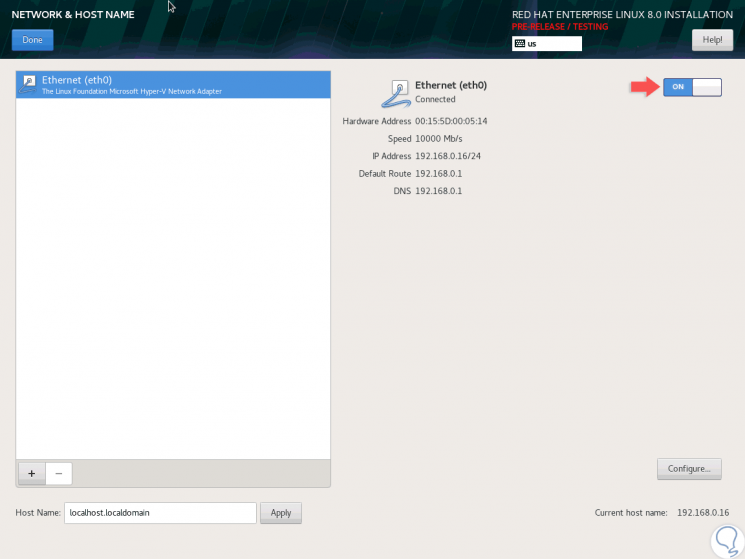
Step 2
In the "Network & Host Name" section we can define a name for the equipment, as well as activate the network switch to connect to the local network:
Step 3
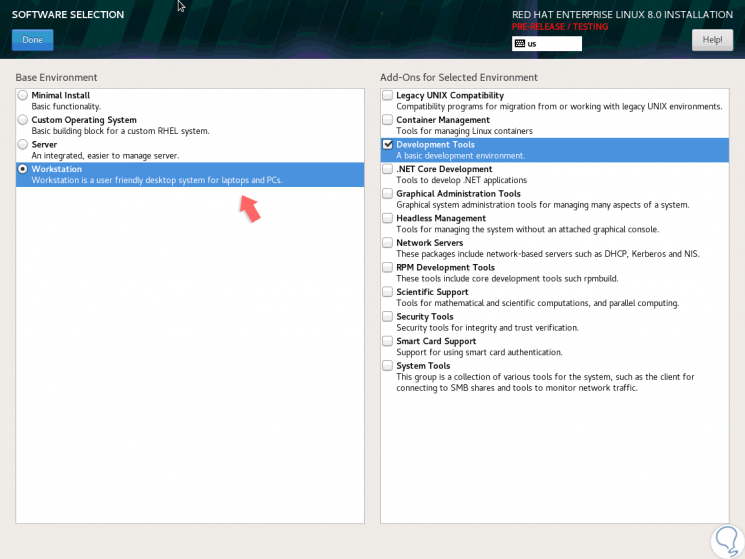
In the section "Software Selection" it will be possible to define the type of installation to be performed, as well as add the complements of each one, for example, if we select Workstation we will see:
Step 4
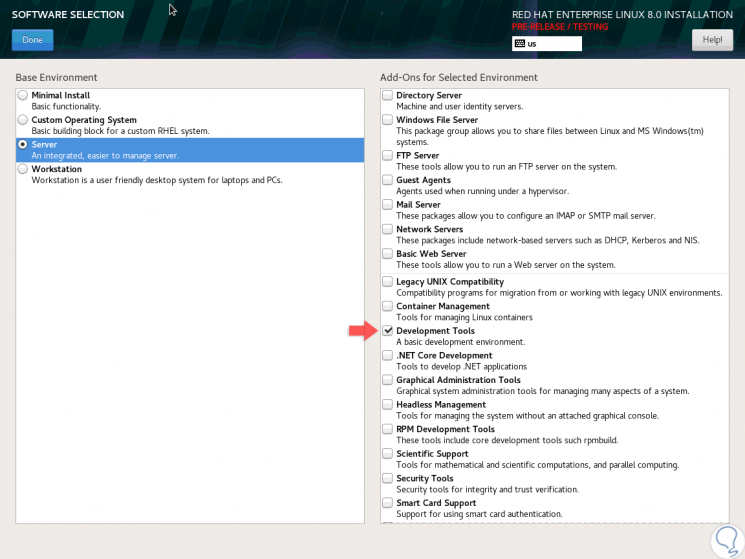
If we select Server we will have the following options:
Step 5
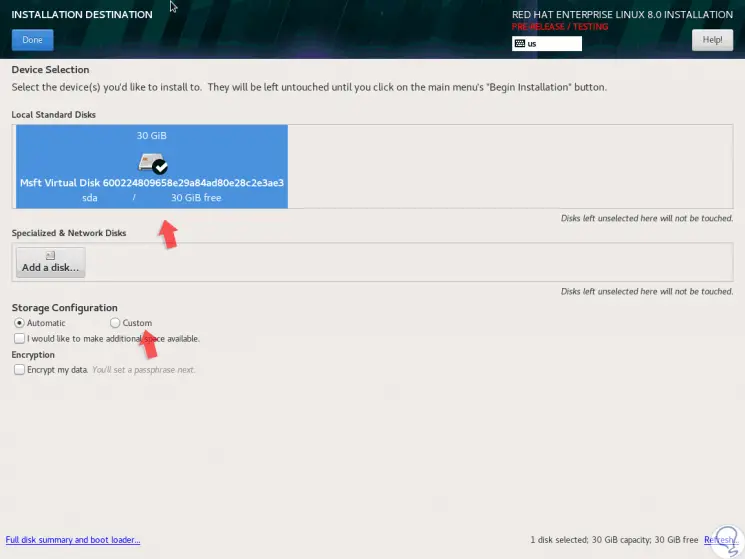
Now, in the “Installation Destination†section we must select the disk where Red Hat 8.0 is to be installed:
Step 6
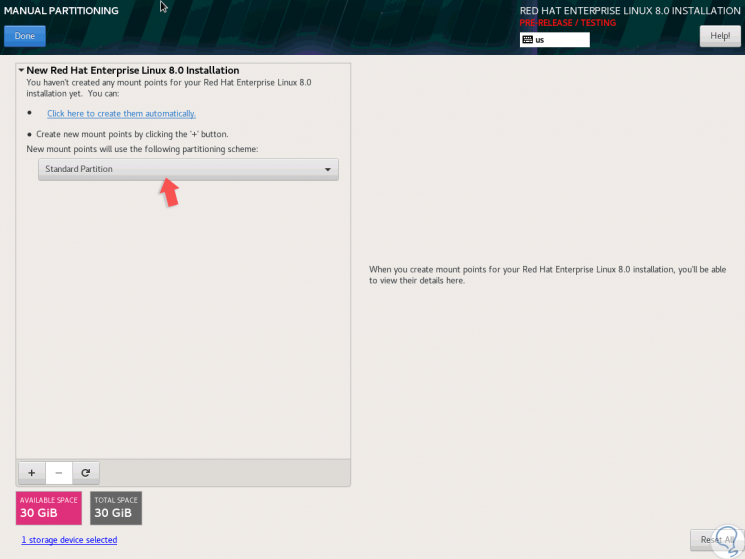
At the bottom in the "Storage Configuration" section we can define whether we want to configure the partition as automatic or manual (custom), for this case we select "Custom" and the following will be displayed:

Step 7
There we click on the “New mount points†field and select the “Standard Partition†option:
Step 8
The following window will be displayed where we will select the root folder (/) and assign the desired space:
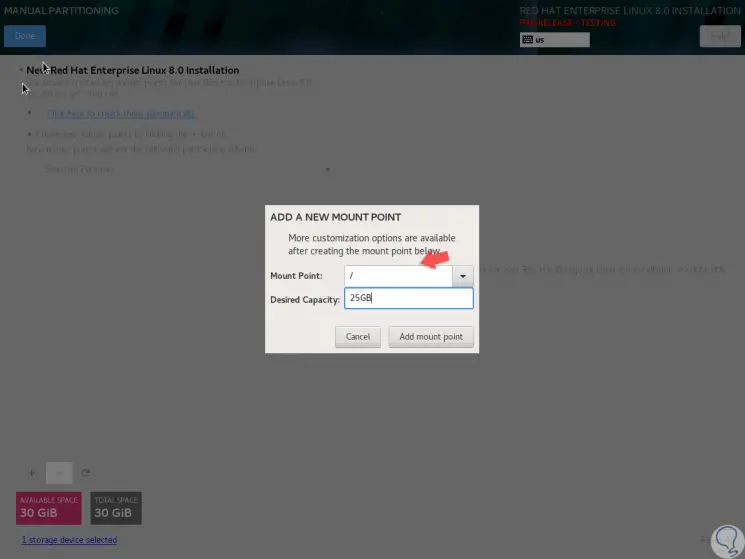
Step 9
Click on “Add mount point†and we will see the following:
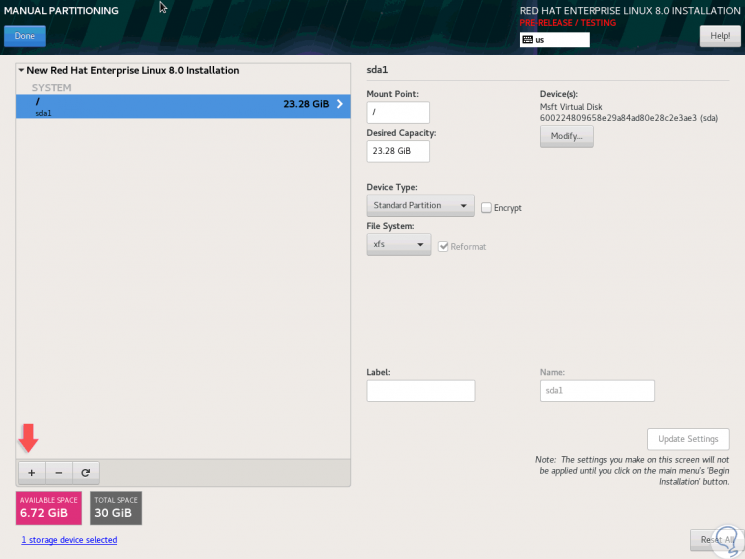
Step 10
There we can make changes if we wish. Now, we click on the + sign and in this case we will add swap memory:
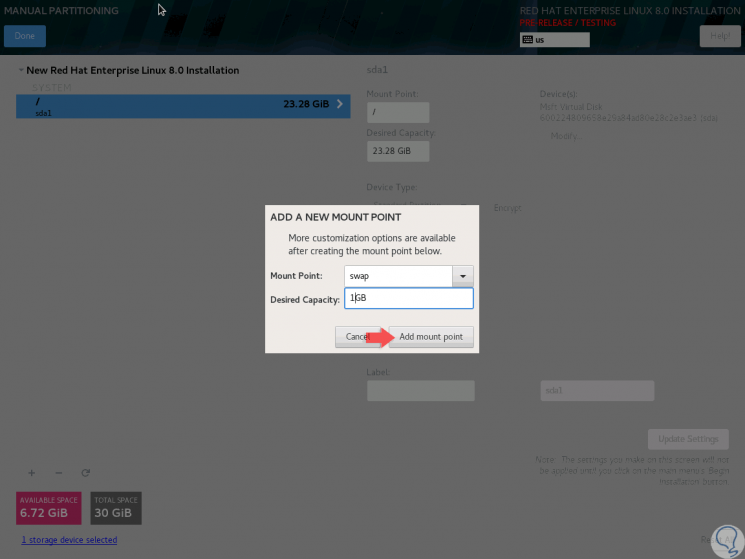
Step 11
Click on “Add mount point†again and this will be the result:
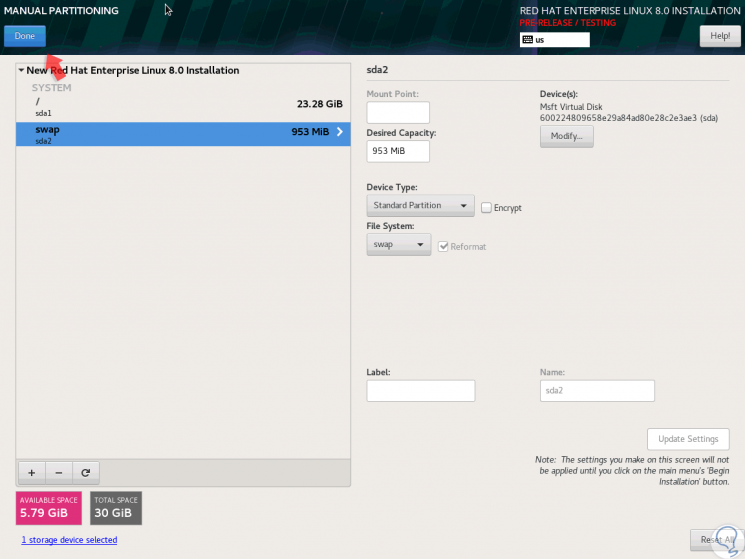
Step 12
We click on the “Done†button and the following will be displayed:
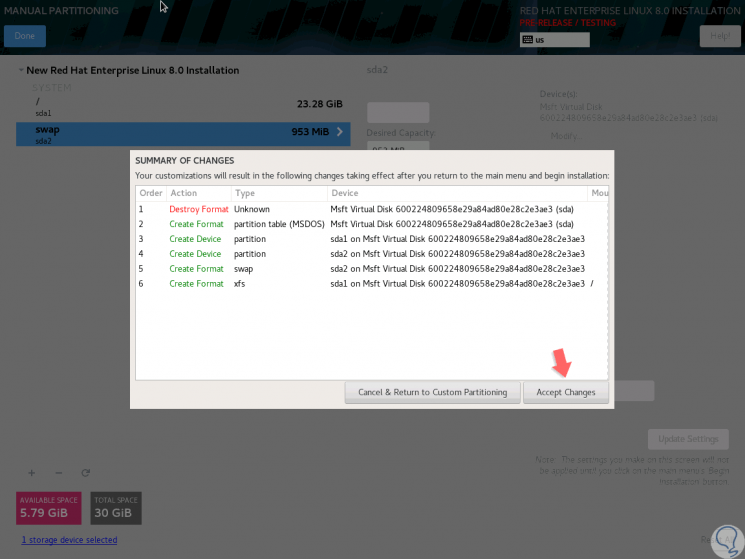
Step 13
There we click on the “Accept Changes†button to apply the changes and we will be redirected back to the main window and there we click on the “Begin Installation†button where the Red Hat 8 installation process will begin:
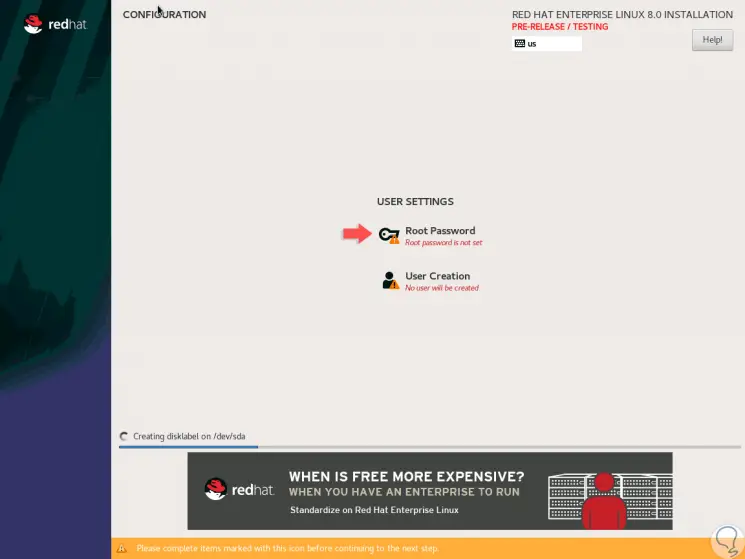
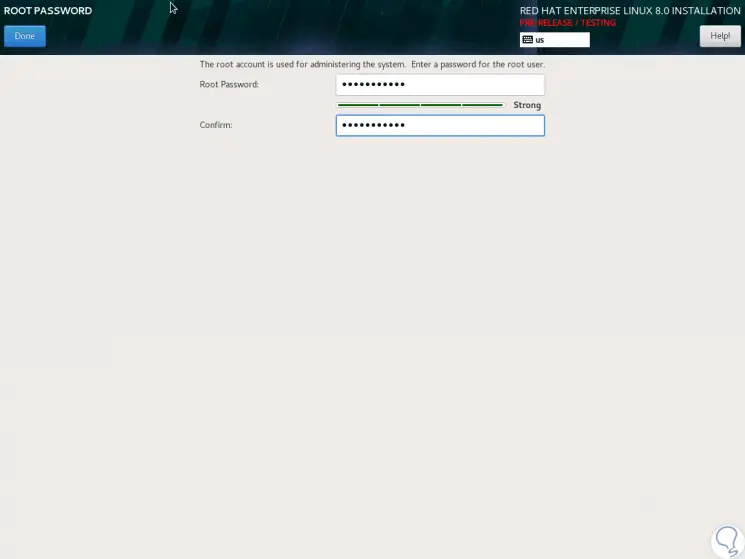
Step 14
There we must assign the root user password:
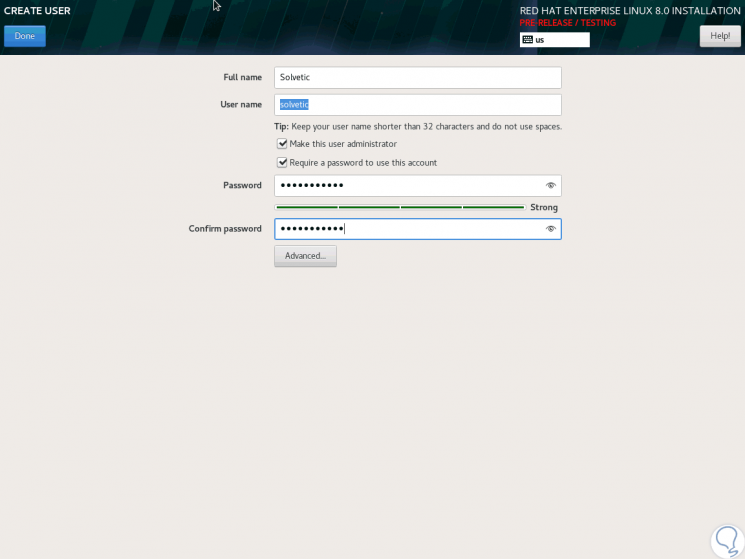
Step 15
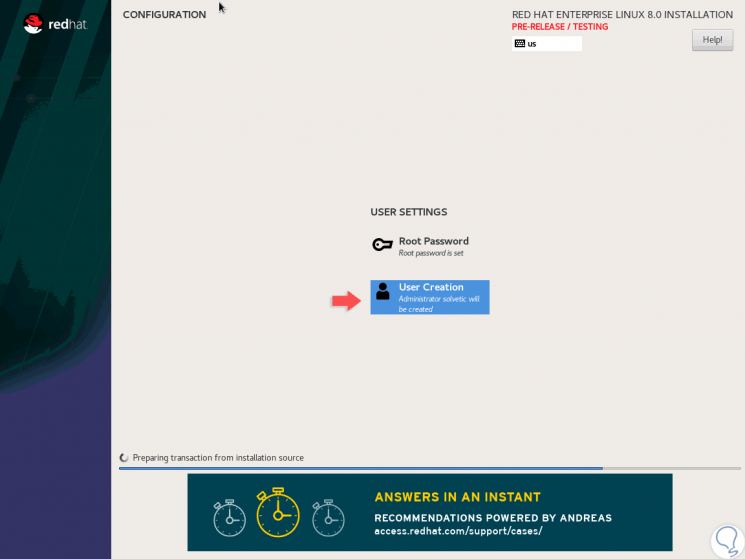
Then we add the user with his password:
Step 16
We can see that the installation process continues:
Step 17
Once finished we will see the following:
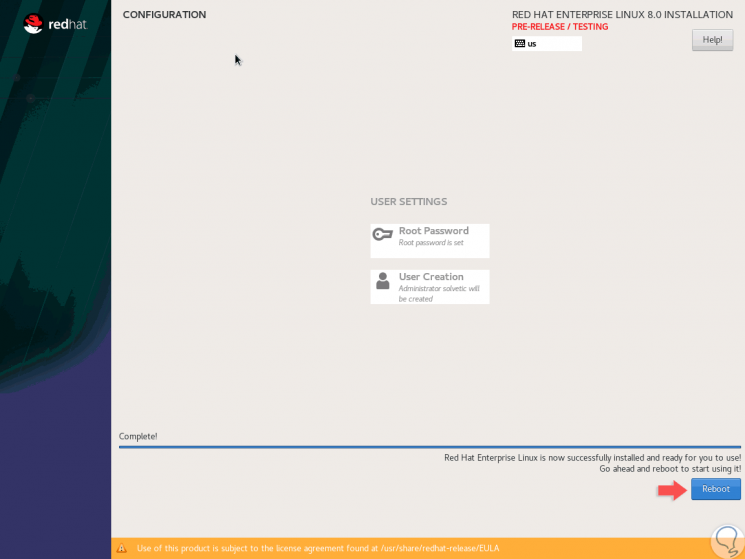
Step 18
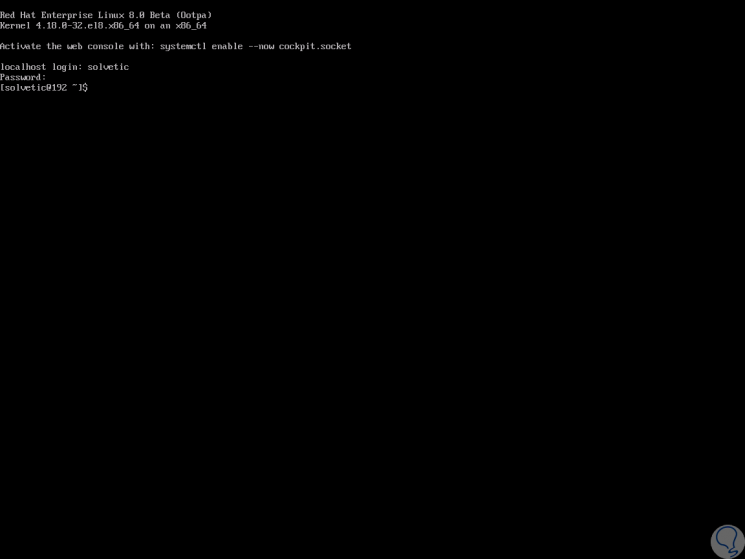
Click on the "Reboot" button and once the system restarts we can access our Red Hat 8 server:
It's that simple that we've learned to install Red Hat 8 and be able to get the most out of each of its features..