Every day we work with all types of files in macOS Mojave and in turn these can be grouped in multiple folders in order to keep a specific and centralized order of the information to be used. This is something normal since having an order will be much simpler to access that information later. There are several ways to organize our information in macOS Mojave , but one of the most practical ways for this task is to use the tools integrated in the system itself and we talk about labels..
Thanks to macOS Mojave tags, it will be possible to organize, prioritize, sort and tag all types of files or folders on your computer. Once the process of tagging a file in the Finder of macOS is complete, this file will be marked with the color-coded tag and its associated associated tag, which allows us to refer to that file and access them to through any assigned tag. One of the advantages is that, based on the type of file to be tagged, it can be tagged with several different tags simultaneously.
TechnoWikis will explain how we can carry out the tagging process in macOS Mojave and thus have a file management solution..
1. How to tag a file or folder in macOS Mojave from the Finder
There are several ways to tag a file or folder in macOS. One of the most practical ways is through the Finder menu.
Step 1
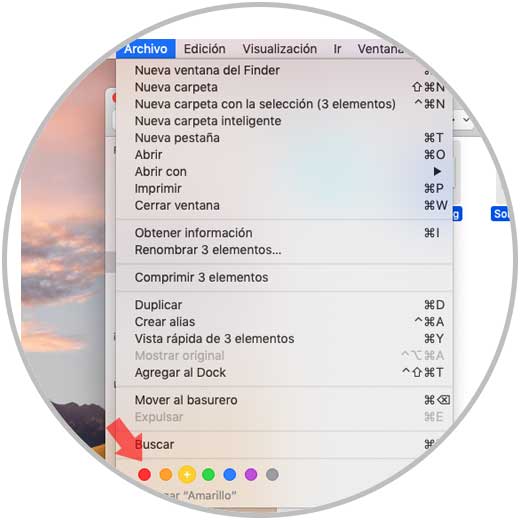
For this we access the directory where we have the files or folders to be labeled, then select the file (s) to be marked and go to the File menu and at the bottom select the desired color (Yellow, blue, gray, red, green, purple, etc):
Step 2
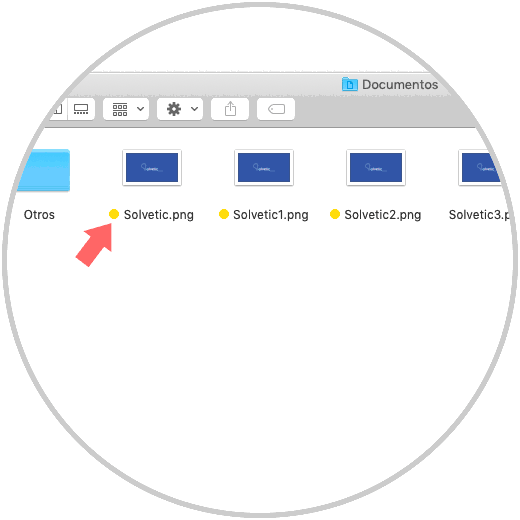
Once we select the color, it will be next to the name of the selected file or files:
2. How to tag a file or folder in macOS Mojave from context menu
Step 1
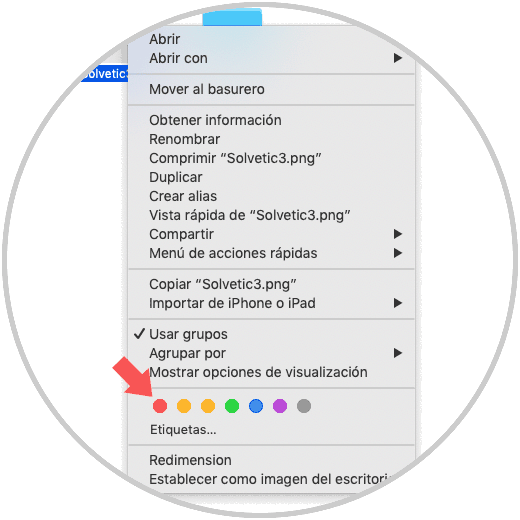
Another possible way to tag a file or folder in macOS Mojave is using the context menu (right click) of the file, for this option we will select the file and right click (Ctrl + click) on it and in the Tags section we choose the desired color:
Step 2
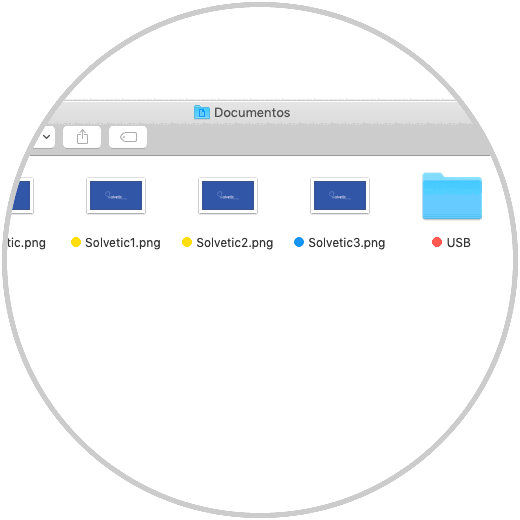
So little by little we will see all the desired files or folders with their respective tag:
3. How to tag a file or folder in macOS Mojave from the configuration menu
The next option available in macOS to label an item is using the configuration menu (gear icon at the top), for this method we select the desired file and when clicking on the gear icon we select the desired color of the label for said archive:
![image]()
4. How to manage tags in macOS Mojave file or folder
Step 1
Once the files in macOS Mojave have been tagged, we can switch between the various views to see the tags assigned to each one:
Step 2
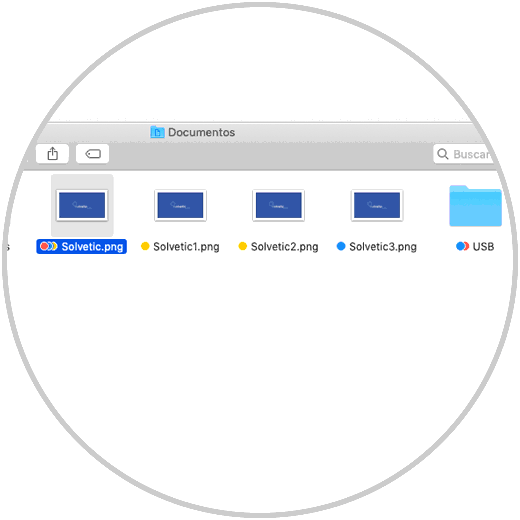
As we have mentioned, the same file can contain different tags based on your need, for this we can simply use any of the indicated methods to add a tag and it will be possible to add the desired tags without any problem:
Step 3
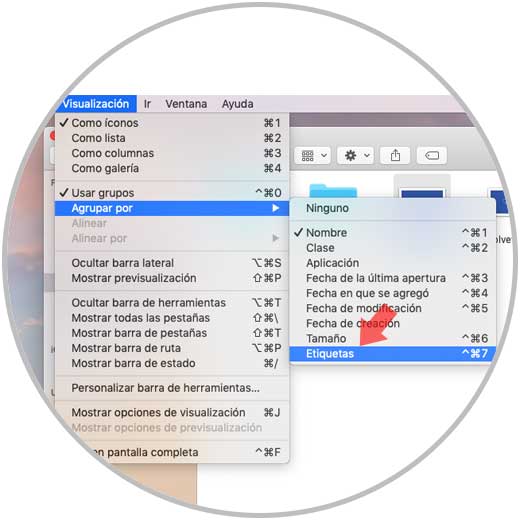
macOS Mojave gives us the opportunity to sort the files by tags for their management purposes, one of the simplest ways is to go to the View menu and there go to the Group by / Tags section or we can use the Shift + Command keys + 7:
+ ⌘ + 7 ⇧ + ⌘ + 7
Step 4
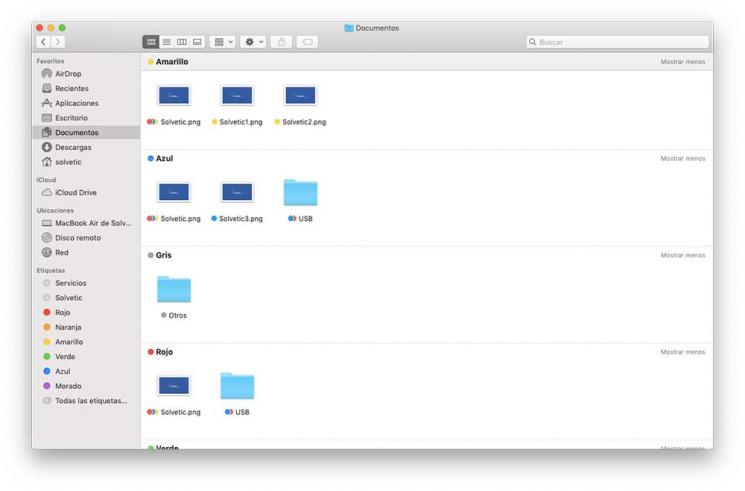
The result will be as follows. There we can view each file according to the assigned label.
Step 5
Another way to view the files according to their tag is through the Finder menu, for this on the left side we go to the Tags section and there we click on the desired color to see what files are with that tag:
![image]()
The tags are not available only for macOS, it will also be possible to tag files on iPhone or iPad and if those tagged files are stored in iCloud, it will also be transferred from iOS to mac through iCloud Drive and so we will have the tags available.
As we see, this is a simple method but it allows us to maintain a total order on the files managed in macOS..