Many are those who use Avast as an antivirus program for Windows 10, however, what many of these users do not know is that the Microsoft operating system incorporates by default a more than decent antivirus that also has the best integration with the system as well as the lower resource consumption. With Windows Defender you can not only enjoy real-time protection, but you can also scan specific files and folders to make sure they are followed.
Related: How to delete Windows Defender protection history
The ways in which our Windows 10 computer can be infected with viruses or malware are multiple and perhaps the risk is somewhat higher than in other operating systems, so the use of an antivirus program in Windows is something that is presented as essential for any type of user..
Microsoft is aware of this problem and finally with the launch of the Windows 10 operating system, it incorporated by default an antivirus that, with successive updates, has become one of the best for this operating system. Thanks to Windows Defender, we can decide which files we want to scan so that it can check if it is free of any potentially malicious software.
Windows Defender allows several ways to perform a specific scan of files or folders. Thanks to its integration with Windows 10, we can perform the scan directly from the context menu or if you prefer, from the interface of the antivirus program itself..
With that said, here are some detailed ways to scan specific files and folders in Windows 10 using the default Windows Defender antivirus program:
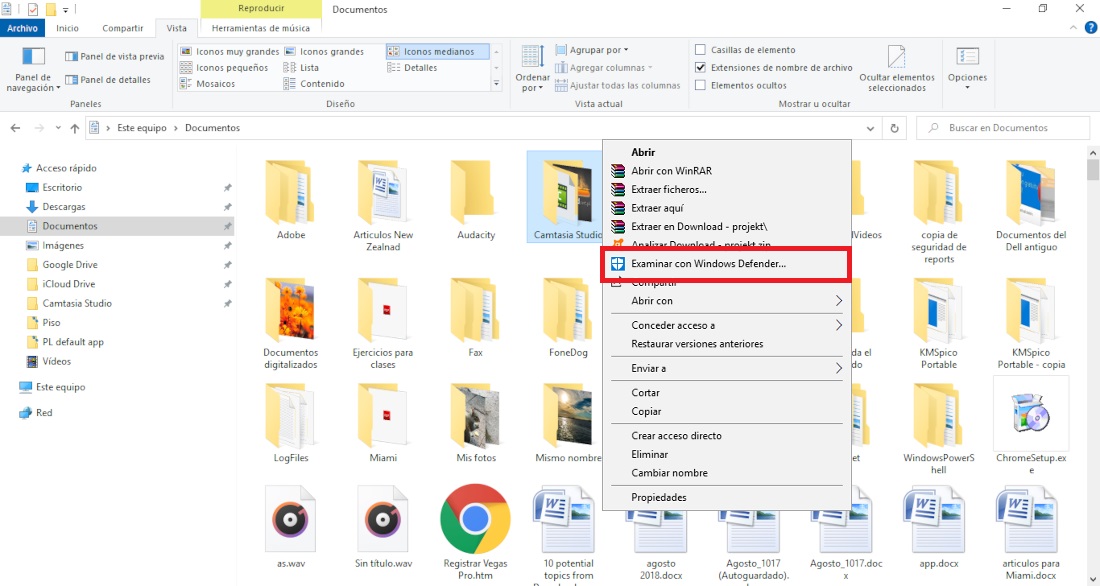
Scan files or folders with Windows Defender from the context menu.
1. Open Windows File Explorer.
2. Locate the file or folder that you want to scan with Windows Defender..
3. Select all the items you want to scan.
4. Right-click on one of the selected items.
5. When the contextual menu is displayed, you must click on the option: Scan with Microsoft Defender or Browse with Windows Defender.
6. All items will be scanned.
7. When the scan is complete, Windows Defender will open and display the scan results.
Scan specific files or folders with Windows Defender using custom scan.
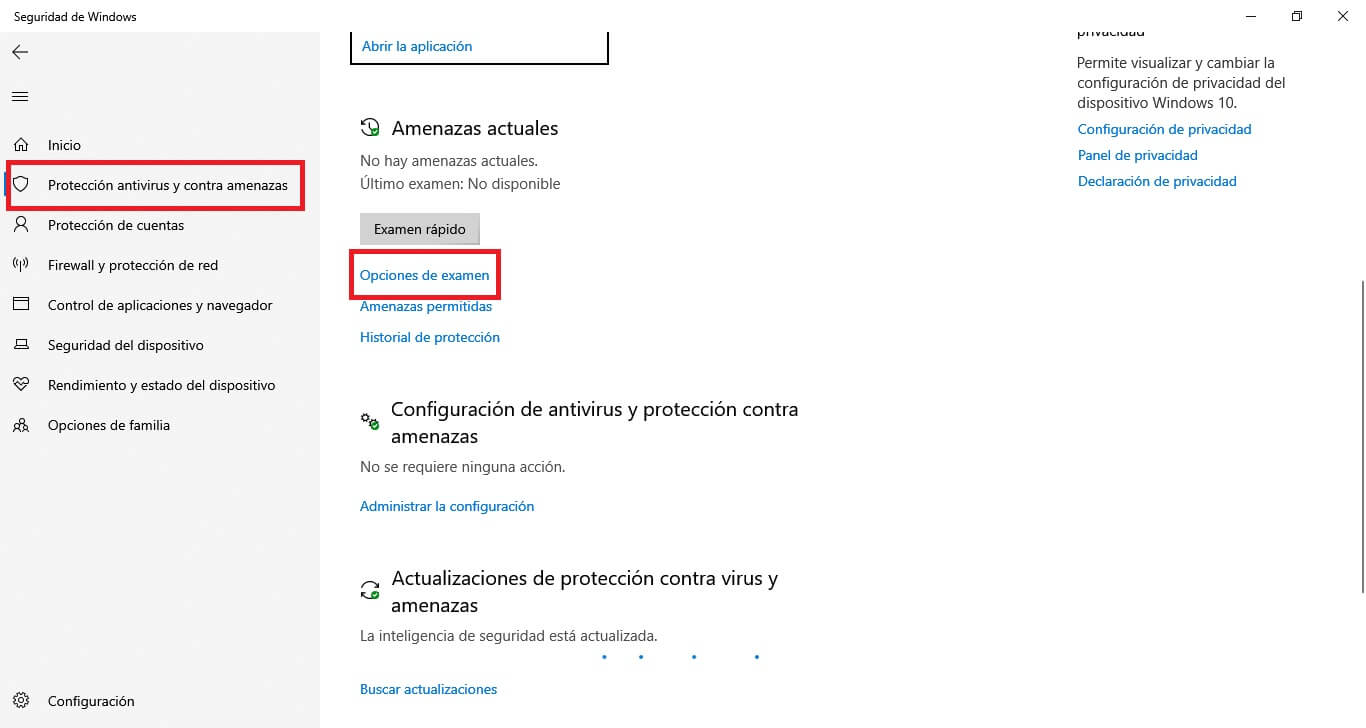
1. Open Windows Defender.
2. Go to Virus and threat protection .
3. Click Exam Options .
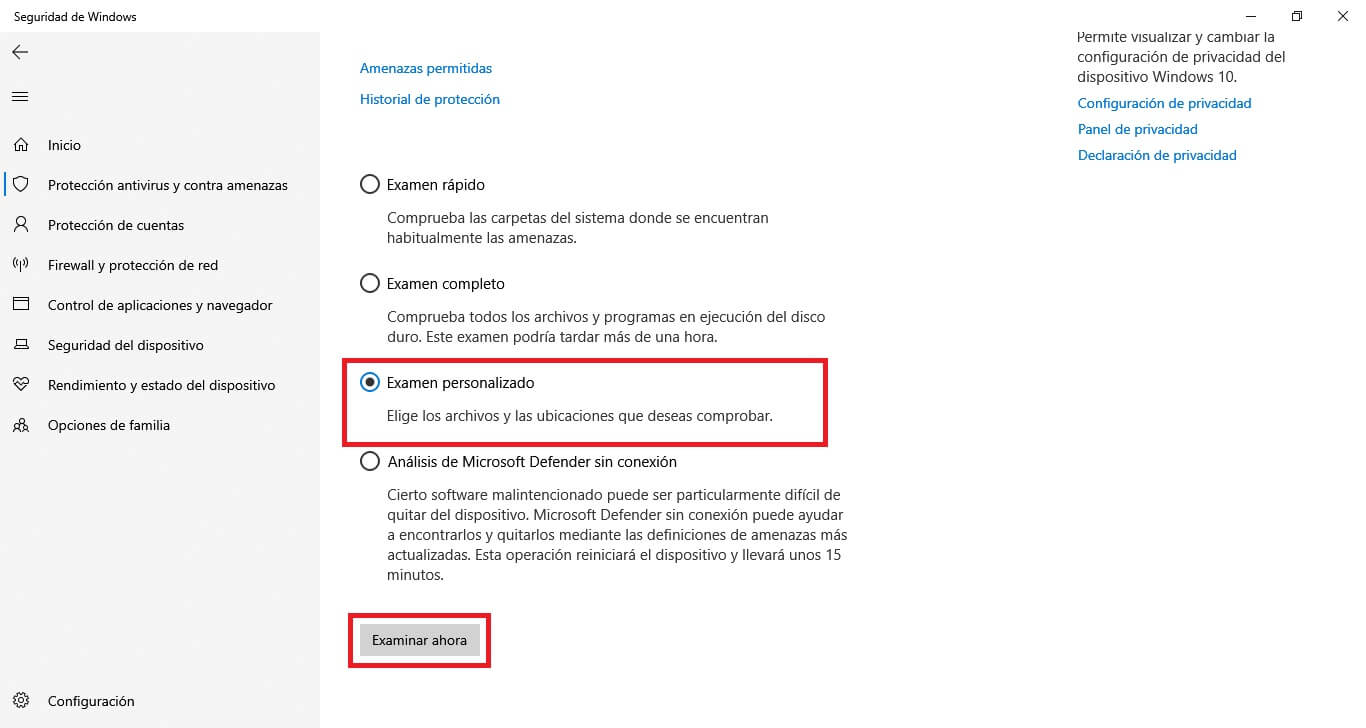
4. On the next screen select Custom Scan .
5. Click on: Browse now .
6. At this point, a small window will open in which you will have to select the folder you want to scan for viruses or malware.
7. Once the folder is selected, the scan will begin and its completion, the result will be displayed.
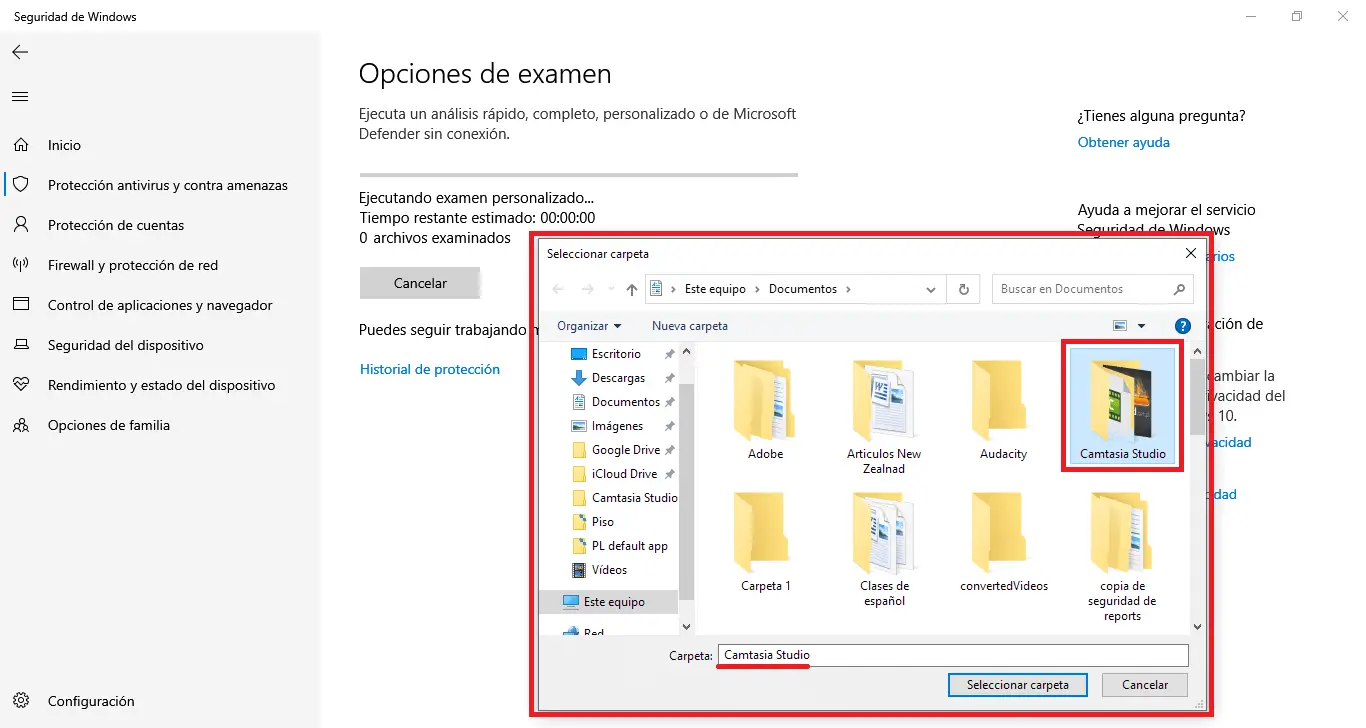
Important Note: This method only works with folders and not with specific files.
Run a full system scan with Windows Defender.
If Windows Defender is enabled on your system, it will run periodic scans of the entire Windows 10 operating system. These scans are typically run when you are not using the operating system. However, if you wish, you can perform a full scan manually at the time you want. For it:
1. Open Windows Defender.
2. Go to the option: Virus and threat protection .
3. On the next screen you will have to click the button: Quick test.
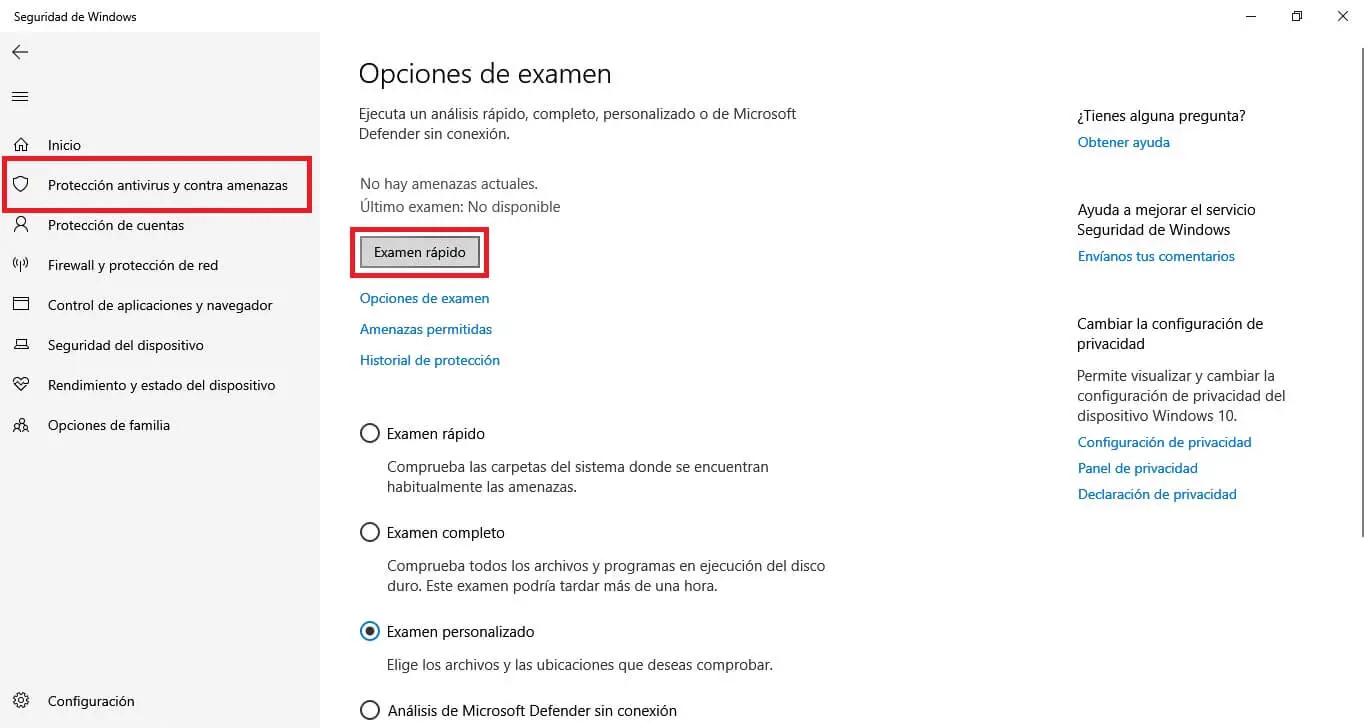
4. Windows Defender will perform the scan, including the specific files and folders that you are interested in scanning.
5. Let the scan finish and Windows Defender will show you the results.