Security must always be one of the main pillars that we must take into account when we use any operating system or simply when we manage multiple users in the organization , we know very well that today the threats are latent in the network and we can be vulnerable through from various sites, links, emails and others..
The good news is that Windows 10, and its millions of users, has the possibility to perform periodic analyzes in order to detect security flaws or vulnerabilities thanks to its integrated security tool called Windows Defender.
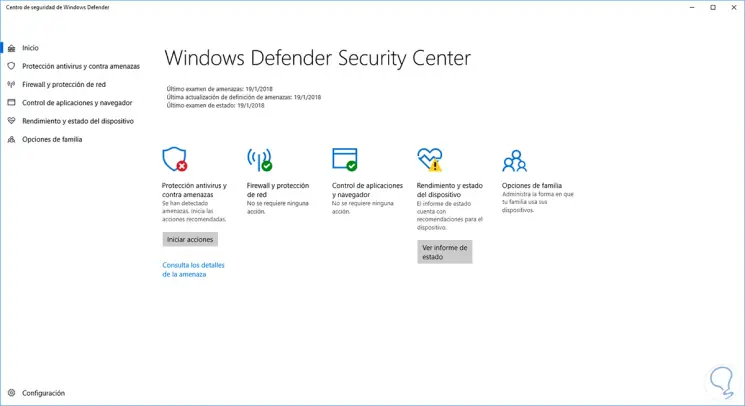
In the new editions of Windows 10, significant improvements have been added to this utility, since this Windows Defender Security Center contains the Windows Defender Antivirus and Windows Firewall , with the aim of protecting the device to a higher level of scope..
Windows Defender uses real-time protection to examine everything we download from the network or run on the computer allowing it to be more secure.
Some of the advantages we will have when using Windows Defender are Advanced Threat Protection, Network Drive Scanning, Limited Periodic Scanning, Offline Scanning, Security Center Console and Vulnerability Protection which allows us to centrally manage multiple security levels ..
Today we will see how to automatically program the scanning task in Windows 10 to preserve the security of the system and the data hosted there.
Access to the task scheduler
First, we must access the task scheduler using one of the following options:
- Using the key combination + R and executing the taskschd.msc command
- Using the Windows 10 search box looking for the term tasks and selecting the respective application
- In the path Control Panel \ System and Security \ Administrative Tools and there by clicking on the line
1. How to access the task scheduler and edit the task in Windows 10
Step 1
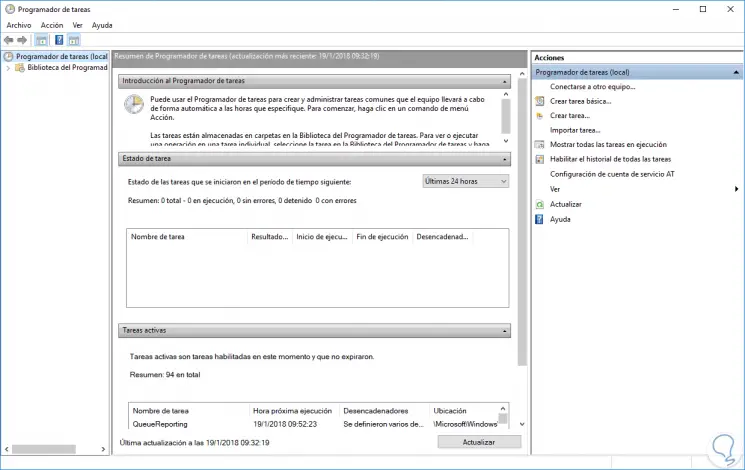
When accessing this application we will see the following:
Step 2
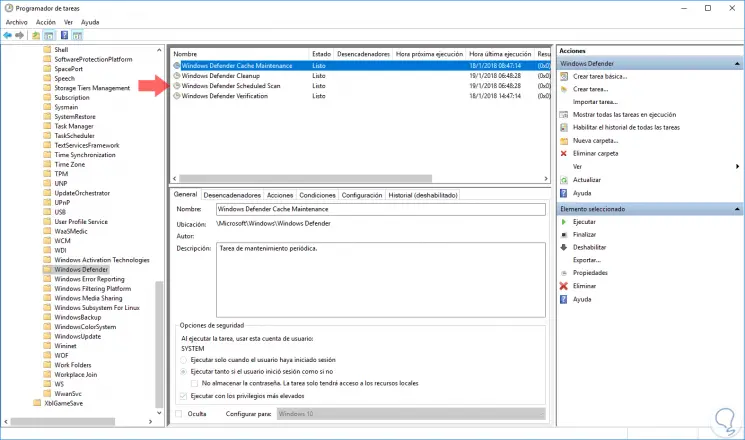
In this open window we will go to the following route:
Step 3
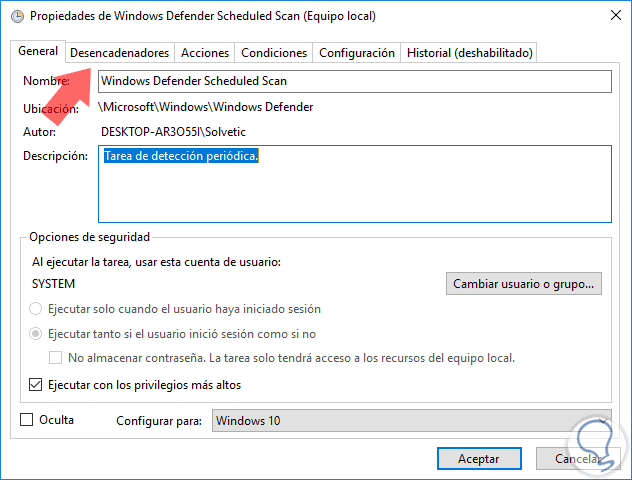
There we will double click on the task called Windows Defender Scheduled Scan located in the central panel and the following window will be displayed.
Step 4
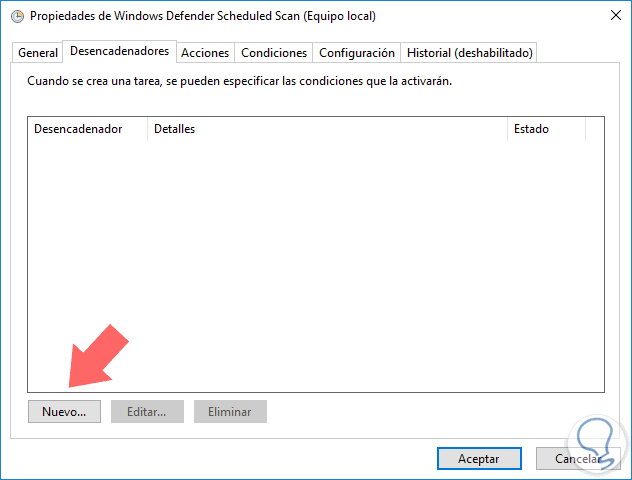
There we can leave the option already set, now we go to the Triggers tab and we will see the following:
Step 5
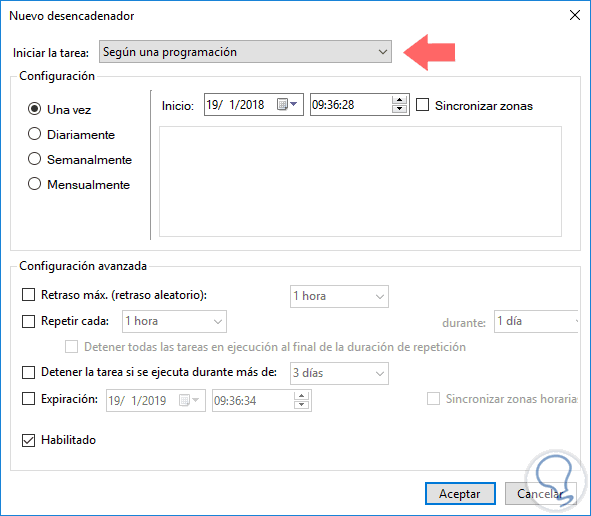
Click on the New button to create a new trigger and in the displayed window we select the option According to a schedule in the Start a task field and we will define the time and days in which the scanning tasks are to be applied:
Step 6
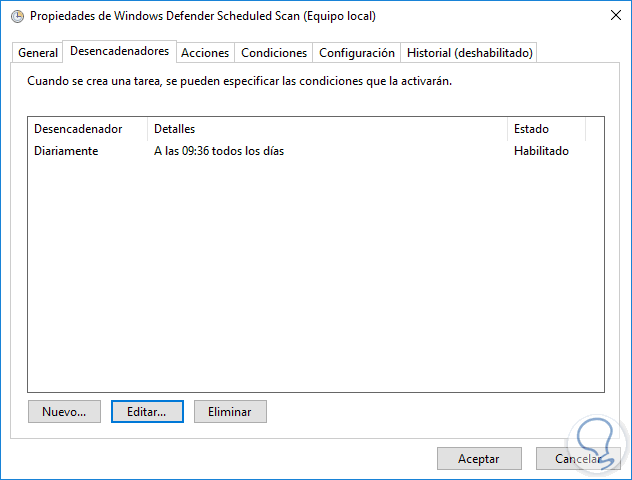
Click on OK and we will see our configuration created. Click OK to exit the task scheduler assistant.
2. How to create a personally scheduled task in Windows 10
Step 1
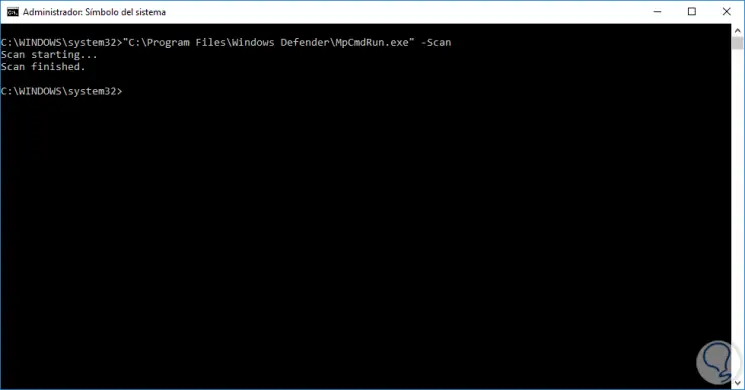
If we want to execute this scan from console mode we must execute the following line at the command prompt:
C: \ Program Files \ Windows Defender \ MpCmdRun.exe "/ Scan
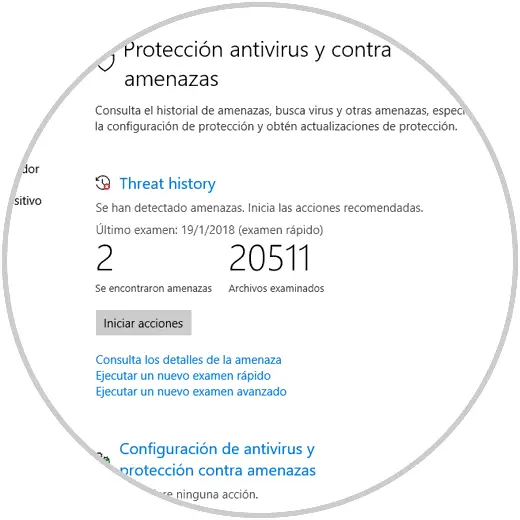
Step 2
The results can be seen in the Windows Defender Center console:
Step 3
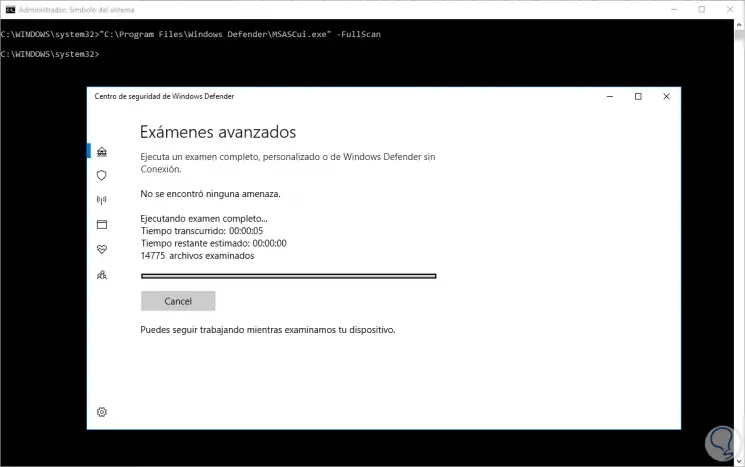
If we want to see the graphical interface during the scan we can execute the following line:
"C: \ Program Files \ Windows Defender \ MSASCui.exe" -FullScan
We have seen the various options offered by Windows Defender to establish security measures in our operating system and this should be taken as a good practice since threats do not give truce and will always be there.
To keep up, remember to subscribe to our YouTube channel! SUBSCRIBE