To stay up to date, remember to subscribe to our YouTube channel!
SUBSCRIBE ON YOUTUBE
Windows Defender is part of Windows as a comprehensive protection method that includes the use of updated databases that seek to be one step ahead of current threats, which are thousands, to protect both the operating system and user data, this It is achieved through tests that allow a superficial, detailed or specific analysis within the system and its files, Windows Defender offers tests such as:
exam types
- Quick Scan: It is a scan that focuses on critical areas of the system to look for popular threats and known malware, it is a scan that does not scan all system files.
- Full Scan: is responsible for running a scan of the entire system and this covers all files and programs to detect potential threats and therefore takes more time.
- Custom Scan: gives us the ability to select specific folders or files for the scanning task.
- Microsoft Defender Antivirus: It is a test that runs in offline mode to search for viruses or more complex malware, its use requires restarting the computer.
Normally we can perform these tasks manually from Windows Security but today we are going to learn how to schedule the Windows Defender exam in Windows 11 and the process applies equally to Windows 10..
How to schedule Windows Defender scan
Step 1
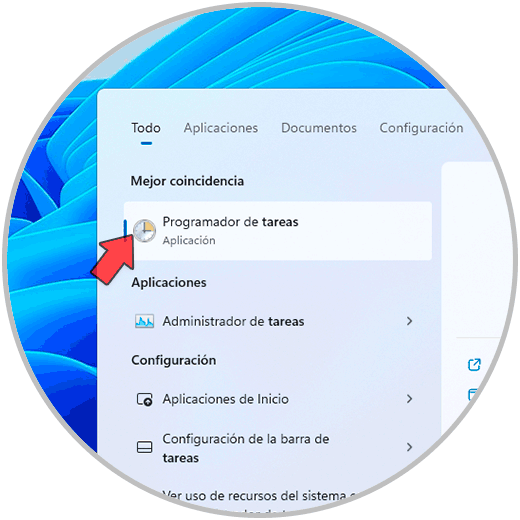
To start we open the Task Scheduler from the Start search engine:
Step 2
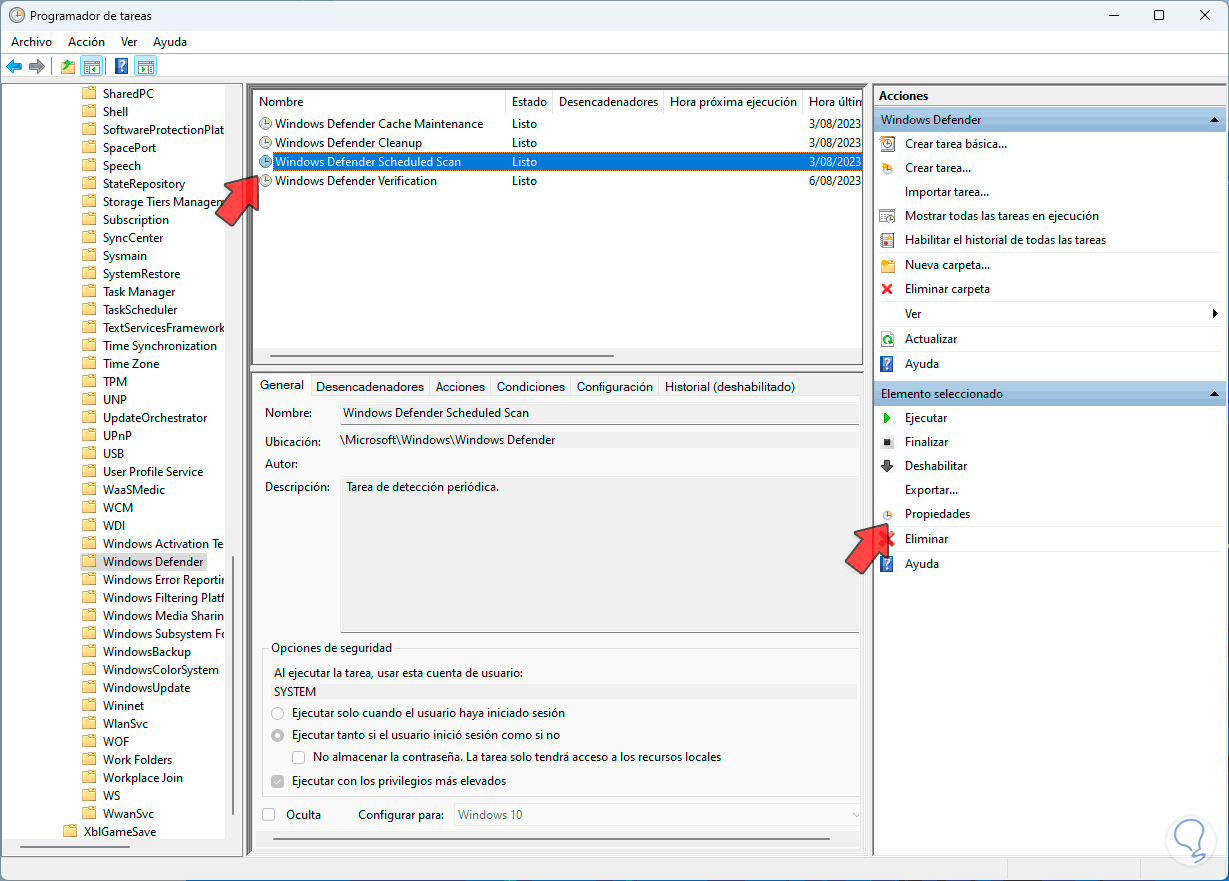
In the Task Scheduler we go to the path "Task Scheduler Library - Microsoft - Windows - Windows Defender":
Step 3
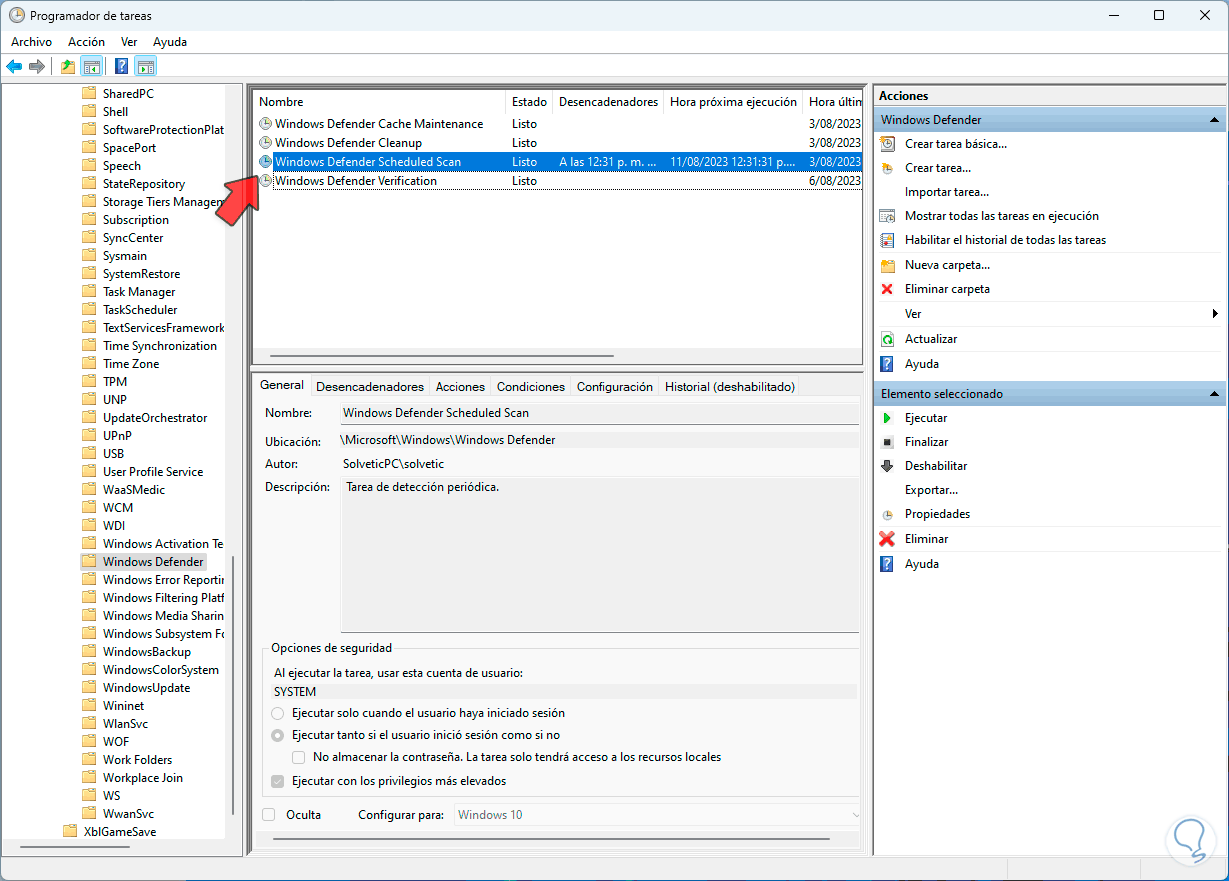
There we select the "Windows Defender Scheduled Scan" option, there we click on the "Properties" line and the following will open:
Step 4
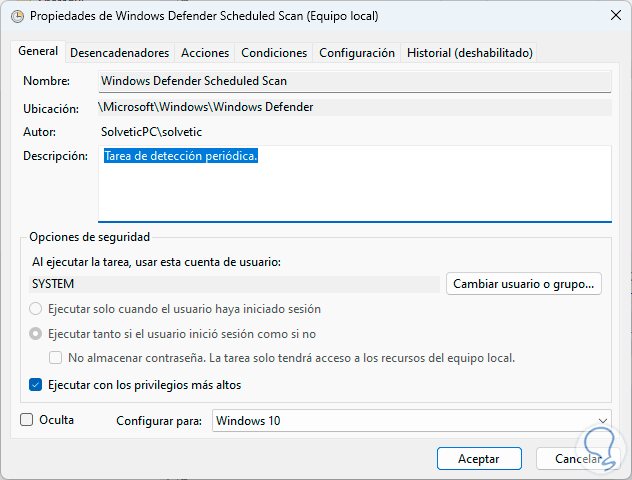
In the initial tab you can make basic settings such as:
- Be able to run the task with administrator privileges
- We can change user or group
- View the path from where the scan is run
step 5
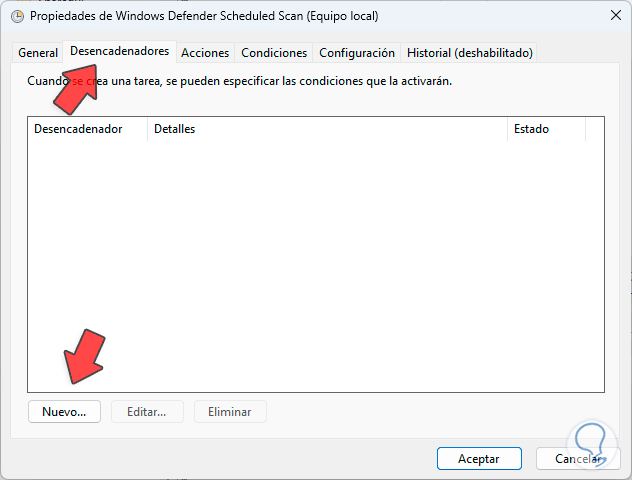
We go to the "Triggers" tab where we will see the following:
step 6
There we click on the "New" button to see the following:
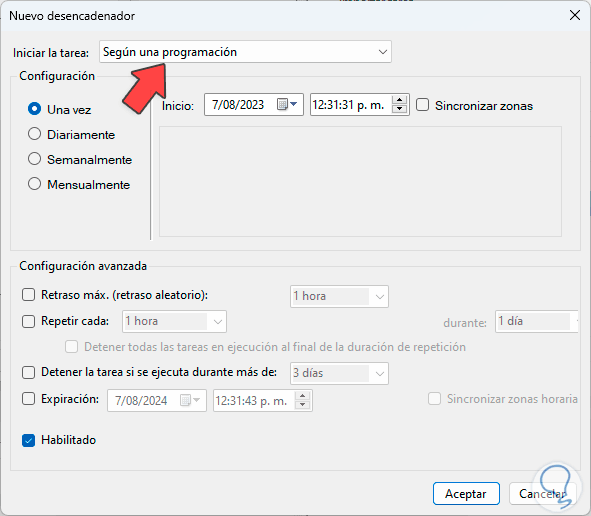
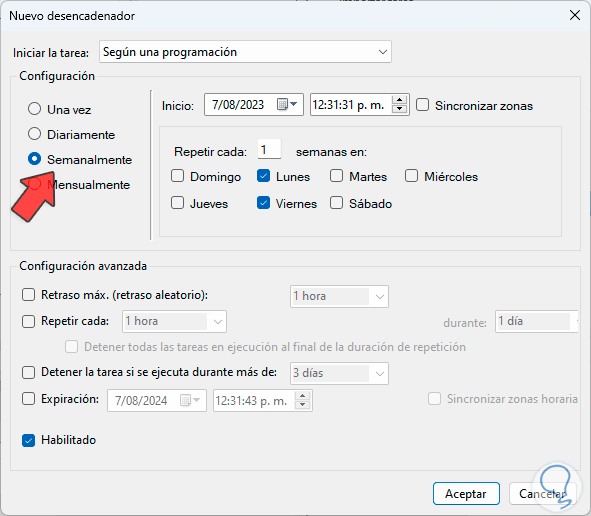
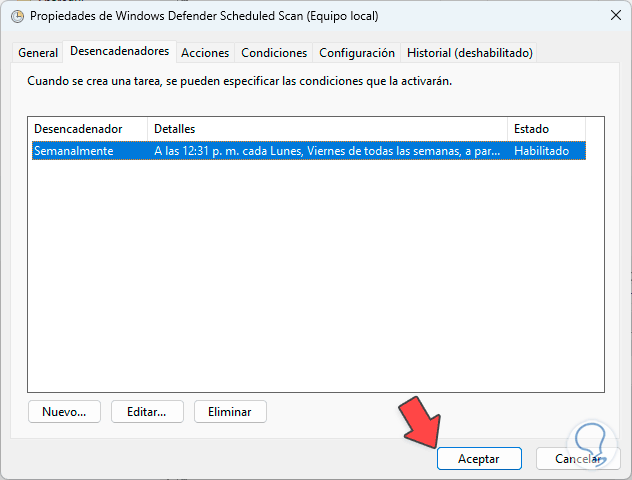
step 7
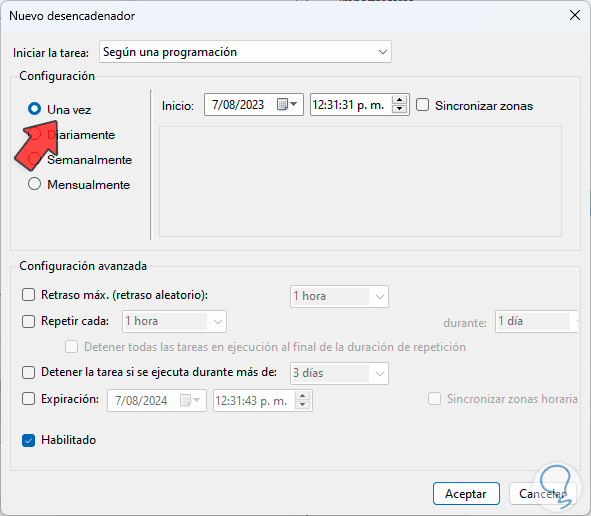
Confirm that the "According to a schedule" option is in "Start the task" and there we have various methods to use, in this case we select the "Weekly" option and define the day and time to be executed:
step 8
If we choose the option "Once" we must define at what time the exam will start:
step 9
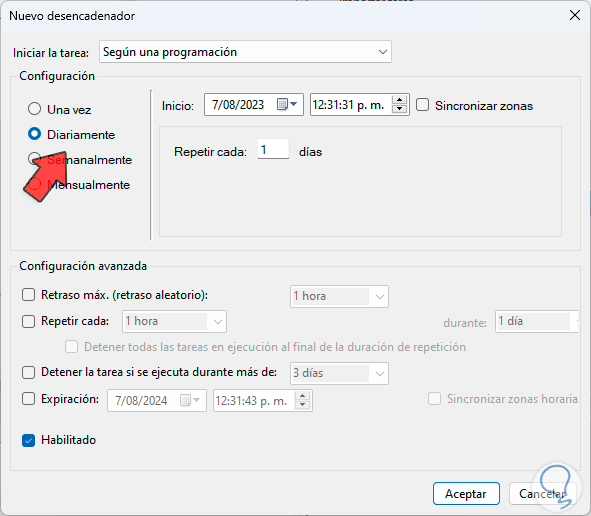
If we choose "Daily" we must define the start time and frequency of repetitions:
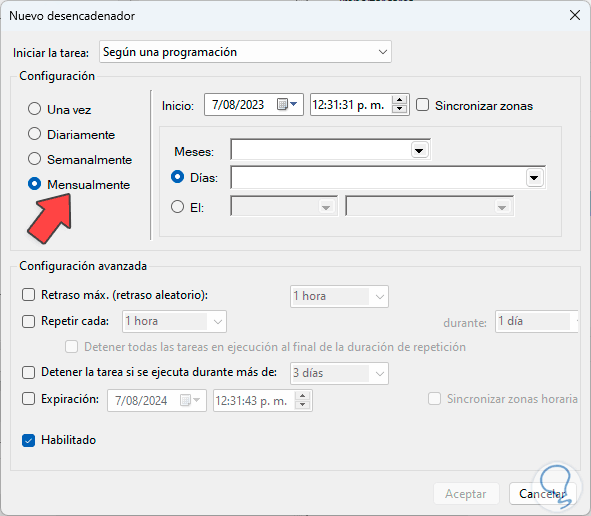
step 10
In the case of the "Monthly" option, we can select the month and days in which the schedule will be executed:
step 11
We apply the changes:
step 12
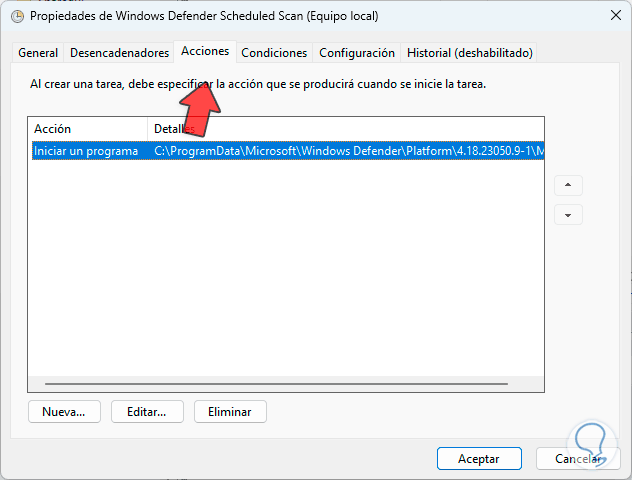
Now in the "Actions" tab it will be possible to see the command to be executed by default:
step 13
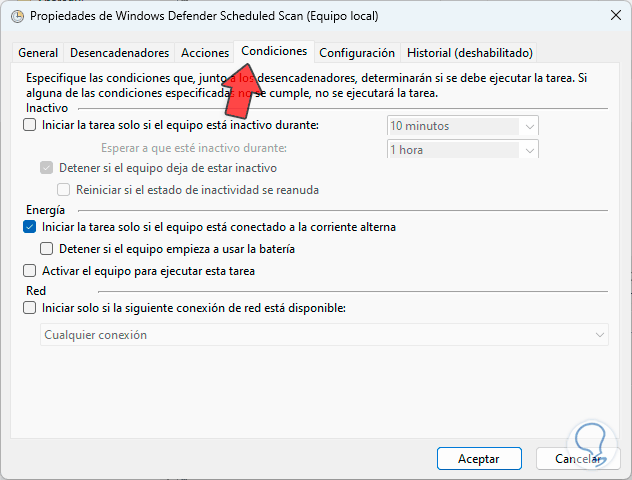
In the "Conditions" tab it will be possible to make the necessary adjustments such as:
- Activate the PC to run the task
- Start the task with the computer idle
- Configure battery usage and more
step 14
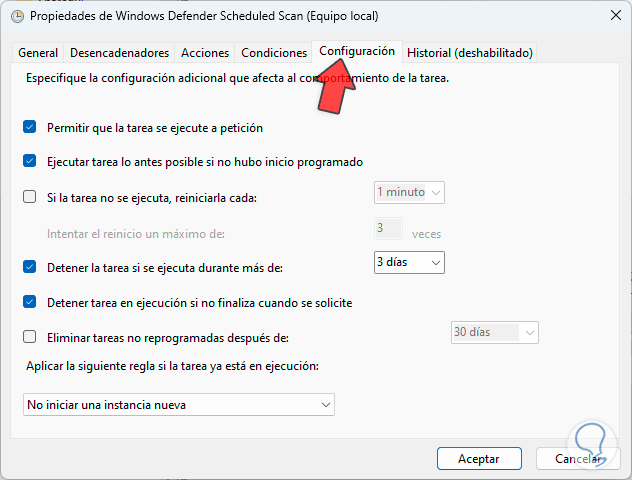
In "Settings" we also have some options to use for the analysis to be successful:
step 15
We apply the changes and the task will be scheduled as configured:
step 16
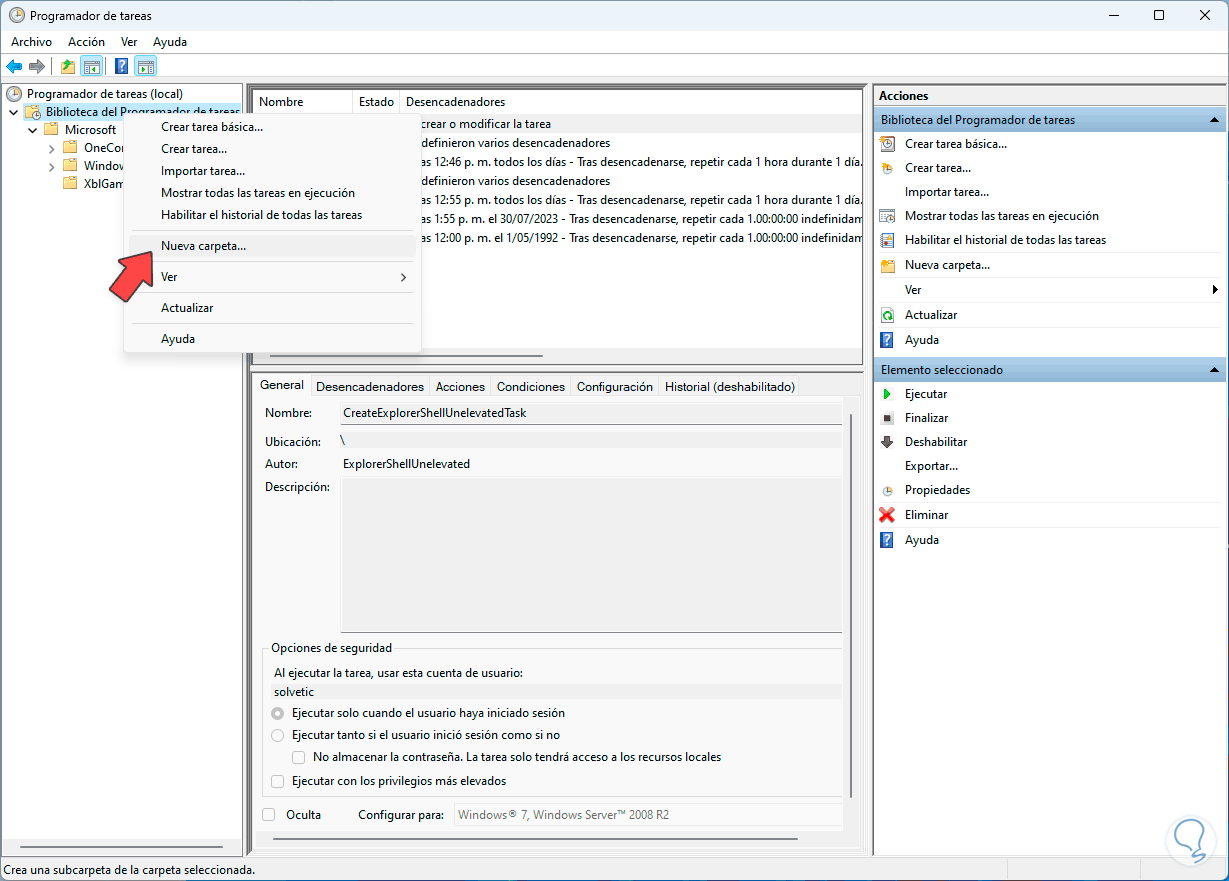
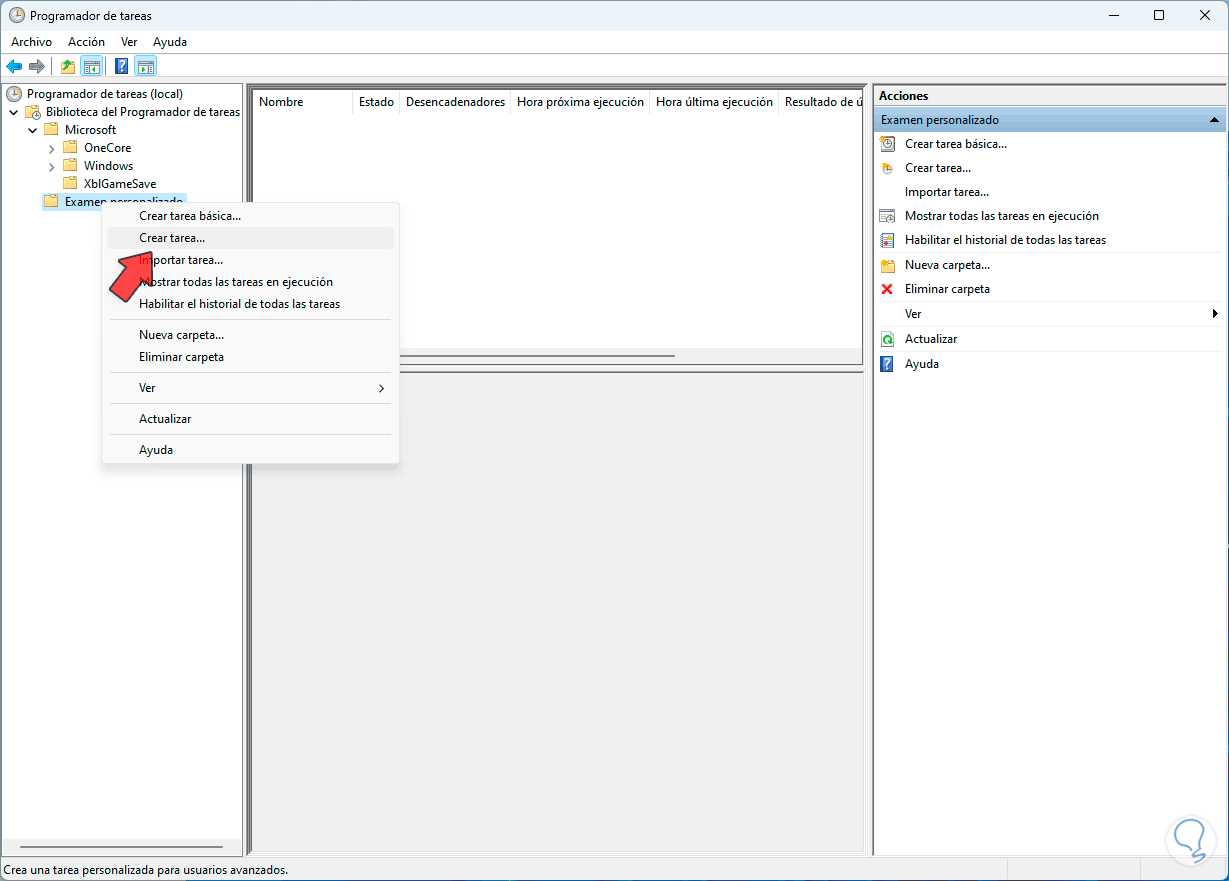
Now, it is possible to carry out a personal examination, for this we right click on the main part of the Programmer and there we select the "New folder" option:
step 17
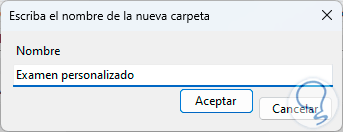
We assign the desired name:
step 18
Now we right click on this folder and select the "Create task" option:
step 19
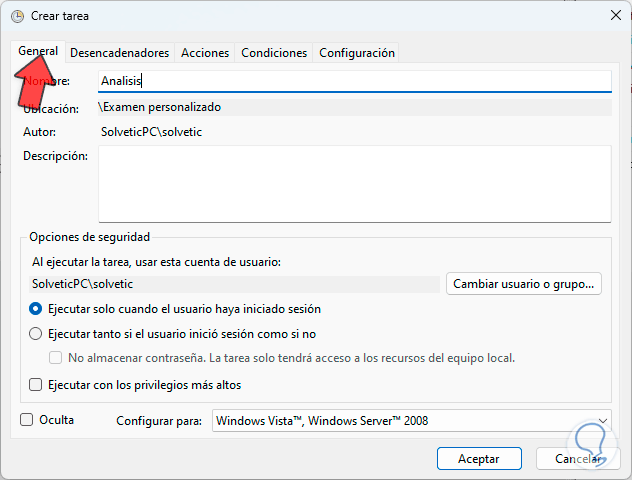
The following window will open, in "General" we establish the name and basic settings of the task:
step 20
We go to the "Actions" tab and we will see the following:

step 21
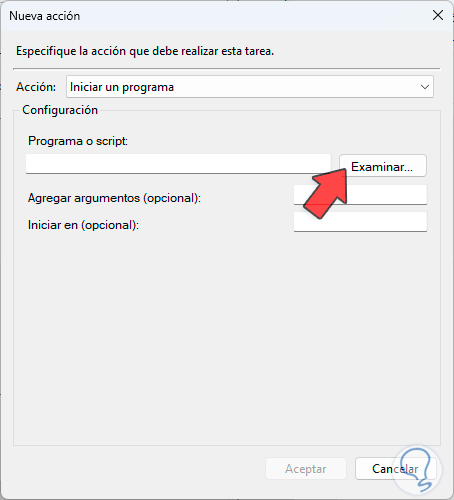
We click on "New" to open the following:
step 22
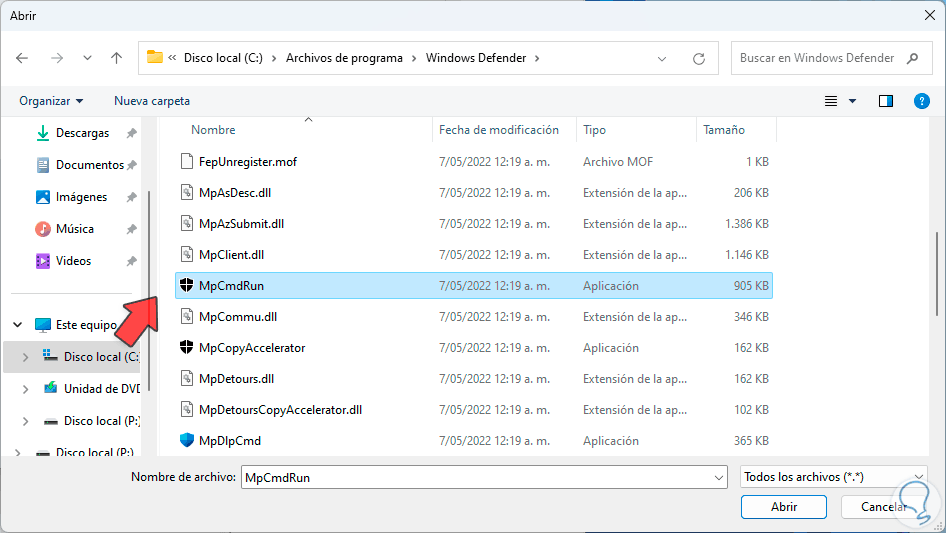
There we click on "Browse" and then we go to the path where the Windows Defender executable is and select this option, the path is:
C:\Program Files (x86)\Windows Defender
Step 23
We click on "Open" to add it, now in the "Add arguments" field we enter the test parameter to use, the options are:
- If we want a complete scan we use “-Scan -ScanType 2”
- For a quick analysis we will use “-Scan -ScanType 1”
- For a folder or personal location scan we use “-Scan -ScanType 3 -File (path)”
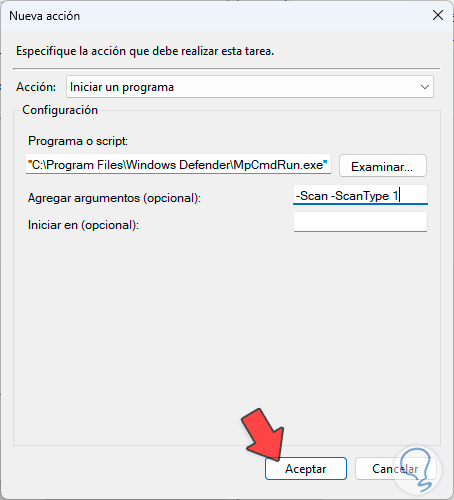
step 24
You can apply the changes.
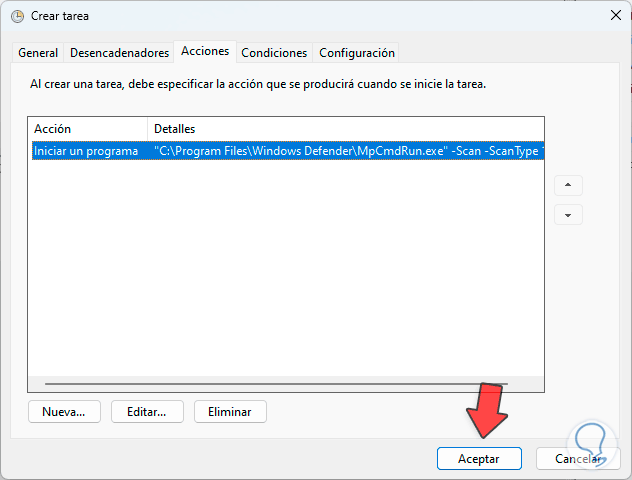
step 25
Now we go to "Triggers" and there we click on "New":
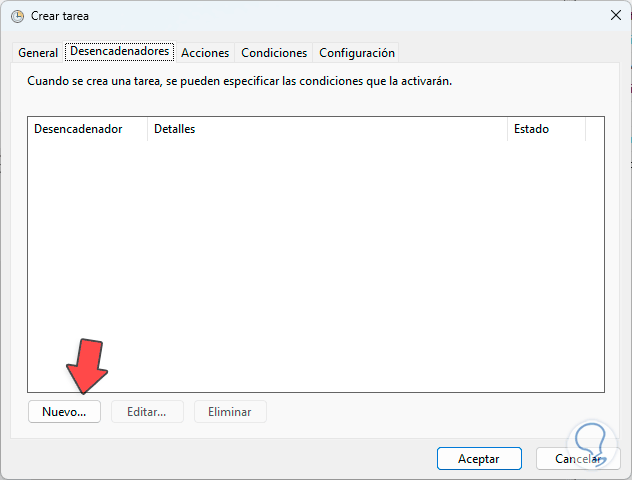
step 26
There we will define the frequency of system analysis as necessary (daily, weekly, monthly, etc.):
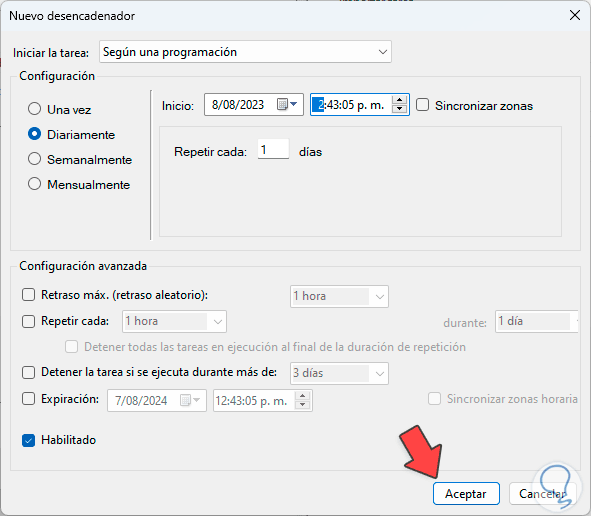
step 27
We apply the changes:
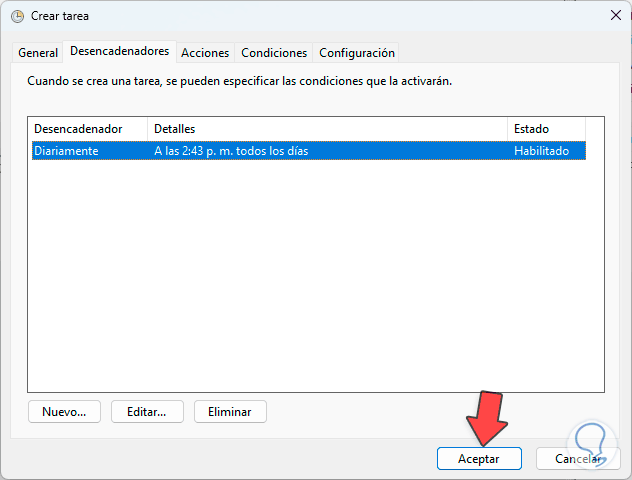
Step 28
In the "Conditions" tab we review whether or not it is necessary to carry out any adjustment:
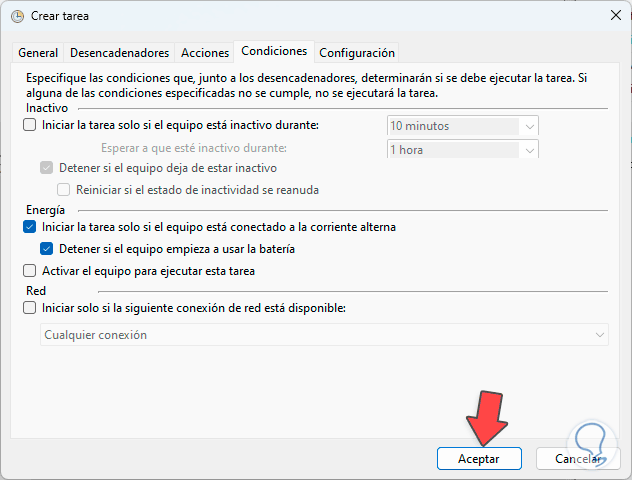
Step 29
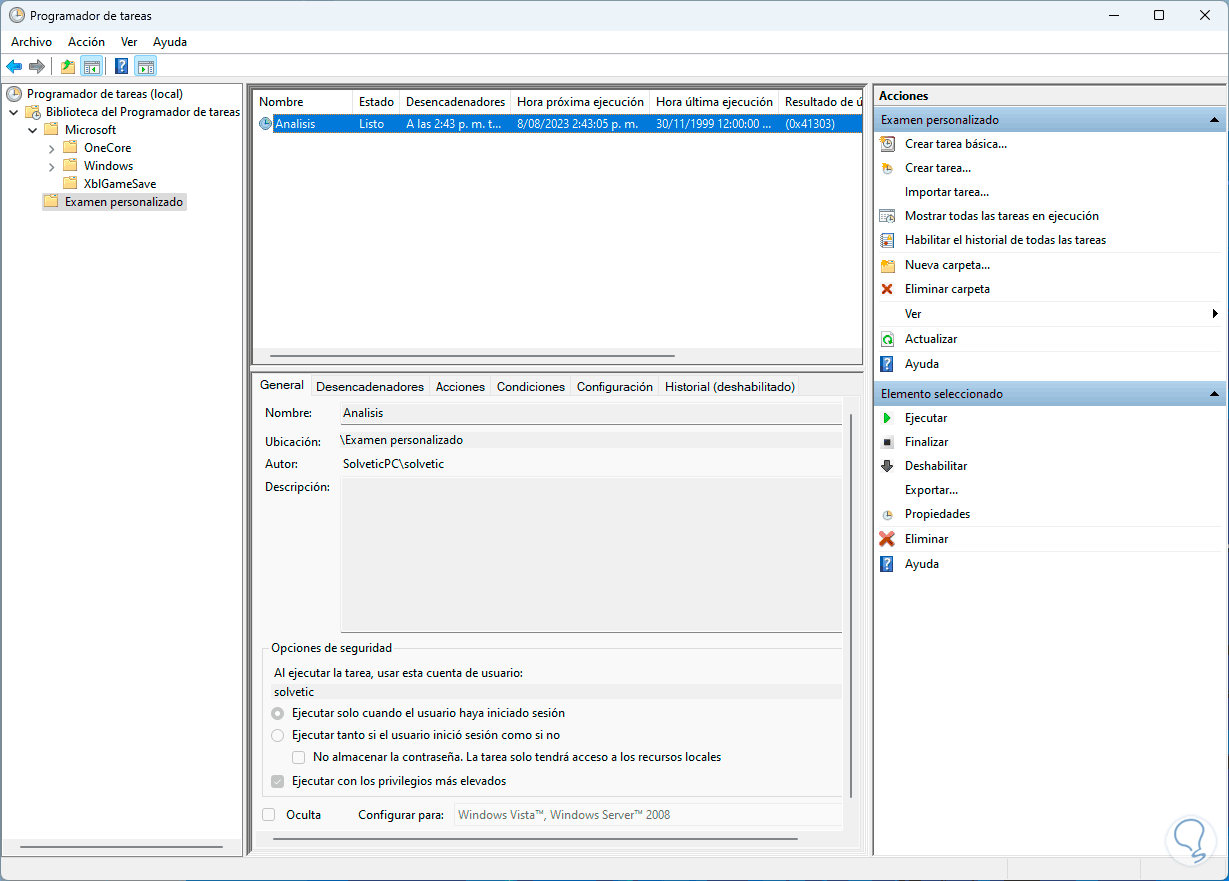
We applied the changes and now this system scan has been scheduled at the times previously established:
From this section we can edit the values, execute the task to validate that it works correctly or delete the task that has been scheduled.
So it is possible to configure the Windows Defender scan schedule in Windows 10/11 and ensure a safe and available system..