Microsoft Word is part of the Office suite and is one of the most used and versatile applications when creating professional documents for its different tools and configuration options, both text and various items to enter..
For a document to be sufficiently presentable, there are certain criteria that we must take into account during its editing and one of these are the margins. For this reason we will learn how to set margins in Microsoft Word.
Note
This process applies to both the 2016 and 2019 versions.
The margins in Word 2016 documents are responsible for creating a text area on a page, either on the left, right, up or down. These margins allocate a space between the text and the edge of the page, which results in the text entered being outside the document which would have a negative visual impact..
Microsoft Word automatically sets the margins of the page 1 inch for each edge of the page.
Step 1
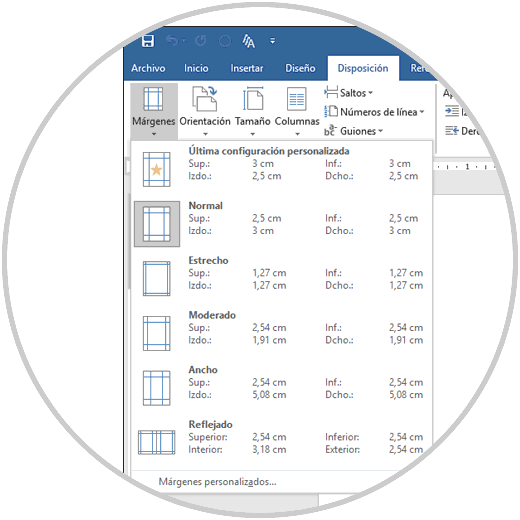
To assign a margin to the active Word document, we must go to the "Layout" menu and in the "Page Setup" group, click on the "Margins" option and the following options will be displayed. There we can activate some of the default options and one of the advantages is that there we can see the measurements of each margin by default.
Step 2
If we want to customize the margin, this is based on the content of the document, we select the option "Custom margins" and the following will be displayed:
There it will be possible to set parameters such as
- Dimension in centimeters of the upper, lower, right or left margins.
- Set the number of pages to use, etc.
Note
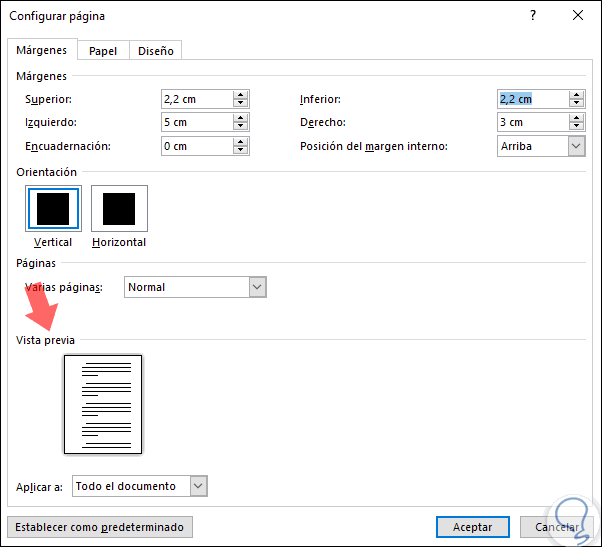
We can also configure other values ​​for the document such as orientation or views.
Step 3
With each change we make we can see a preview in the bottom panel:
Step 4
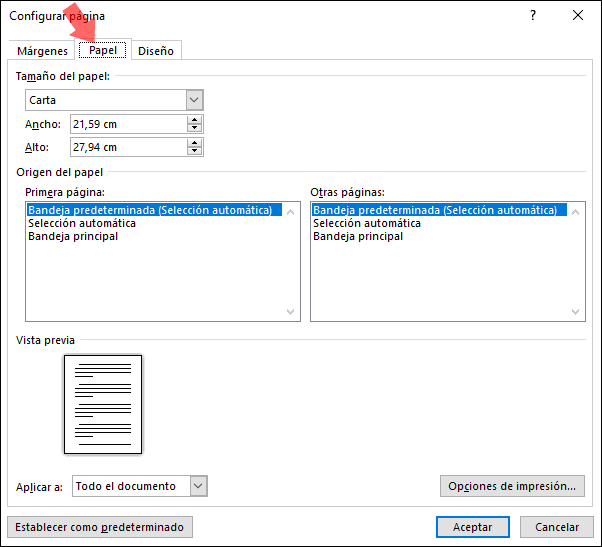
As an additional point, we can go to the "Paper" tab where we can configure details such as:
- Width and height of this paper
Step 5
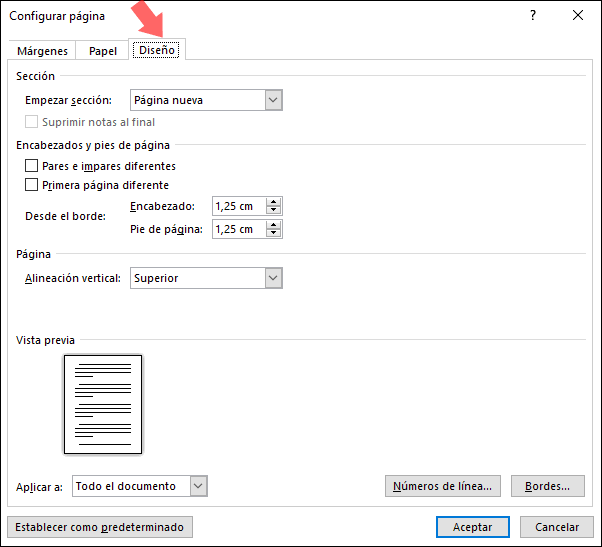
In the Design tab it will be possible to set values ​​such as:
- Where to start a section.
- Print headers or footers.
- Header and footer dimensions.
Step 6
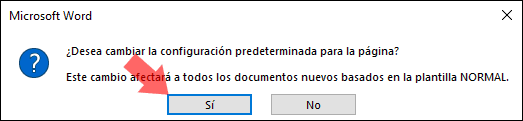
If we set a custom margin and want this setting to apply to all documents from now on, we must assign the desired dimensions and in the "Margins" tab click on the "Set as default" button located at the bottom and the following message will be displayed: There it is indicated that these new changes will affect from now on all the documents based on the Normal template, which is the default of Word 2016 or 2019, there we click on "Yes" to confirm.
With this method we have learned to insert margins in Microsoft Word and better organize the content entered..