Windows 11 virtual desktops offer an excellent way to organize our activities on the computer , being especially interesting for our productivity if we carry out many tasks at the same time, in different areas.
In the Microsoft operating system it is not a novelty, since in Windows 10 we could enjoy them, but not with as many customization possibilities as with the new version of the Californian company, where it is possible to choose different backgrounds and names for each desktop ..
Index
- How to create virtual desktops in Windows 11 step by step
- How to switch between desktops
- Choose a different background for each desktop
- Give your virtual desktops a name
- Organize virtual desktops
- Use the same app on all desktops
How to create virtual desktops in Windows 11 step by step
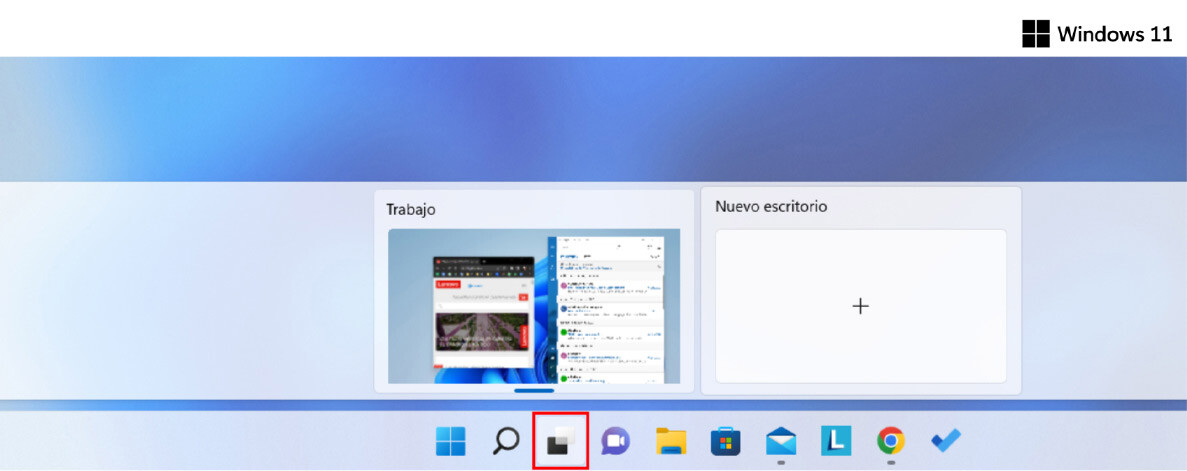
In Windows 11 we start from a main desktop, but we can create as many as we need through the 'Task View' button . We find it in the lower toolbar. It is also possible to create a new virtual desktop with the combination 'Windows + Ctrl + D'.
Once the second virtual desktop is created, we can have different applications on it . For example: use Chrome browser with work tabs on the first desktop, and use the same browser with leisure pages on the second..
How to switch between desktops
The way to move between them is with the aforementioned 'Task view' button, which displays an interface with the previews of each desktop. It is also possible to switch with the key combination ' Windows + Ctrl + Right or Left Arrow '.
From this screen we can close virtual desktops, just click on the 'X' in the upper right corner of each view..
Choose a different background for each desktop v
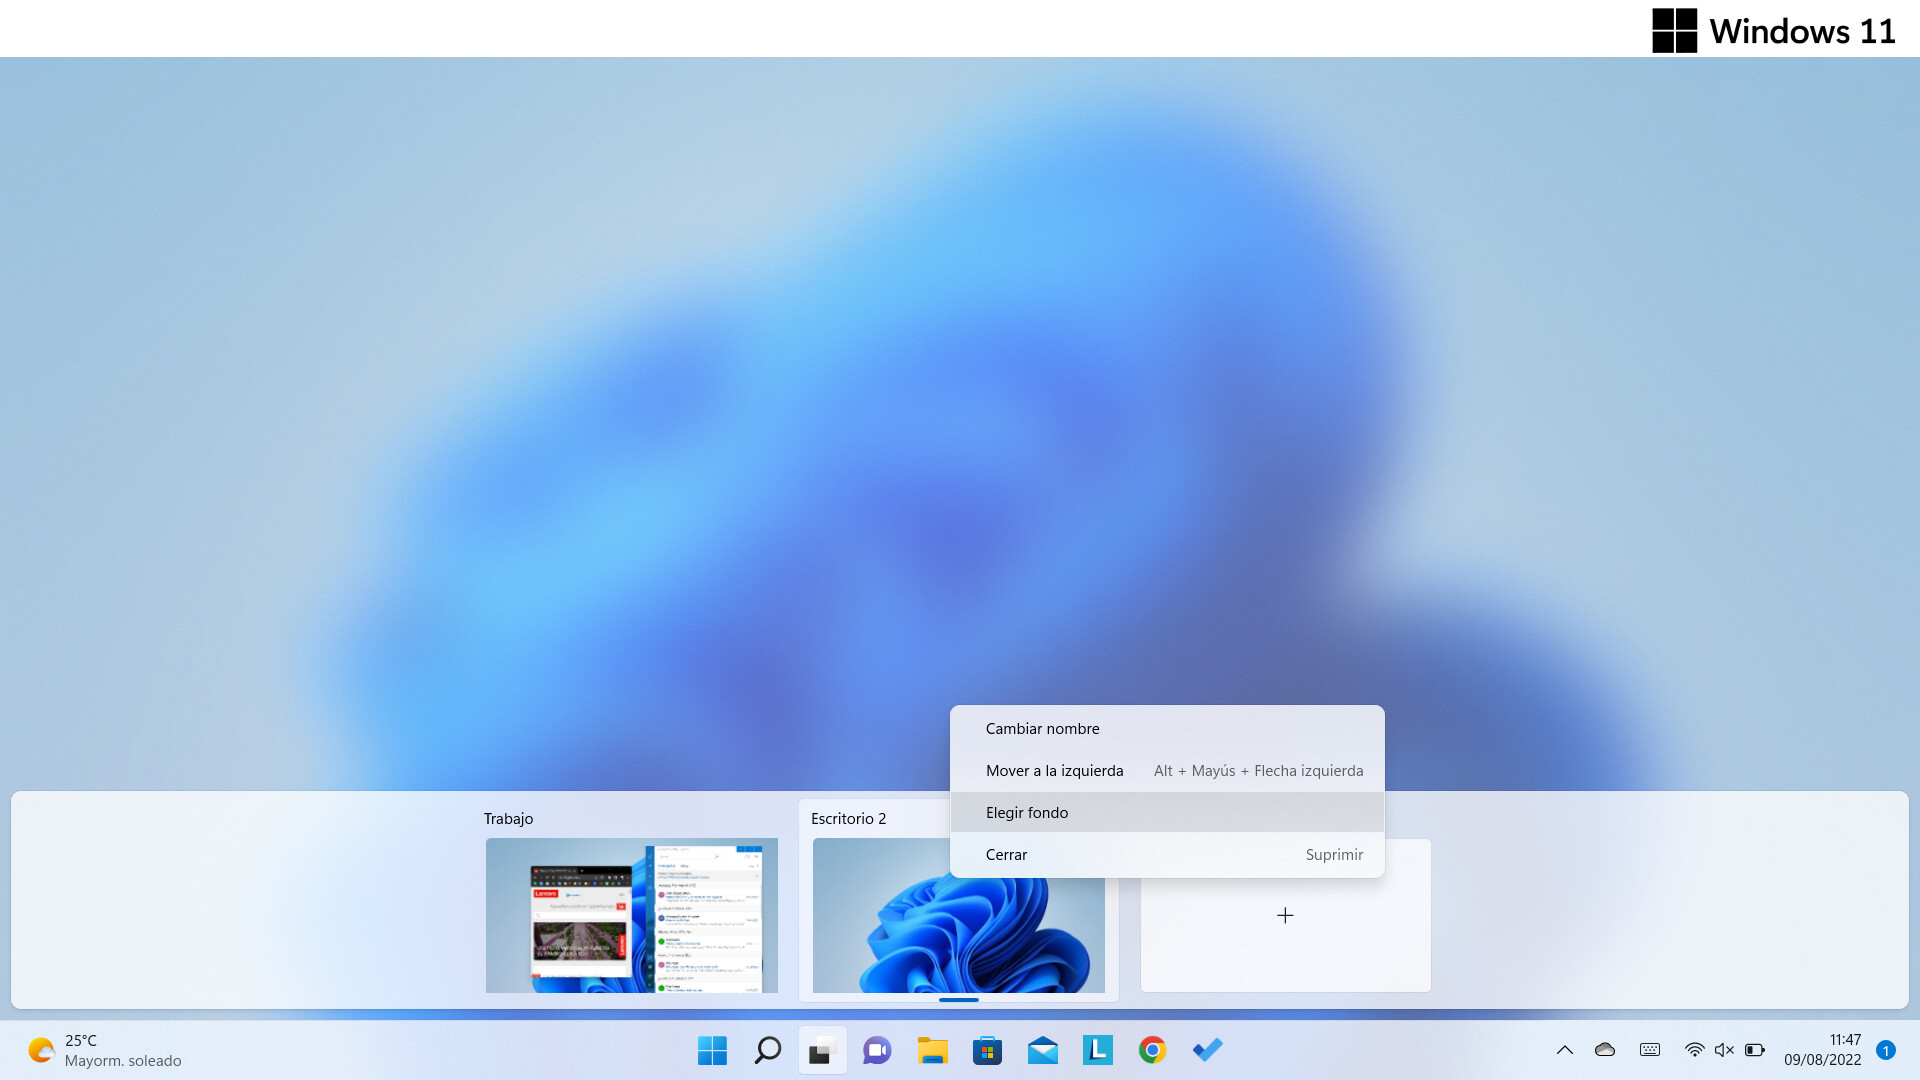
It is something possible in the virtual desktops of Windows 11, allowing you to create better differentiated environments at a glance. To do so, we select 'Task View' again in b, and right-click on the desktop view that we want to modify.
The option that allows us to make the change is ' Choose background '.
Name your virtual desktops in Windows 11
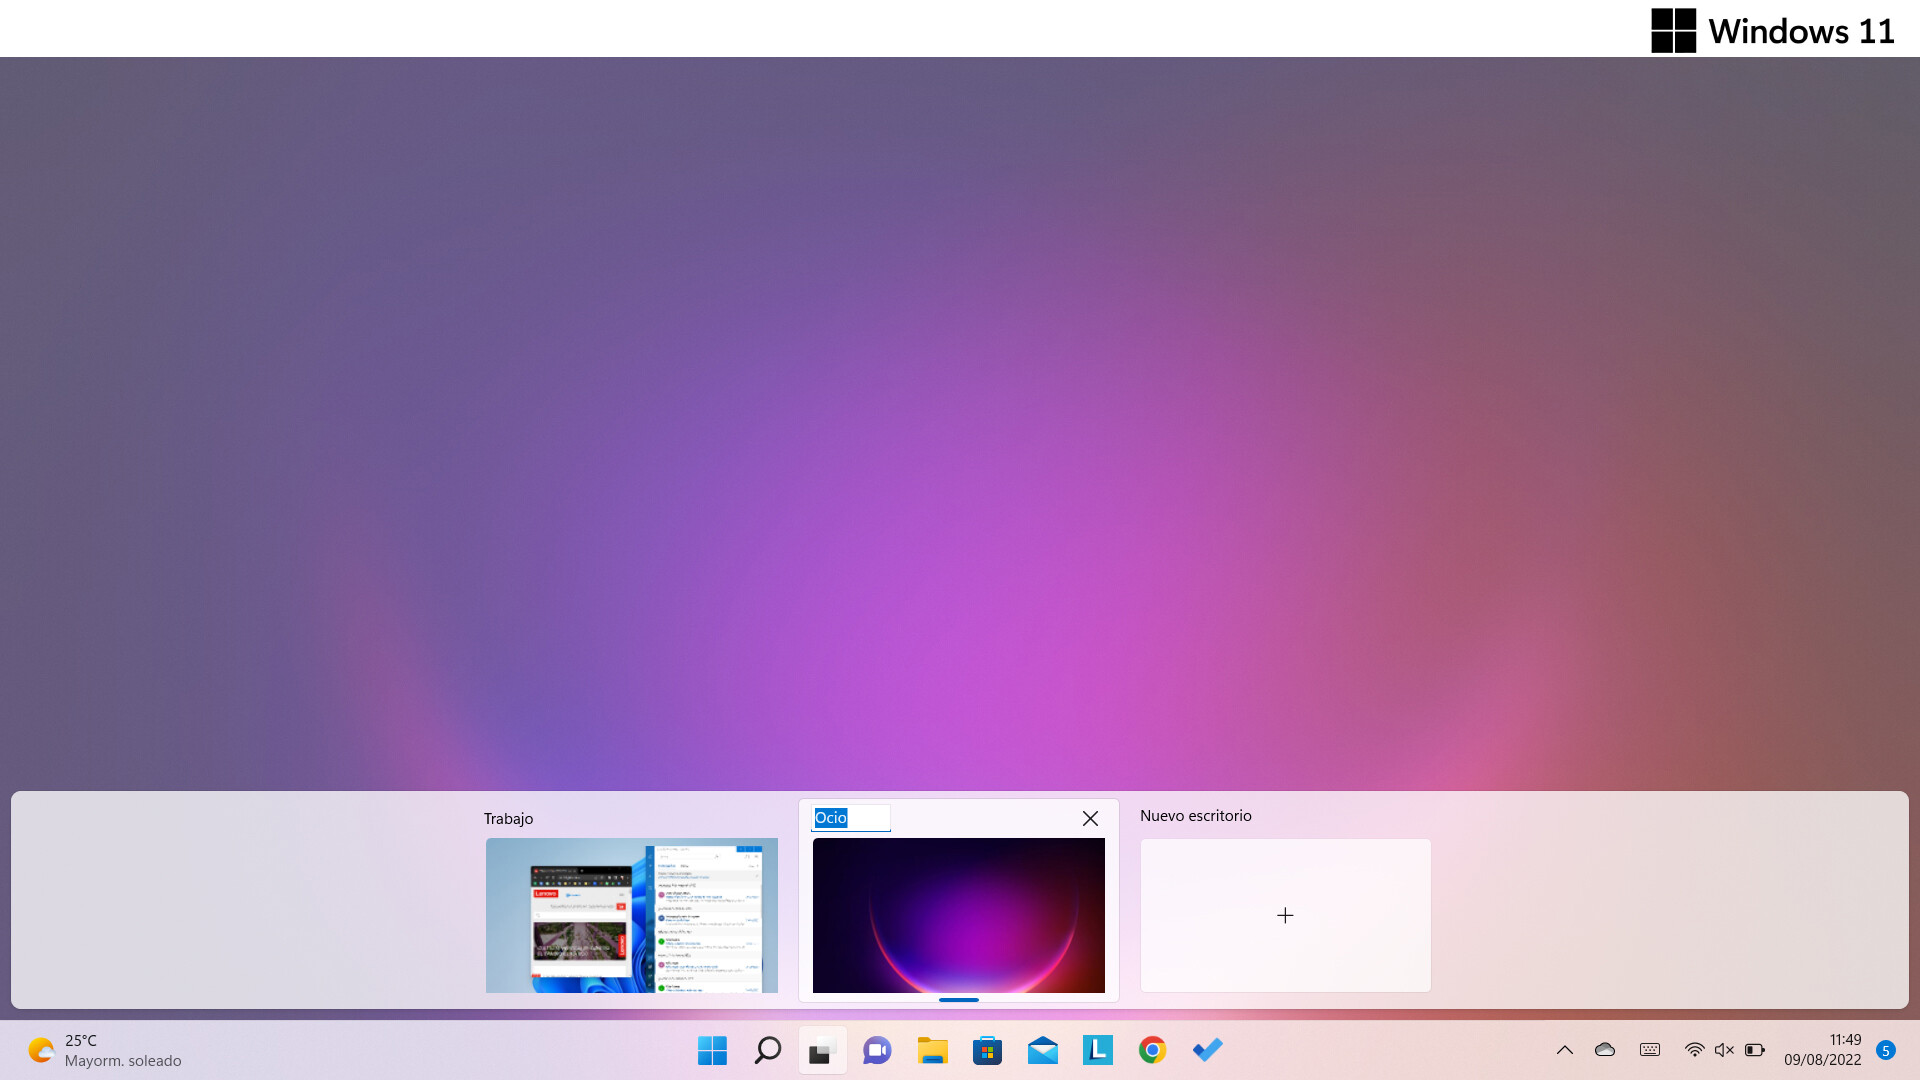
Yet another possibility of customization that is new in Windows 11. At first it may not seem very useful, but it is when there are many desktops working at the same time.
Again we turn to the 'Task View', click on the name of the series that has the desktop view and it will allow us to edit the text. We can change it again at any time.
Organize your Windows 11 virtual desktops
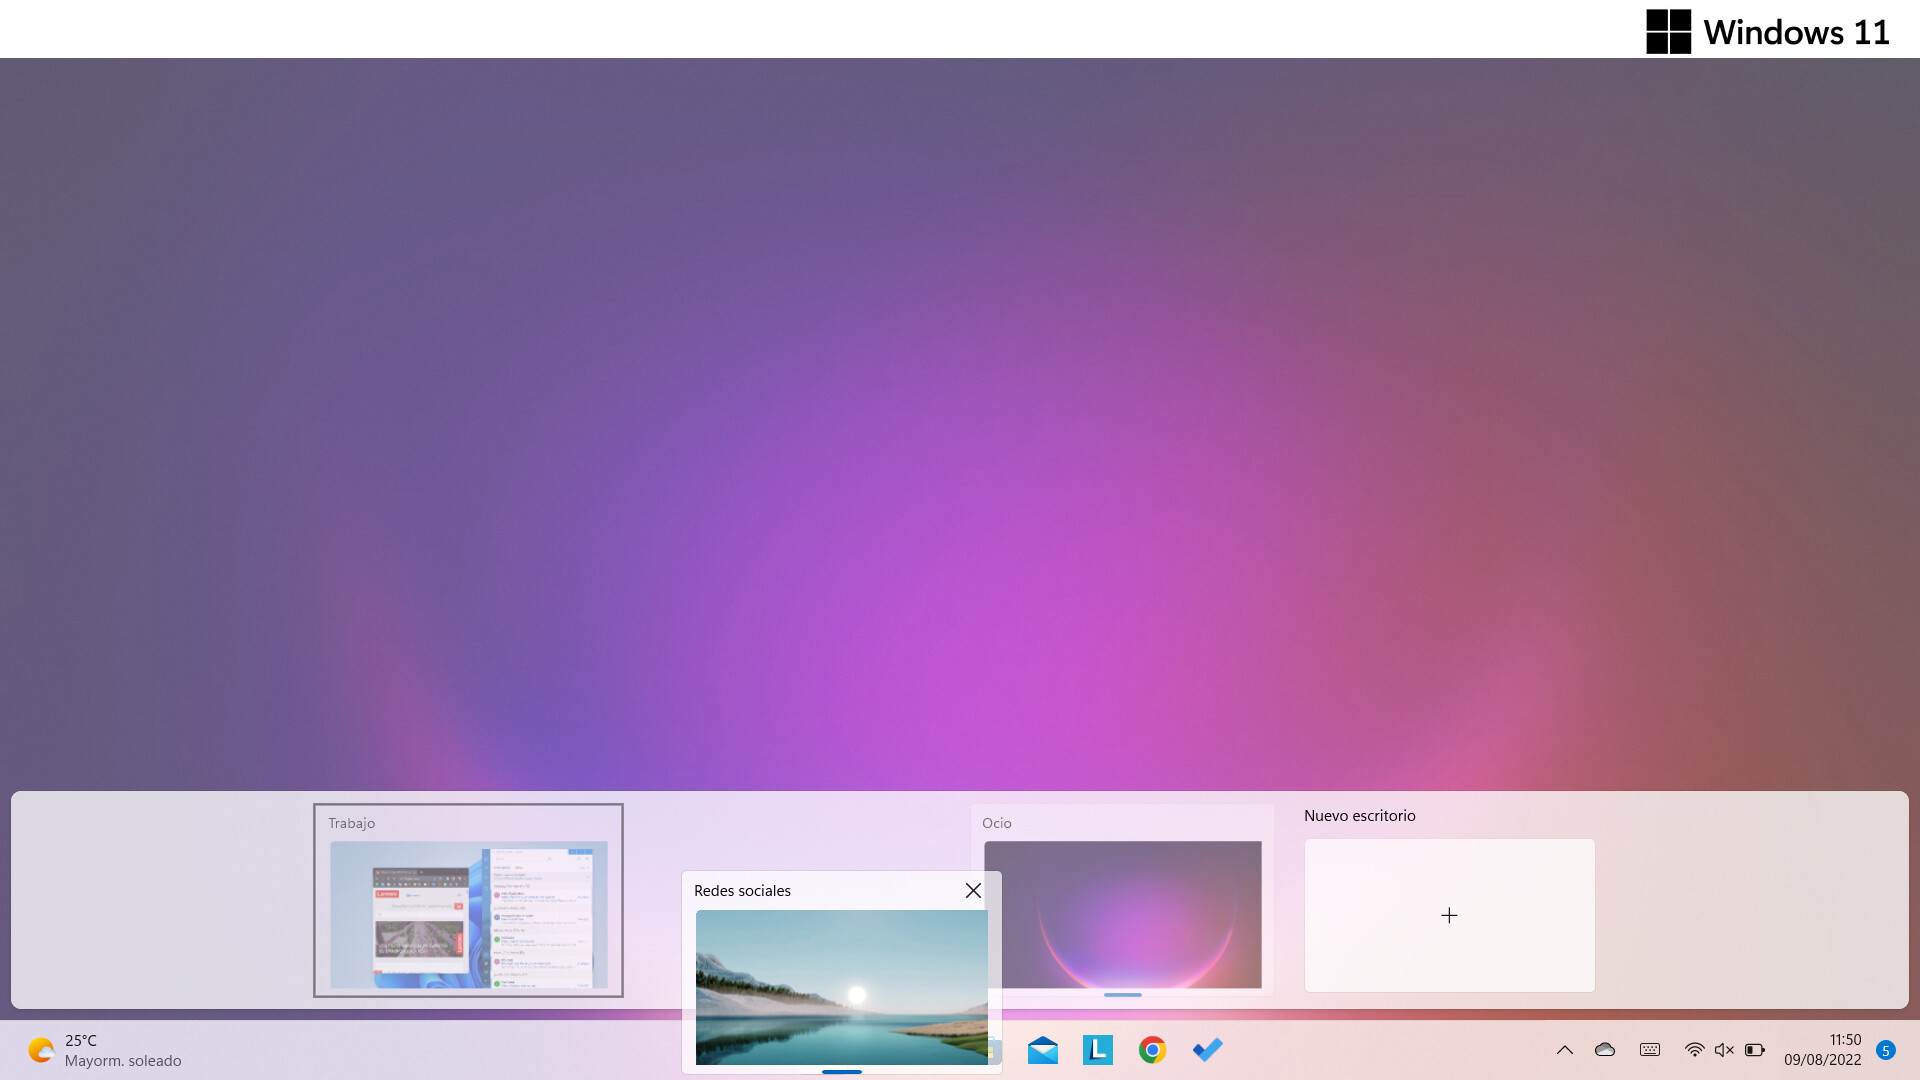
Once we have several desktops running at the same time, any of them can be the main one or take the leftmost place in the 'Task View'. The way to modify the order is as simple as dragging and dropping the desktop views.
Use the same app on all desktops
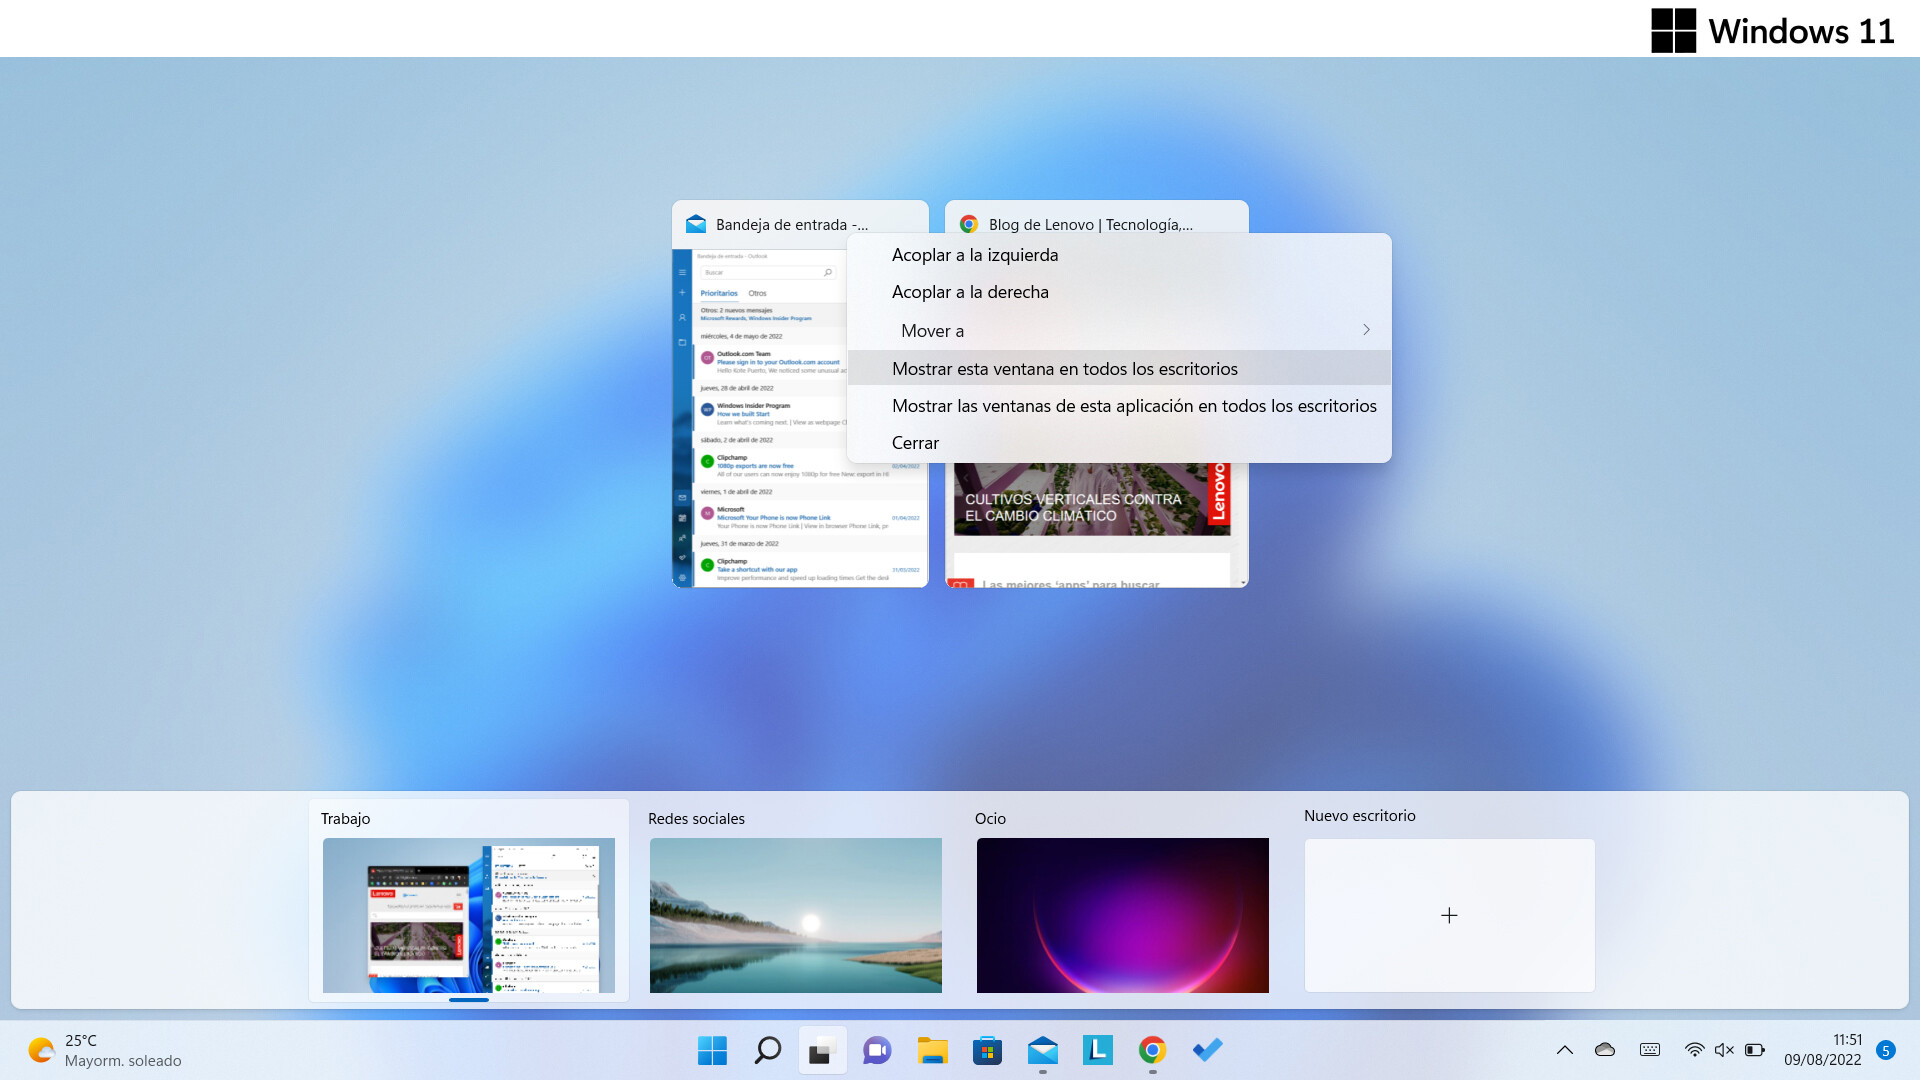
It is possible that, in some cases, we do not want different instances of an application depending on the desktop, for this we must right-click on it in the 'Task View' interface. There, the option to choose is ' Show this window on all desktops '.