Users are a fundamental part of Windows 11 since when creating and configuring them, a profile is created with which the system is accessed and based on the permissions it will be possible for this user to have certain privileges, the types of account available for use in Windows 11 are:
- Local accounts: these are accounts that will be used for the particular computer (not synchronized with the Microsoft account) and administrator or standard permissions can be used on it
- Domain accounts – As the name implies, these are accounts that are linked to a Windows Server domain or other server operating system
- Microsoft accounts: these are accounts that are currently being forced to use and are those created with our Outlook or Hotmail account, these are synchronized with the activities that we carry out on various devices
- Guest: it is a temporary account where the permissions of this user are limited to avoid changes in the configuration of the equipment
- Integrated administrator: it is an account with all privileges and is disabled by default, its use is intended for administrative tasks but with the respective care of not affecting the configuration or management of the system
TechnoWikis will explain in this tutorial how to create a guest account in Windows 11 and thus have an account for users who will not have access to the system for long periods of time.
To stay up to date, remember to subscribe to our YouTube channel! SUBSCRIBE
1 How to create a Guest Account in Windows 11 from Settings
From Settings it is possible to perform most tasks in Windows 11.
Step 1
To create the user from there we go to "Start - Settings - Accounts - Family and other users":
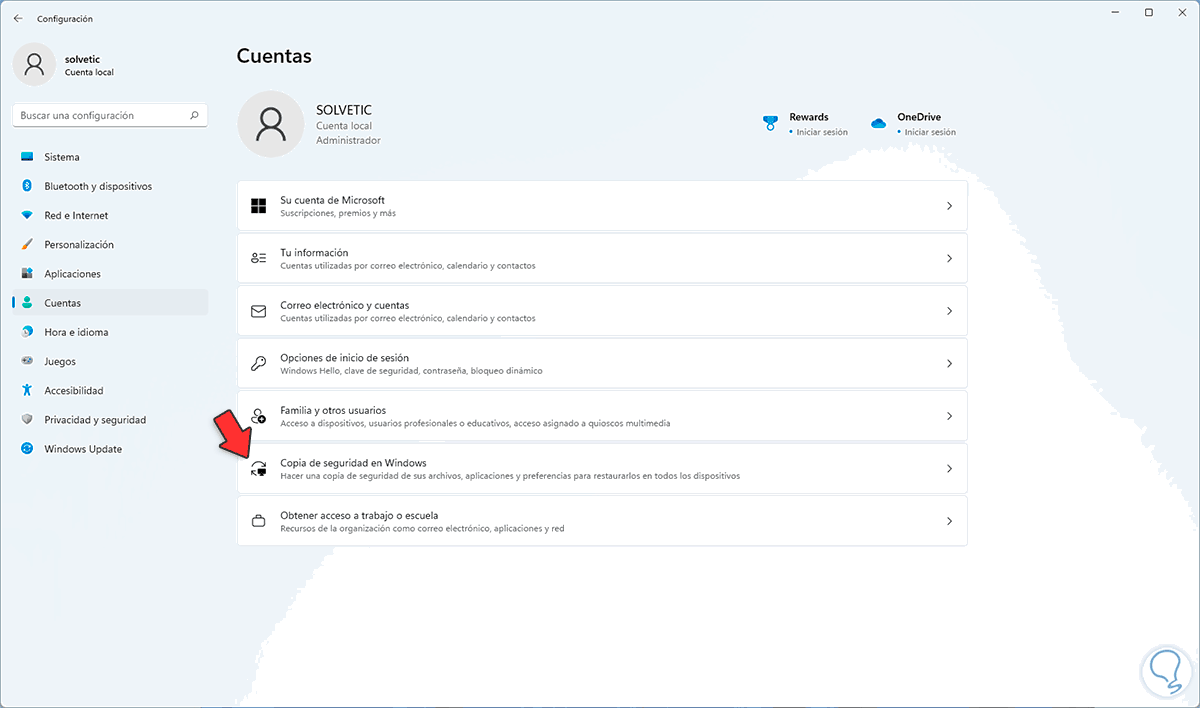
Step 2
By clicking there we will see the following. We click on "Add account"
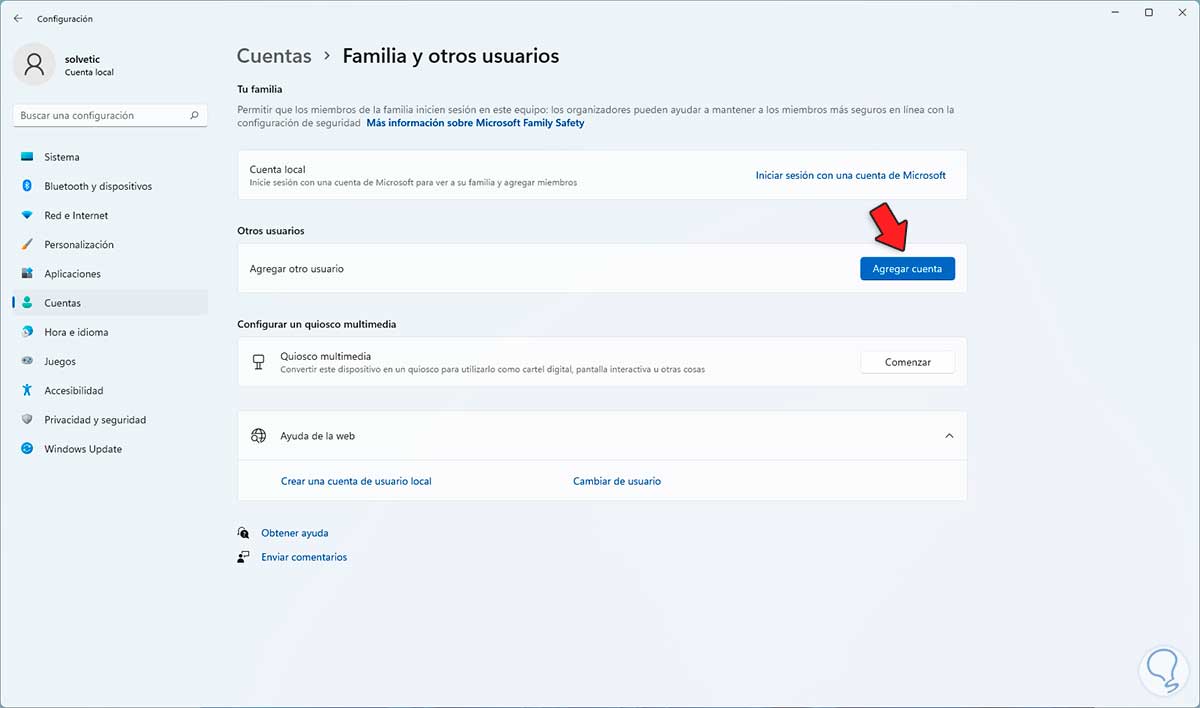
Step 3
The following pop-up window will be displayed. We click on "I do not have the login data of this person
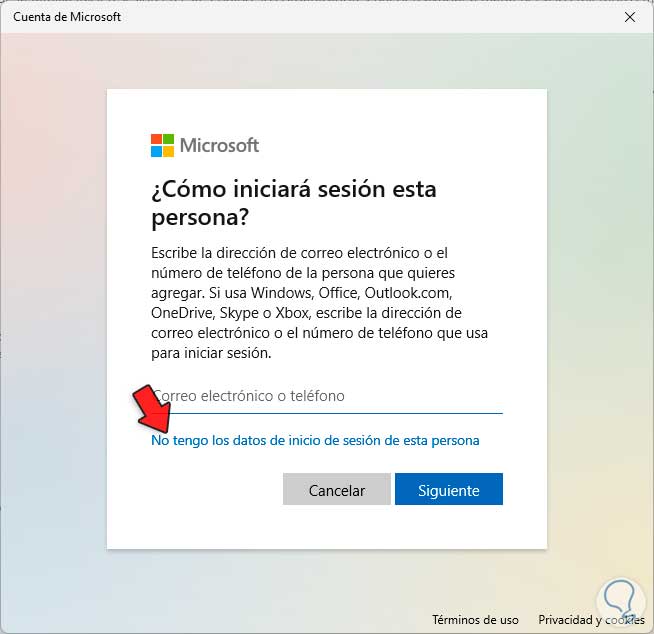
Step 4
Then we will see the following window. We click on "Add a user without a Microsoft account"
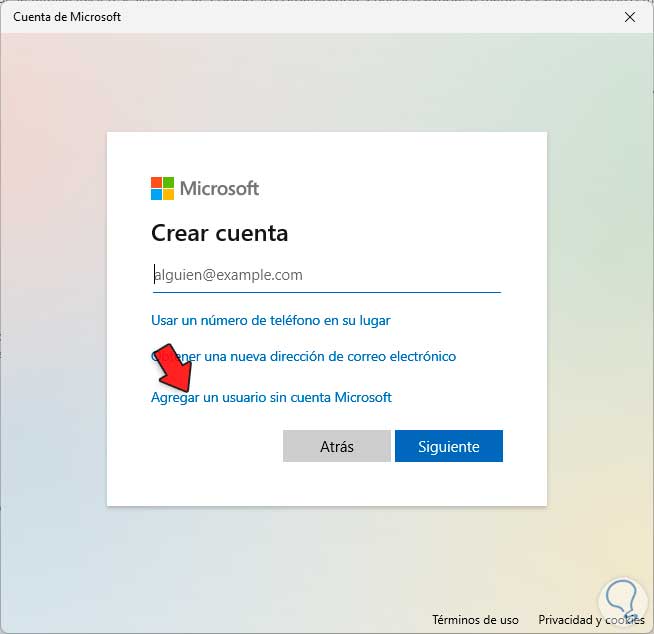
step 5
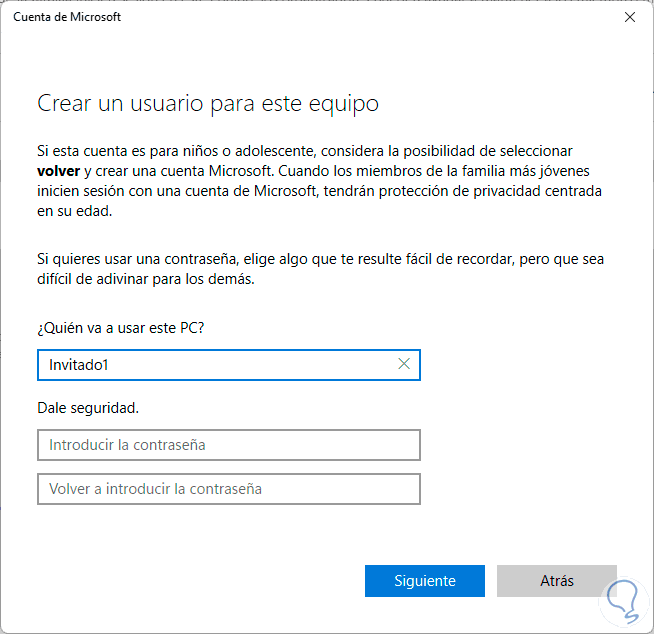
In the next window we assign a name for the guest user and leave the password fields blank:
Note
It is not possible to use the name "Guest" since Windows 11 already has a built-in account with that name and which is disabled by default.
step 6
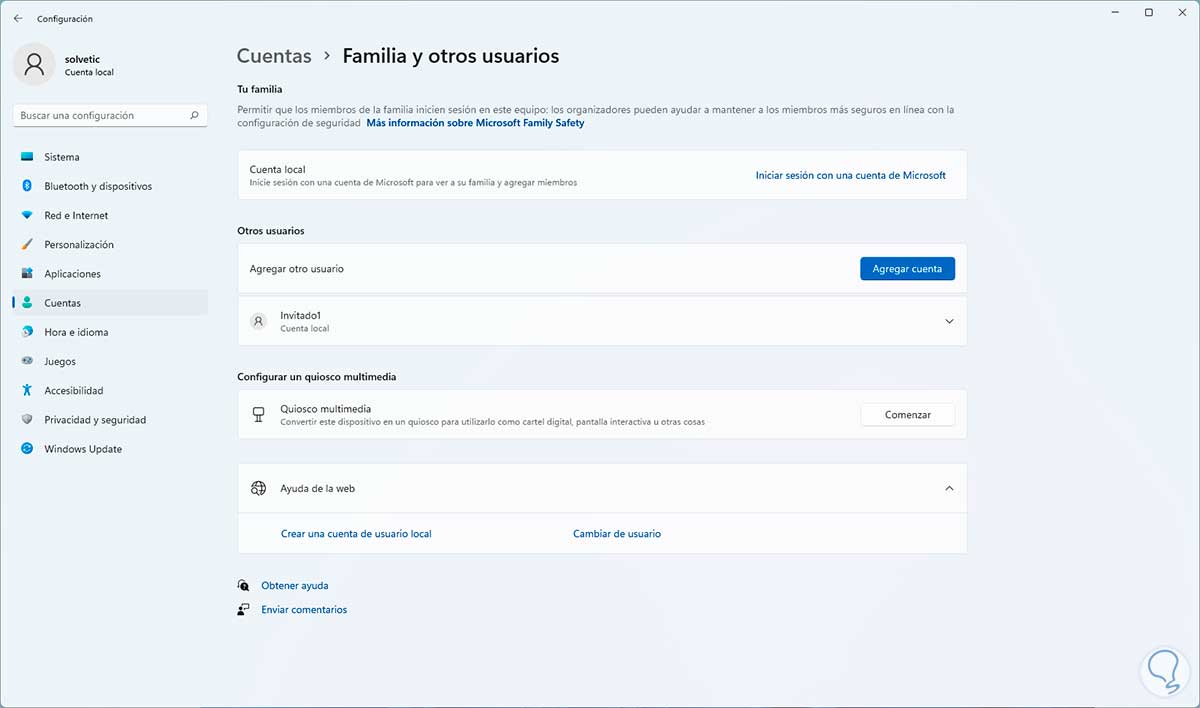
We click Next to apply the changes:
Step 7
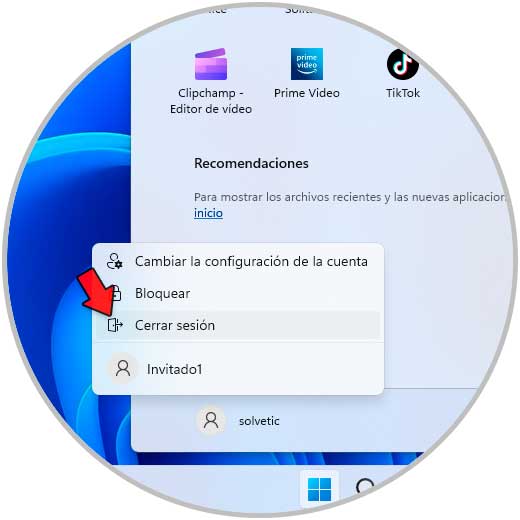
Once the account is created, close the Windows 11 session:
step 8
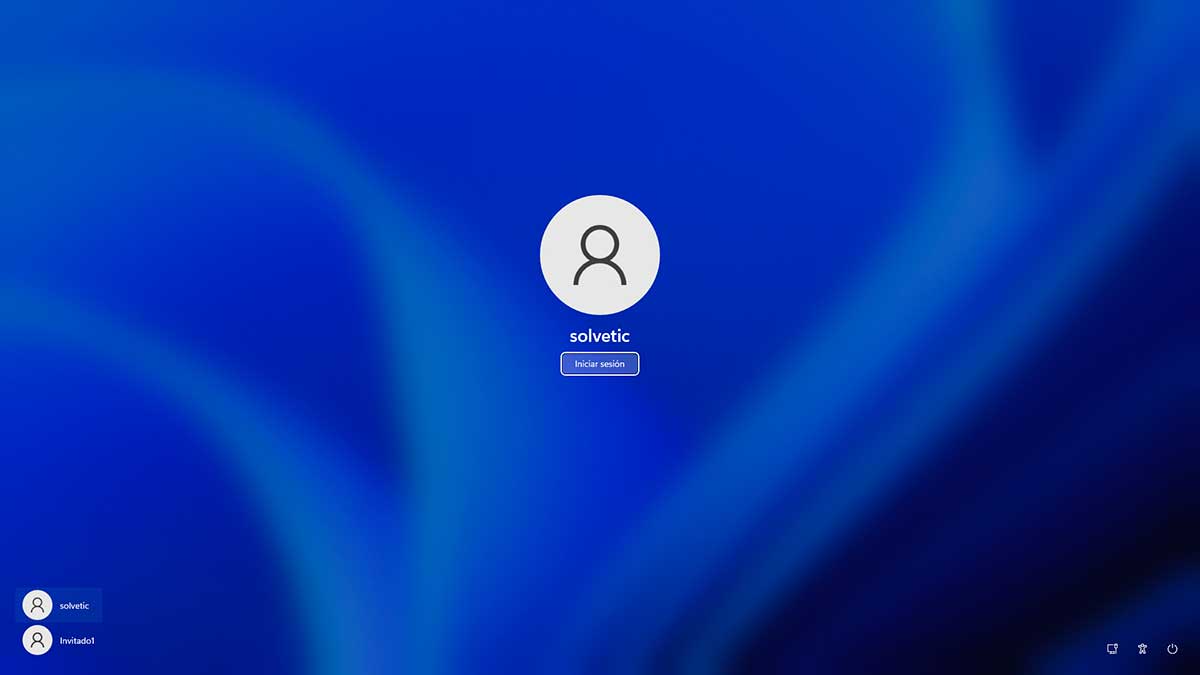
Validate the user created as a guest:
2 How to create a Guest Account in Windows 11 from CMD
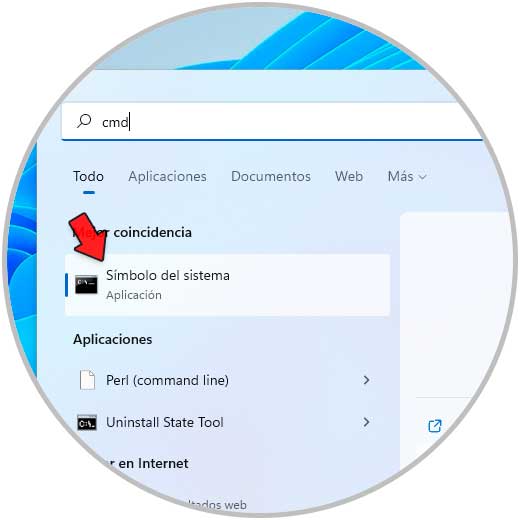
Step 1
Another option to use is from the CMD console, to do this open CMD as administrator:
Step 2
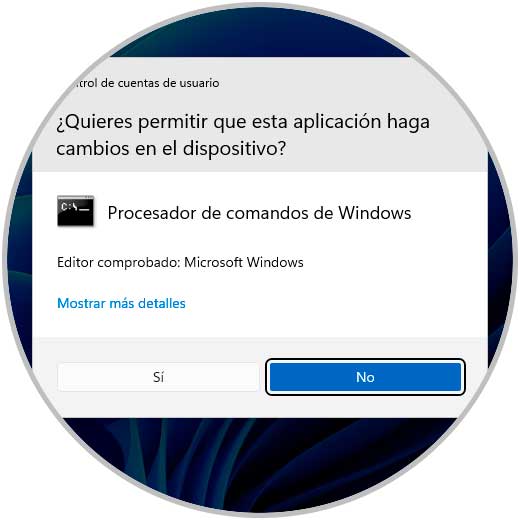
Confirm UAC permissions:
Step 3
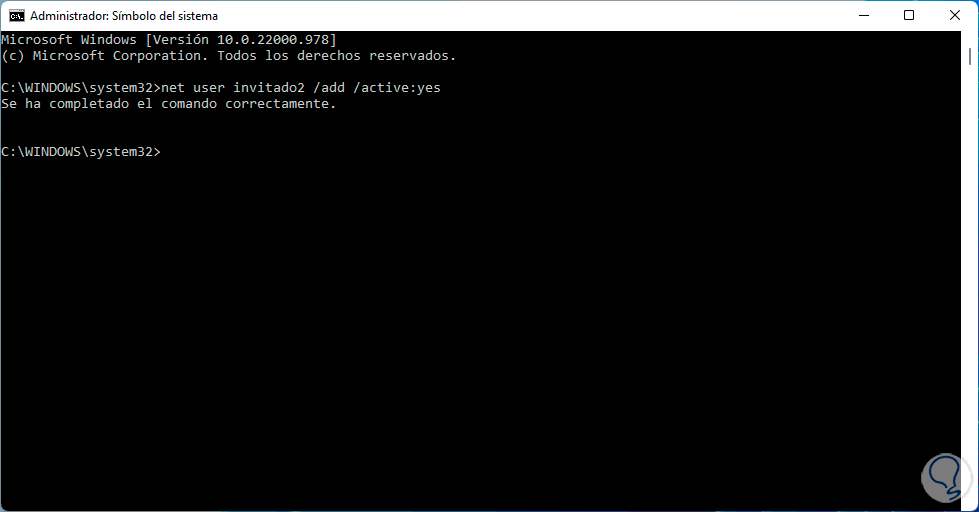
We create the guest user with the syntax:
net user username /add /active:yes
Step 4
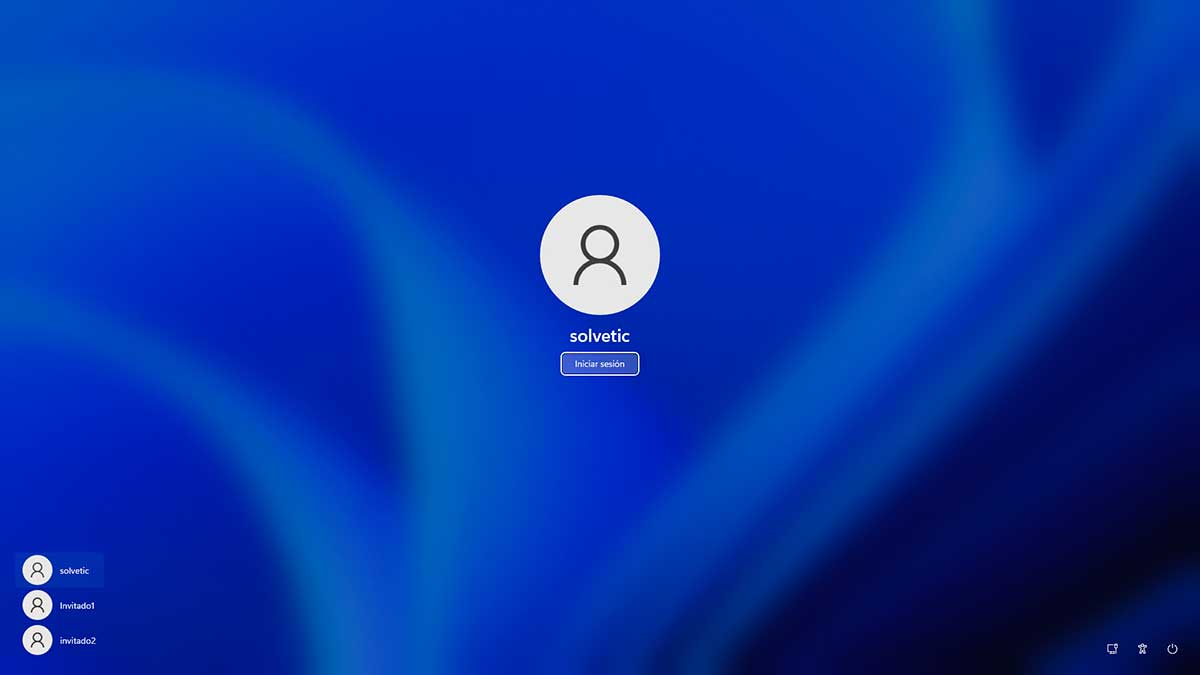
Close the session and validate that the user is available:
How to create a Guest Account in Windows 11 from Computer Management
Step 1
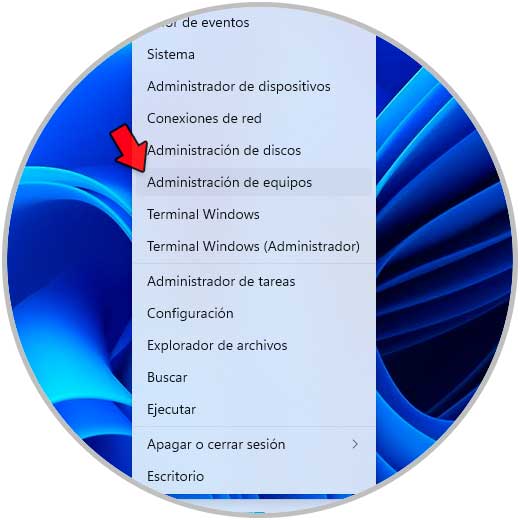
We can create our guest user from Team Manager, open Team Management from the Start context menu:
Step 2
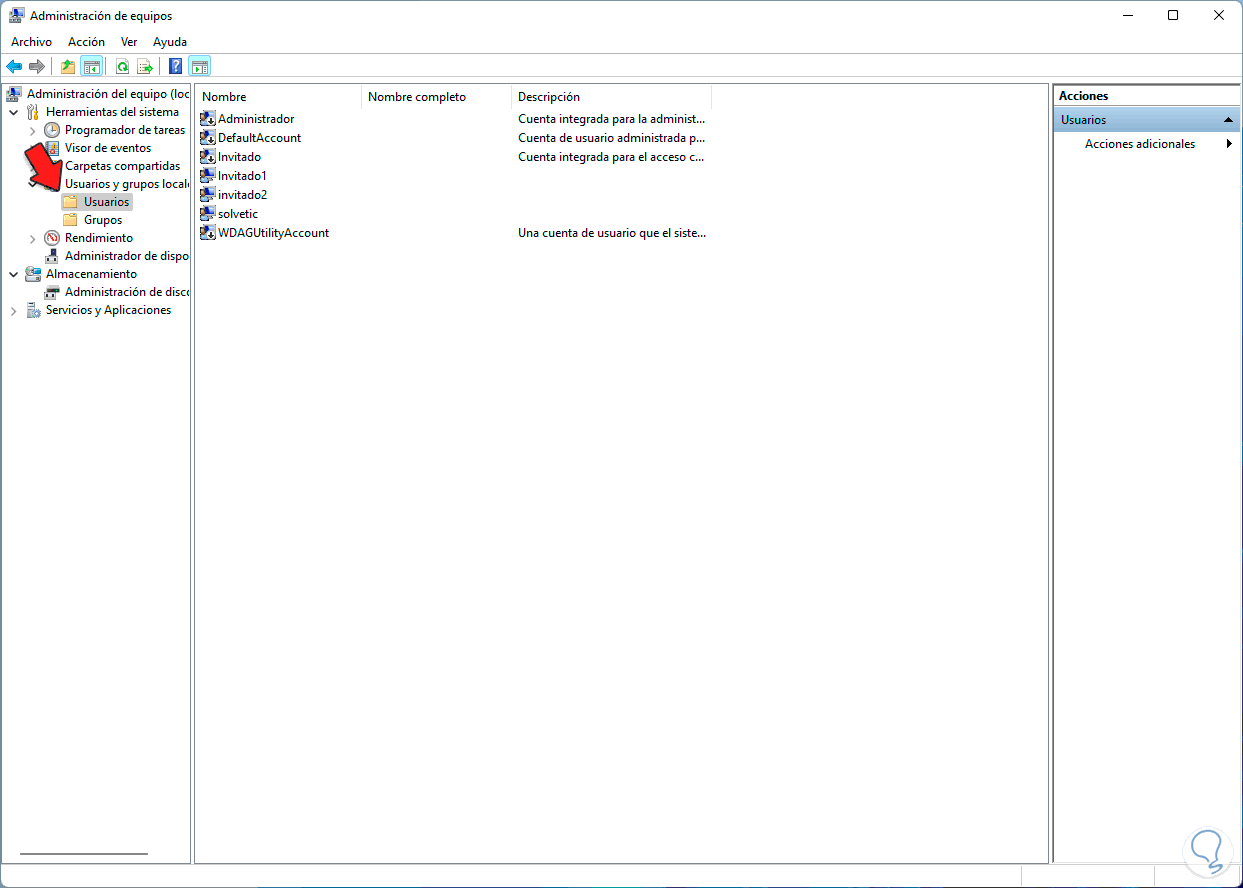
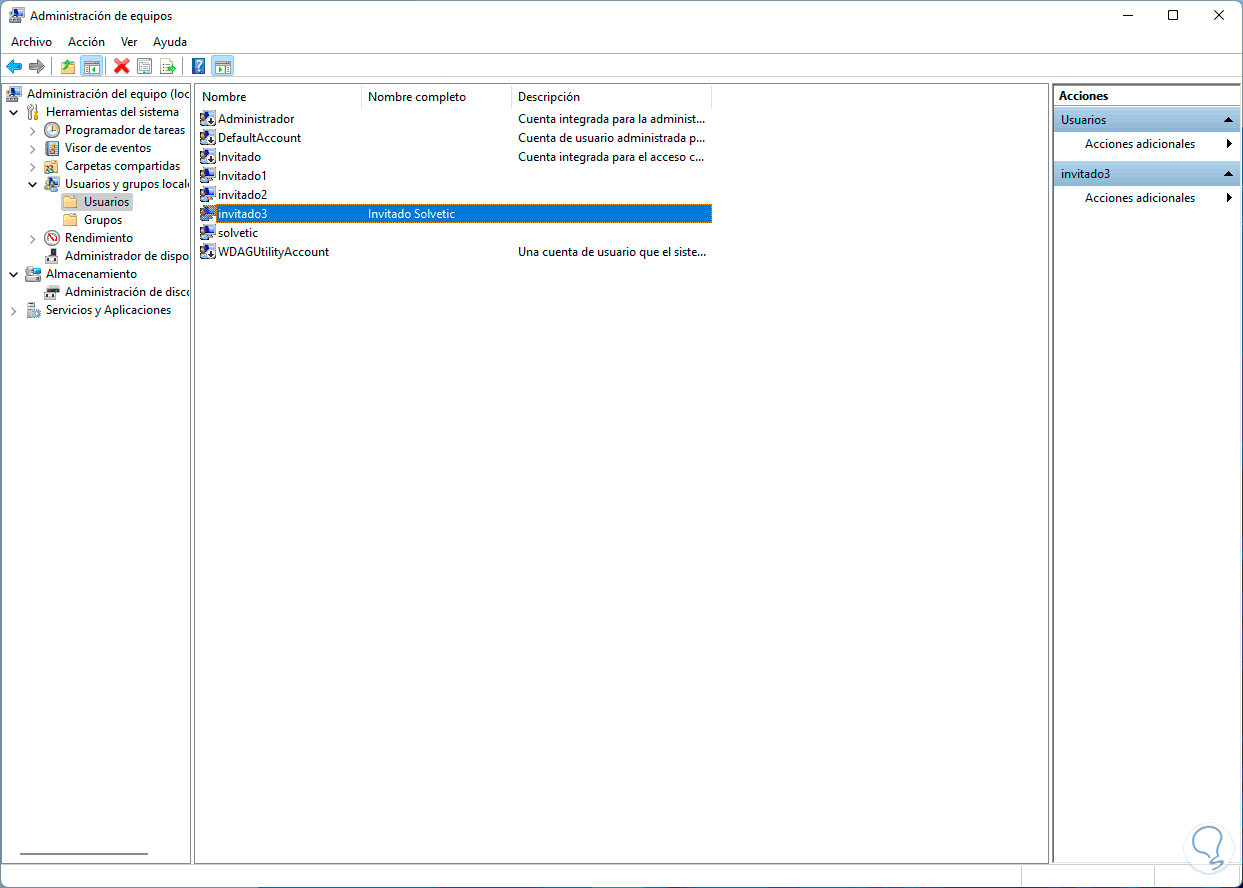
Let's go to "Local Users and Groups - Users":
Step 3
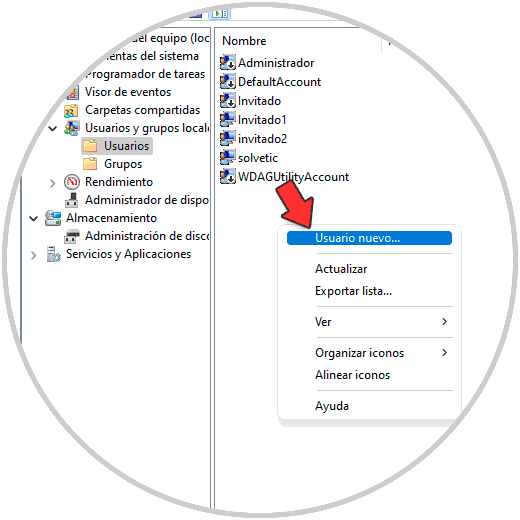
We right click somewhere and select "New User":
Step 4
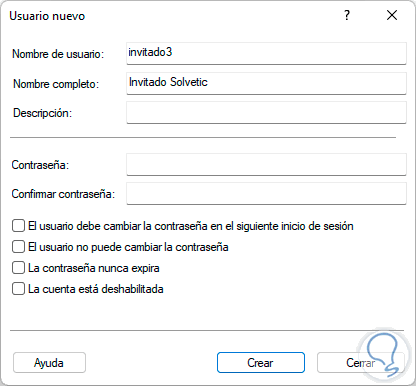
In the pop-up window we assign a name and description of the user, no password is assigned so that they have a direct login and we recommend deactivating all the available option boxes:
step 5
We click on “Create” to apply the changes:
step 6
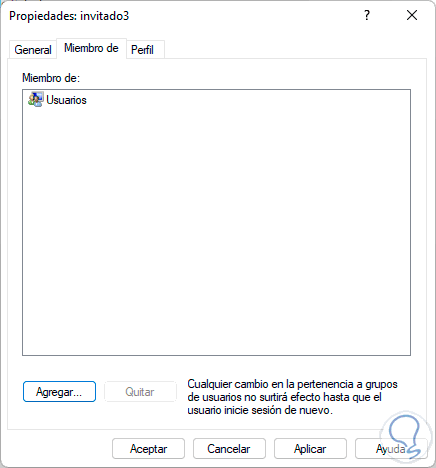
We double click on the user and in the "Member of" tab we click on the "Add" button:
Step 7
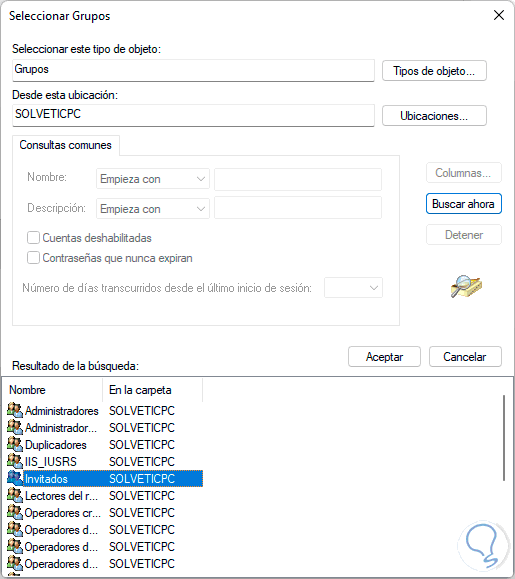
Then in "Advanced Options" we click on "Search" and select the "Guests" group:
step 8
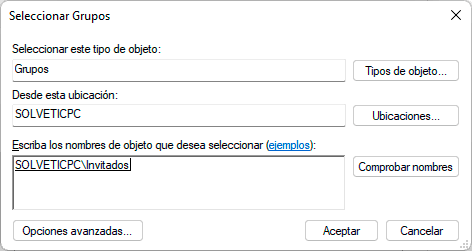
We click OK to add this group:
step 9
Apply the changes:
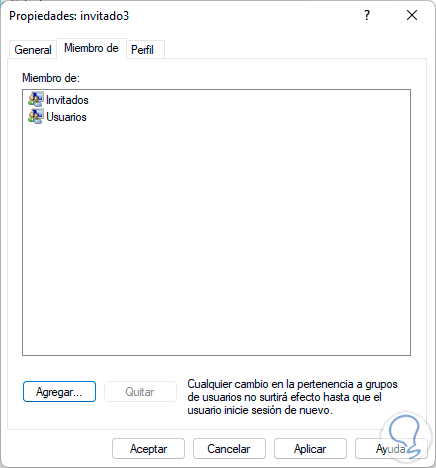
step 10
Now we select the "Users" group:
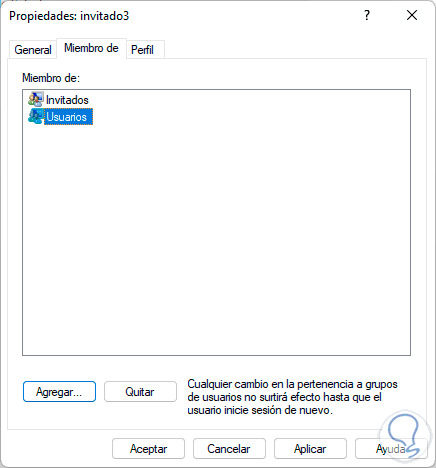
step 11
We click "Remove" to remove this group:
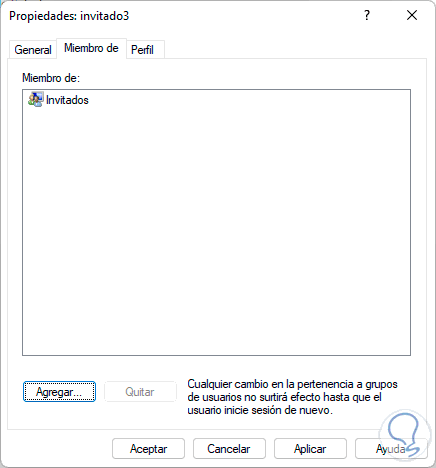
Apply the changes..
step 12
Log out and check the user at login:
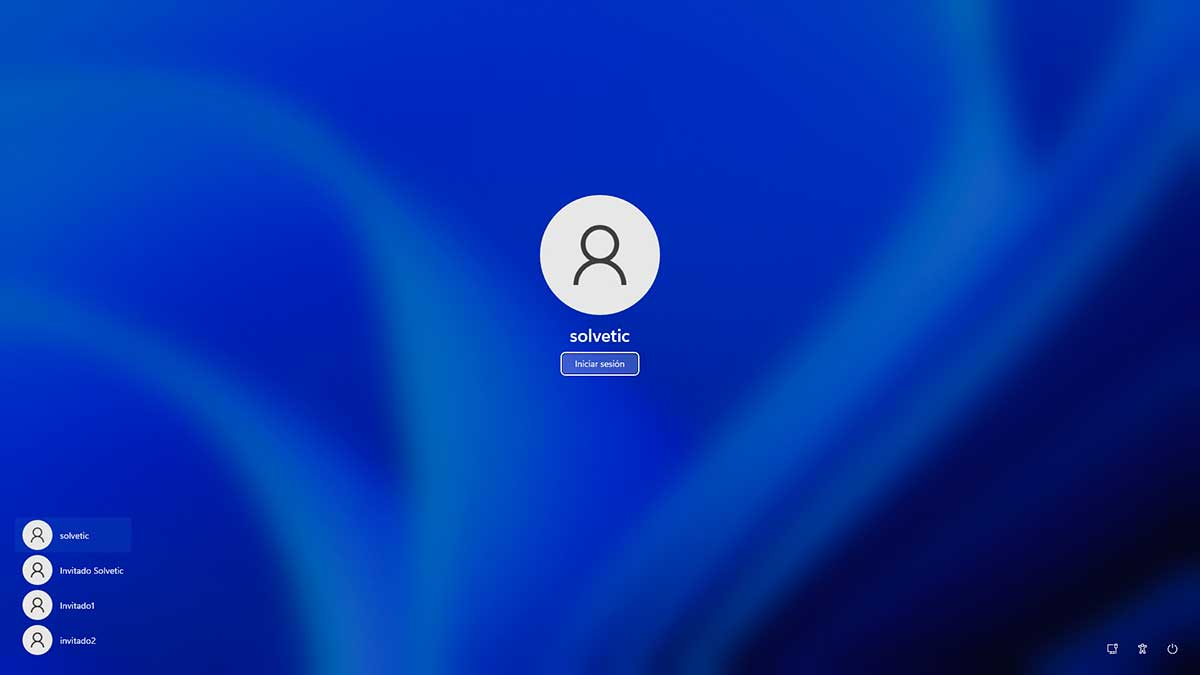
Note
To restrict the permissions of the guest user, it is necessary to add the created user to the Guests group and leave only that group.
step 13
When logging in we wait for the configuration:
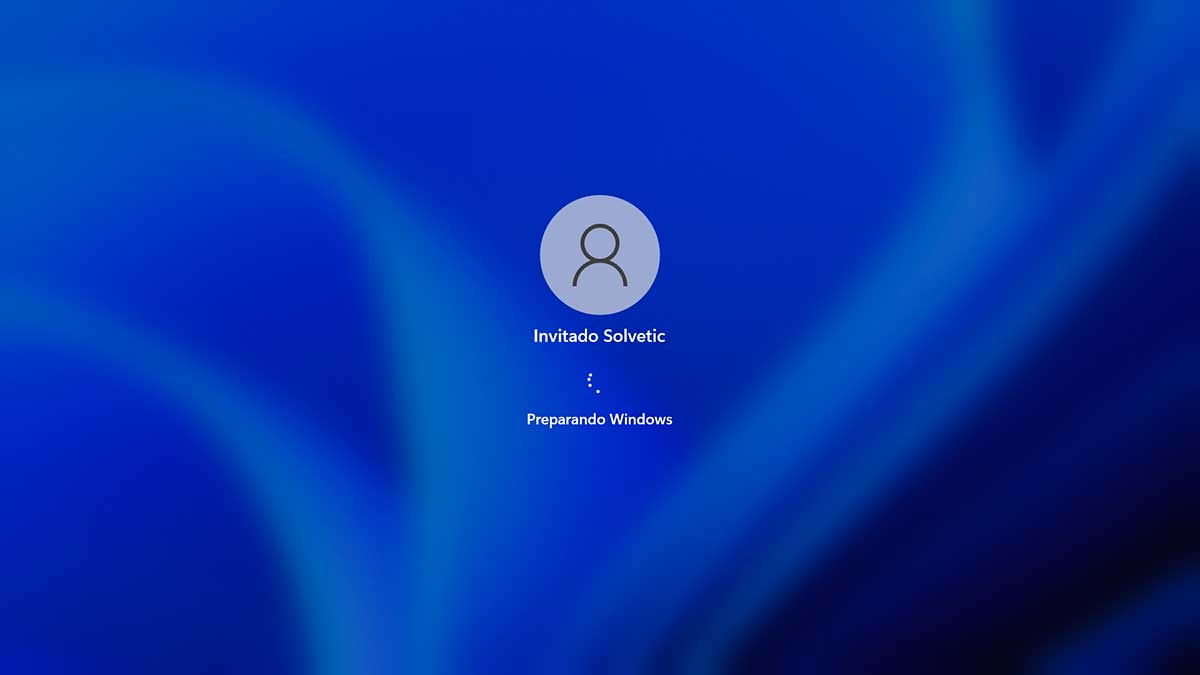
step 14
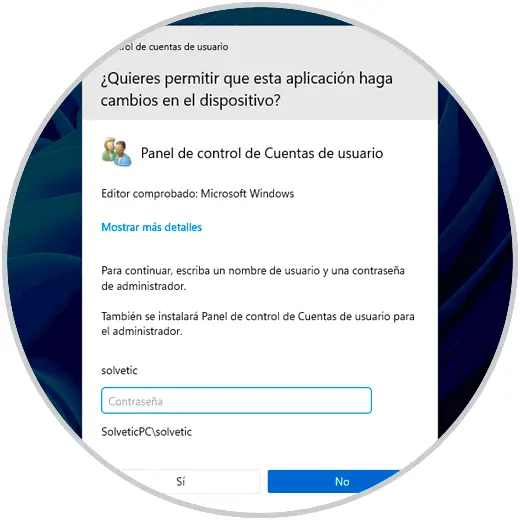
This Guest user has restrictions such as no access to Configuration or if you want to make any changes, you will require administrative permissions:
That's how simple it is to create a guest user in Windows 11.