The use of Wi-Fi networks in macOS is something that is done on a daily basis since 95% of computers with macOS require wireless connectivity for everything related to web browsing and other tasks that require access to the network..
By default, macOS will automatically connect to known networks and its values are default, but there may come a time when connectivity is lost, it is not possible to detect networks, we present inconsistencies and more errors that prevent normal use of the Wi-Fi connection. Fi on macOS.
TechnoWikis has a series of steps to correct these errors and thus have the best Wi-Fi connection in macOS and thus allow the necessary tasks to be unaffected. Below you will see different ways to know how to solve WiFi problems on Mac, explaining each of the processes in detail step by step..
To stay up to date, remember to subscribe to our YouTube channel! SUBSCRIBE
1 Fix Mac WiFi Problems Using Network Diagnostics
macOS in its various editions integrates a tool to analyze the Wi-Fi network and this is called Wireless Diagnostics, this is a utility that performs a detailed analysis of the Wi-Fi network and its components. At the end of this analysis, you will have a list with the problems detected as well as the solutions that we can apply and as an extra we will receive information on the best practices for the use of Wi-Fi in our macOS.
Step 1
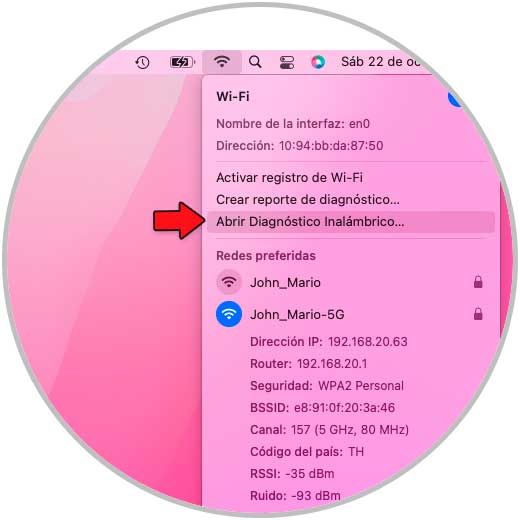
Press the Option key, click the Wi-Fi icon, and then click "Open Wireless Diagnostics":
Step 2
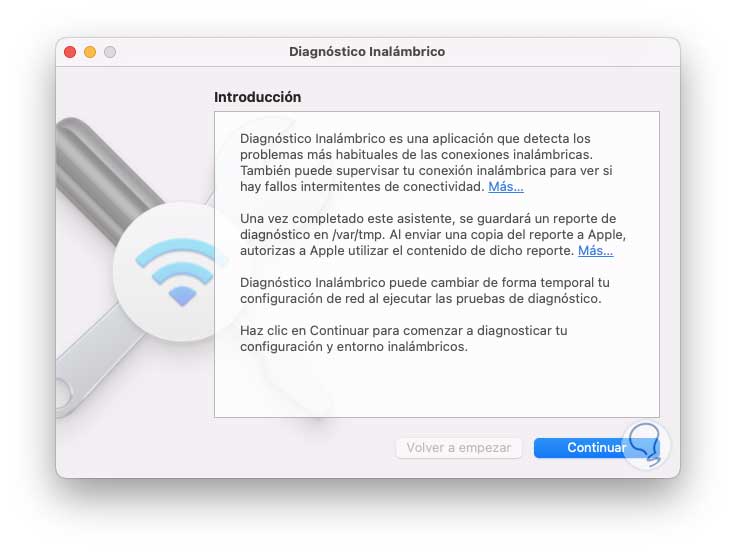
The following wizard will open:
Step 3
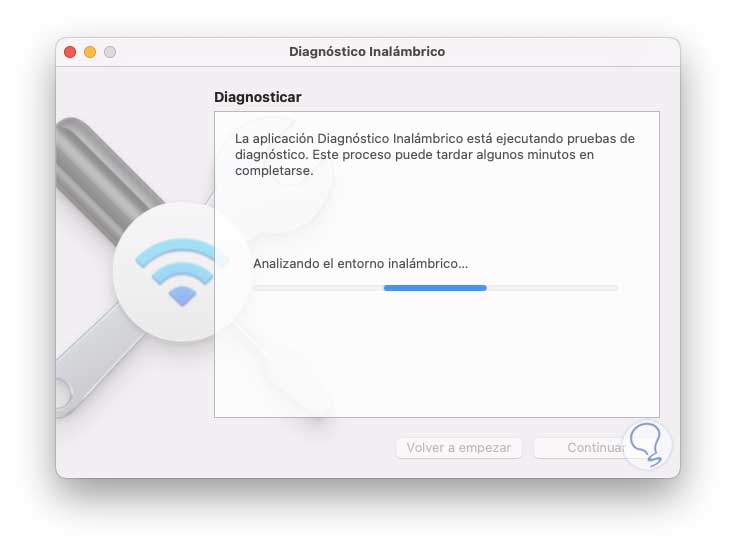
We click "Continue" and wait for the Wi-Fi environment to be analyzed:
Step 4
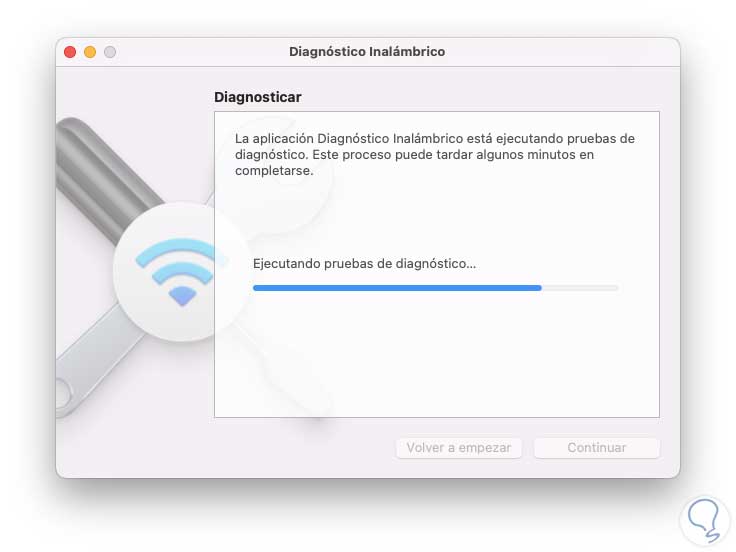
At the end of this analysis, some small diagnostic tests will be carried out:
step 5
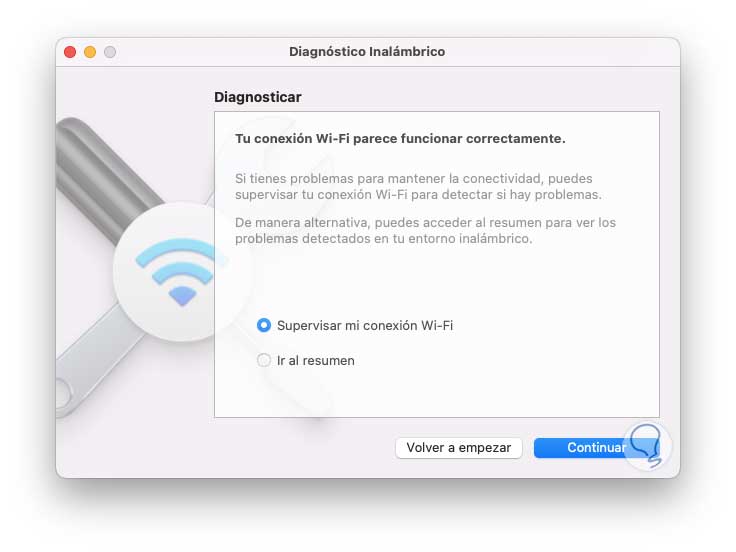
Then we will see the status of our Wi-Fi network:
Step 6
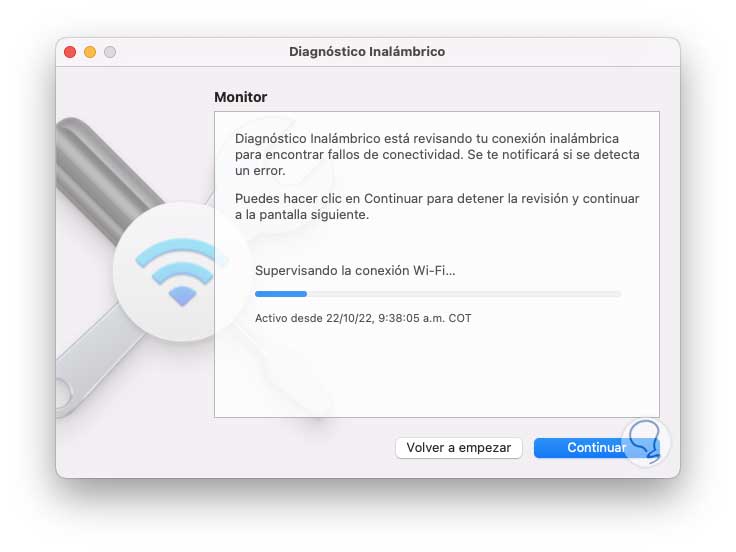
If it works well, we can move forward or it is possible to monitor the Wi-Fi network by activating the "Monitor my Wi-Fi connection" box:
step 7
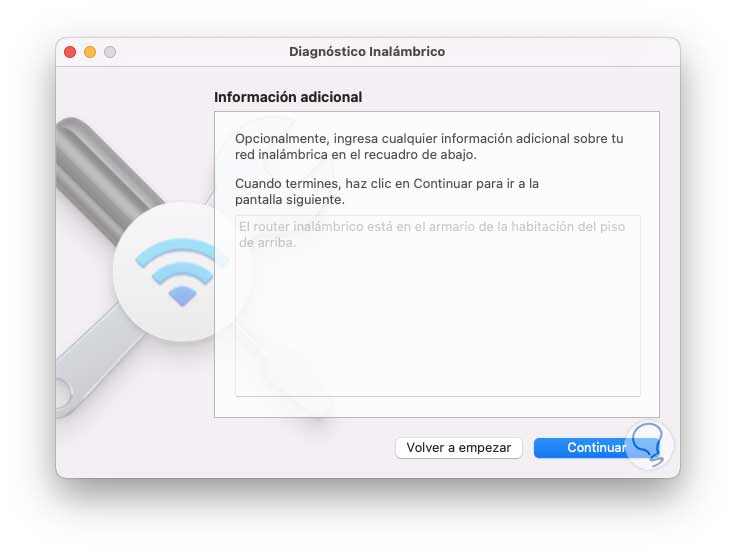
At the end of this process it is possible to add extra details to the report such as details of the modem or router:
step 8
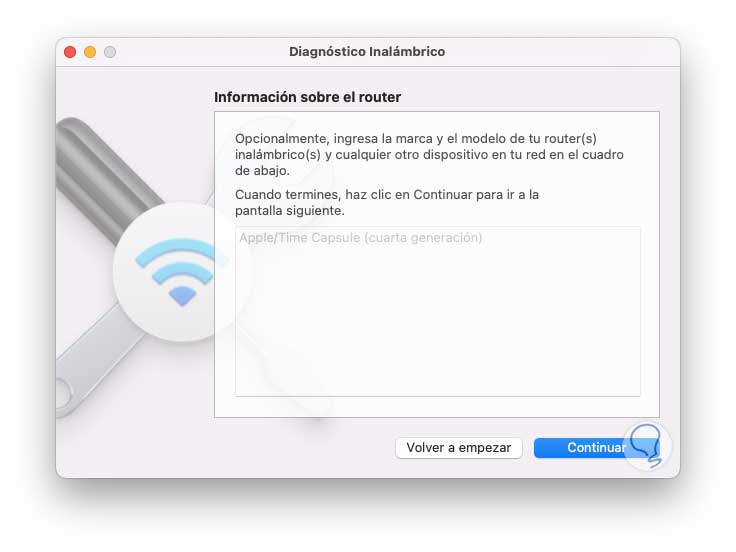
Now it will be possible to enter brand or model if necessary:
step 9
We click Continue to generate the report:
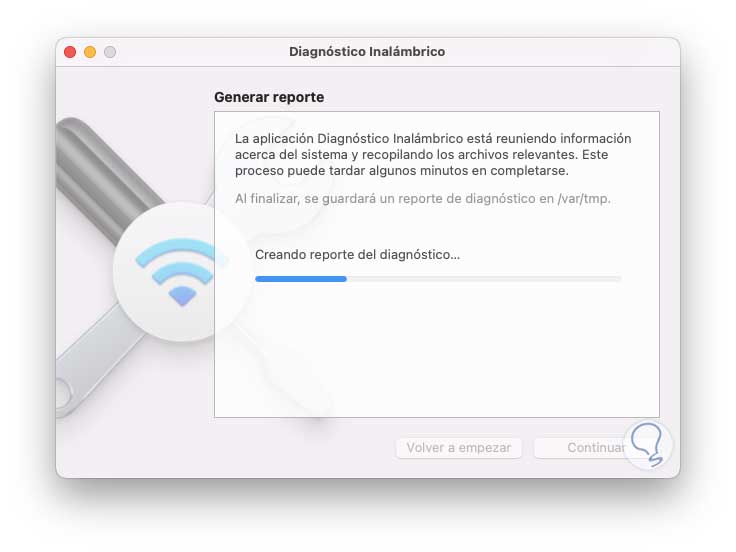
step 10
We wait for the final report to be created:
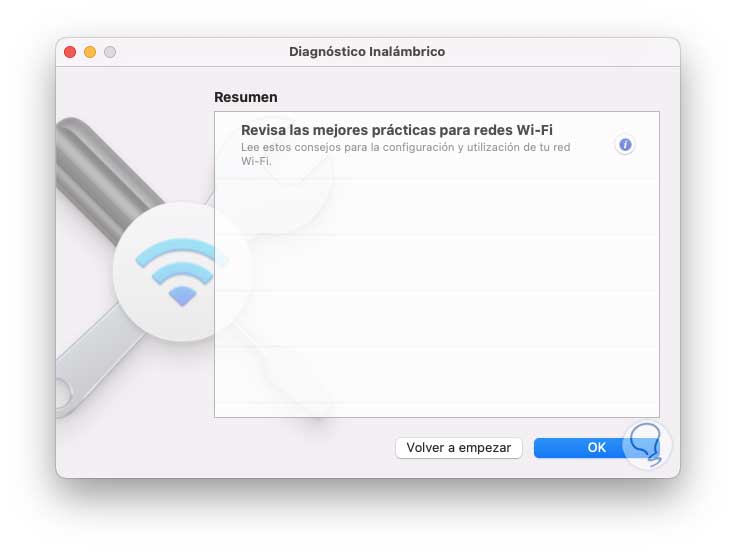
Best practices for using the Wi-Fi network will be listed there in case they detect bad configurations or incorrect use of it.
step 11
Clicking OK will open the window where the report has been created, this will be /var/tmp and the file name will start with WirelessDiagnostics- with extension.tar.gz.
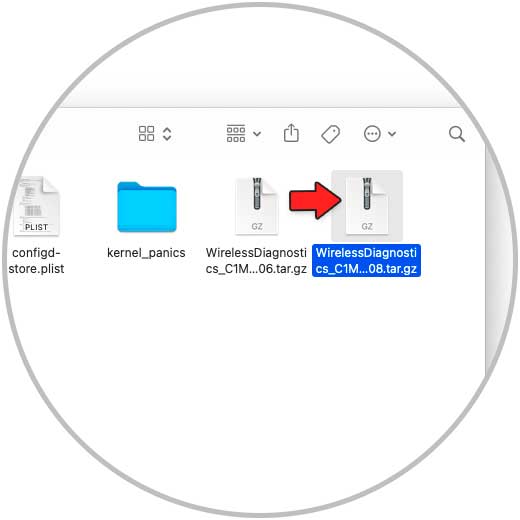
step 12
We double click on the created file to decompress it:
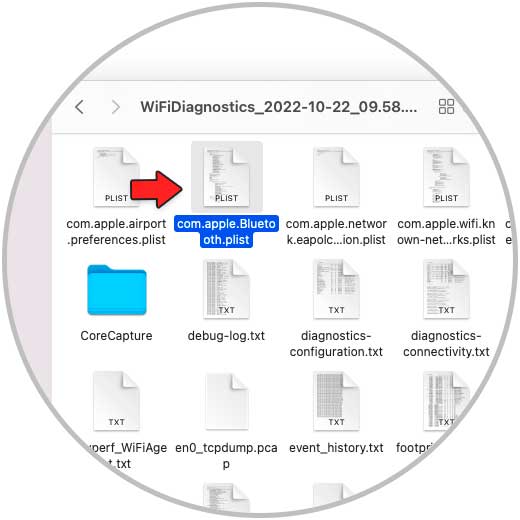
step 13
There we find a series of text files with the network details which are key for the administrator in order to analyze them and determine where the fault is, we open some of the results created to see details:
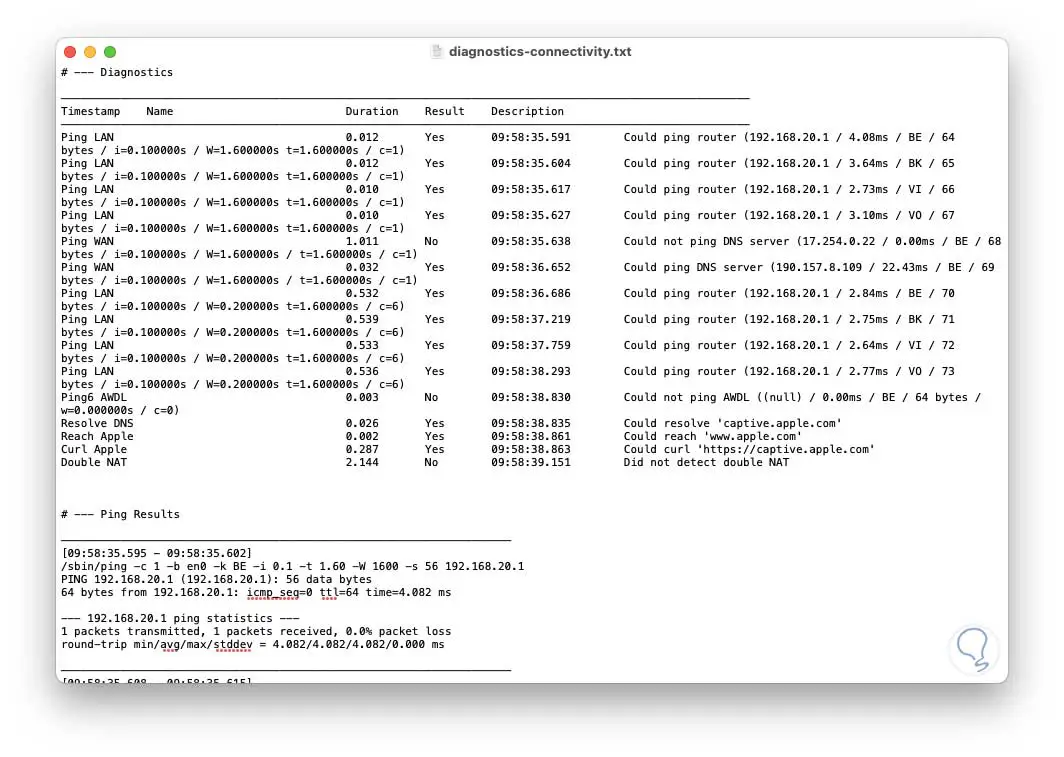
2 Solve WiFi Problems Mac Adjusting network and services
This case applies to when our macOS device wakes up from sleep mode, in some cases some errors occur.
Step 1
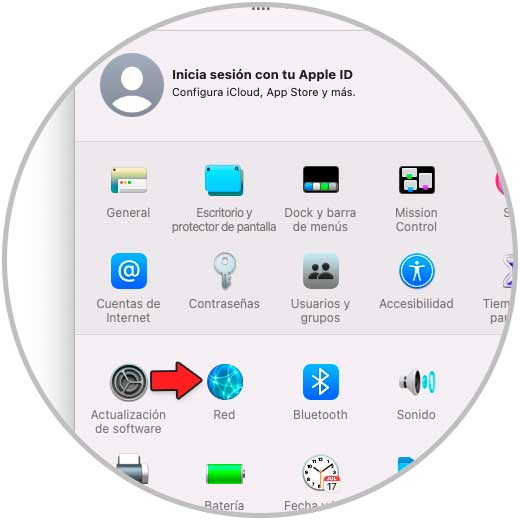
To correct this we open System Preferences and click on "Network":
Step 2
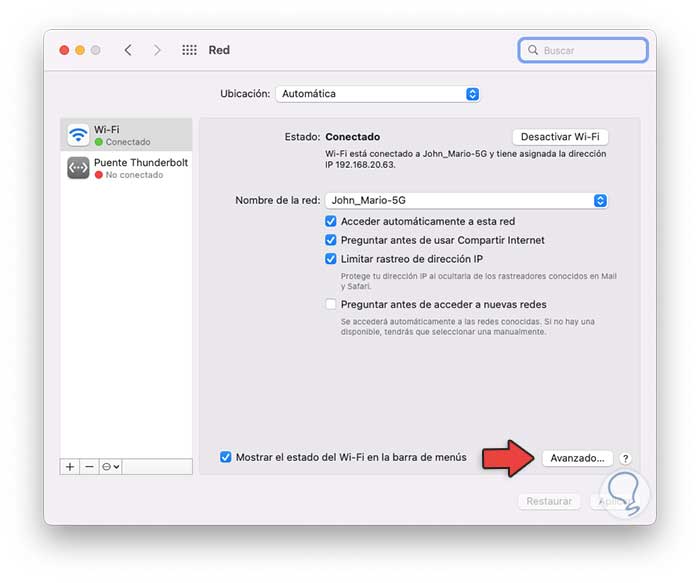
The following will open:
Step 3
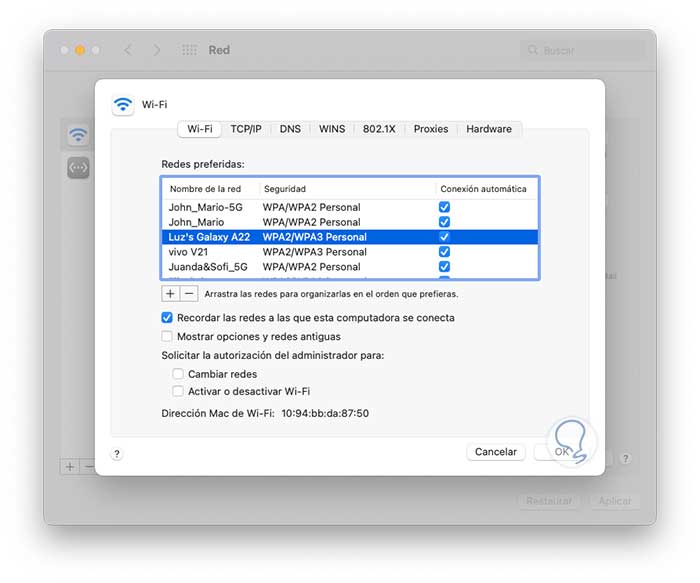
We click on "Advanced" to access the available networks:
Step 4
If you see a different network, you can uncheck its box to connect automatically or click on the - sign to remove it:
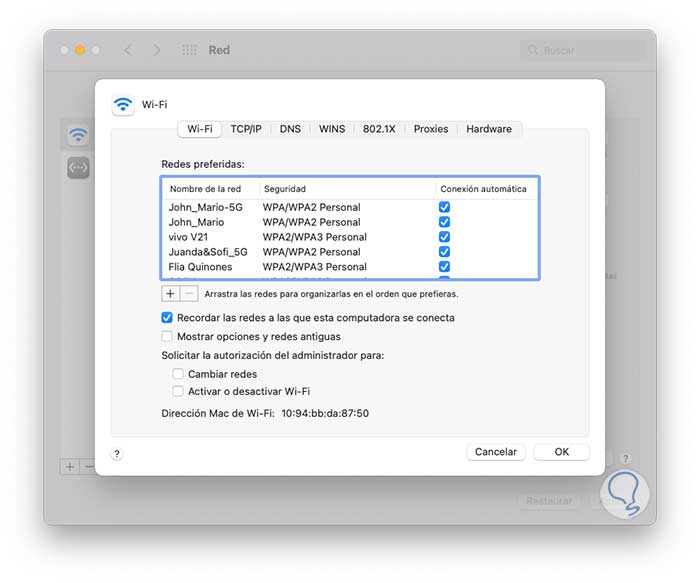
step 5
We click OK to access the main window:
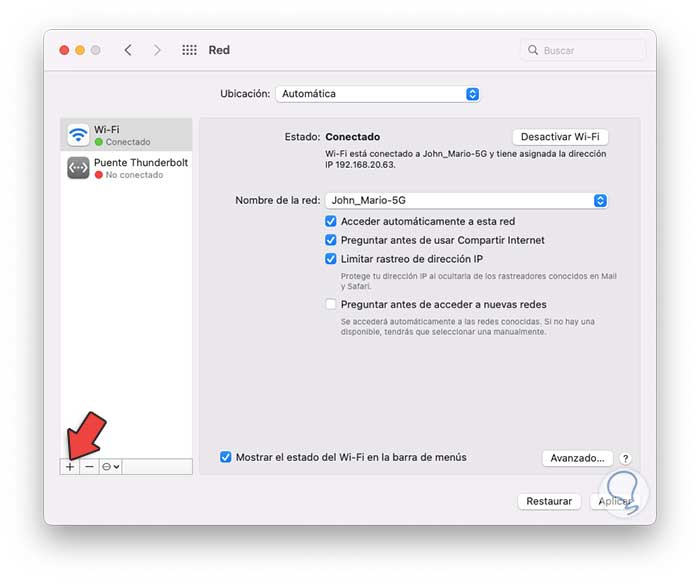
Step 6
On the left side we click on the + sign to open a small pop-up window, in it we select the type of interface and assign a name:
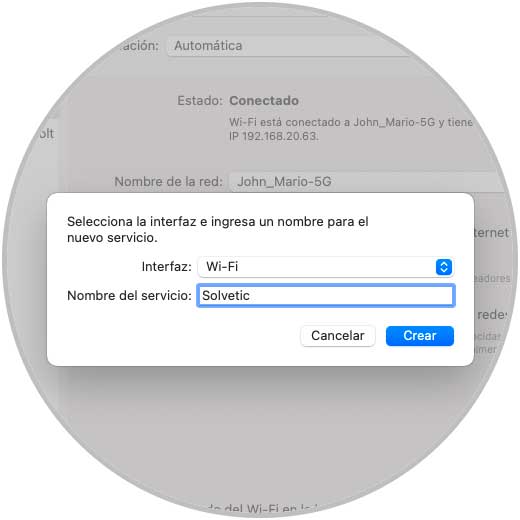
step 7
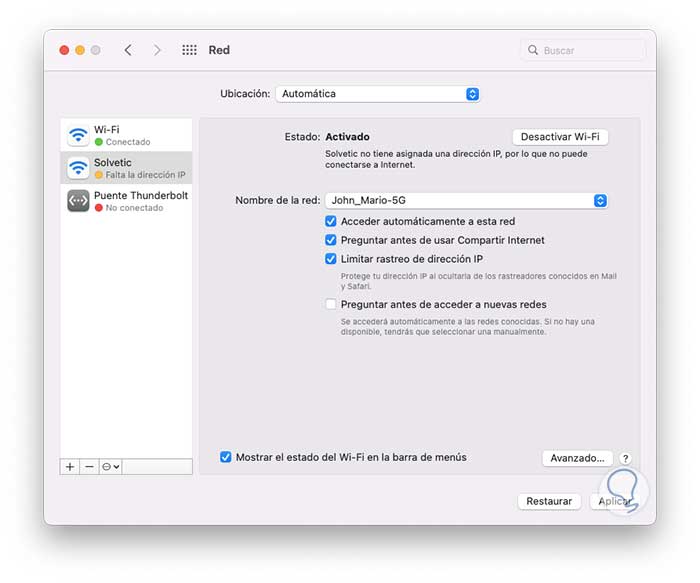
We apply the changes by clicking “Create”:
3 Fix Mac WiFi Problems by Restarting macOS
Many Wi-Fi problems, and some other services or processes, are due to excessive use of the system that can cause blockages, with a simple restart it will be possible to correct Wi-Fi errors.
Step 1
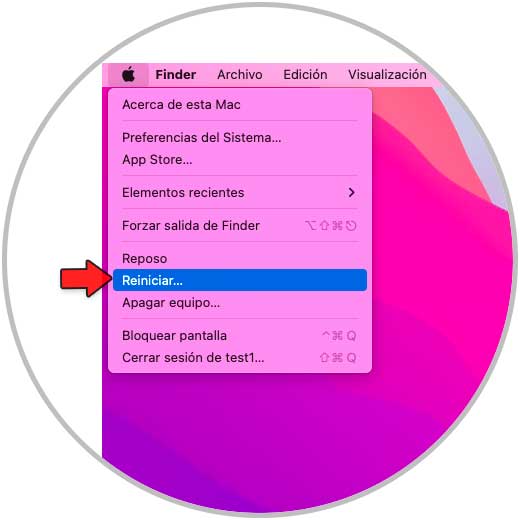
To restart macOS we click on the Apple logo and select "Restart":
Step 2
The following window will open:
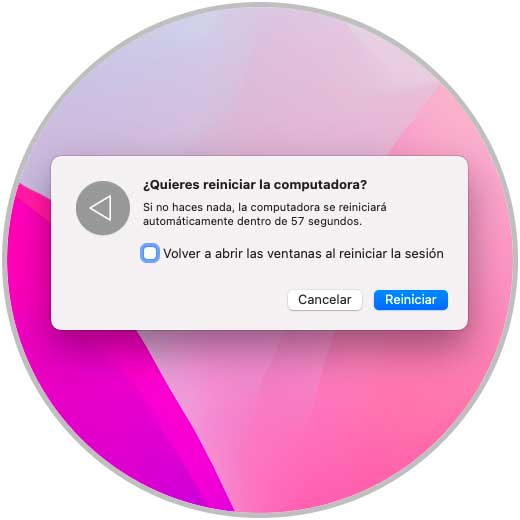
There it is possible to open the windows used or not again, we click on "Restart" to proceed with the process and then validate the use of the Wi-Fi network..
4 Fix WiFi Problems Mac Configuring DNS
In DNS (Domain Name System – Domain Name System) it is a network function whose task is to convert domain names into IP addresses and vice versa, so it is much simpler for us to enter the name of the website and not its IP address , but in macOS (and in all systems) the DNS is assigned by the Internet provider and this can become saturated, affecting this process and thereby causing errors in the natural use of the Wi-Fi network.
Step 1
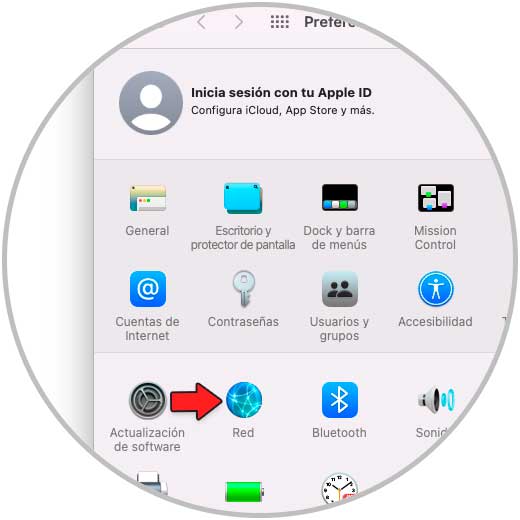
To change the DNS in macOS we open System Preferences and click on "Network":
Step 2
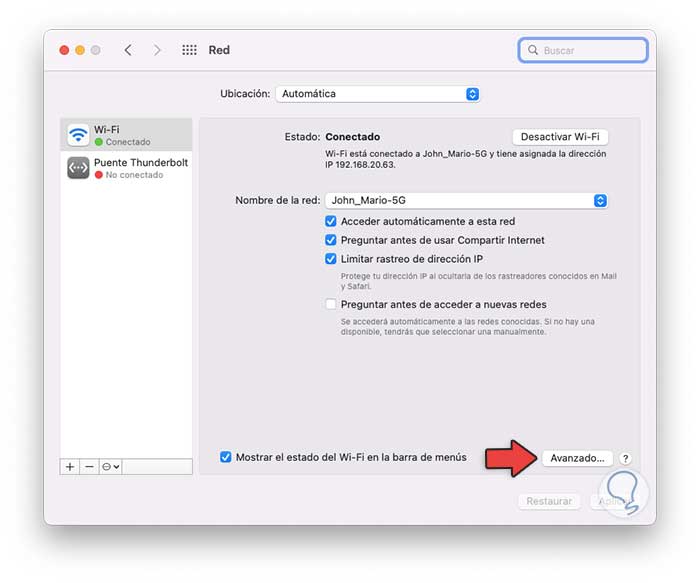
We will see this:
Step 3
We click on "Advanced" and go to the "DNS" tab:
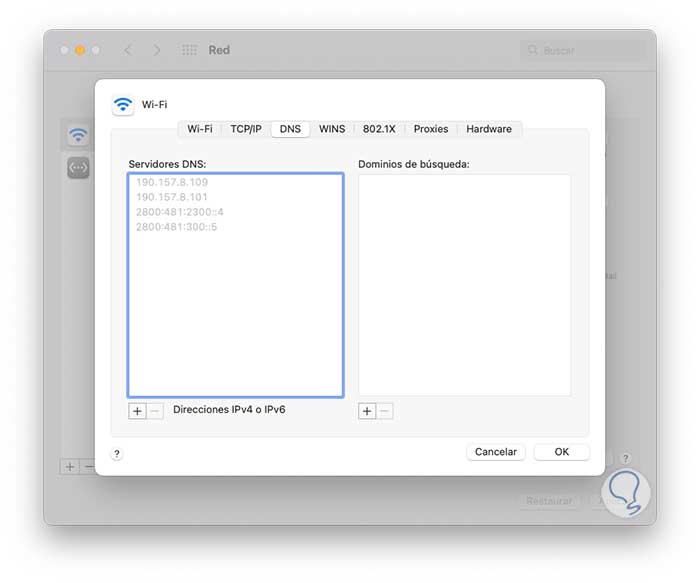
We click on the + sign and add the IPs of the desired DNS servers, we can use public DNS servers such as:
- OpenDNS: 208.67.222.222 and 208.67.220.220
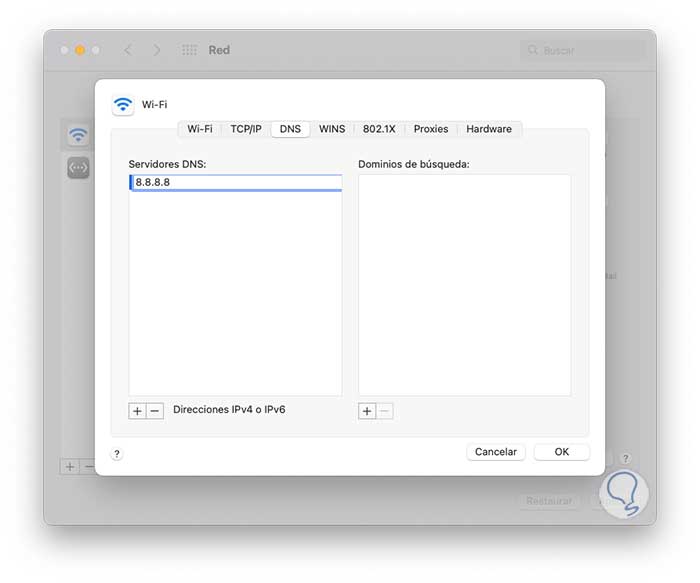
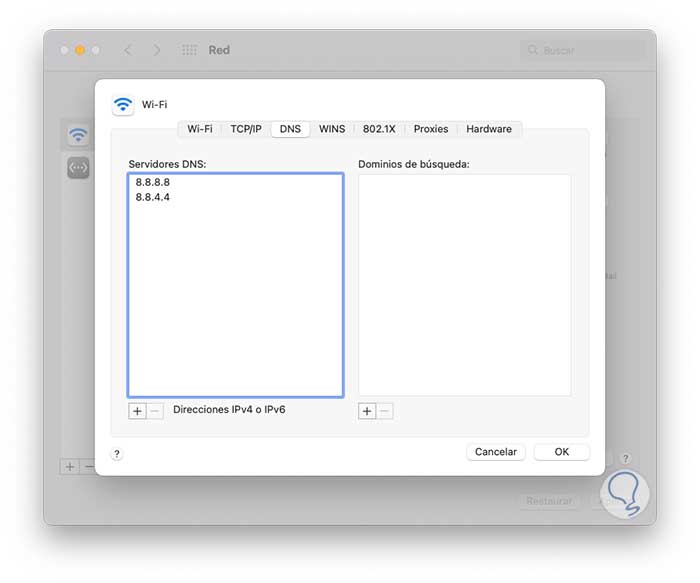
- Google Public DNS: 8.8.8.8 and 8.8.4.4
- Cloudflare: 1.1.1.1 and 1.0.0.1
- Comodo Secure DNS: 8.26.56.26 and 8.20.247.20
Step 4
We add the primary DNS:
step 5
Then we add the secondary DNS:
Step 6
Apply the changes.
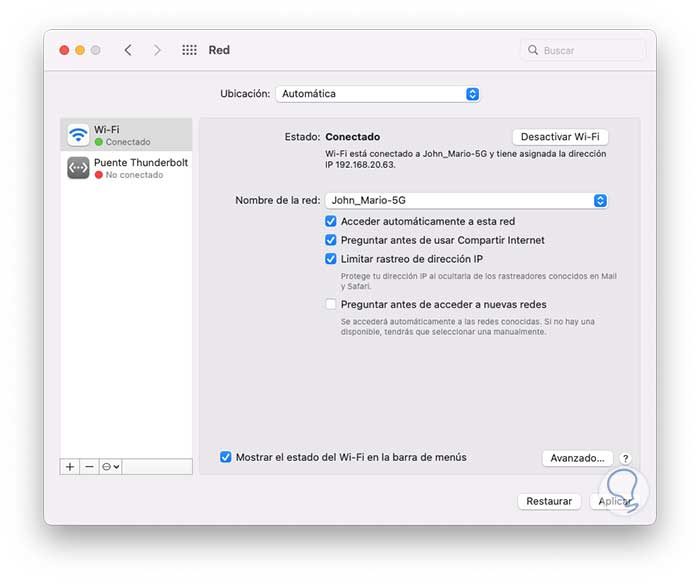
There we click Apply to complete the process.
5 Fix Mac WiFi Problems Adjusting Packets
The packets is the amount of packets or data that can be transmitted through the Wi-Fi network, if for some reason there is a limitation, it is possible that the network is collapsed due to lack of capacity.
Step 1
To make this adjustment we go to System Preferences and click on "Network":
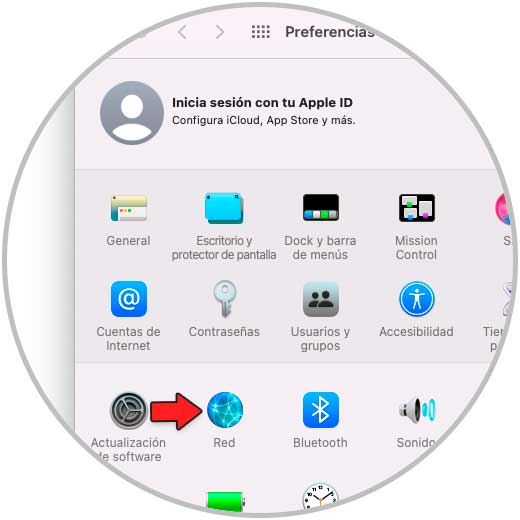
Step 2
We will have access to the following:
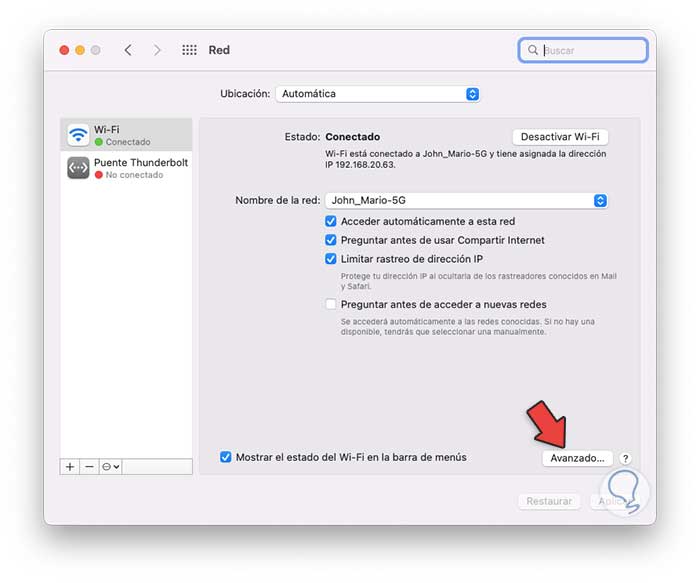
Step 3
We click on "Advanced" and then go to the "Hardware" tab where this will be seen by default:
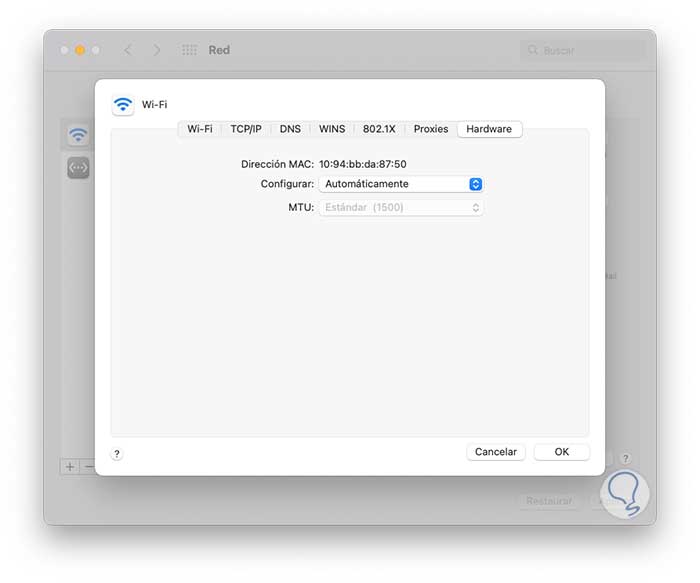
Step 4
We assign the following:
- In "Configure" we set "Manually"
- In "MTU" we assign "Custom"
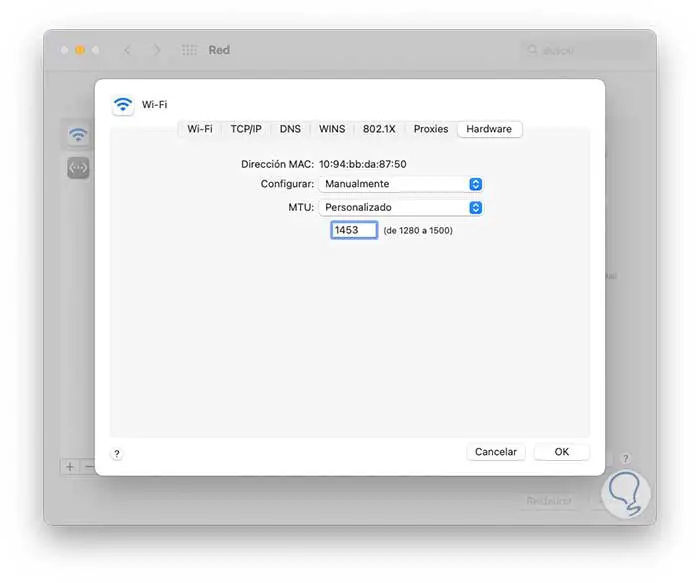
Apply the changes.
6 Fix Mac WiFi Problems Changing Location
By default macOS assigns an automatic location based on the region but this can fail, there it is possible to assign a new location and configure its DHCP and IP parameters.
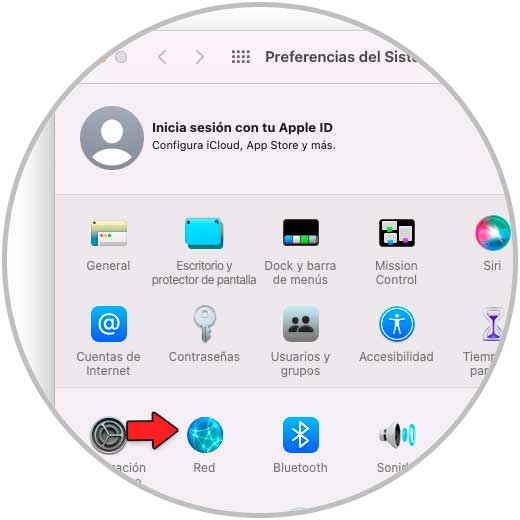
Step 1
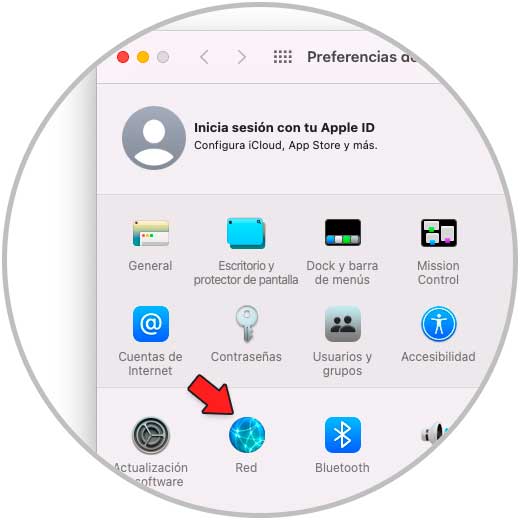
To achieve this we open System Preferences and click on "Network":
Step 2
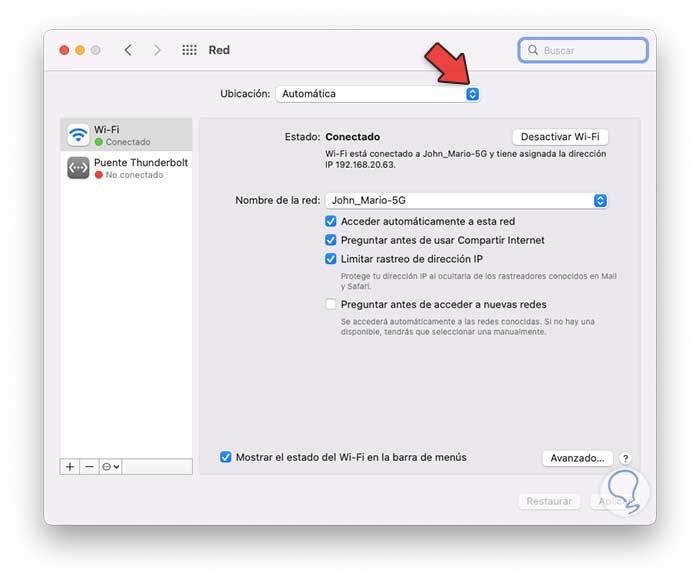
In Network we will see this:
Step 3
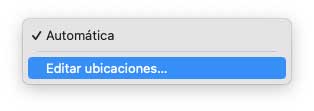
In "Location" we click on "Edit locations":
Step 4
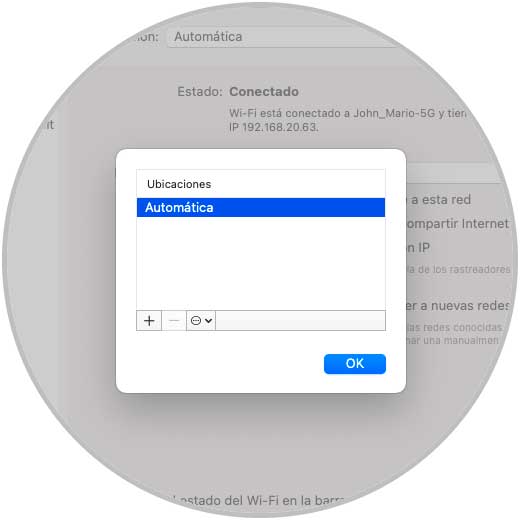
The following will open:
step 5
We click on the + sign and add a new location:
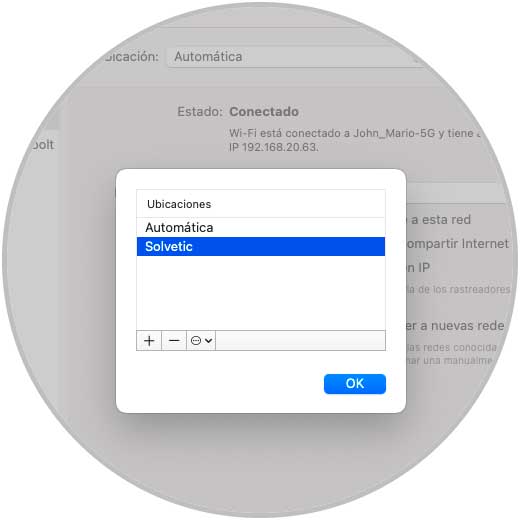
Step 6
We click OK and we will see that this new location is not enabled at the network level:
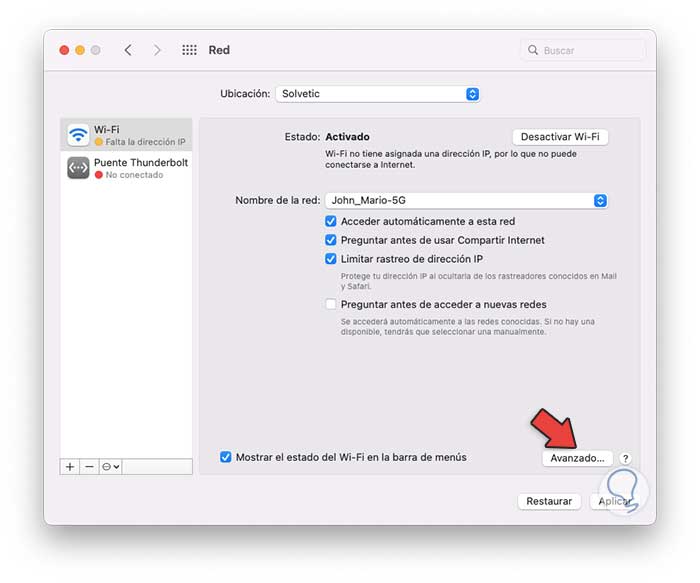
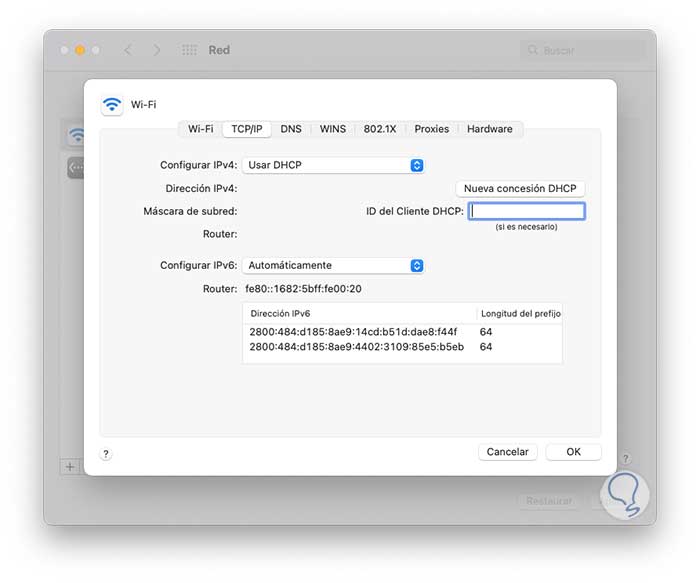
step 7
To activate it we click on "Advanced" and in the "TCP/IP" tab we click on "New DHCP lease":
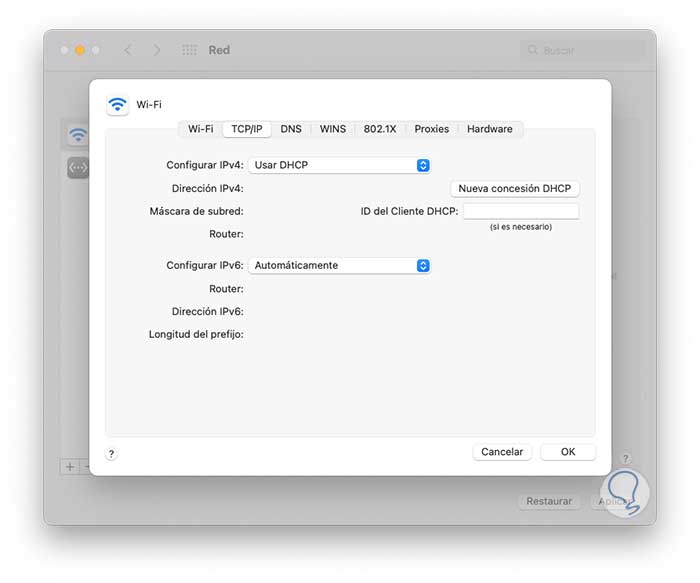
step 8
We will see the following:
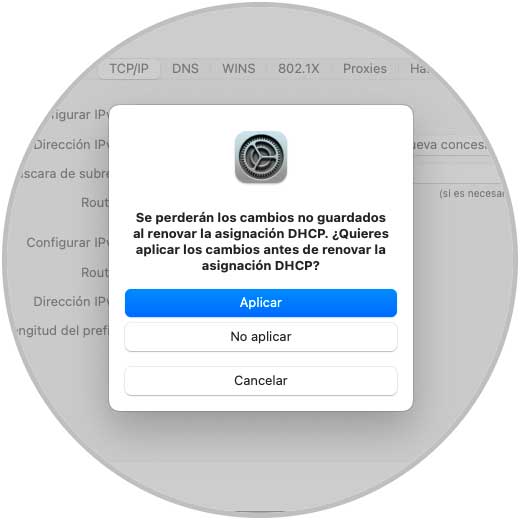
step 9
By clicking there we can see that the usage variables are loaded:
step 10
Apply the changes and now this location will have access to the Wi-Fi network:
7 Troubleshoot WiFi Mac Forgetting Network
Many times the error lies in the network to which we are connecting, the reason is that when connecting automatically to a network it is possible that it is no longer available later or that its settings have been modified affecting access.
Step 1
We can remove that network from macOS, for this we go to System Preferences and then click on "Network":
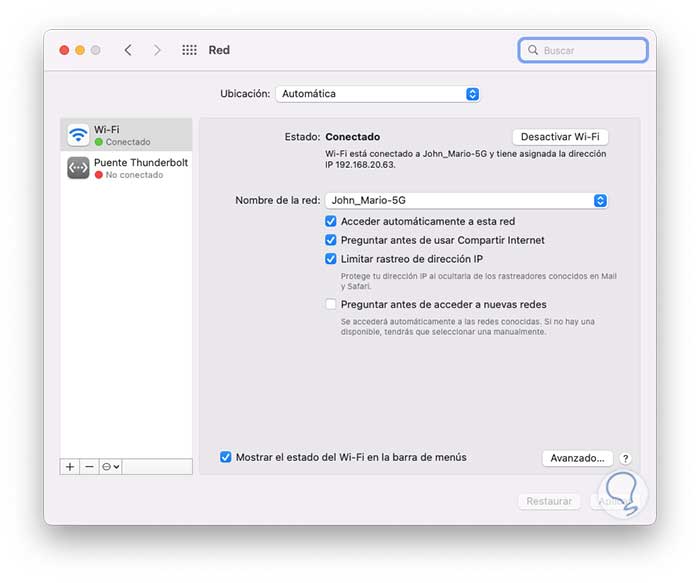
Step 2
We click on "Advanced" and in "Wi-Fi" we select the network:
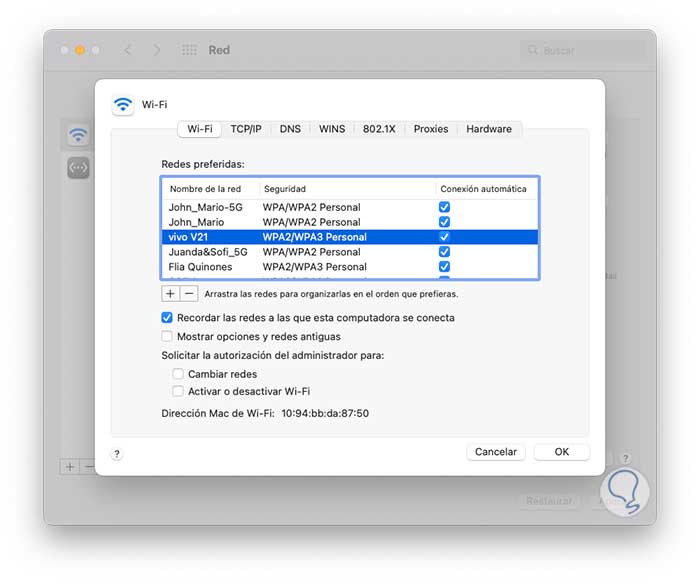
Step 3
We can uncheck the box to connect automatically:
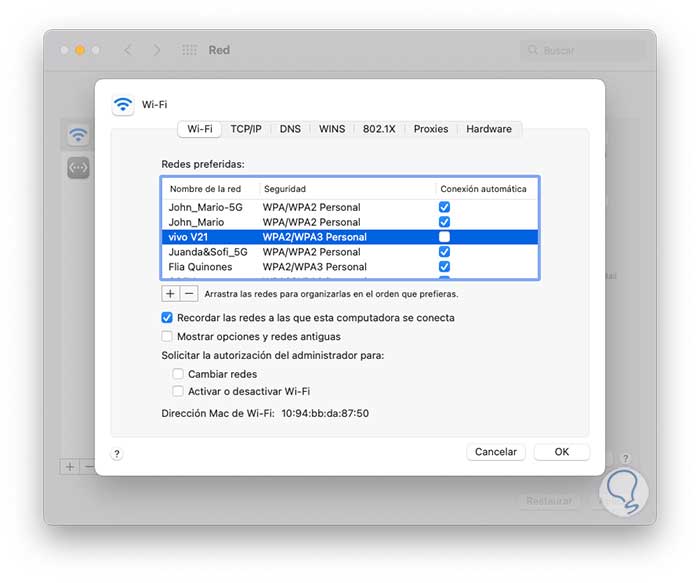
Step 4
We click on the - sign to remove it:
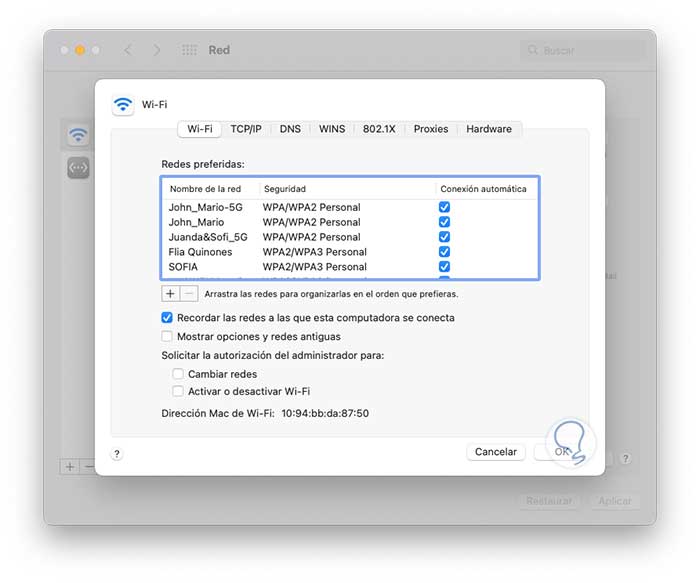
Note
It is possible to uncheck the "Remember networks this computer connects to" box so that future connections are not saved.
8 Fix Mac WiFi Problems Updating macOS
Another cause of the Wi-Fi error can be due to system update issues, if we do not install the latest updates it is possible not only that the Wi-Fi fails but also many other aspects of the system.
Step 1
To update macOS we go to System Preferences:
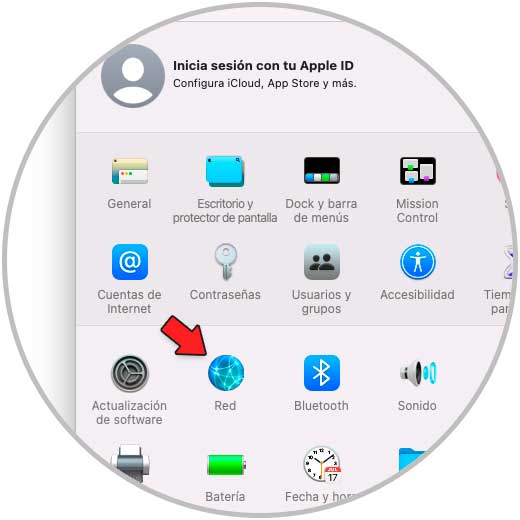
Step 2
We click on "Software update" to check new available updates:
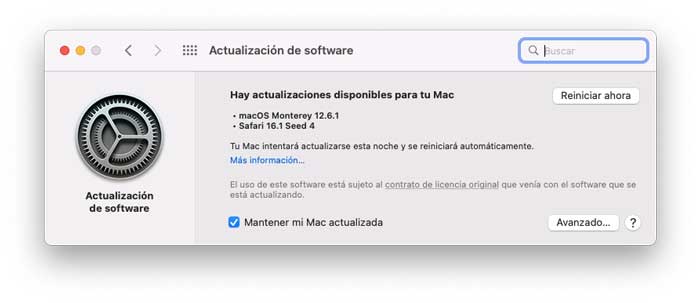
We click on "Restart now" to apply them.
9 Fix Mac WiFi Problems by resetting NVRAM/PRAM
PRAM (Parameter Random Access Memory) and NVRAM (Non-Volatile Random Access Memory) together with SMC (System Management Controller) are integrated into the system in order to manage basic operations that are essential for many functions of macOS, in this In this case, the process must be carried out by turning off the equipment, then we turn it on and during this process we press the Command + Option + P + R keys:
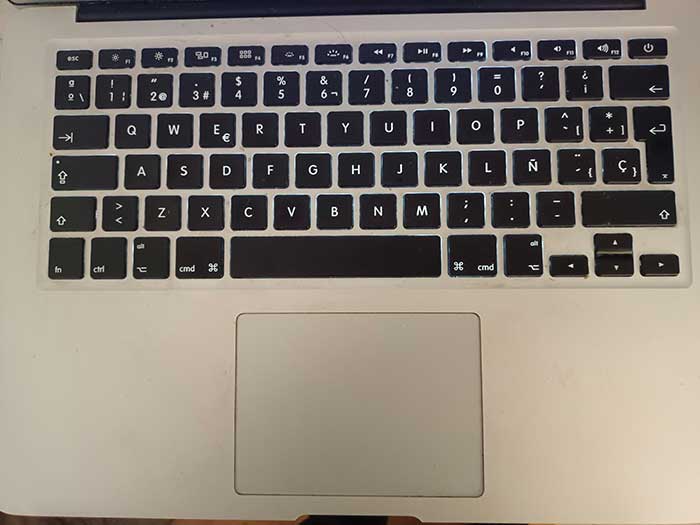
Releasing the keys will release this memory.
Some extra things we can do are:
- Turn off the modem or router for a minute or two and then turn it on again
- Disconnect USB and USB-C devices for a short time and then connect them
TechnoWikis has taught you the options to solve Wi-Fi problems in macOS and thus have full connectivity.