macOS has finally launched macOS Ventura as the new edition available and in which we will find a wide range of new features designed to make the user experience as complete as possible, this is a renewed version with a dynamic interface but at the same time intuitive and With enhancements that will make using macOS an enhanced experience, macOS Ventura is available for the following device editions:
- MacBook Air 2018 and later
- MacBook Pro 2017 and later
macOS offers us special improvements and news that TechnoWikis will tell you:
spot light
- Preview files with Quick Look by pressing the space bar
- Local and web image search
Safari
- Synchronization of website settings
- Translation of web page images
- Pinned tabs in tab groups
Access keys (passkeys)
- Protects against website leaks
- Synchronization between devices
Messages
- Message Collaboration API
- Invitations to collaborate
- Recovery of recently deleted messages
- SharePlay through messages
Stage Manager
- Quick access to windows and applications
- Allows you to group apps together
- Mission control integration
continuity chamber
- Allows you to use the iPhone as a webcam and microphone
Some extra improvements are
- BetaLive Captions on FaceTime
- New Clock and Weather app
- Focus Feature Enhancements
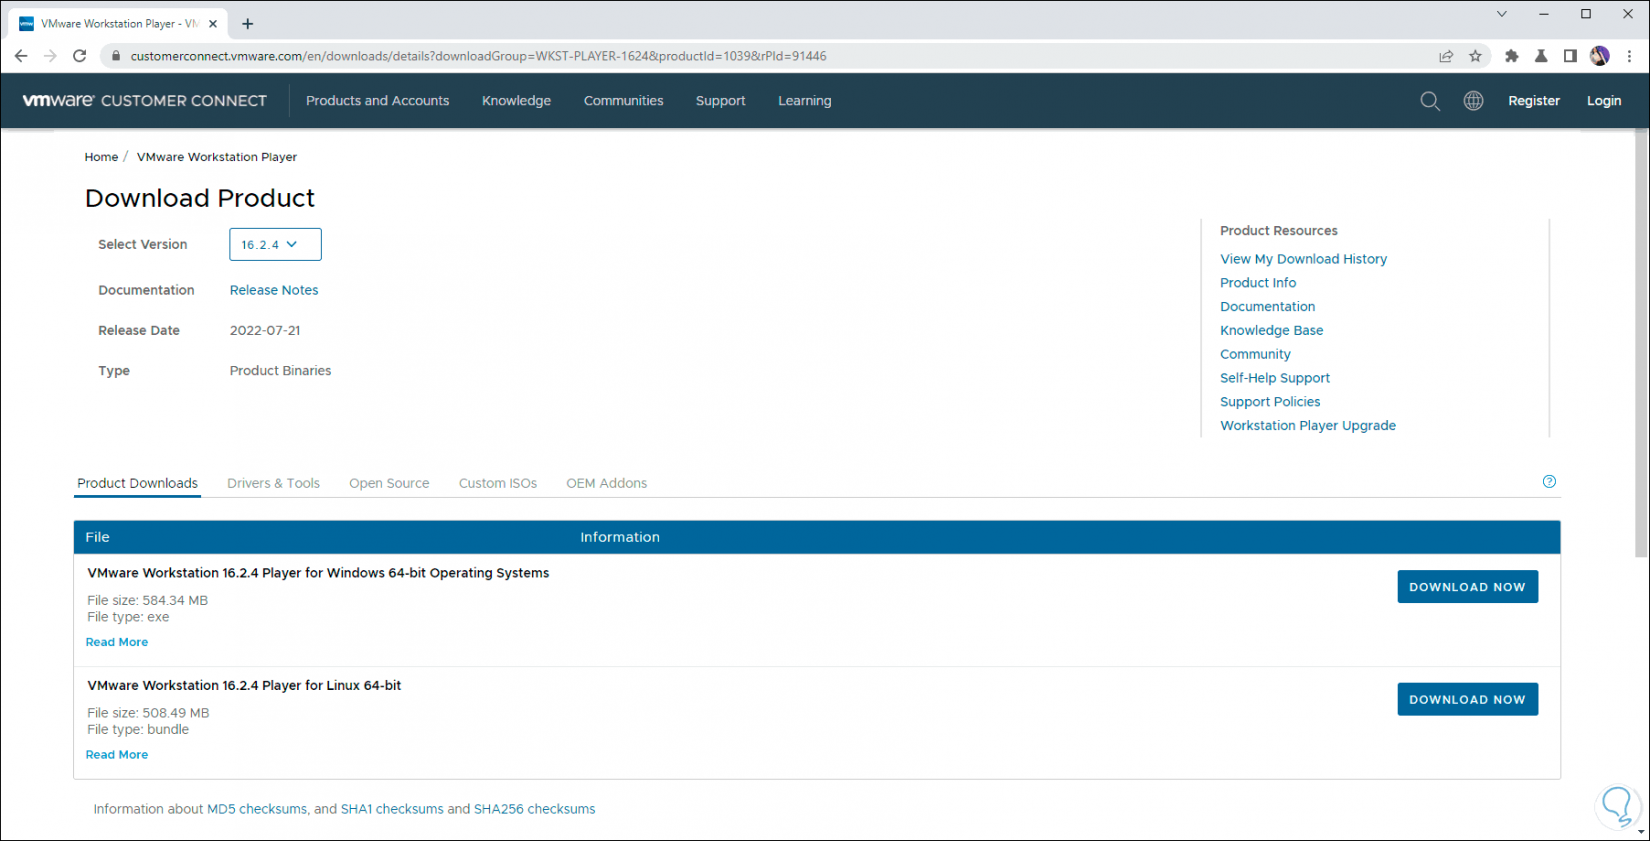
TechnoWikis will explain how to install macOS Ventura in VMware Player which is offered for free at the following link:
VMware Player
This is a platform with which it is possible to create a virtual machine in Windows of various operating systems and use them as if we were in a real computer but without spending on additional hardware..
TechnoWikis will give you the step by step to install macOS Ventura in VMware Player and as a requirement you need:
Requirements
- Disk space of at least 40 GB
- Intel CPU (AMD is not supported yet)
- macOS Ventura ISO which you can create with the installer on macOS
How to install macOS Ventura on VMware Player
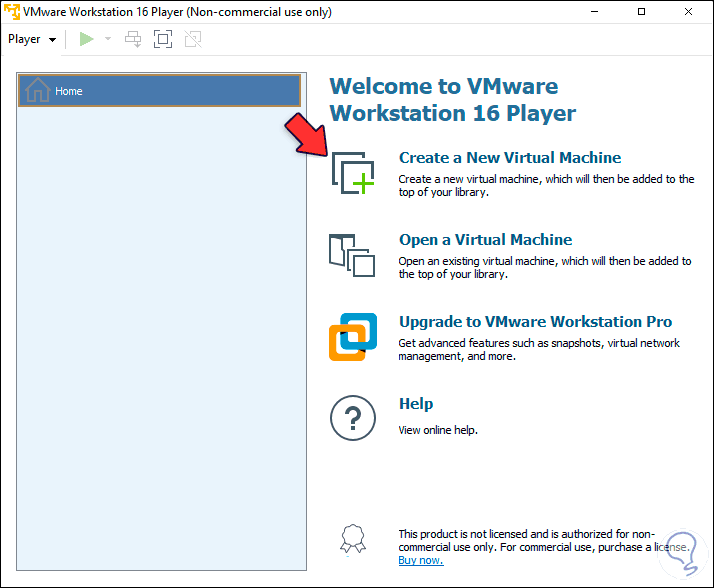
Step 1
We open VMware Player:
Step 2
We click on "Create a New Virtual Machine" and the following will open:
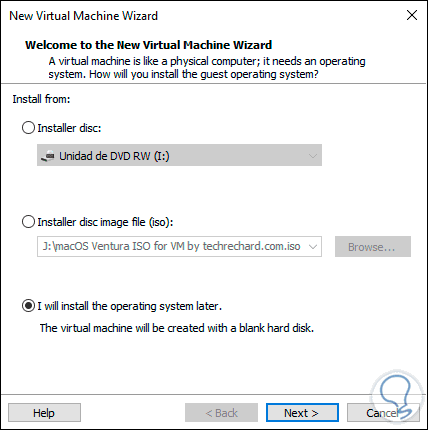
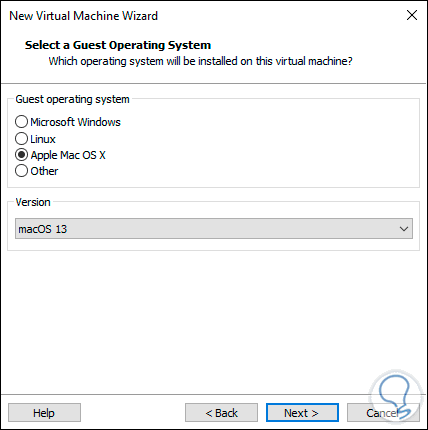
Step 3
We activate the box "I Will install the operating system later" and click Next, now we activate the box "Apple Mac OS X" and in Version we choose "macOS 13":
Step 4
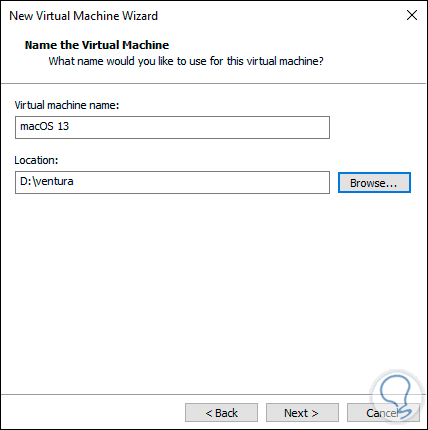
We click Next and define where the virtual machine will be hosted:
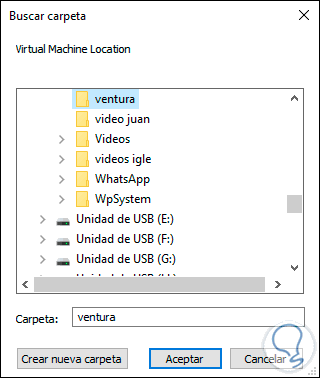
step 5
We click OK to assign the name and see the location:
Step 6
In the next window we set the size of the virtual hard disk and activate the "Split virtual disk into multiple files" box:
7
Step 7
We click Next to see a summary of the machine to create:
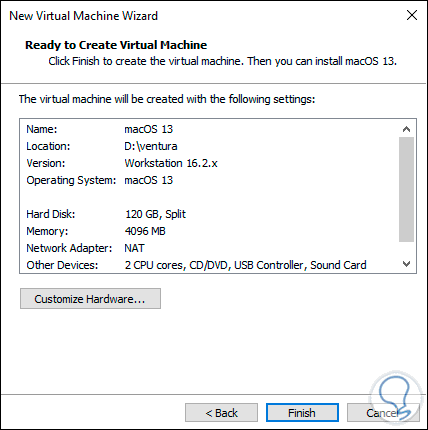
step 8
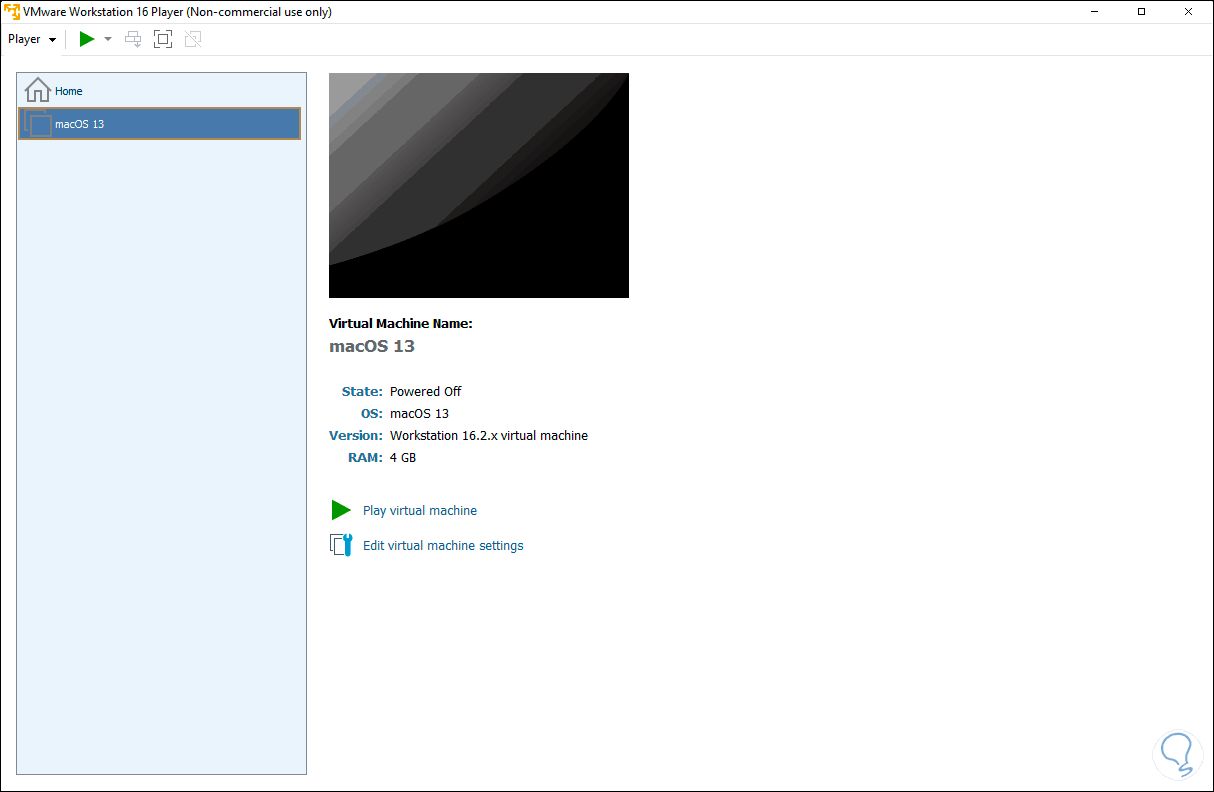
We click on “Finish” to create the virtual machine:
step 9
We go to the path where the virtual machine has been created, locate the VMDX file, right click on it and select the "Open with" option:
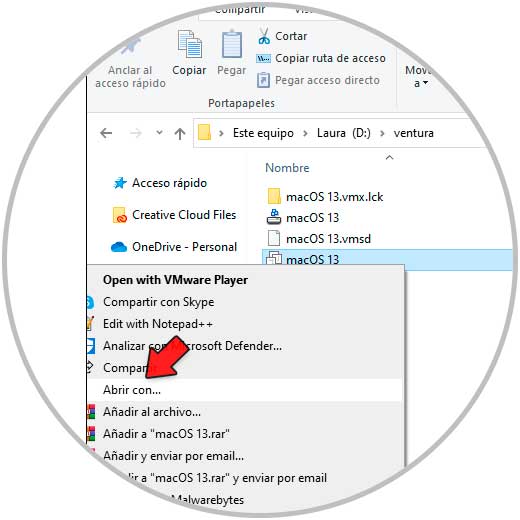
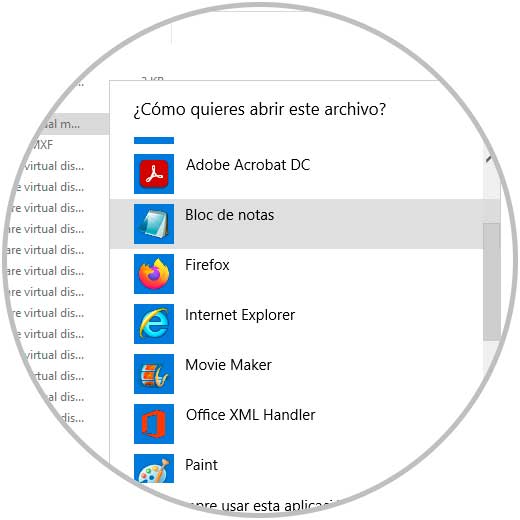
step 10
We choose a text editor:
step 11
We will see the following:
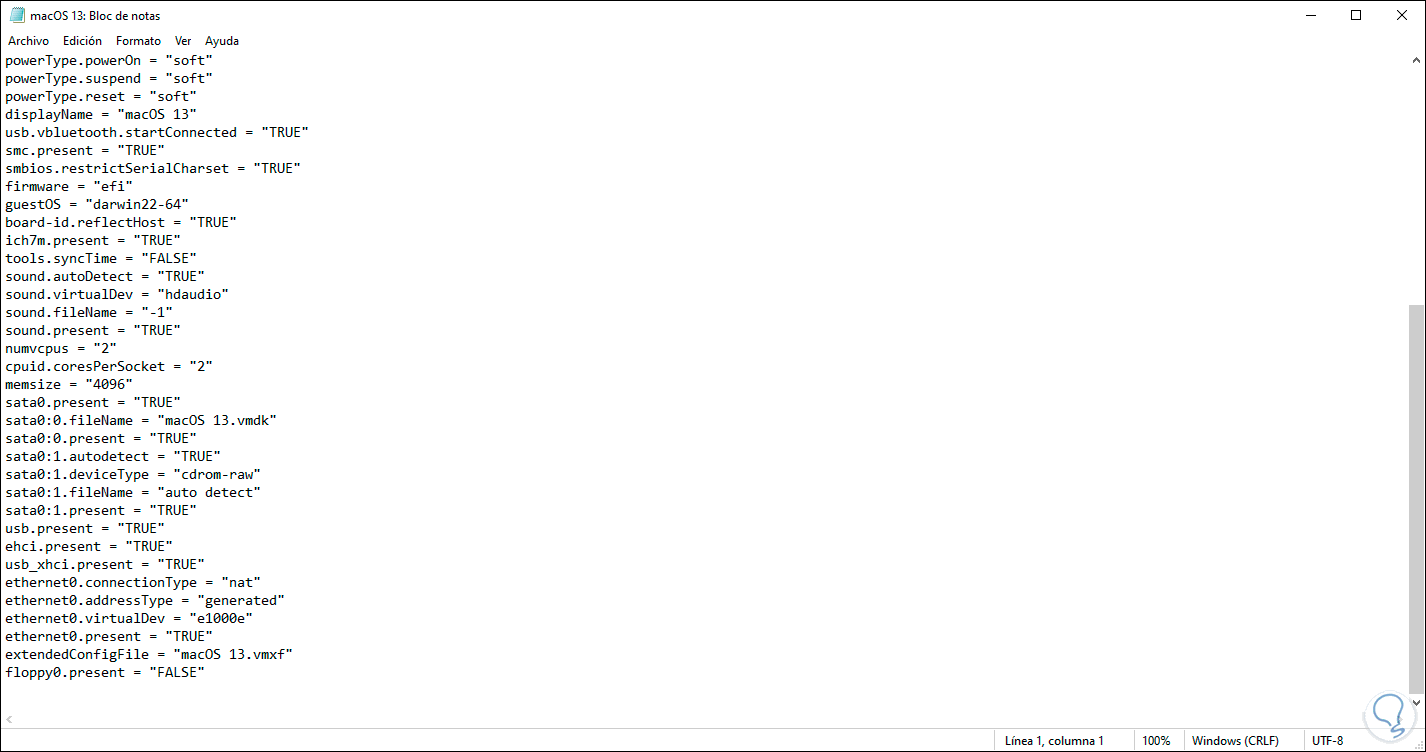
step 12
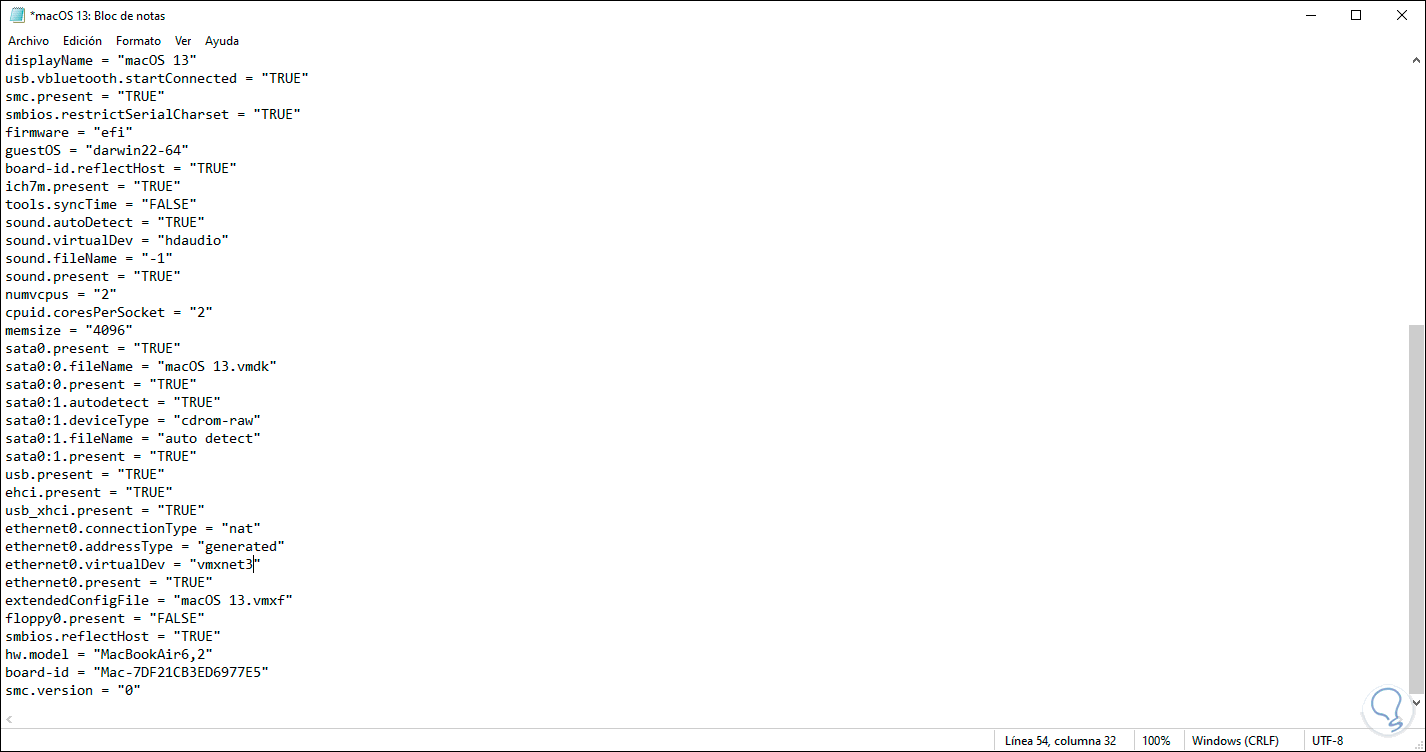
In the final part of the file we add the following lines to simulate the hardware of the computers compatible with macOS Ventura:
smbios.reflectHost = "TRUE" hw.model = "MacBookAir6,2" board-id = "Mac-7DF21CB3ED6977E5" smc.version = "0"
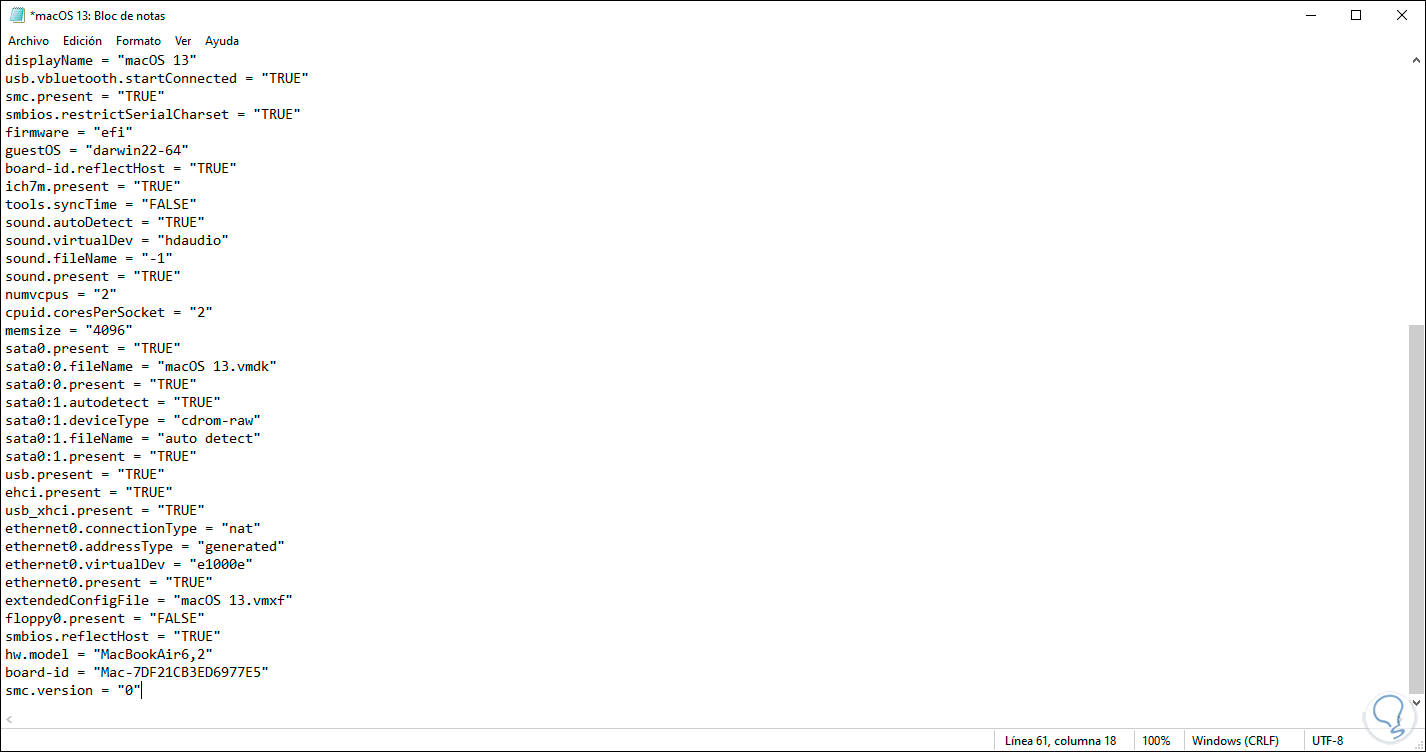
step 13
Additionally, in the "ethernet0.virtualDev" line we assign the value "vmxnet3":
step 14
We save the changes in the file and return to VMware Player:

step 15
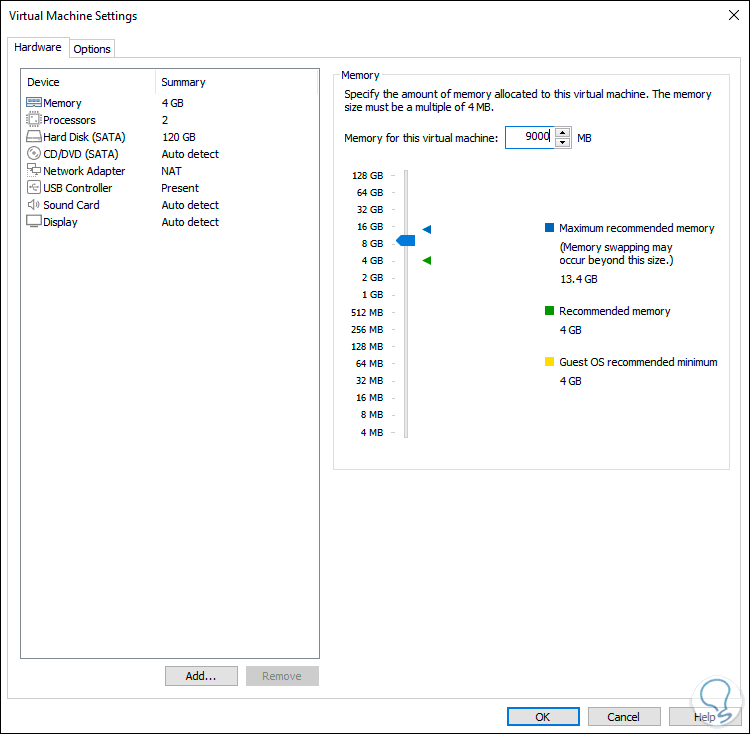
We click on "Edit virtual machine settings" and in the "Memory" section we set a minimum of 8 GB of RAM:
step 16
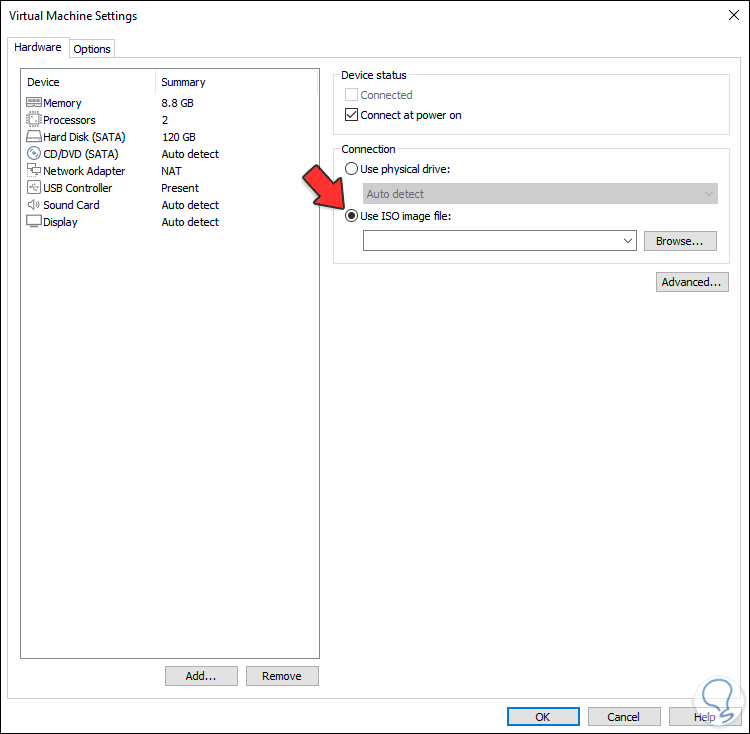
In the CD/DVD (SATA) section we will see this:
step 17
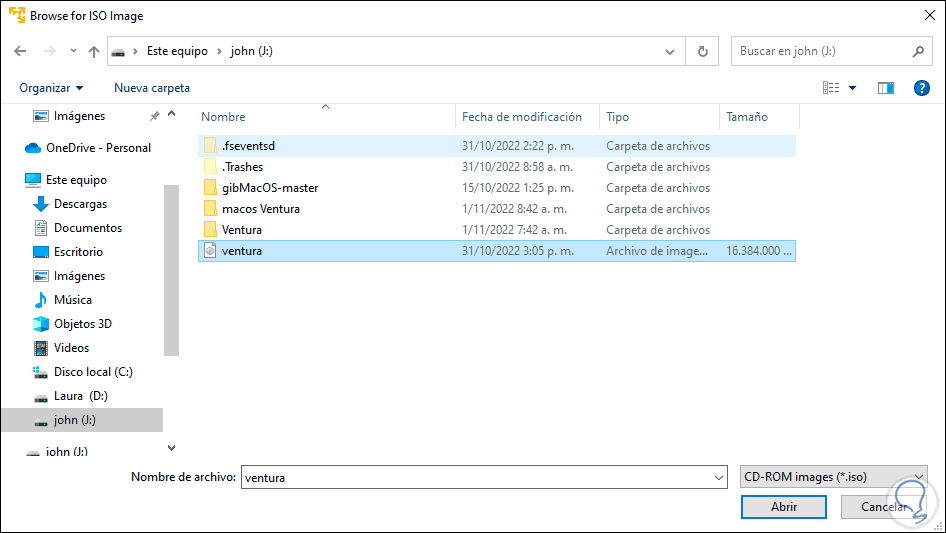
We activate the “Use ISO image file” box and in Browse we select the ISO image of macOS Ventura:
step 18
We click Open to add it:
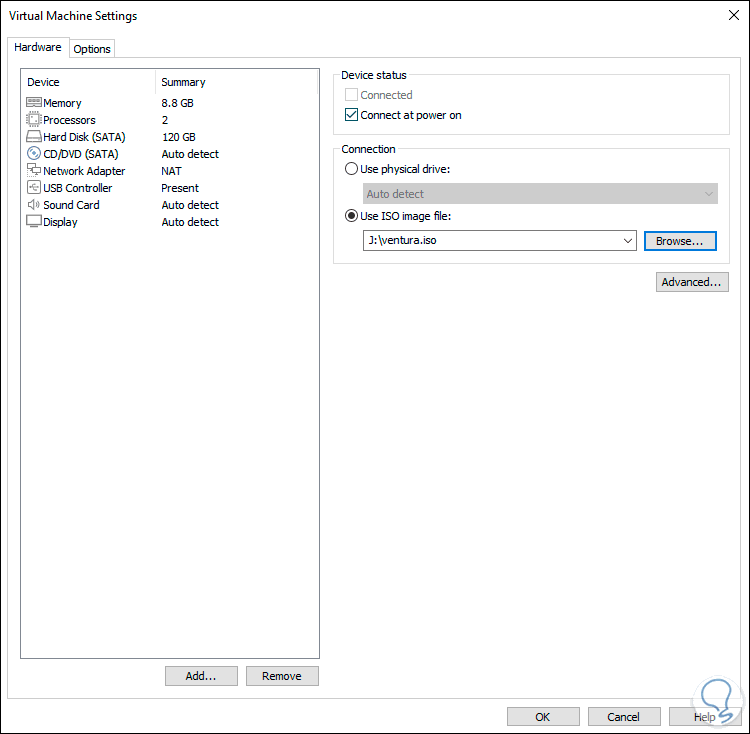
We apply the changes.
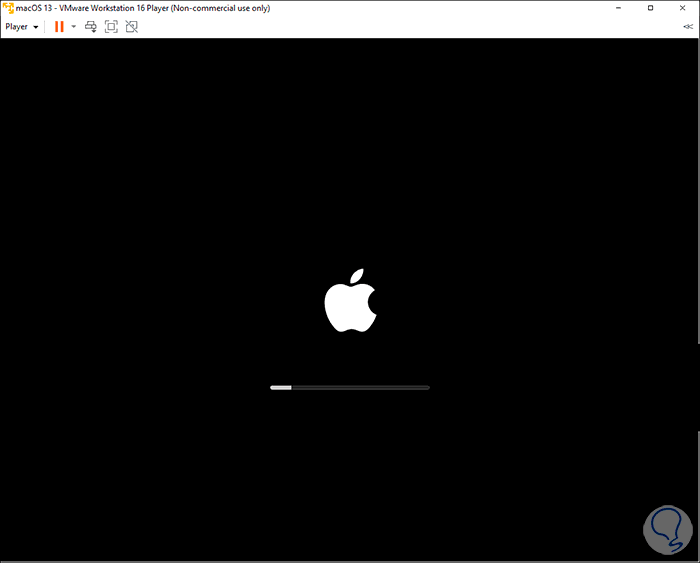
step 19
We start the virtual machine and the Apple logo will load:
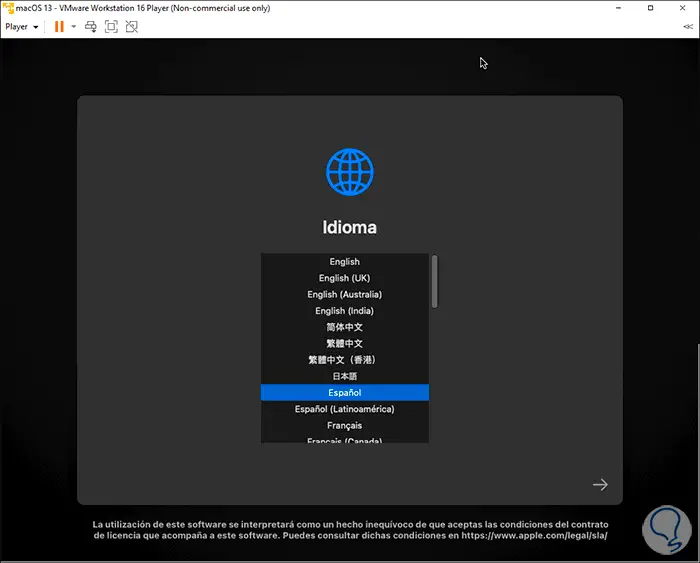
step 20
We select the language in which macOS Ventura will be installed:
step 21
We click on the arrow to access the recovery menu:
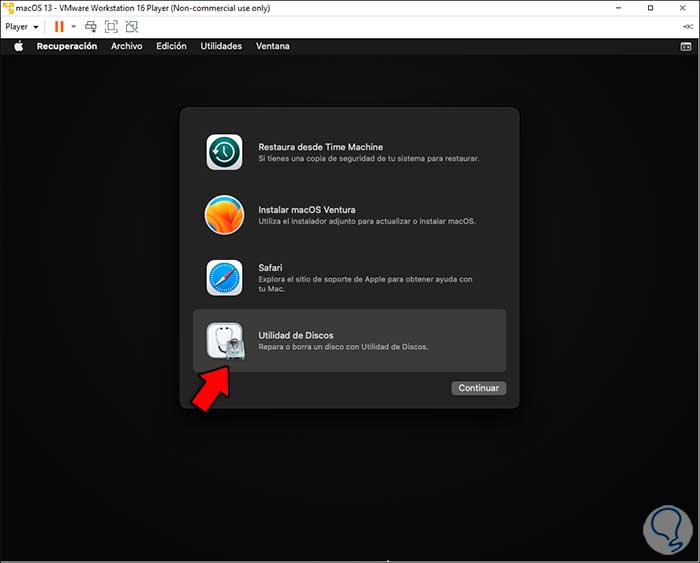
step 22
Select "Disk Utility" and then click "Continue":
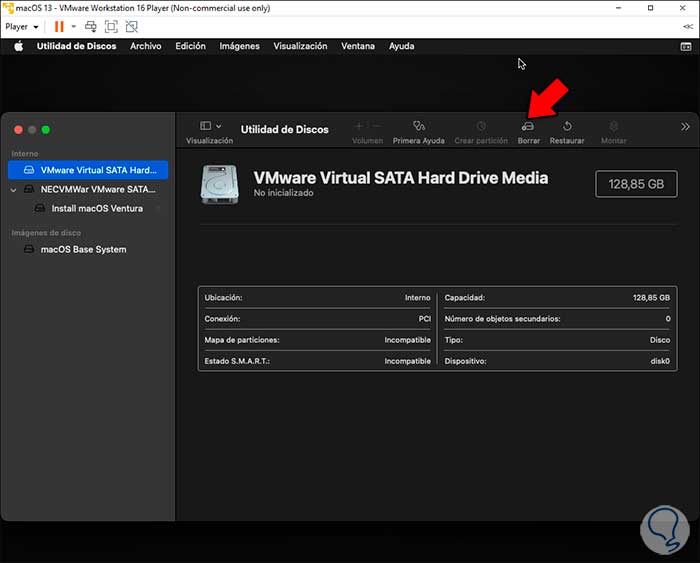
step 23
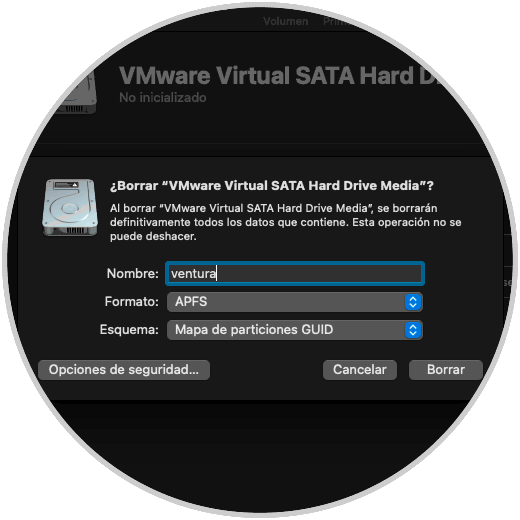
We select the hard disk and click on "Delete", in the pop-up window we define:
- In schema we define GUID Partition Map
step 24
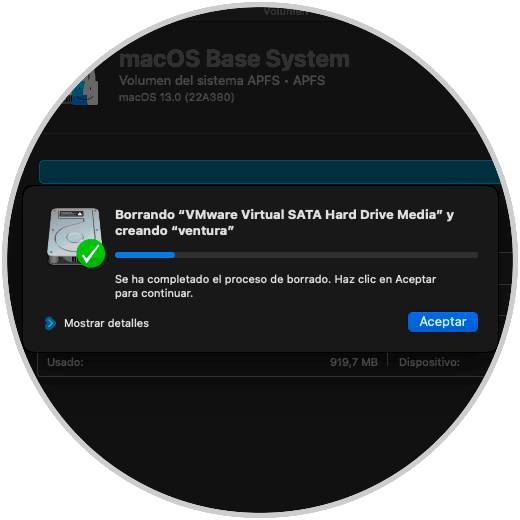
We click on "Delete" to start the process:
step 25
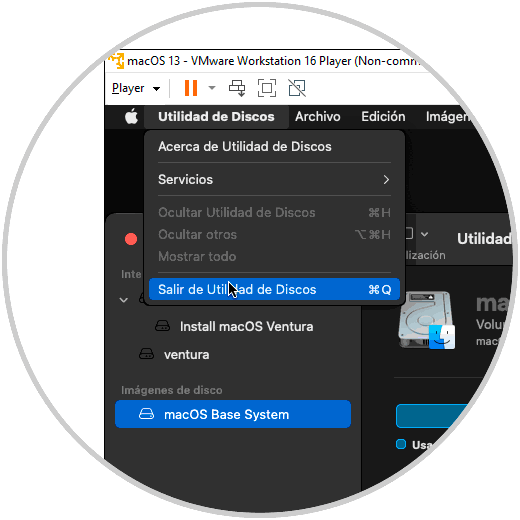
We exit Disk Utility:
step 26
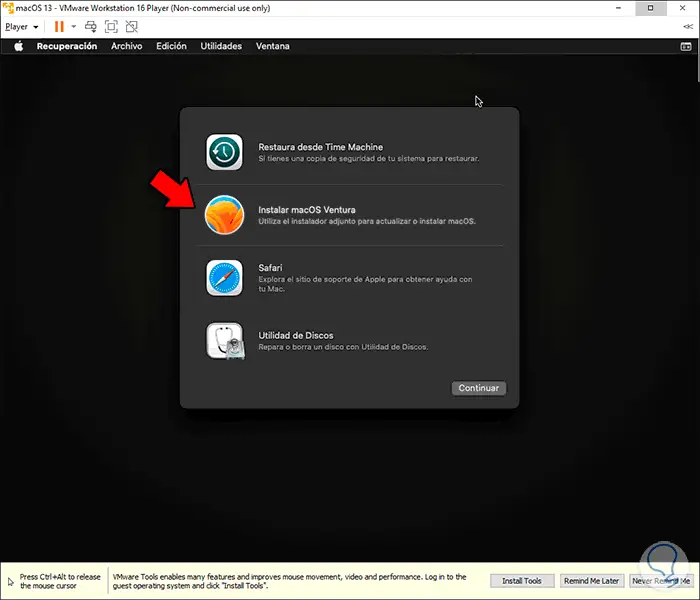
Now we select “Install macOS Ventura”:
step 27
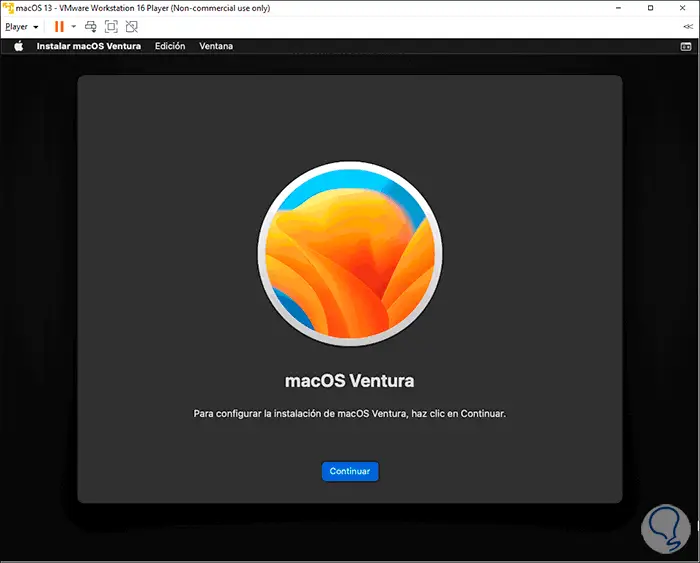
We click "Continue" and we will see the following:
step 28
We click on "Continue" to access the following window:
step 29
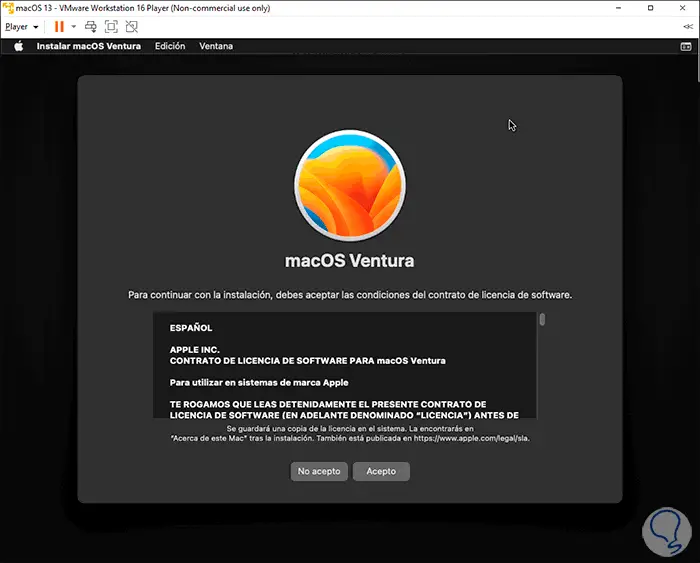
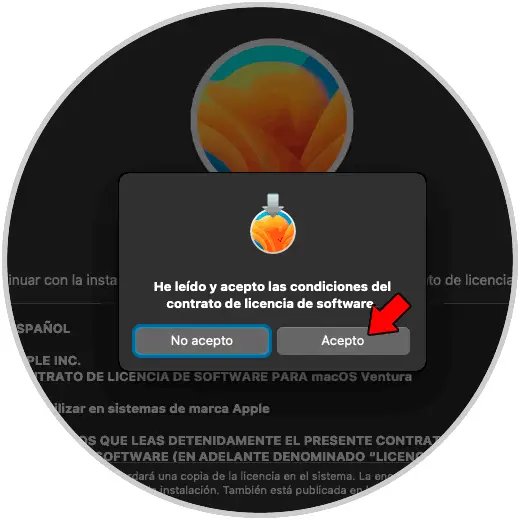
We click on "I accept" to approve the license of use and we must confirm it:
step 30
After this we select the disk where macOS Ventura will be installed:
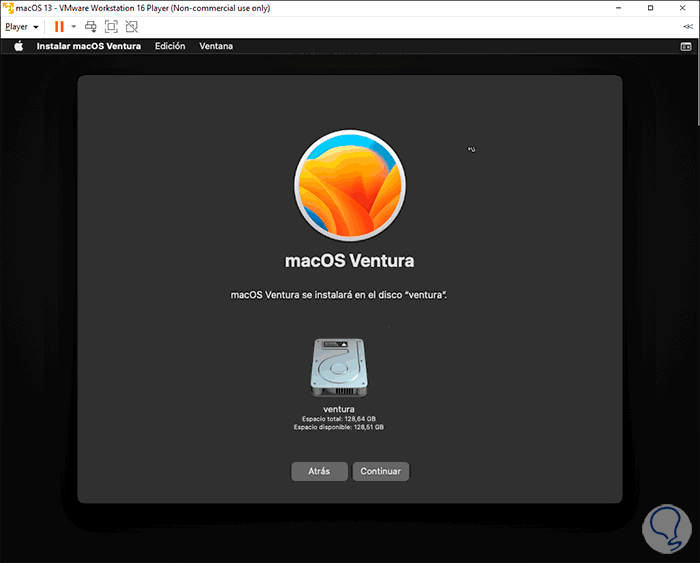
step 31
We click "Continue" and the installation process will start:
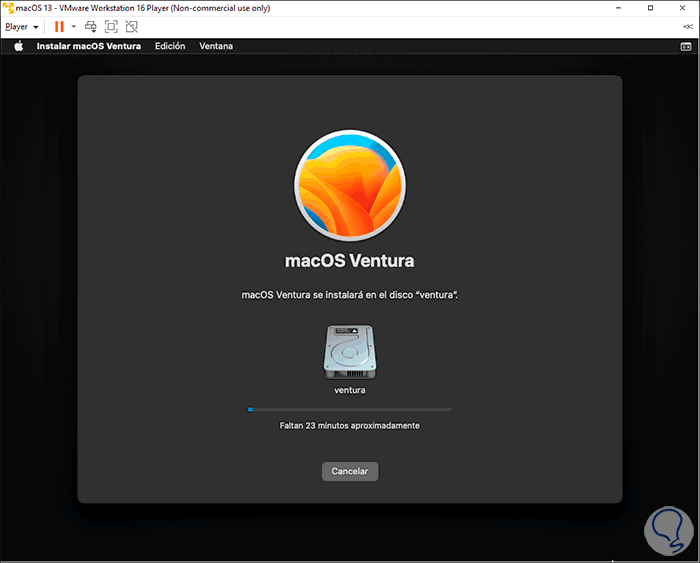
step 32
Then the system will reboot:

step 33
We wait for the local installation to start:

step 34
Once this has finished, the system will be restarted again:

step 35
After two or three reboots we access the macOS Ventura configuration:
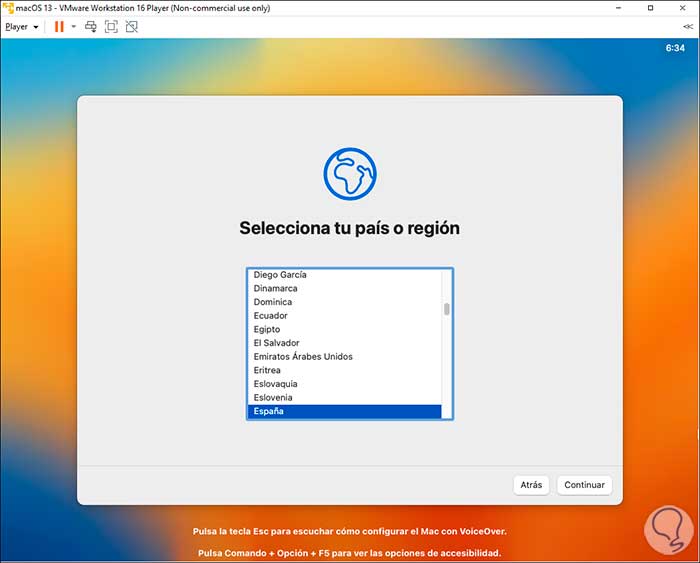
step 36
We define the language and then configure the system voice:
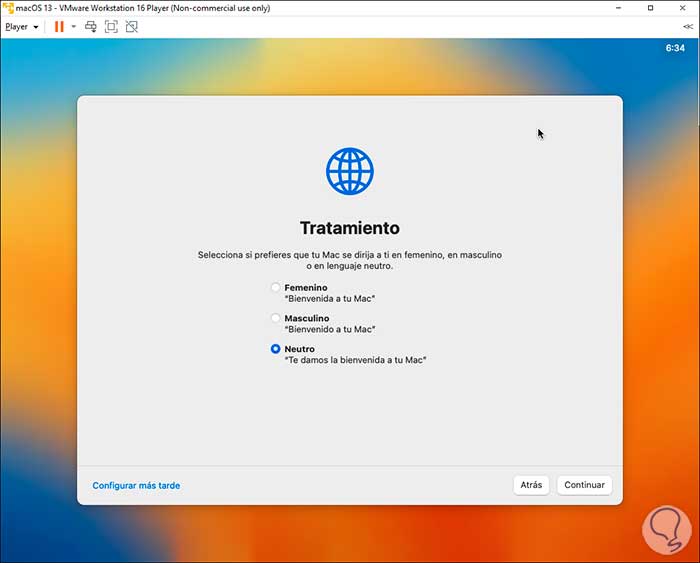
step 37
In the next window we will see the language to use:
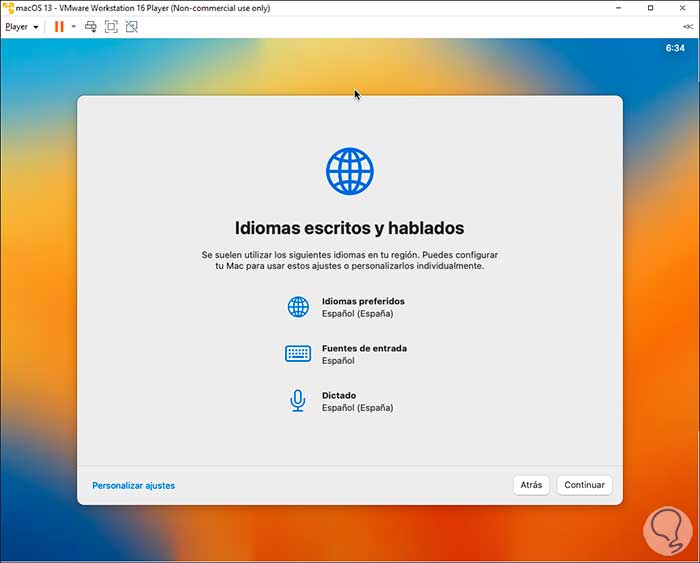
step 38
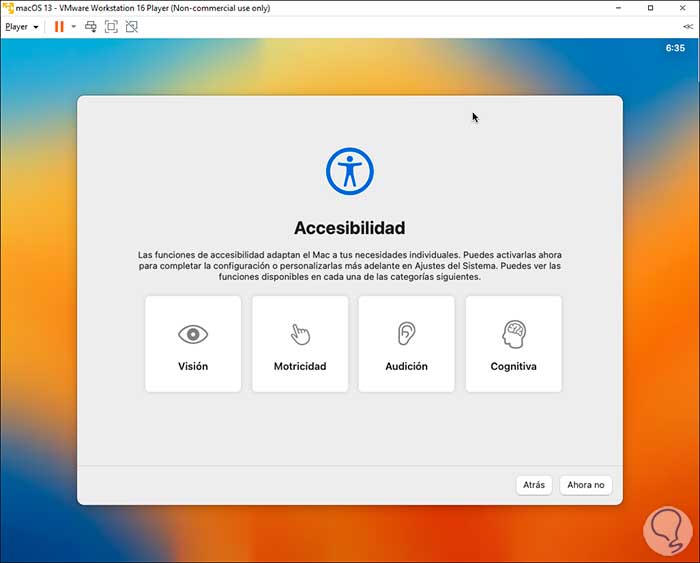
Then it will be possible to configure the accessibility to the system:
step 39
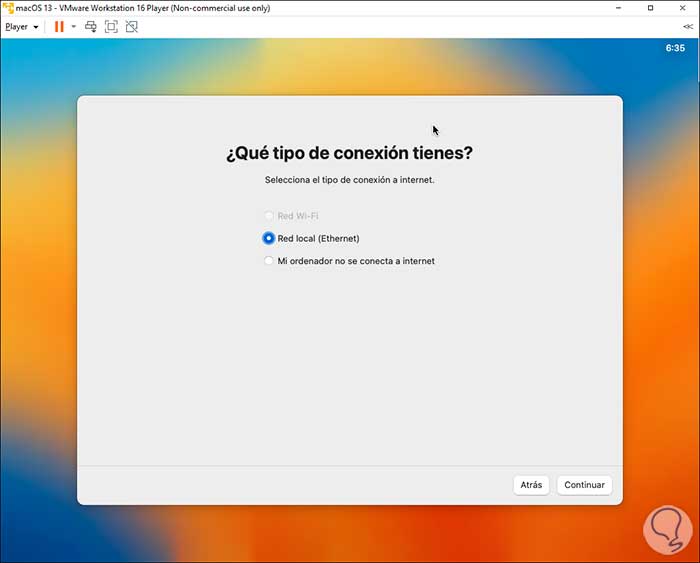
In the next window we configure the connection to the network:
step 40
Now it's time to approve the use of data and privacy:

step 41
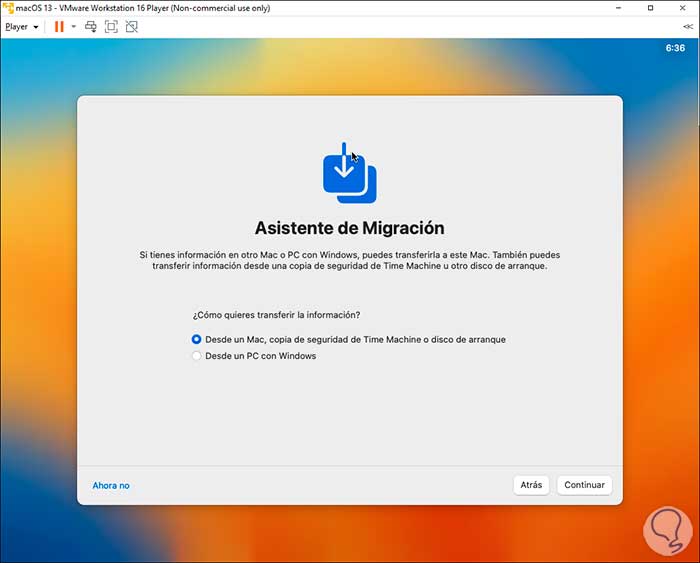
Then it will be possible, if applicable, to use the data migration wizard:
step 42
We arrived at the section of the license of use:
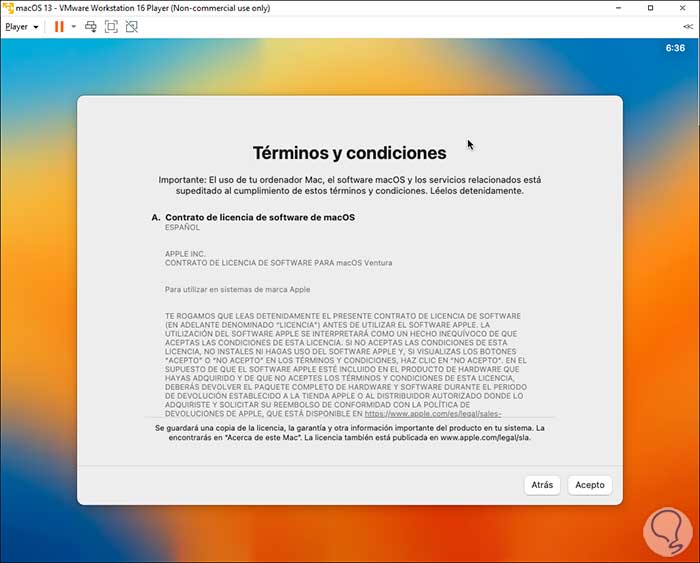
step 43
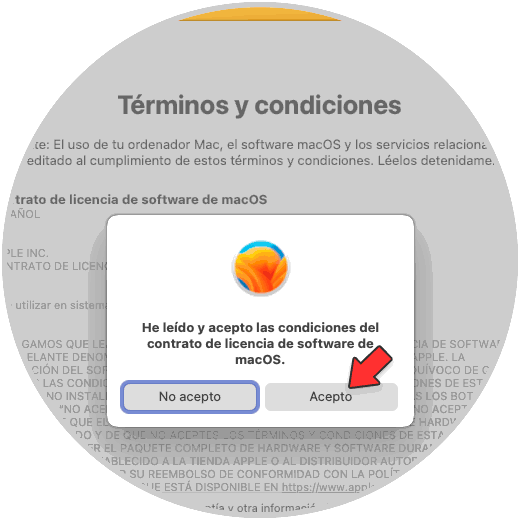
We click on I accept and we must confirm this action:
step 44
It's time to create the macOS Ventura administrator user:
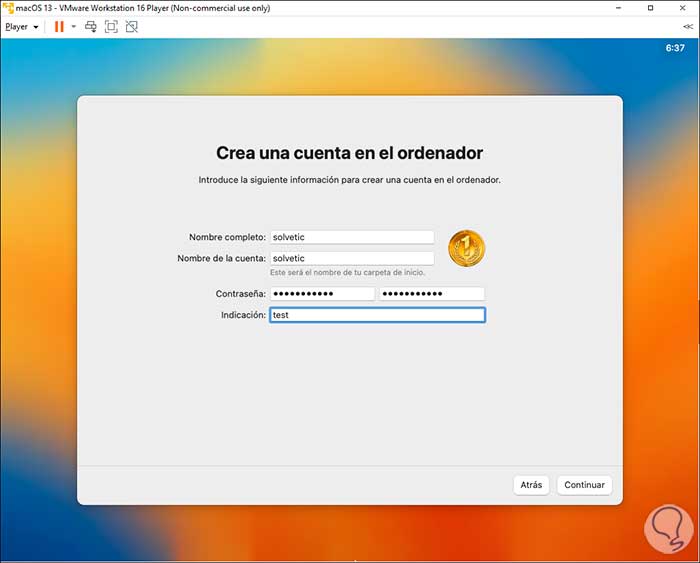
step 45
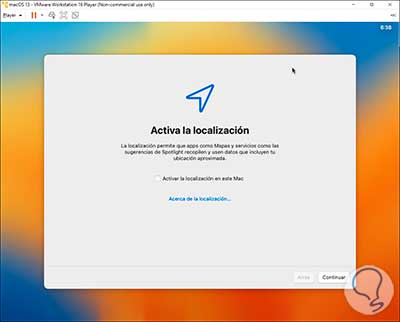
We click Continue to create the account and then we can activate the location:
step 46
We configure the geographical area:
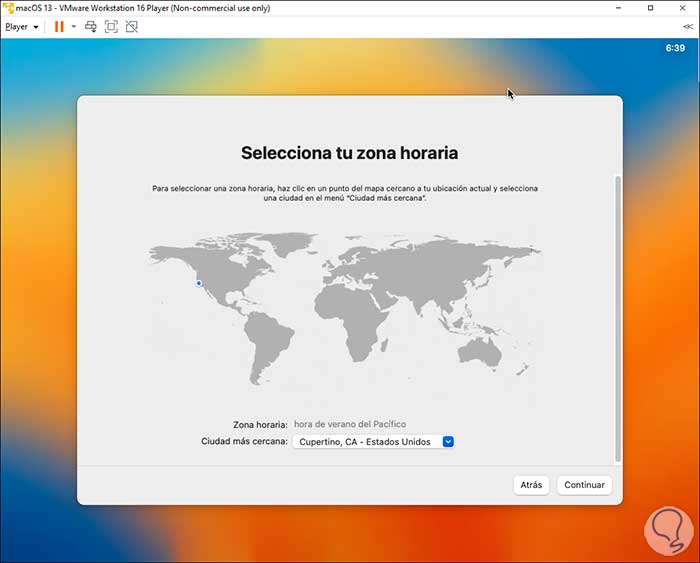
step 47
Finally, we accept or not the use of Analysis on the computer:
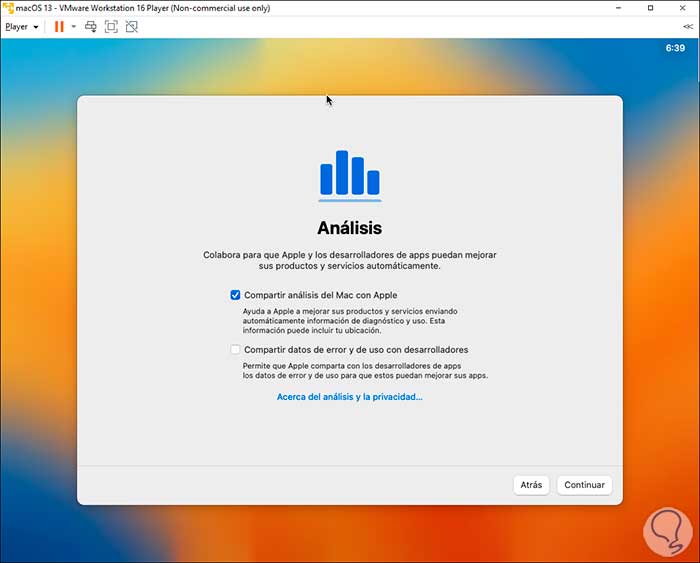
step 48
After this we will access the macOS Ventura environment:

step 49
There we see the ISO image of the USB on the CD icon, we right click on it and select "Eject Install macOS Ventura":
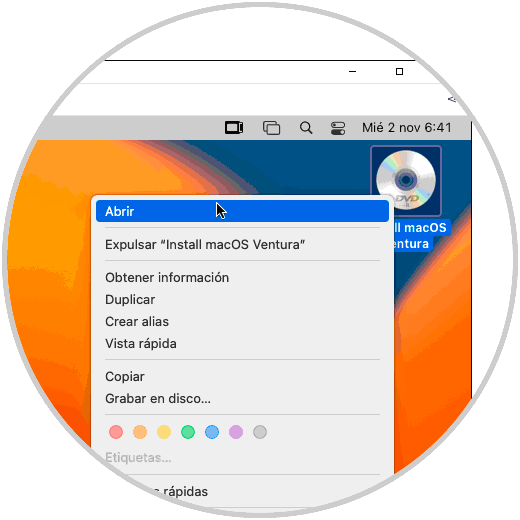
step 50
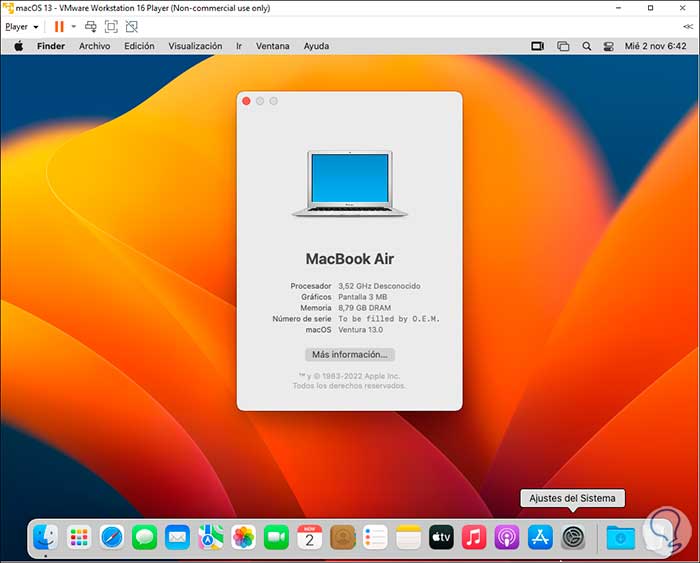
Now we validate that it is Ventura:
In the top menu it is possible to use the VMware Player options to manage the virtual machine. This is how you can try macOS ventura if you don't have a compatible device..