Nowadays, more and more users are joining the trend of using wireless headsets. Beyond a simple fashion, this type of device that does not need cables gives us great comfort in its use, and that is why more and more people are acquiring them for their use..
Normally, this type of device is used connected to the mobile terminal, to listen to music, answer calls and endless actions. But there may be times when you want to pair it with other devices, such as your PC. And this is also possible if you know the procedure to do it. Precisely in this TechnoWikis tutorial we explain how to connect my Huawei FreeBuds SE to the PC explained step by step and in the form of text and video.
To stay up to date, remember to subscribe to our YouTube channel!
SUBSCRIBE ON YOUTUBE
How to connect my Huawei FreeBuds SE to my PC
For this, the steps to follow are the ones that we are going to indicate below:
Step 1
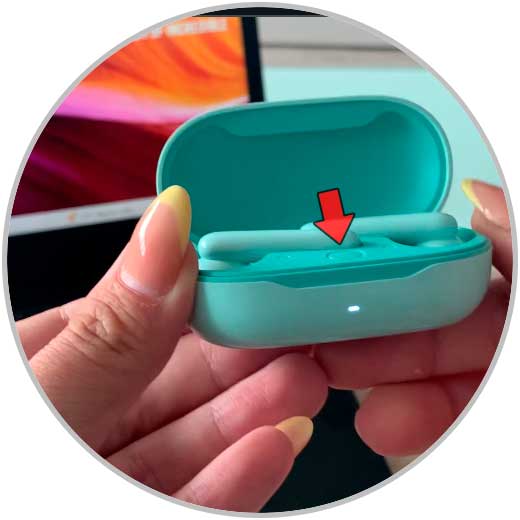
The FreeBuds must be physically close to your computer (within 10 meters). Press and hold the button for about 10 seconds and the flashing white light on the case will indicate that the earbuds are in pairing mode.
Step 2
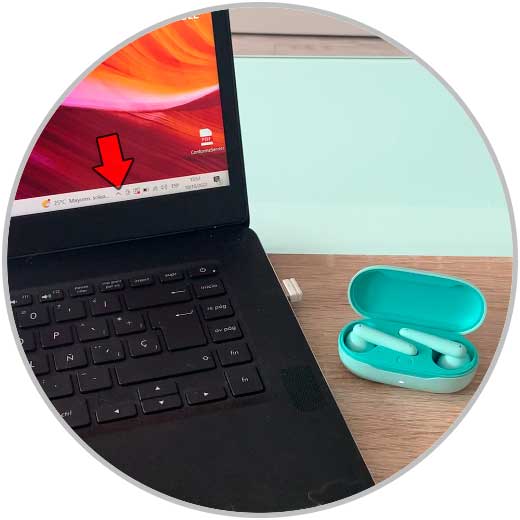
Now, in the bottom bar of your PC, click on the arrow that points up.
Step 3
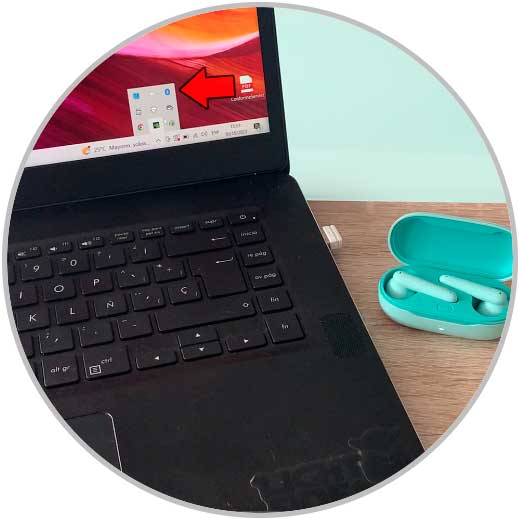
Now, in the drop-down options, click on “Bluetooth”.
Step 4
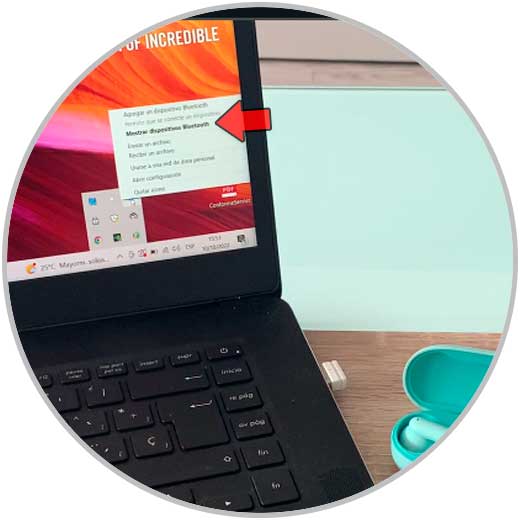
Now on the PC you will have to click on the option “Show Bluetooth devices”.
step 5
On this screen, click on the “+” icon to add a new Bluetooth device.
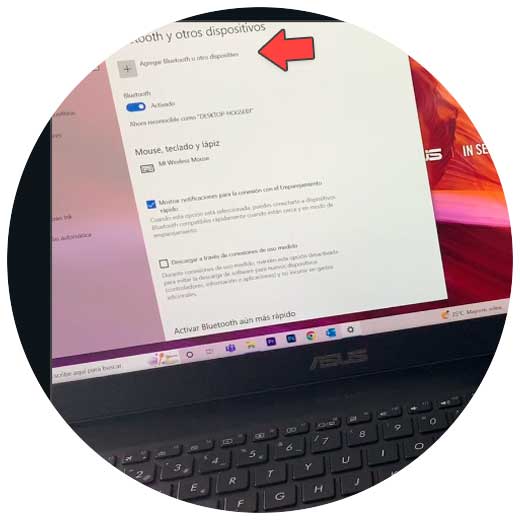
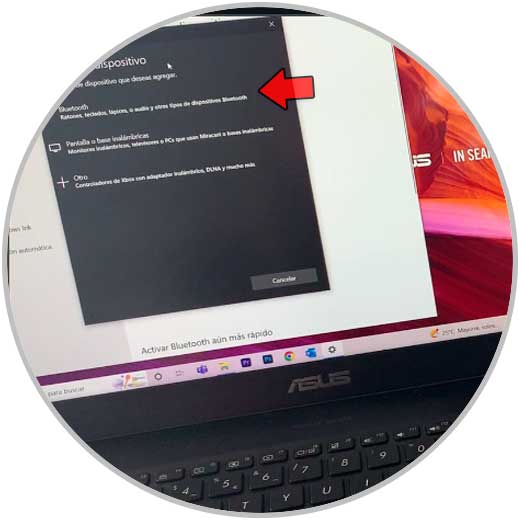
Step 6
In the black box, we select “Bluetooth”.
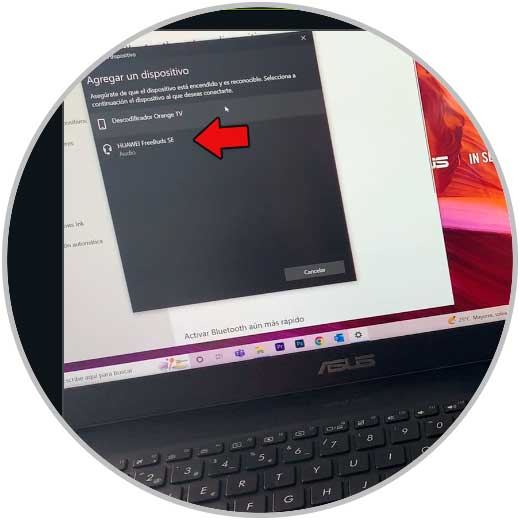
Step 7
When the FreeBuds SE appear in the list of devices ready to add, click on them to link.
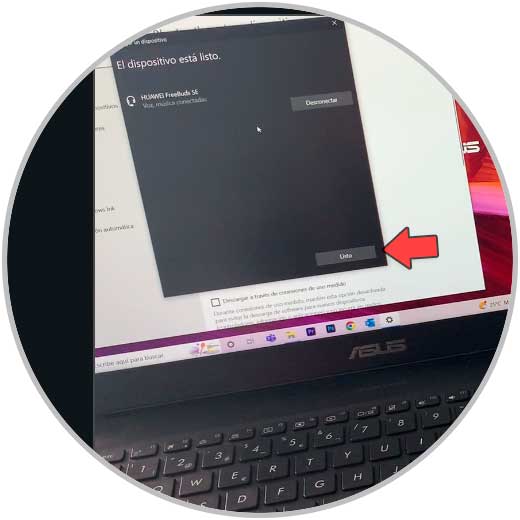
step 8
Once linked, press "Done" and the FreeBuds will already be paired to the PC.
With these simple steps you will have managed to link your Huawei FreeBuds SE wireless headphones to your PC and you will be able to start using them..