One of the most important network components is the IP address since this is similar to our personal identification and in the world of the network it is the presentation between the devices that allow us to connect to the immense world of networks..
The IP address gives the administrator the opportunity to have control over each computer (in the event that we use several PCs) since with that IP it is known if the computer is active and its details.
IP addresses can be of two types:
dynamics
These are managed by DHCP (Dynamic Host Configuration Protocol) and are delivered to the equipment through a concession which has an expiration date, so that today we can have an IP ending in 11 and the next day one ending in 20, this is ideal for teams that do not have specific tasks
Static
As its name indicates, it is a fixed IP address and is usually used for equipment with specific tasks such as a server, this is because other equipment and services depend on it and if its IP changes, communication will be affected.
TechnoWikis will explain two mechanisms to establish a static IP in Windows 11 if necessary for an administrative task.
To stay up to date, remember to subscribe to our YouTube channel!
SUBSCRIBE ON YOUTUBE
1 How to put Static IP in Windows 11 from Settings
Step 1
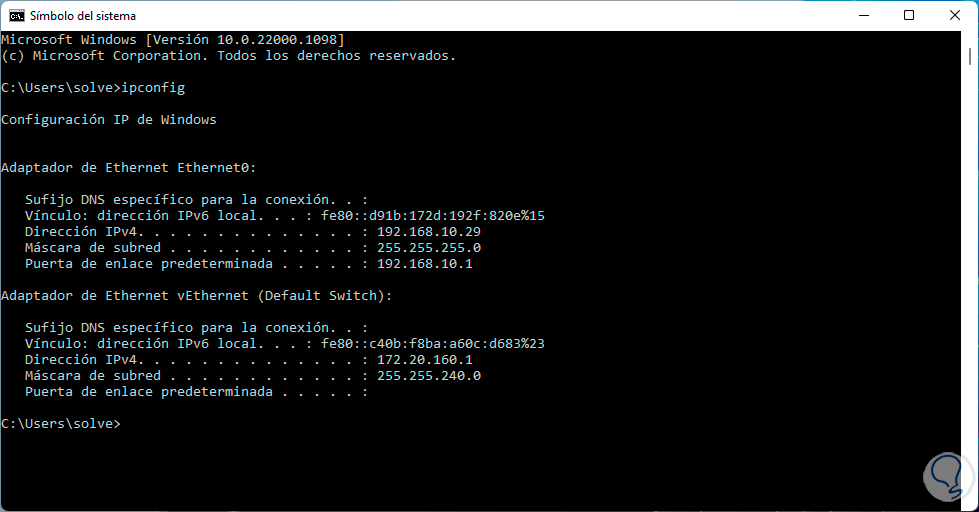
This is one of the simplest methods to assign our static IP in Windows 11, for this we first open CMD and validate the current IP with "ipconfig":
Step 2
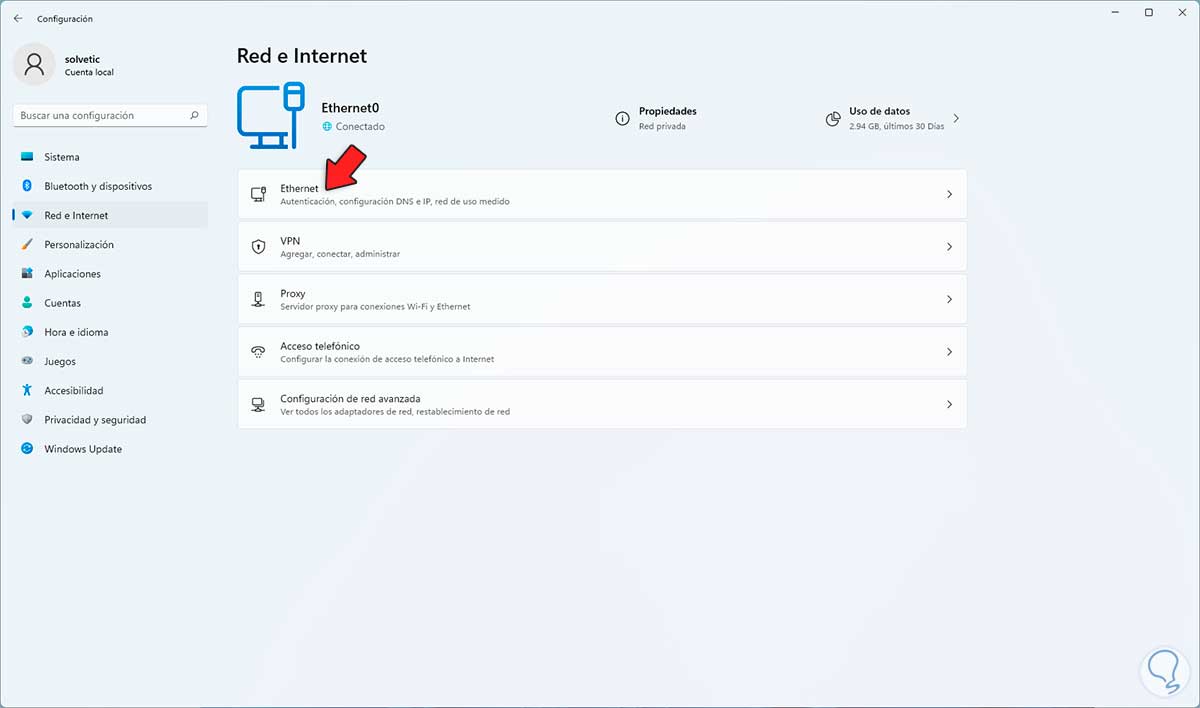
Now we go to "Start - Settings - Network and Internet":
Step 3
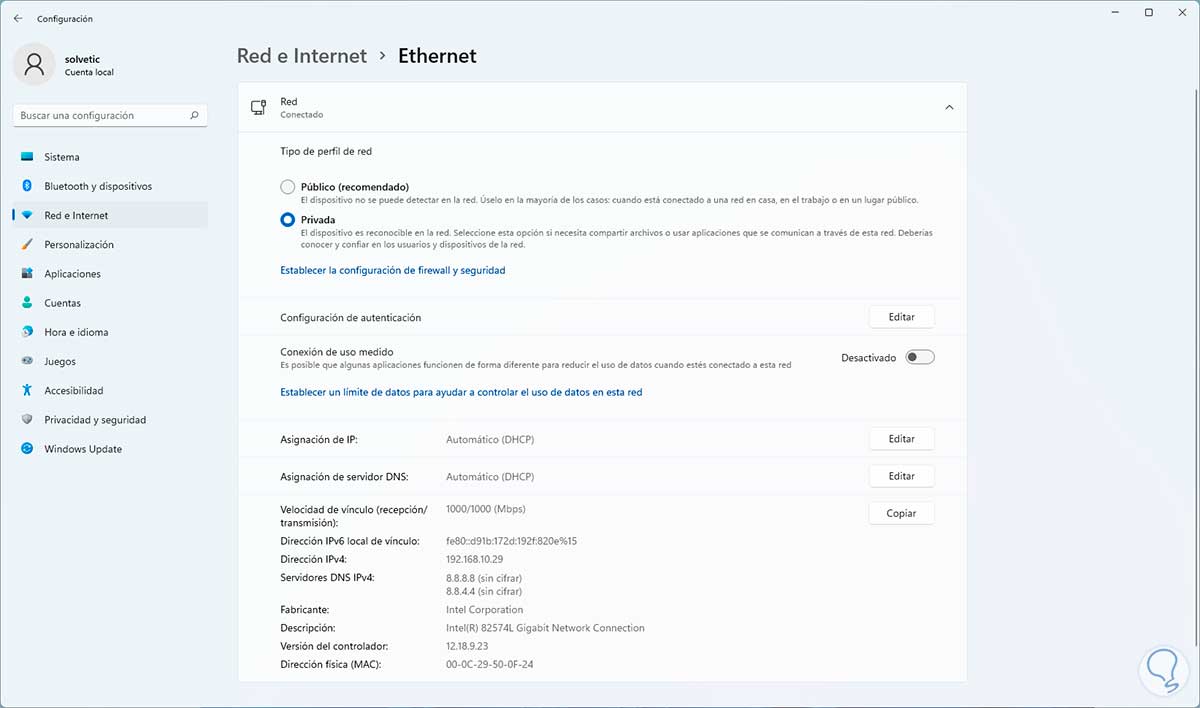
We click on the current network at the top to see its properties:
Step 4
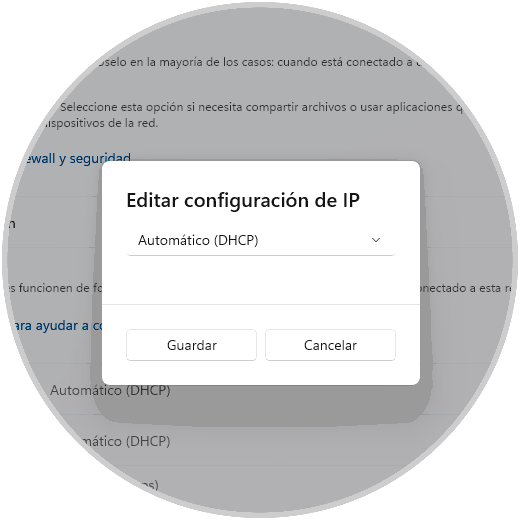
In the "IP Assignment" section we click on "Edit" and we will see the following:
step 5
We select "Manual" to see the current protocols:
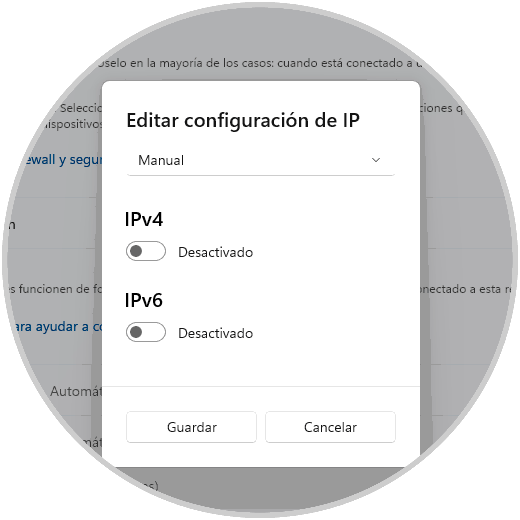
Step 6
We activate the IPv4 switch and then assign the respective IP addresses as they are:
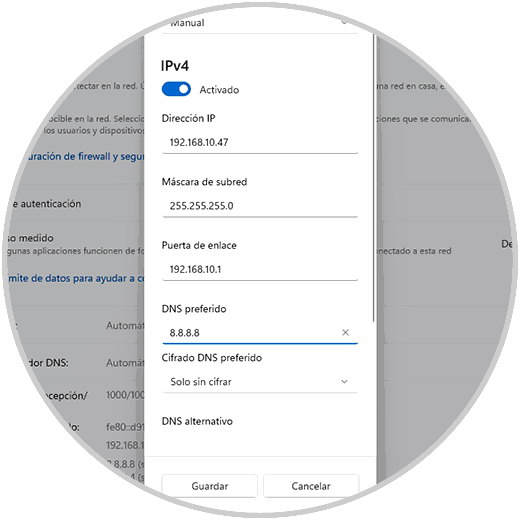
Step 7
In the case of DNS it is possible to assign a much more secure encryption:
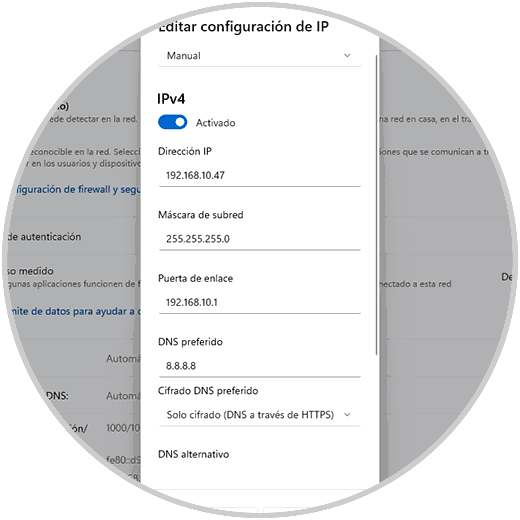
step 8
Apply the changes:
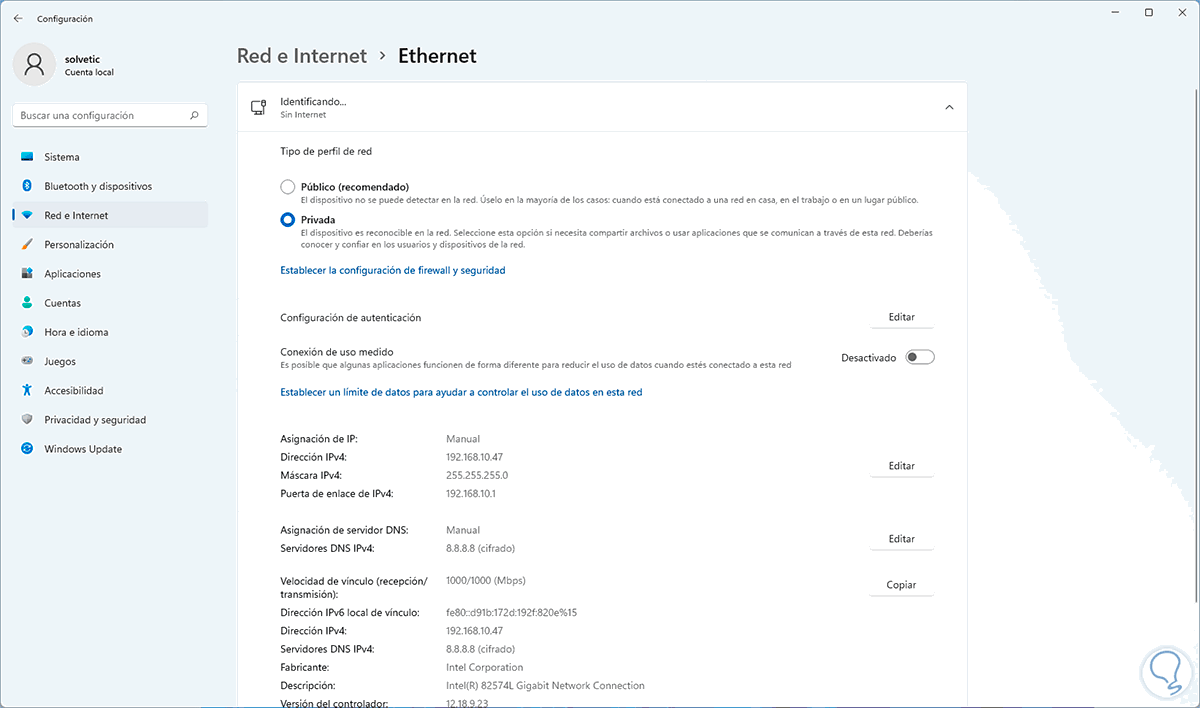
step 9
We open CMD and execute “ipconfig” to see the new IP address:
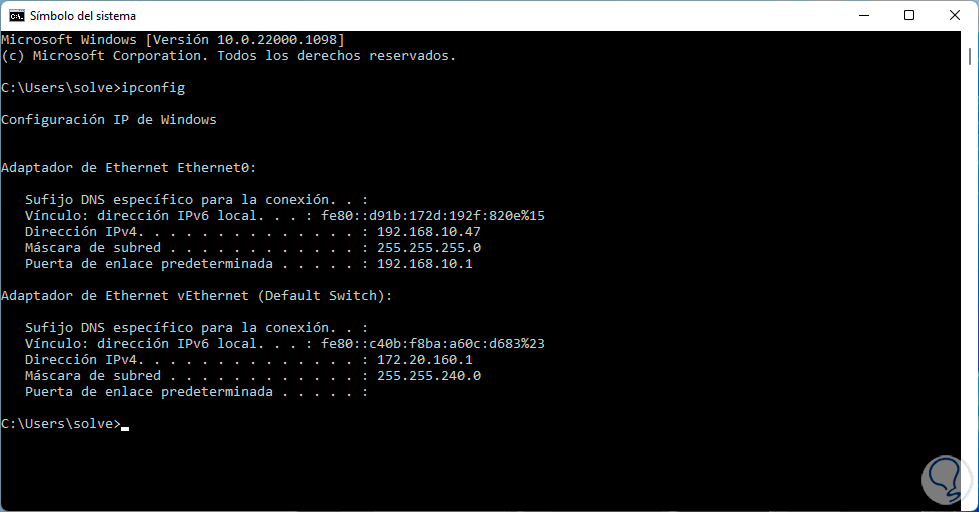
step 10
If we run “ipconfig /all” we can see full details of the assignment we have made:
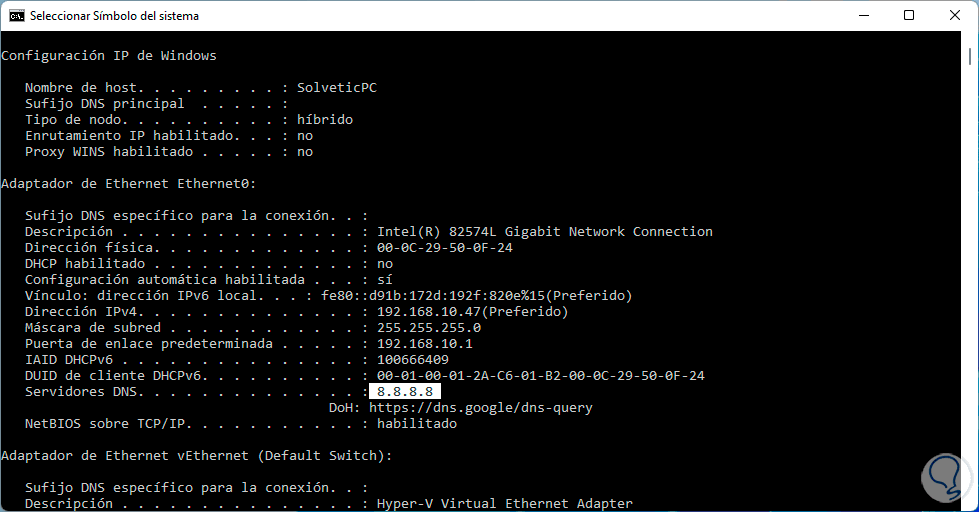
2 How to put Static IP in Windows 11 from CMD
This is another option to assign a static IP address in Windows 11.
Step 1
We can use the Terminal or the CMD console, we open CMD as administrator:
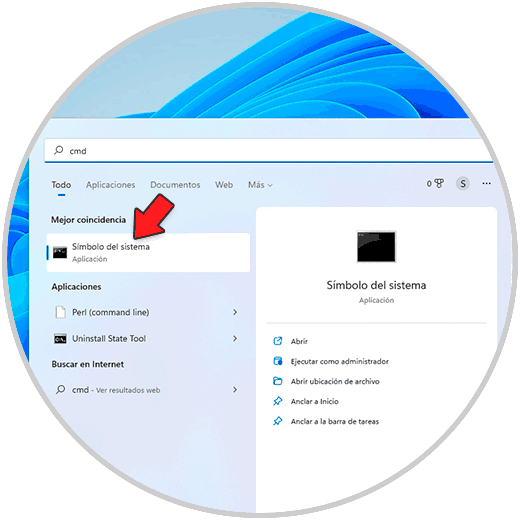
Step 2
We list the current IP with the command:
ipconfig /all
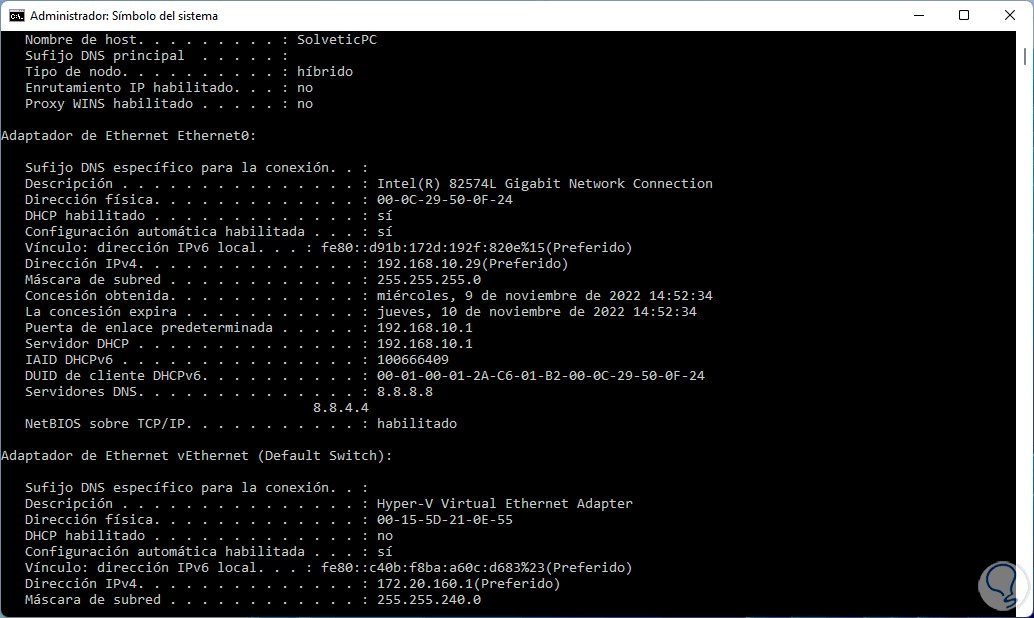
Step 3
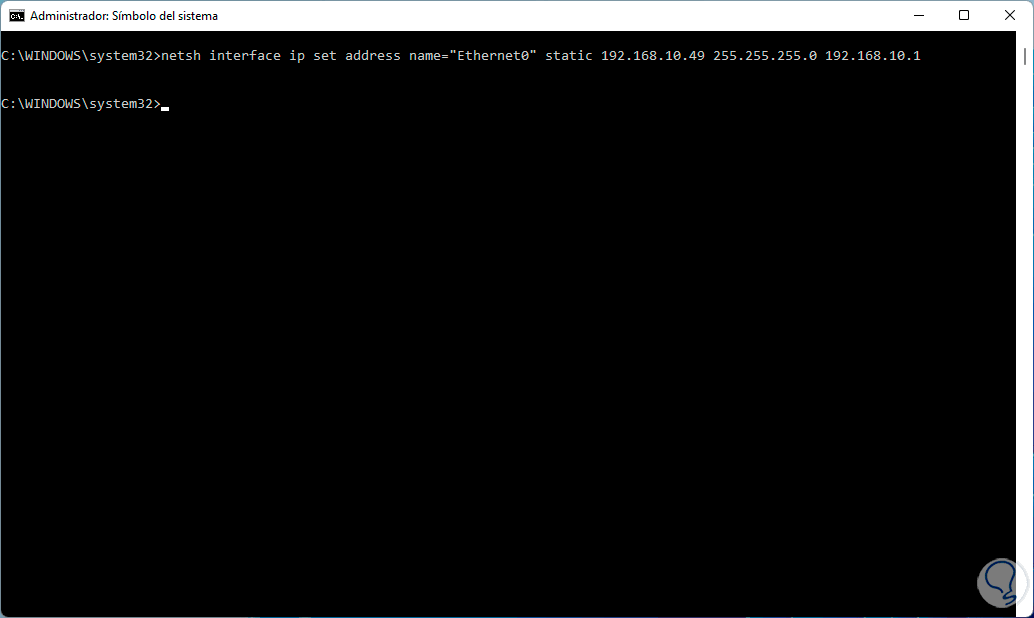
We take into account the name of the current network adapter of the equipment, now we set the new IP address using the syntax:
netsh interface ip set address name= "ADAPTER" static IP NETWORK MASK GATEWAY
Step 4
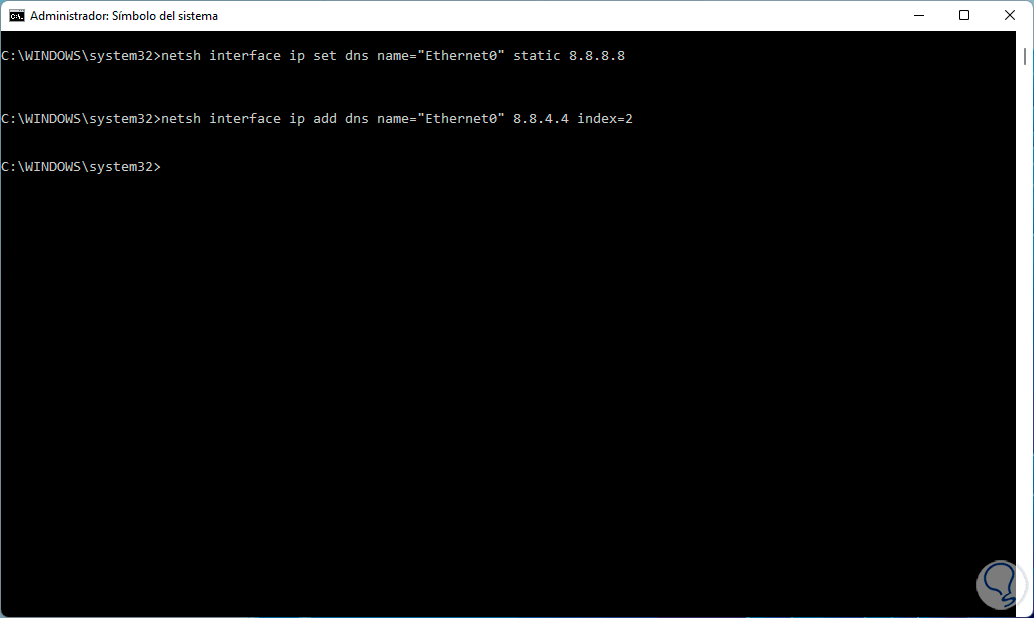
We assign the primary DNS with the syntax:
netsh interface ip set dns name="ADAPTER" static IP_DNS
Alternatively it will be possible to set the secondary DNS with the syntax:
netsh interface ip add dns name="ADAPTER" IP_DNS index=2
step 5
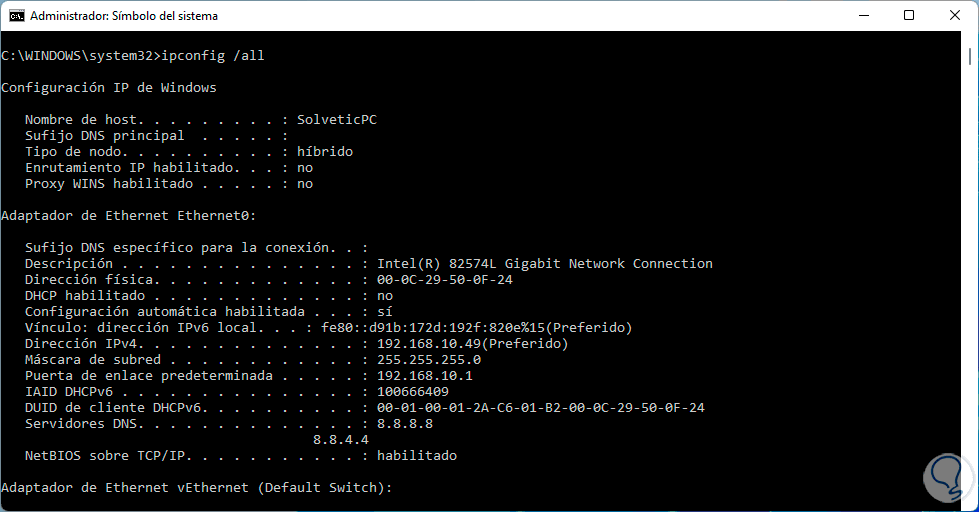
We validate the changes by executing:
ipconfig /all
Let us remember that for the DNS we can use public servers such as:
Cloudflare: Primary: 1.1.1.1 Secondary: 1.0.0.1 Google: Primary: 8.8.8.8 Secondary: 8.8.4.4 OpenDNS: Primary: 208.67.222.123 Secondary: 208.67.220.123 SafeDNS: Primary: 195.46.39.39 Secondary: 195.406.406
By using a static IP we will be able to perform much more direct network tasks knowing that it will not vary constantly.