Network discovery in Windows 11 is an integrated functionality with which it is possible to find devices (such as PCs, modem, folders) that are on the same local network and that have been enabled for sharing, this is ideal for quick access to resources and to be able to transfer or copy information as well as to have access to data. Through network detection in Windows 11 we can manage and connect to other computers that we can find on our local network, but if the function is disabled we will have problems doing so..
Windows network detection is enabled by default and it is possible that at some point and for various reasons, such as a bad configuration or a reset of the network adapter, detection is deactivated. If this is your case, TechnoWikis will give you some solutions to activate it again and have access to items and resources shared on the local network. That is why we are going to see how to solve if we see that Network Discovery is Disabled Windows 11.
To stay up to date, remember to subscribe to our YouTube channel!
SUBSCRIBE ON YOUTUBE
1 Activate Windows 11 Network Discovery from Services
Step 1
In Windows 11, network discovery is linked to a series of services so that it works correctly so that if these services are stopped or failing it is the cause for network discovery to fail, to use this method we open Services:
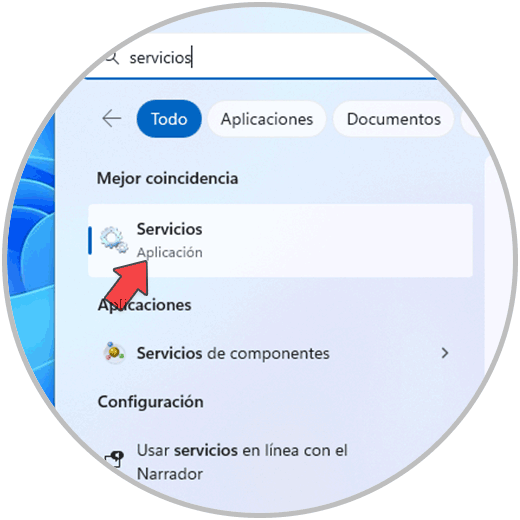
Step 2
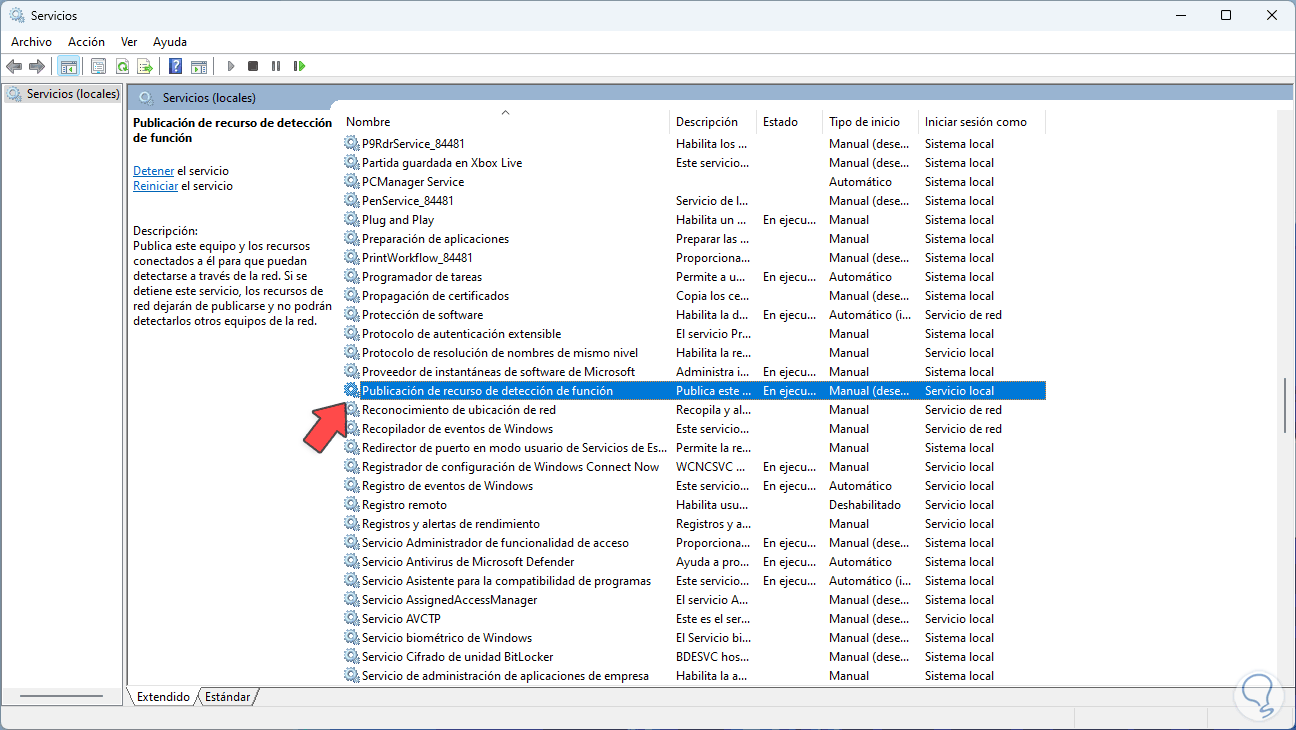
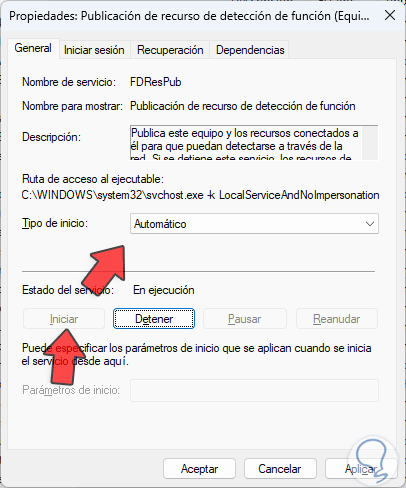
We locate the "Function detection resource publication" service:
Step 3
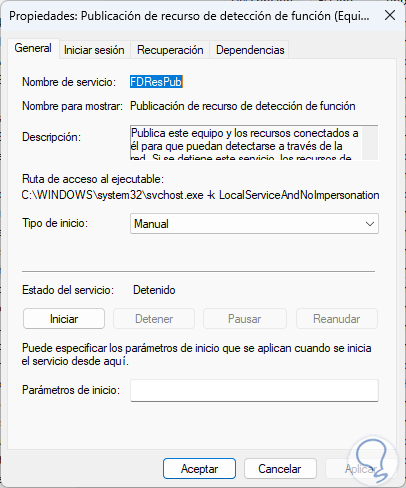
We double click on it to see its properties:
Step 4
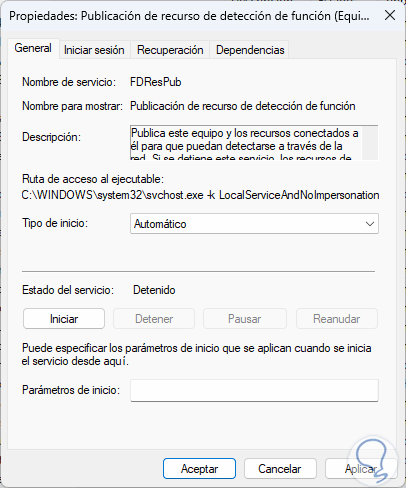
We assign in "Startup type" the option "Automatic". This will cause the service to start itself at every Windows logon.
step 5
We start the service by clicking “Start”. Apply the changes.
step 6
This "Function detection resource publication" service is responsible for making the equipment and the resources connected to it public so that they can be detected over the network. If this service is stopped, the network resources will stop being published. so that it will be impossible to be detected by the other computers on the network.
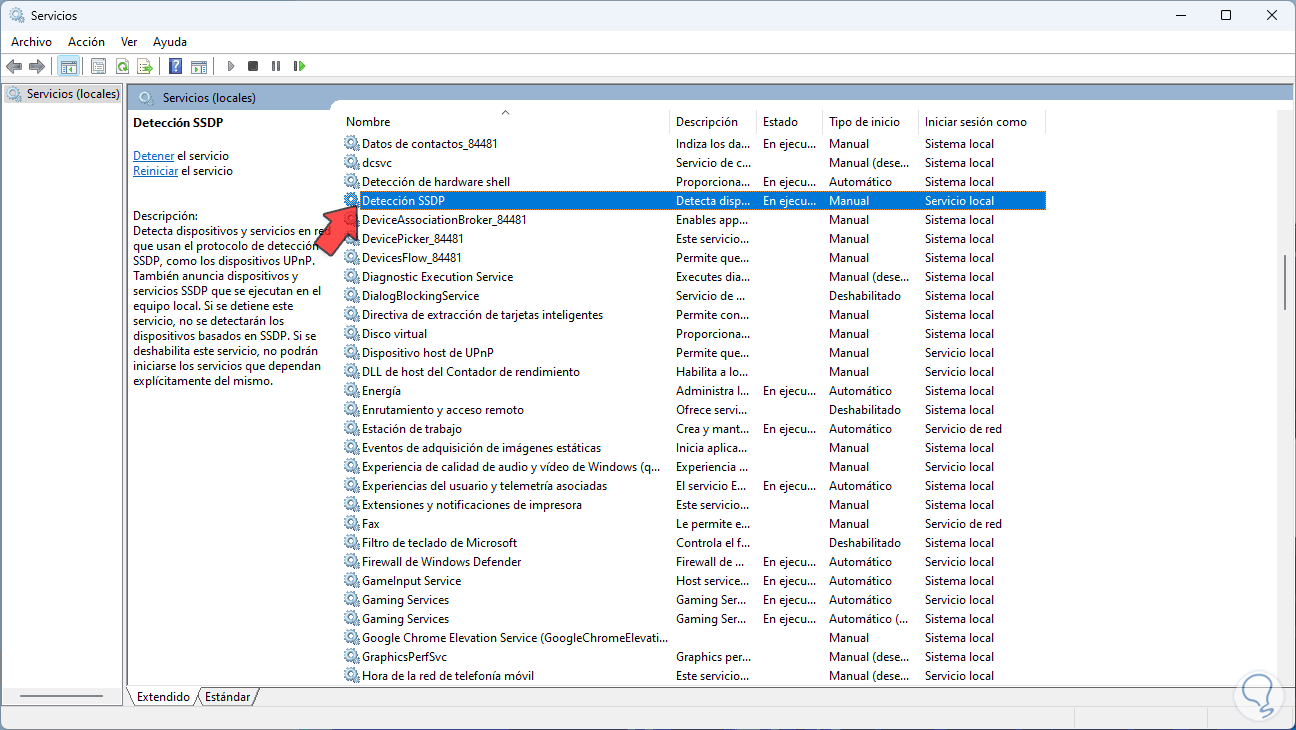
We locate the "SSDP Detection" service:
step 7
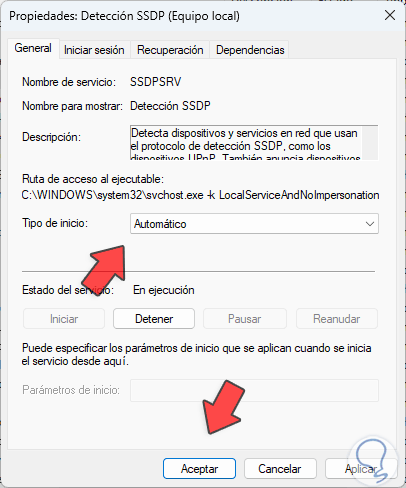
We double click on it and assign the "Automatic" option to "Startup type" and start the service:
Apply the changes.
step 8
This "SSDP Detection" service has the task of detecting devices and services on the network that make use of the SSDP detection protocol, in addition to this it also announces SSDP devices and services executed locally, if the service is stopped, the errors will not be detected. devices based on SSDP and if it were to be disabled it will not be possible to start the services that depend on it.
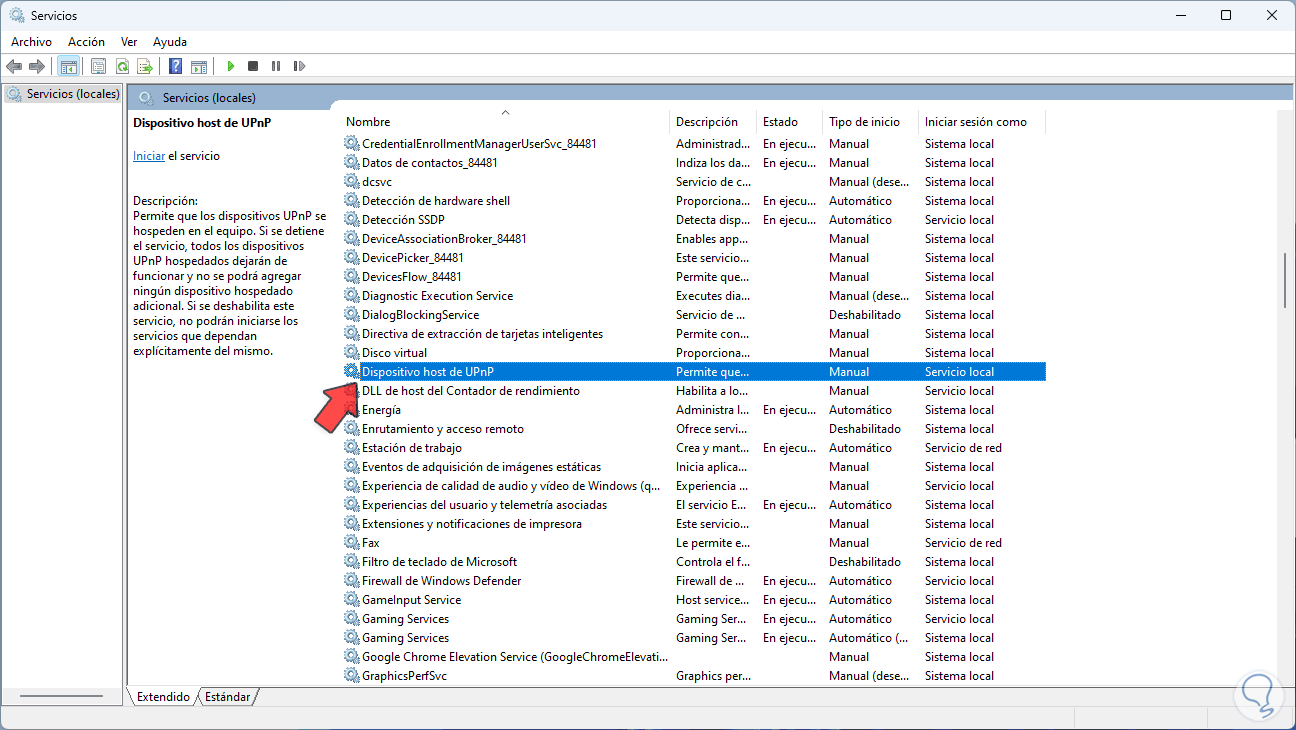
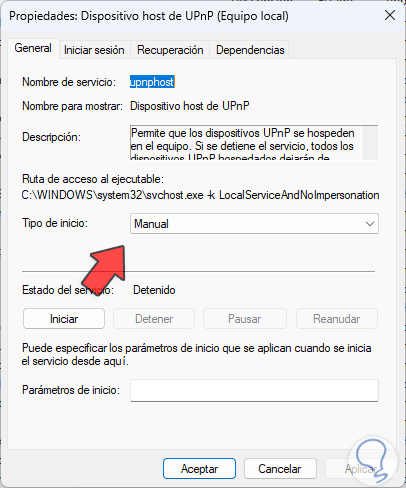
We locate the "UPnP Host Device" service:
step 9
We double click on it to assign the "Automatic" option in "Startup type":
step 10
We start the service. Apply the changes.
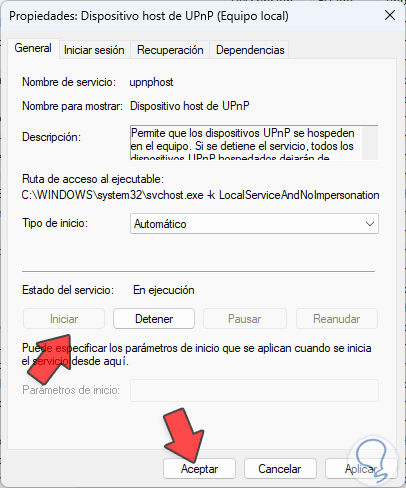
step 11
UPnP Host Device ensures that UPnP devices can be hosted on the computer so if the service is stopped all hosted UPnP devices will stop working and the option to add any additional hosted devices will be disabled.
Now we locate the "DNS Client" service:
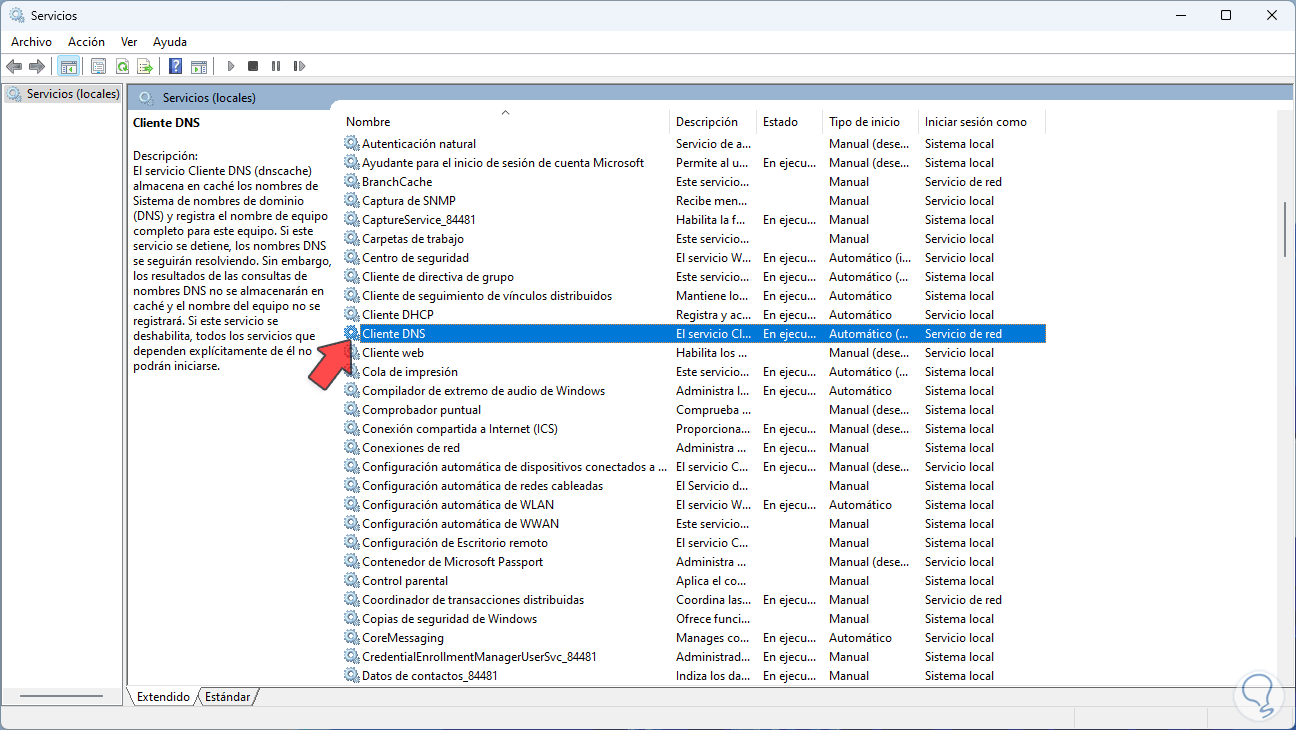
step 12
Validate that the service is up and running:
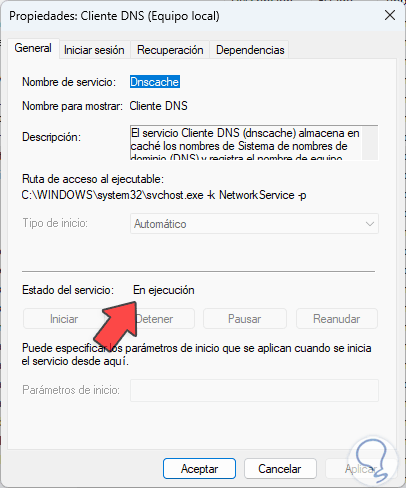
step 13
The DNS Client service (dnscache) caches the Domain Name System or DNS names to later register the complete computer name, this allows much faster access the next time, in case the service is stopped, the DNS names will still be resolved but the results of DNS name queries will not be cached and the hostname will not be registered, if this service is disabled, all associated services will not start.
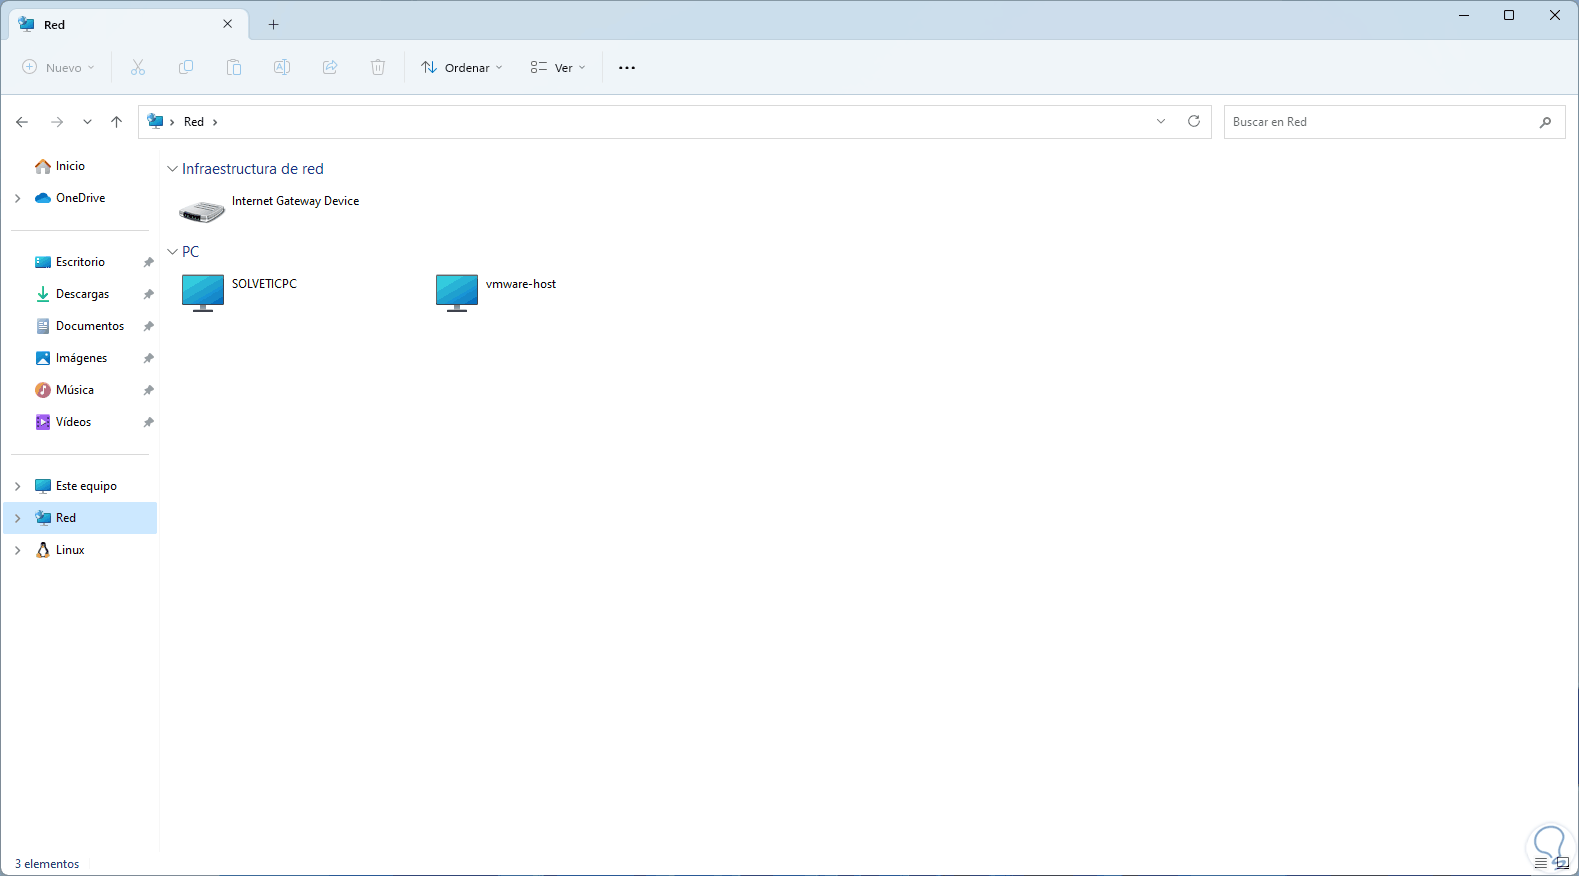
We can verify that network detection works..
2 Activate Windows 11 Network Discovery from Firewall
Step 1
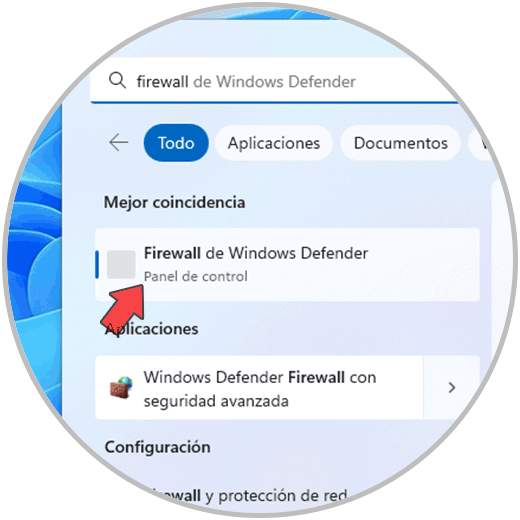
Another reason why network detection can fail is due to permission issues in the Firewall, let's remember that the Firewall manages entry and exit rules with which it allows many processes to work or not work both locally and externally in the system. , we must validate that the network detection is active in the Firewall, in the search engine we enter "firewall" and click on "Windows Defender Firewall":
Step 2
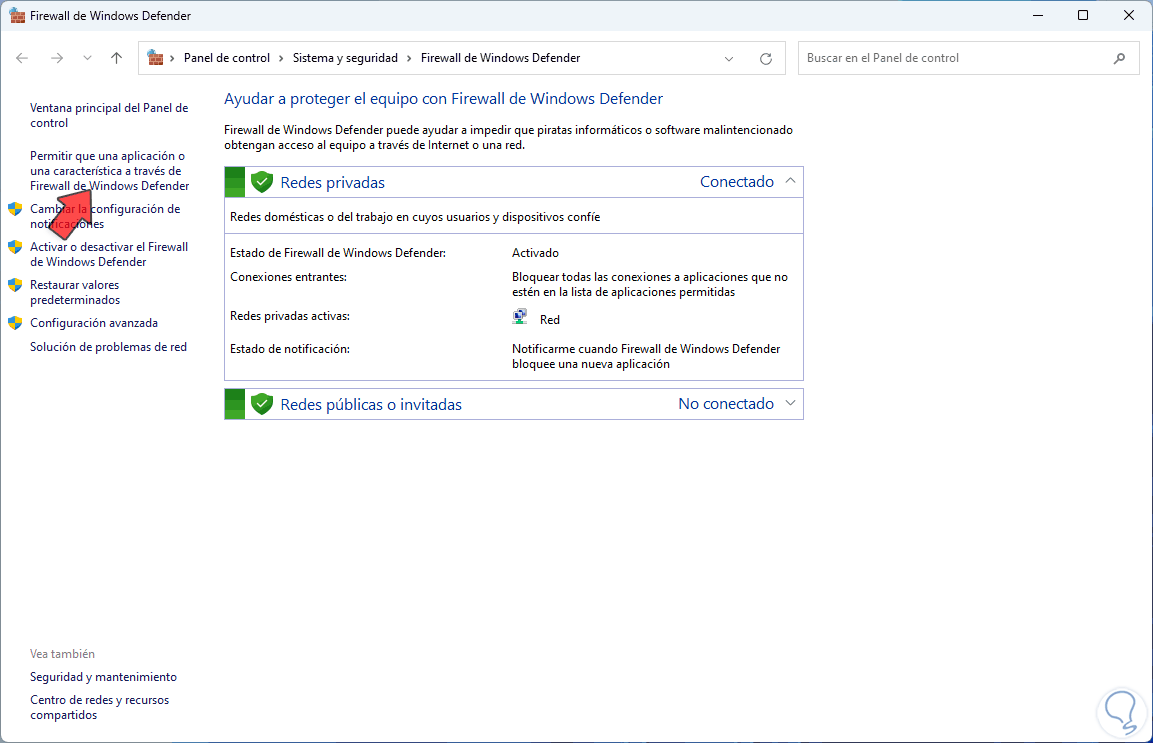
We will see the following. We click on "Allow an application or feature through Windows Defender Firewall"
Step 3
The following will open:

Step 4
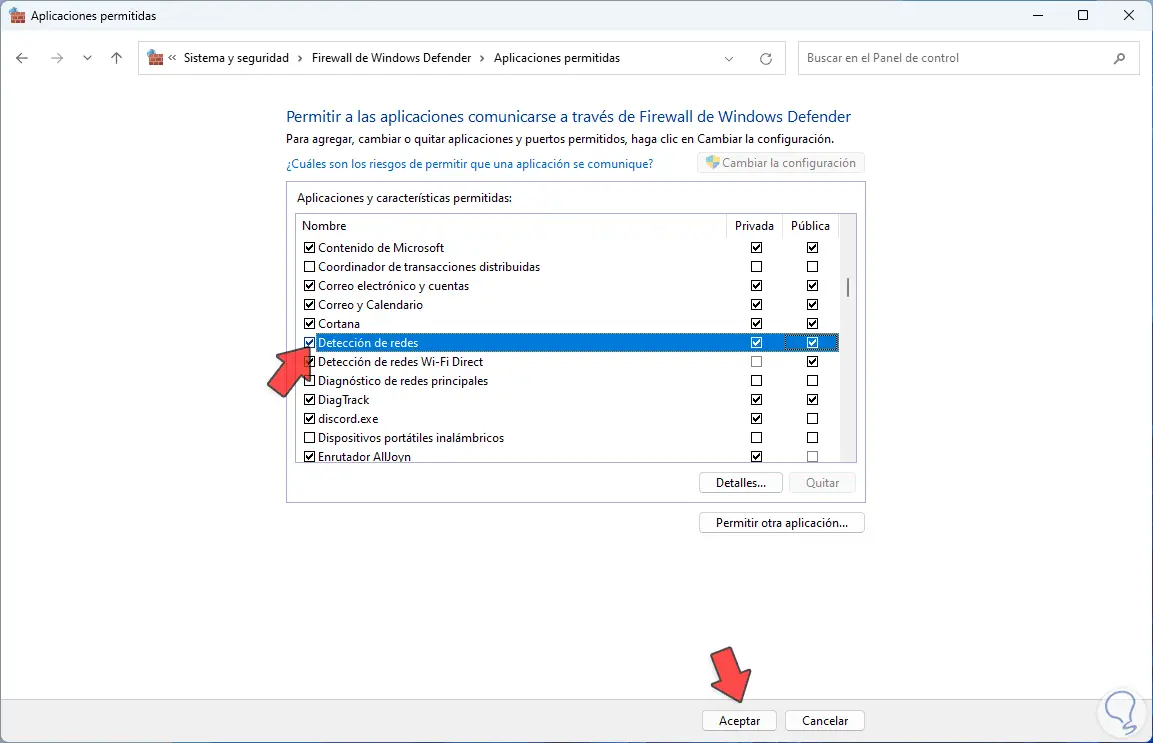
We click on "Change configuration" and validate that the network boxes in "Network detection" are active:
Apply the changes.
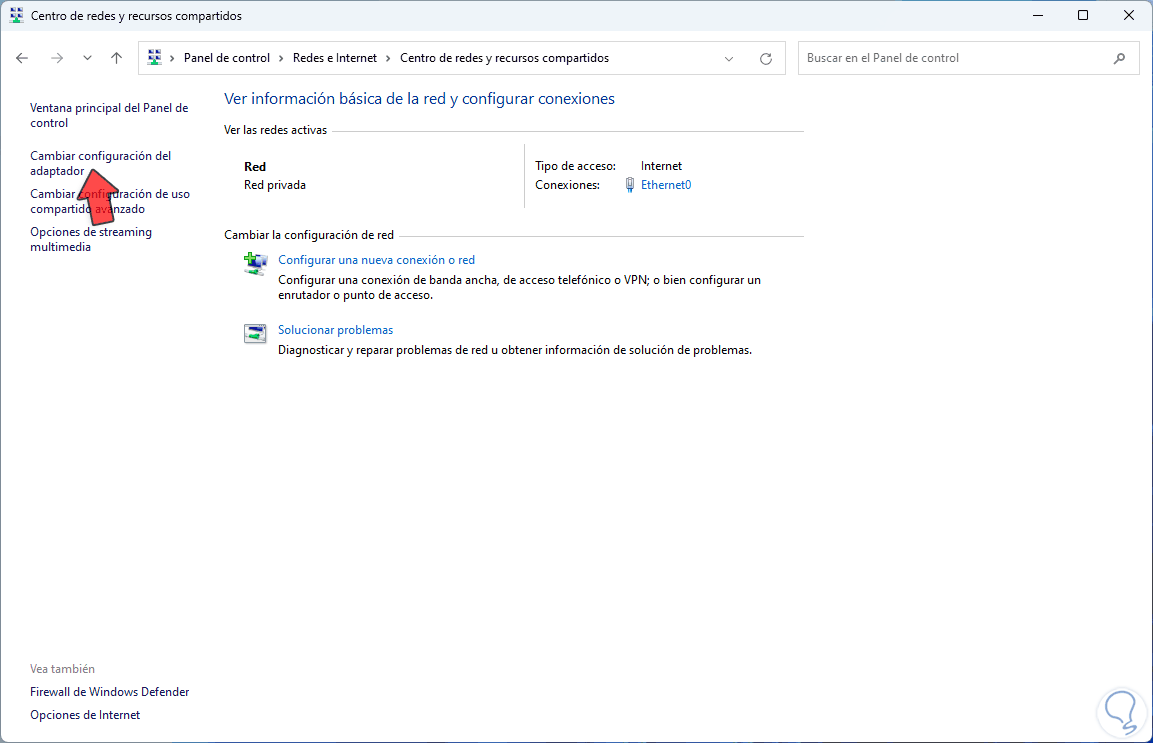
3 Activate Windows 11 Network Discovery from Control Panel
Step 1
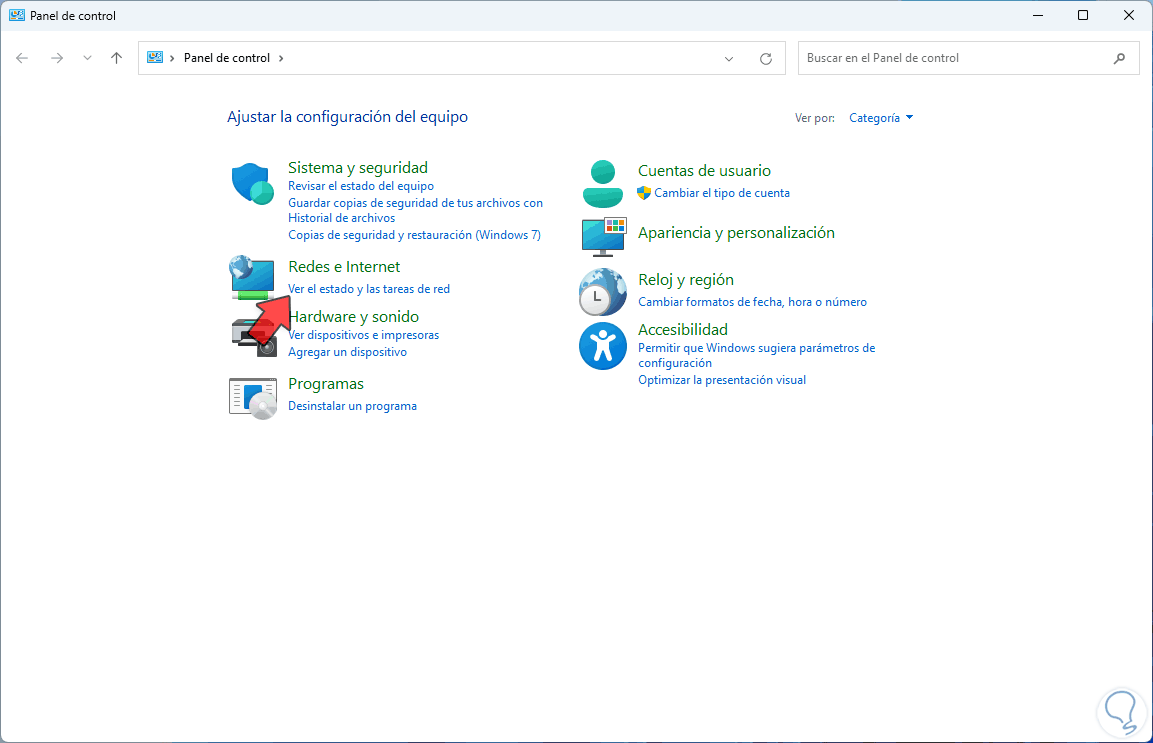
Finally it is possible to use the Control Panel, in this case we open the Control Panel and click on "View network status and tasks":
Step 2
Now we click on "Change advanced sharing settings"
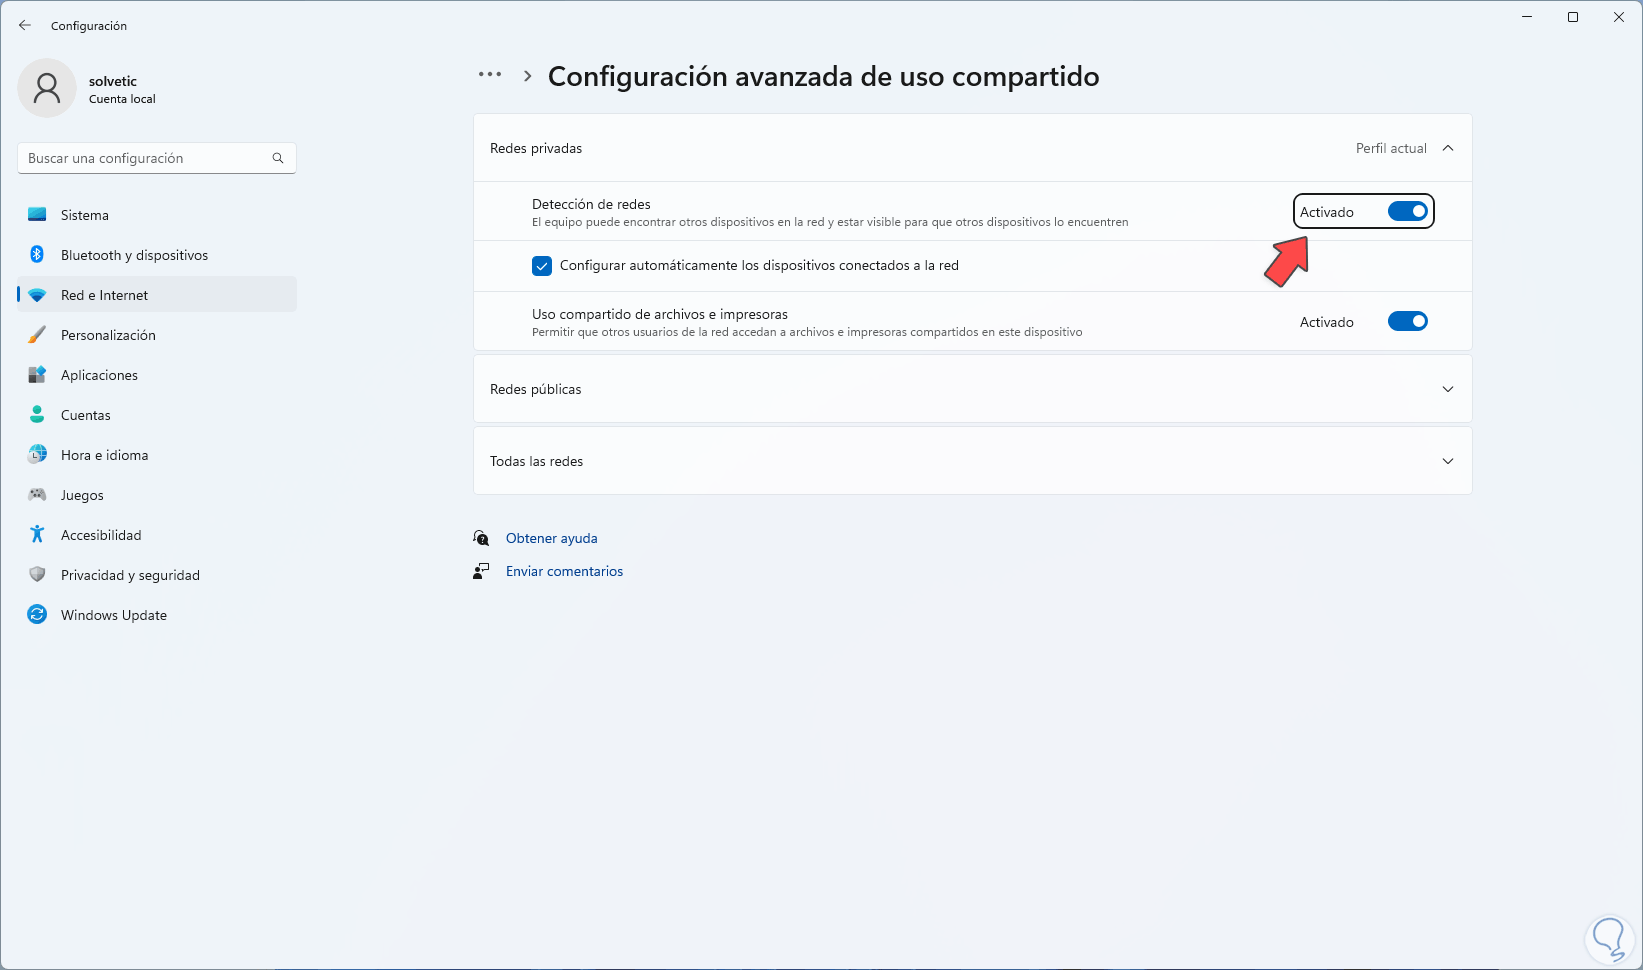
Step 3
In Windows 11 22H2, Settings will open and there we validate that the "Network detection" switch is active:
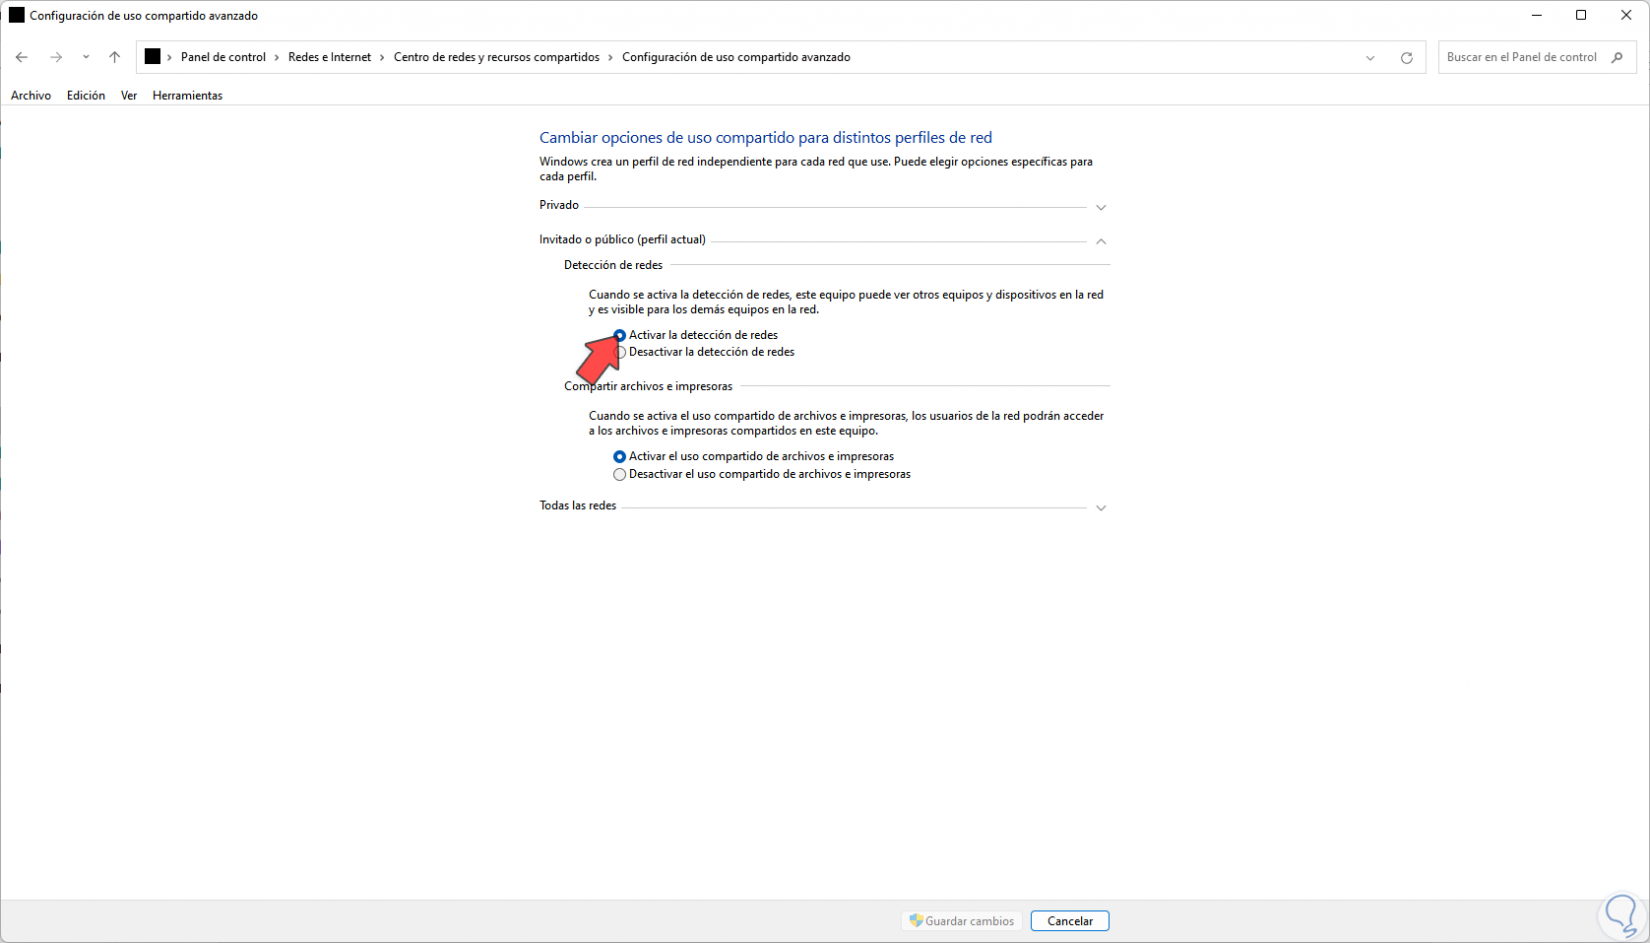
Step 4
In other versions of Windows we activate the "Activate network detection" box:
step 5
In all cases the goal is to validate that network detection works as it is:
In this way we have been able to solve that Network Detection is Deactivated Windows 11 and thus activate it if we need it in different ways.