We find it difficult to think of a normal day in which we do not use technology, since in these times it is one of the topics that is the order of the day. Because of the large amount of data and the high volume of information that we handle on phones, it is important to protect the best possible access to our mobile terminals so that this personal and confidential information is protected from curious eyes.
In the mobile telephony sector, it is true that this is a fact to be taken into account when manufacturing its terminals, incorporating in the same pattern, fingerprint or screen unlock password . In the latest models the technology is more advanced and more personalized protection incorporating other types of unlocking such as fingerprint unlock or facial recognition.
For this reason, to maintain the private nature of the data contained in the terminal it seems a good option to protect them with a fingerprint so that no one can access them without our consent. It may be that at certain times you do not want your phone to be unlocked with a fingerprint and it is for this reason that today in TechnoWikis we will explain how to remove the fingerprint ID on the Huawei Mate 20 Pro Android phone.
The steps to follow will be the following:
To keep up, remember to subscribe to our YouTube channel! SUBSCRIBE
Step 1
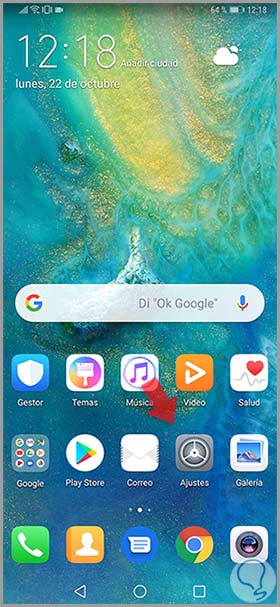
First, tap on the "Settings" of the Huawei Mate 20 Pro, by clicking on the gear icon on the terminal to access.

Step 2
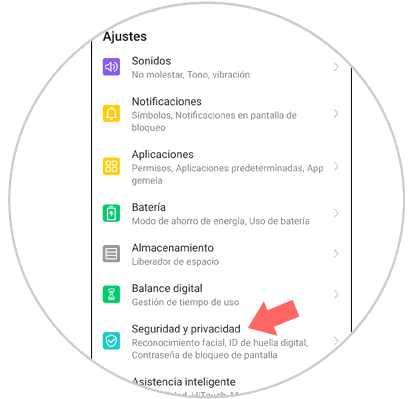
Now, you will appear in the list of options within the Settings of your terminal. You must find the option "Security and Privacy" and click here to continue.

Step 3
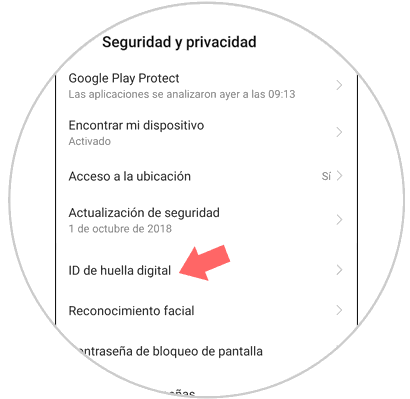
In the new screen, in the "Security and privacy" options you will see "Fingerprint ID". Select this option to continue.

Note
You must enter the pattern, pin or password associated with this fingerprint on your Huawei Mate 20 Pro
Step 4
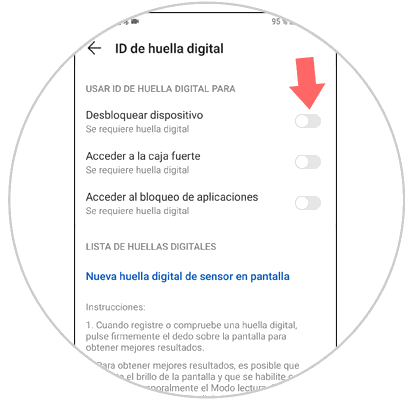
Finally, on the new screen, you will see all the actions you can perform on your Huawei Mate 20 Pro associated with the fingerprint. In the "Unlock the screen" option, deactivate the tab to the right of the option by sliding it to the left and you are done.
