macOS releases new versions of its operating systems with a certain frequency and that is why we currently have Ventura with news, improvements, new designs but always in each new edition with the limitation of the equipment models..
Mac computers are generally characterized by their stability, security, and dynamism, but like all hardware and software, they can present failures that put performance at risk and, in many cases, lead to complex errors where the only remedy is to reset the computer. .
This, unlike other well-known operating systems (such as Windows), implies that the computer can only be restored to the original operating system using a series of steps that TechnoWikis will explain in this tutorial. Below you will see the entire process that you must follow to know how to reset MacBook, MacBook Air and MacBook Pro to the factory in detail step by step..
To stay up to date, remember to subscribe to our YouTube channel!
SUBSCRIBE ON YOUTUBE
1 How to factory reset MacBook, MacBook Air and MacBook Pro
As an initial advice, and it is mandatory, a backup copy of our information must be created to be able to copy it back to the system when it is restored, unless we consider that this copy is not necessary and we proceed without backup, to copy the information we can use some external medium or the Time Machine utility which creates an automatic backup of our hosted information such as applications, music, photos, emails and documents.
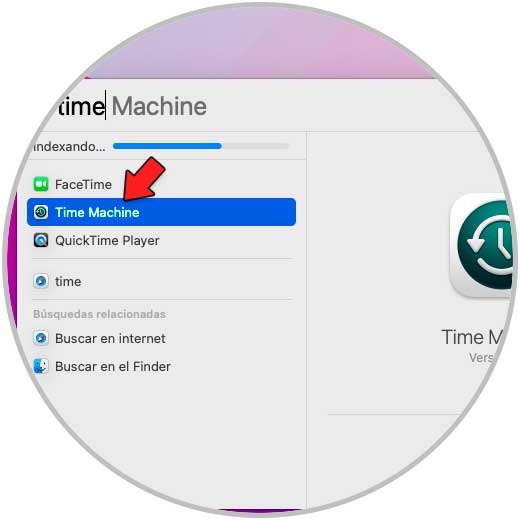
Step 1
We can access Time Machine from Spotlight:
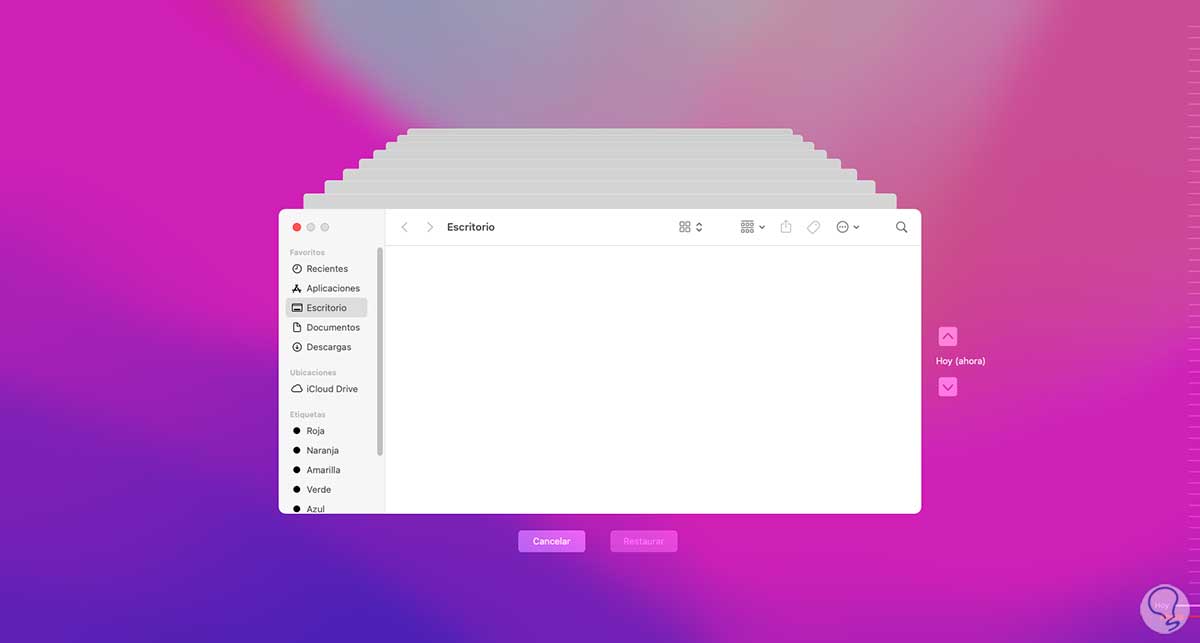
Step 2
Then we select the drive and define the period of time to back up:
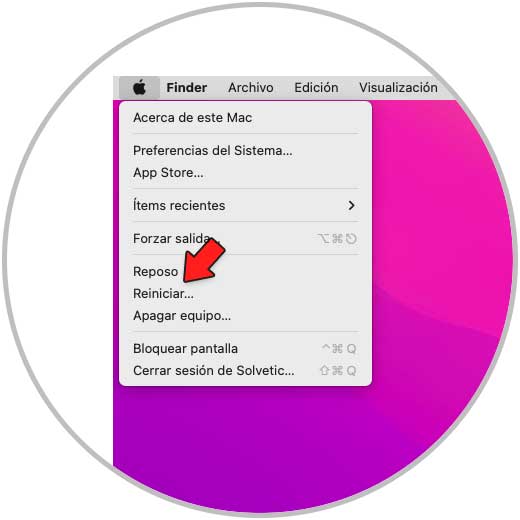
Step 3
Once the data backup is created, click on the Apple menu and select the "Restart" option:
Step 4
The system will be rebooted, during the process we press the Command + R keys to access recovery mode:

step 5
When accessing this mode we will see the following:
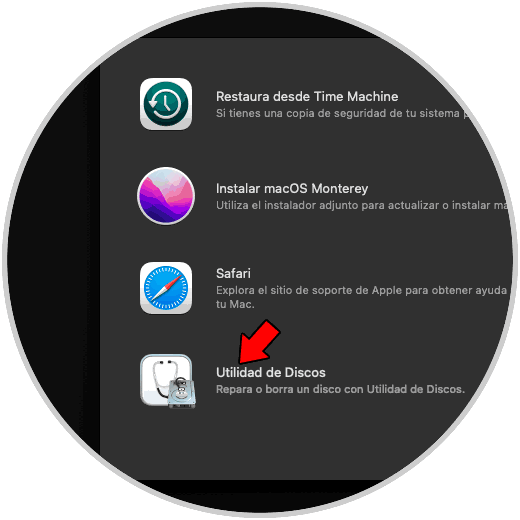
step 6
It is ideal to format the hard drive so that the installation is complete and does not lead to more errors, for this we click on "Disk Utility" to see the following:
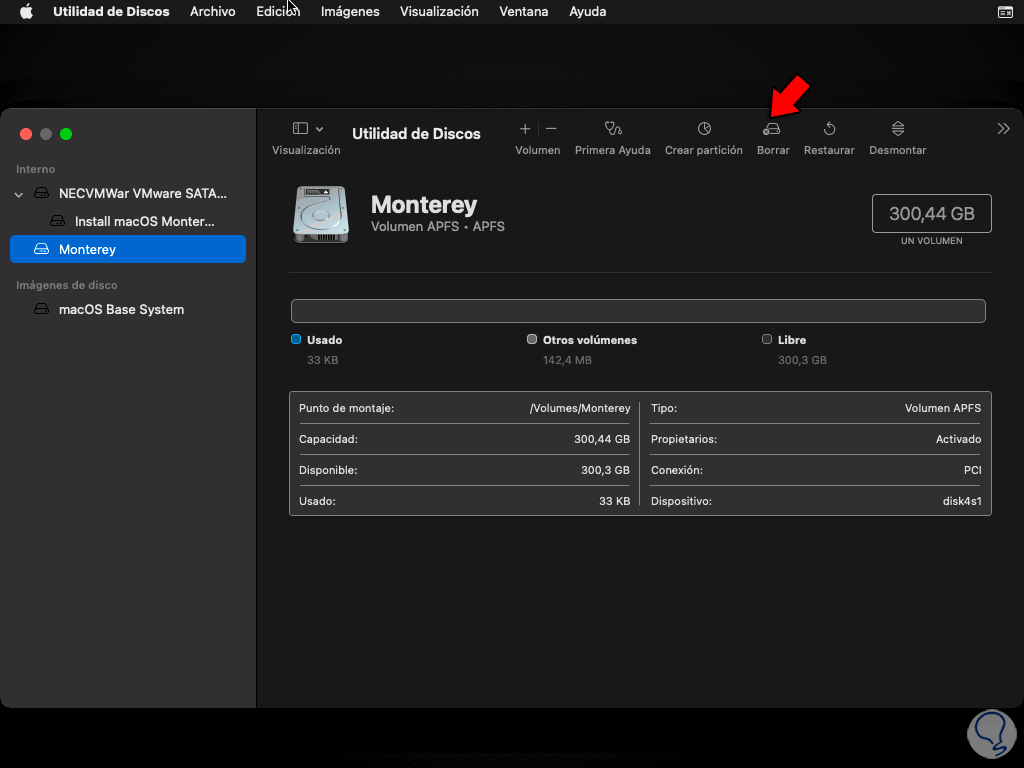
step 7
We select the current disk and click on "Erase":
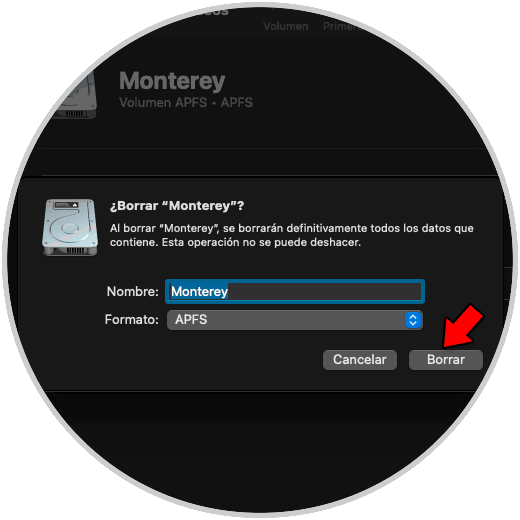
step 8
We assign a name and establish the APFS format, click on "Delete" to start the process:
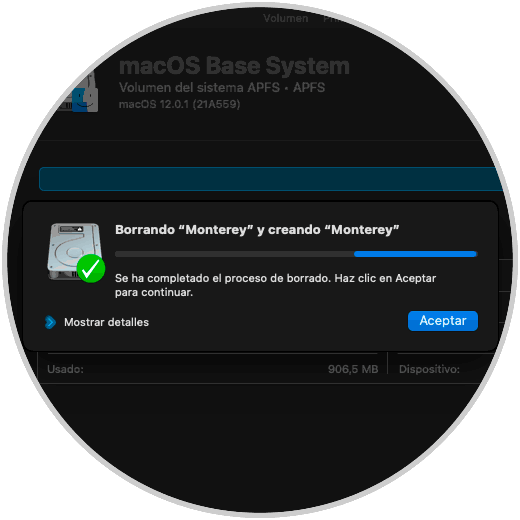
step 9
We wait for the process to finish and we exit Disk Utility:

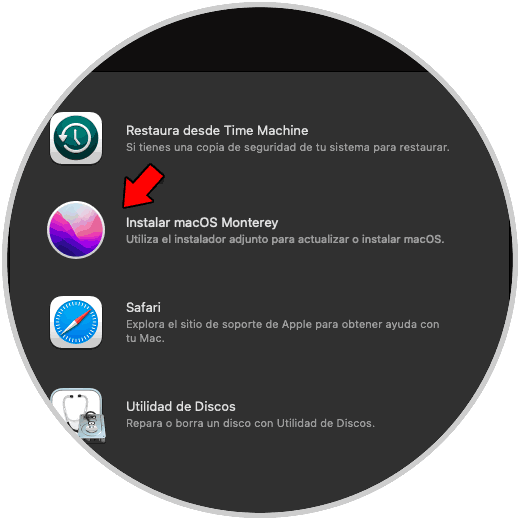
step 10
Now we click on "Install macOS (version)":
step 11
We will see the following:
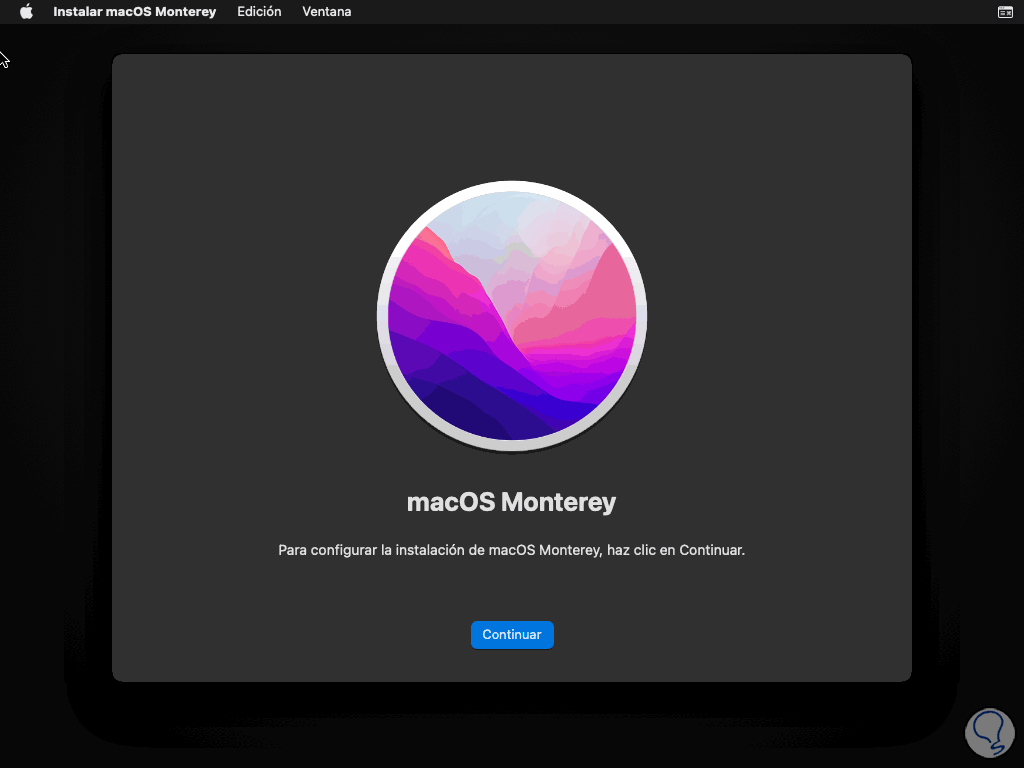
step 12
We click on "Continue" to access the license of use:
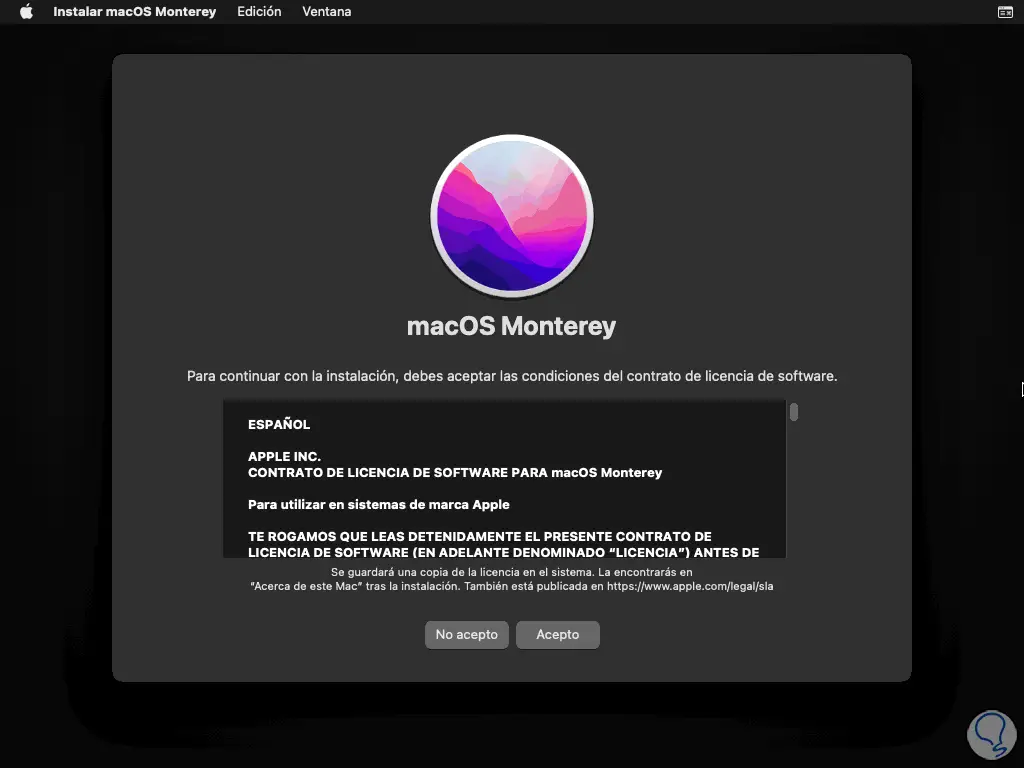
step 13
We accept the license terms and we must confirm this operation:

step 14
Now we select the disk where macOS will be installed:

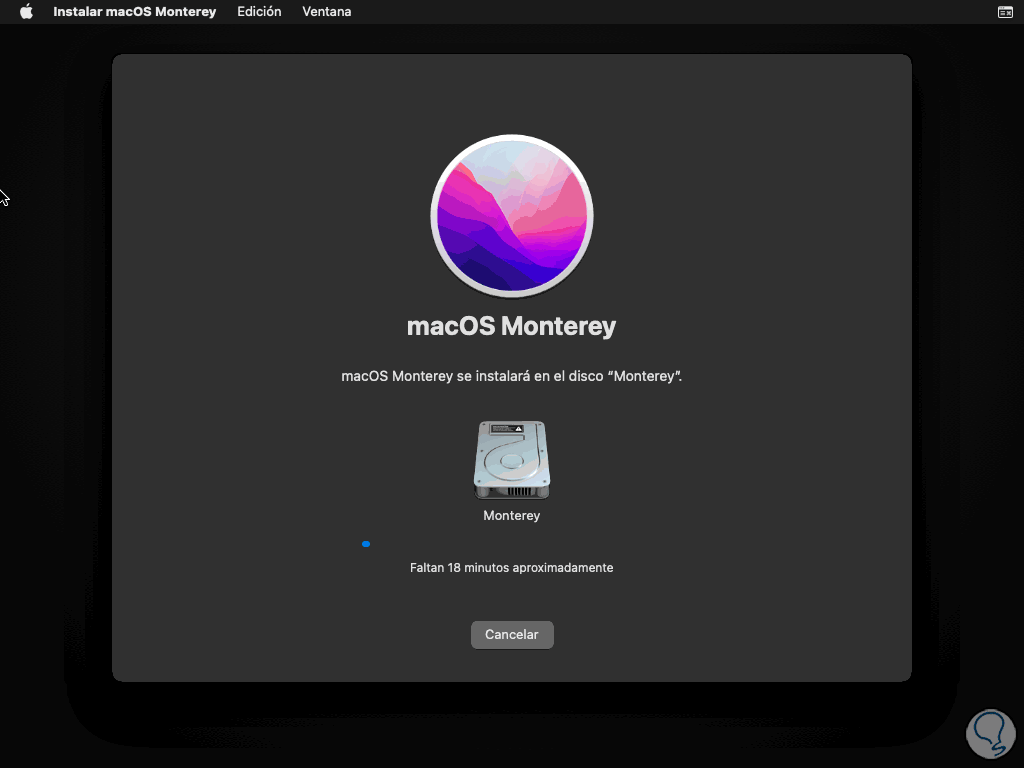
step 15
We click on "Continue" and wait for the files to be copied to the disk:
step 16
After a while the macOS installation process will automatically start:

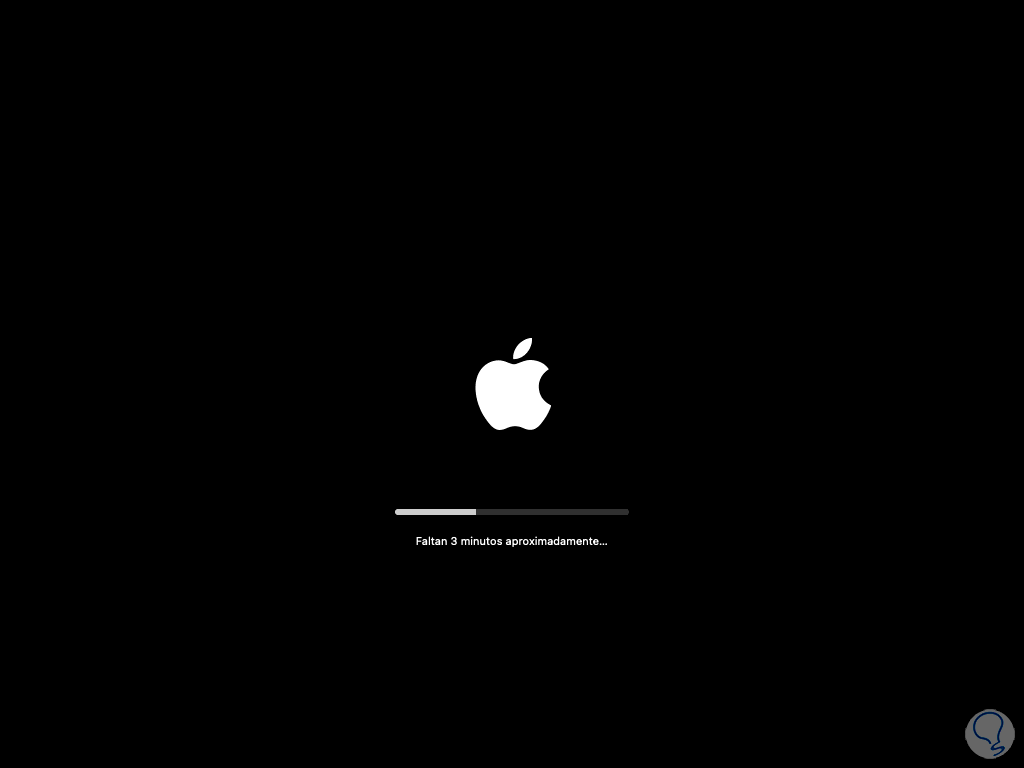
step 17
Now the time count will begin to complete this action:

step 18
We wait for the process to come to an end:
step 19
macOS will restart several times:

step 20
After a while it's time to complete the macOS setup:
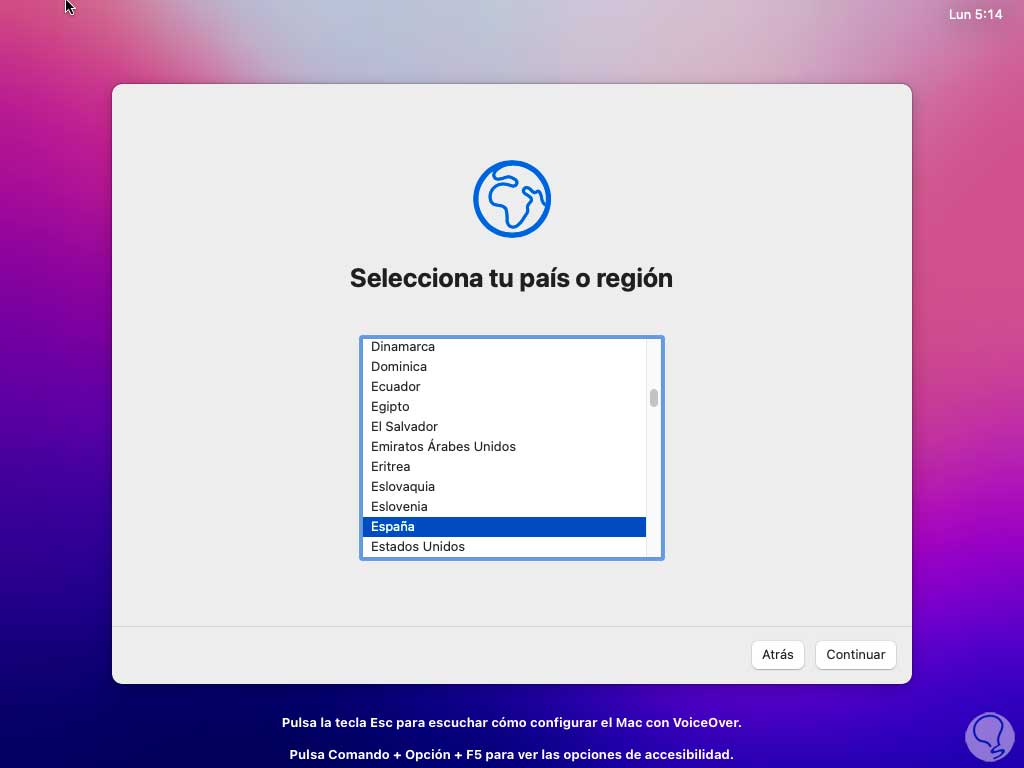
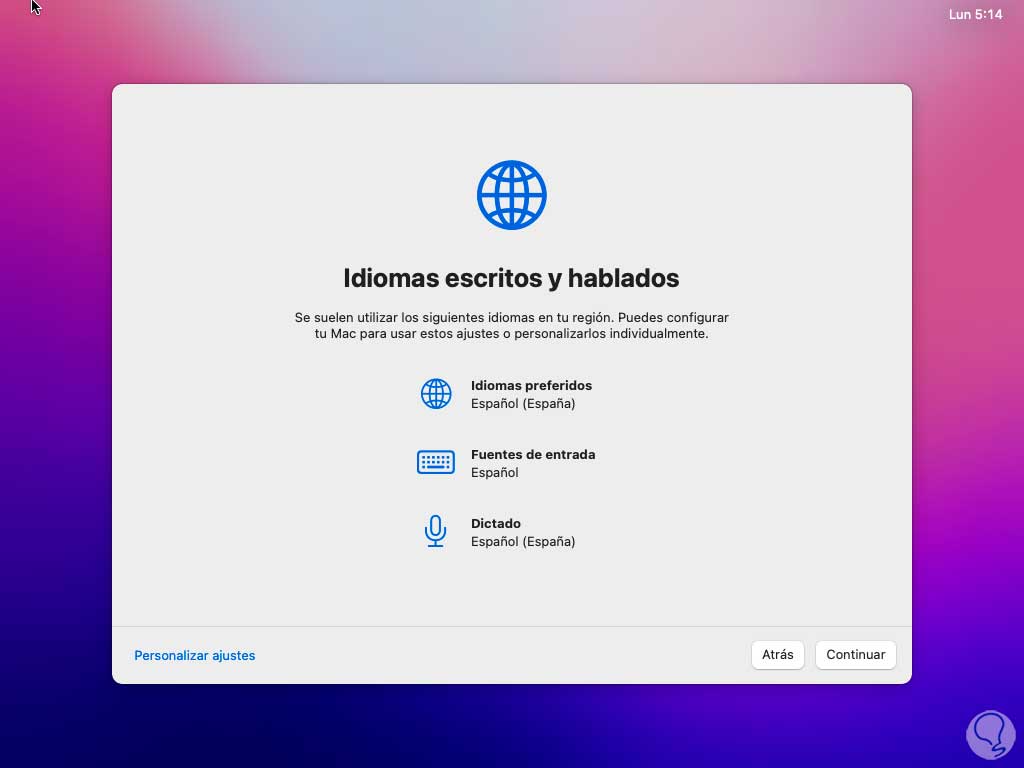
step 21
We select the location and then confirm the language and input sources:
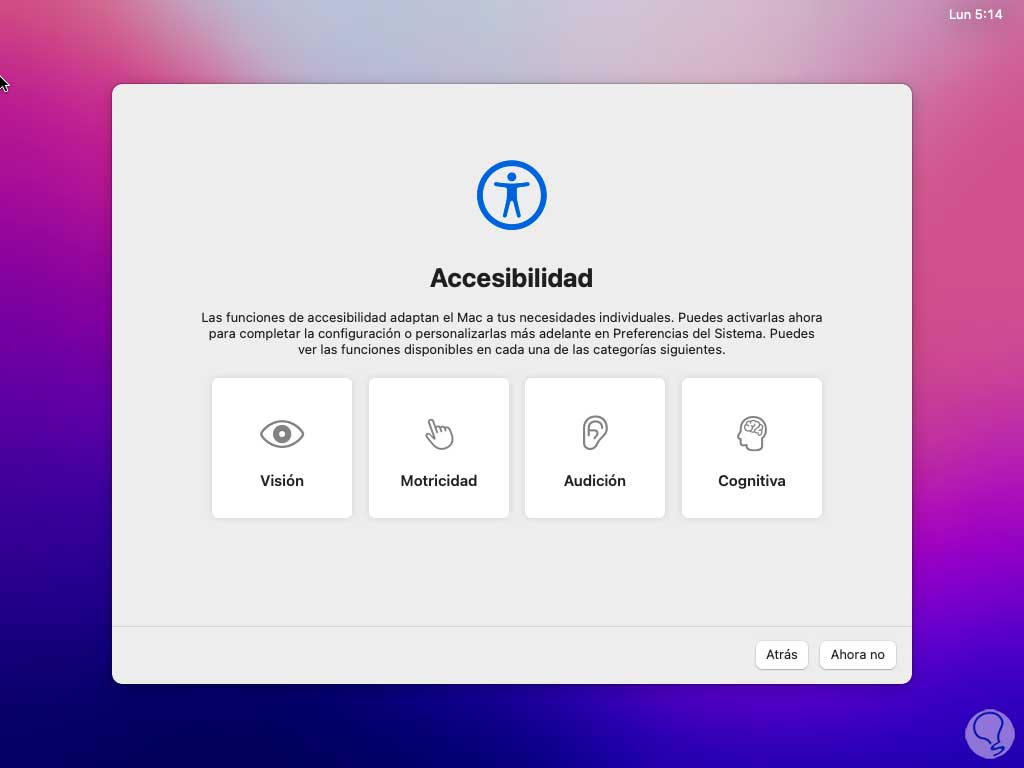
step 22
Now we define if the accessibility function is activated or not:
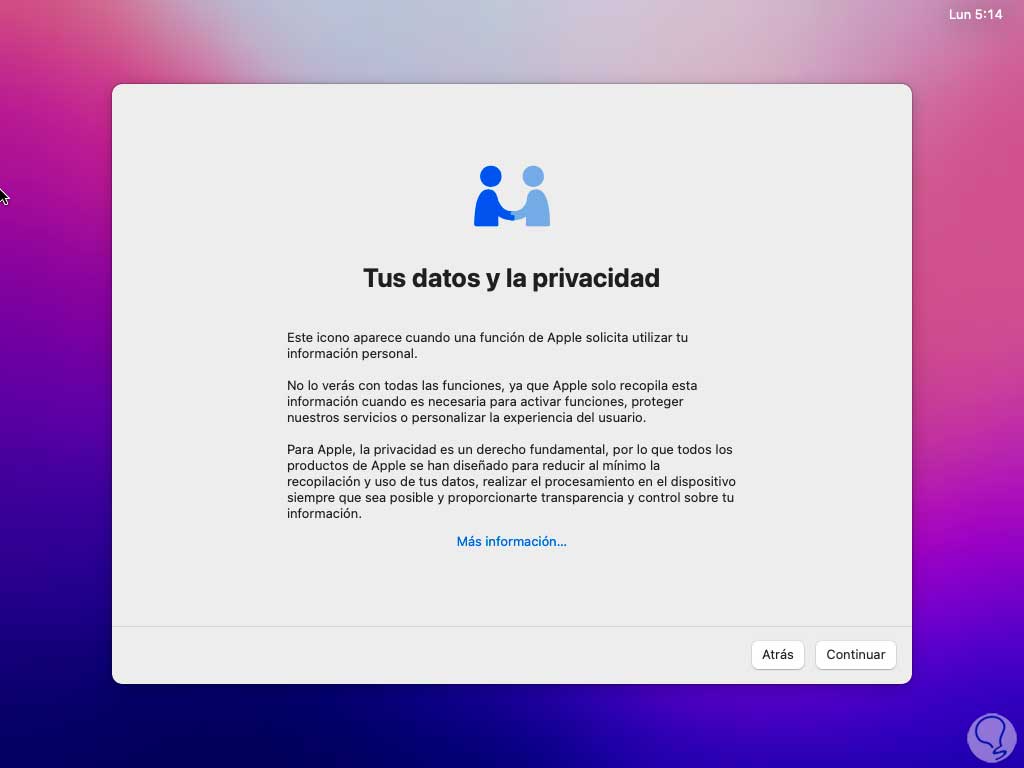
Step 23
We will see the information related to data privacy:
step 24
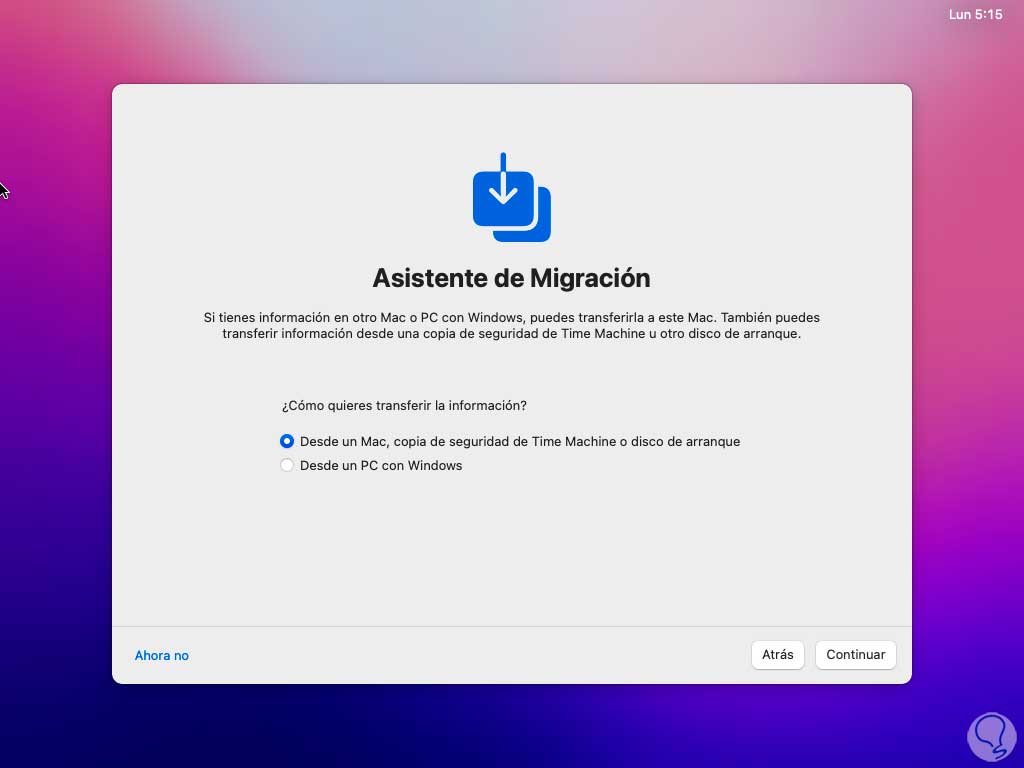
It is possible to migrate the information from another available equipment:
step 25
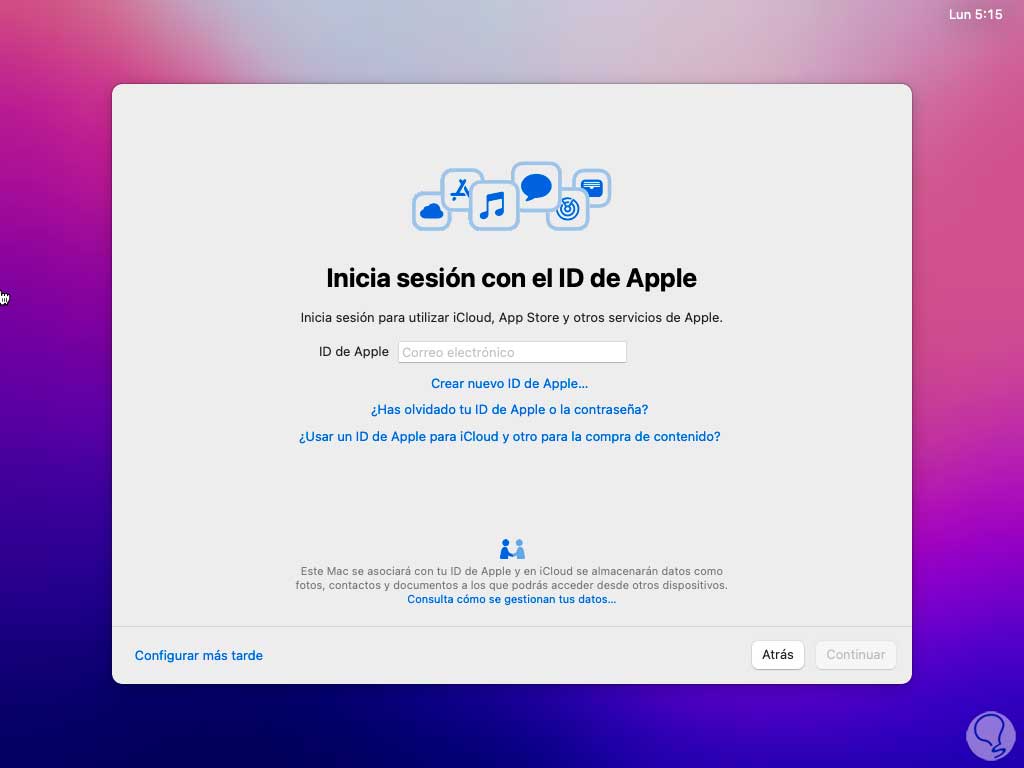
We decide whether or not to start the session with the Apple ID:
step 26
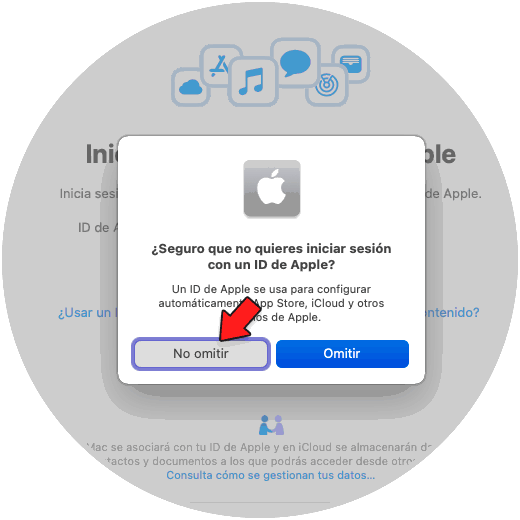
In case of not logging in with the Apple ID we must confirm it:
step 27
We come to the terms and conditions section:

Step 28
We accept the license of use:
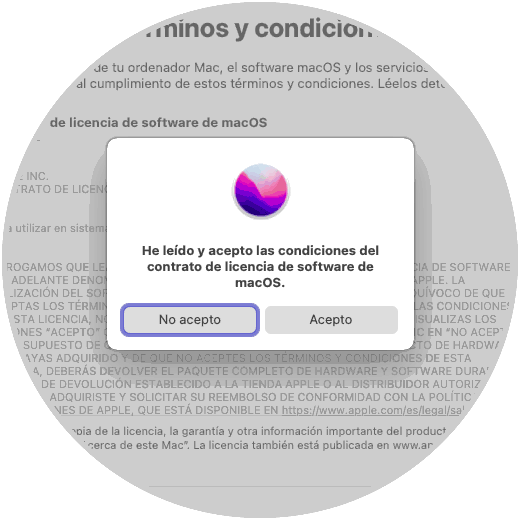
Step 29
We click on I accept and now we enter the administrator user and the assigned password:
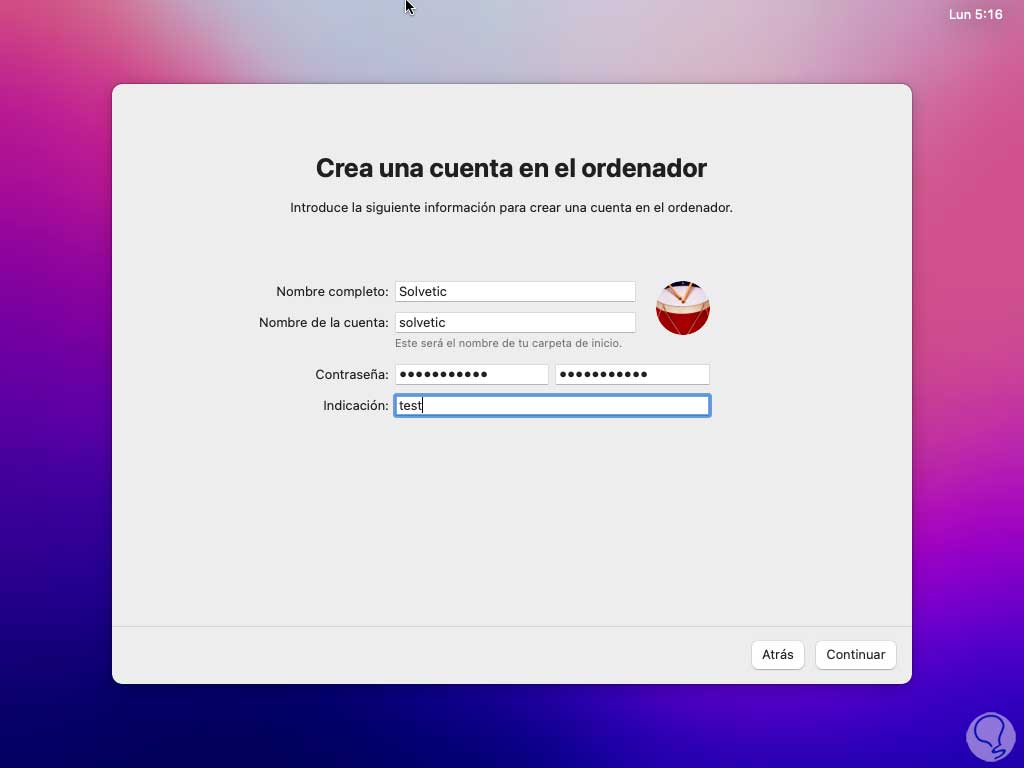
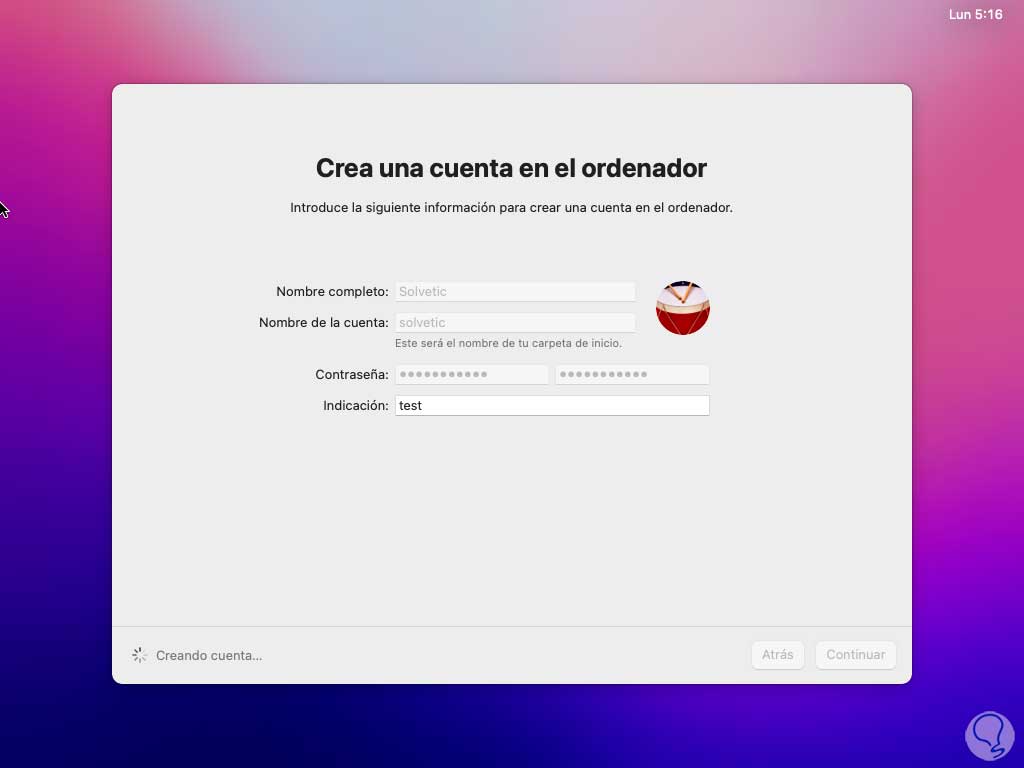
step 30
We wait for the account to be created:
step 31
It is possible to activate the equipment location service:

step 32
We select the time zone that we will use in macOS:
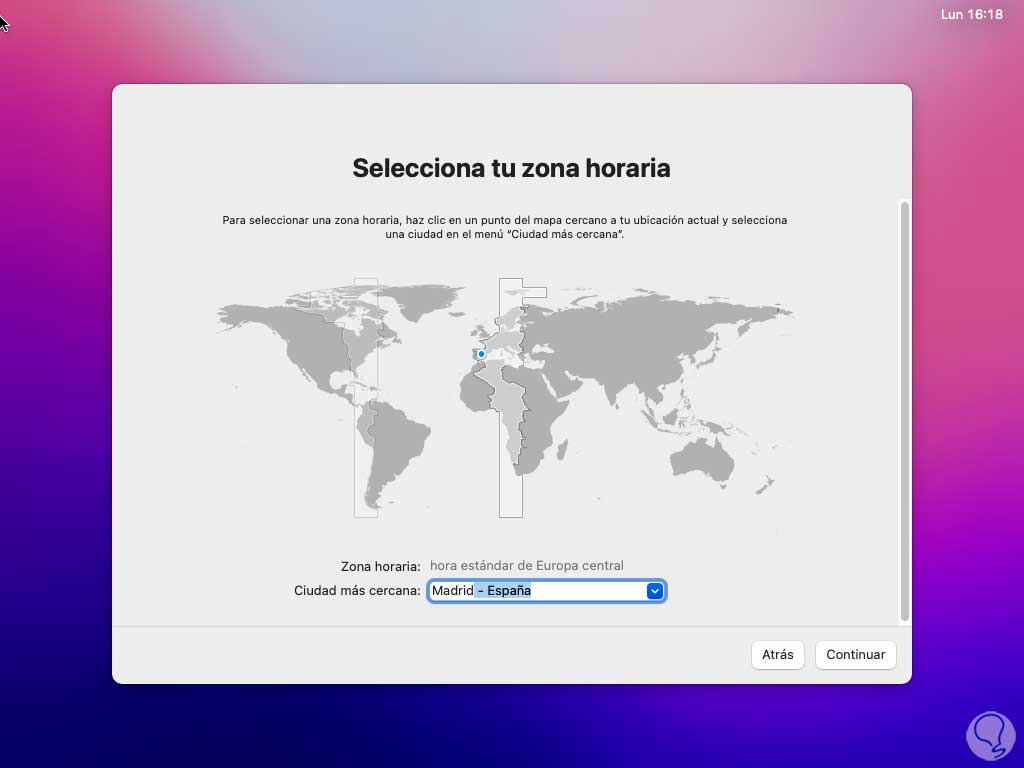
Step 33
It is possible to share analytics functions with Apple:
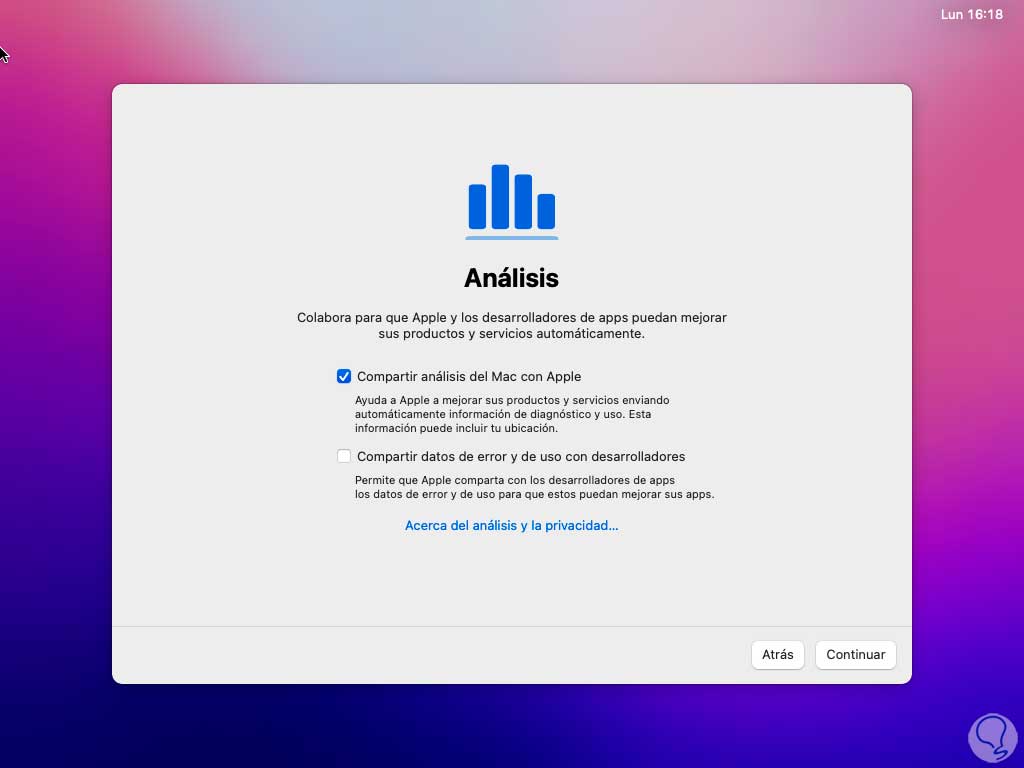
Step 34
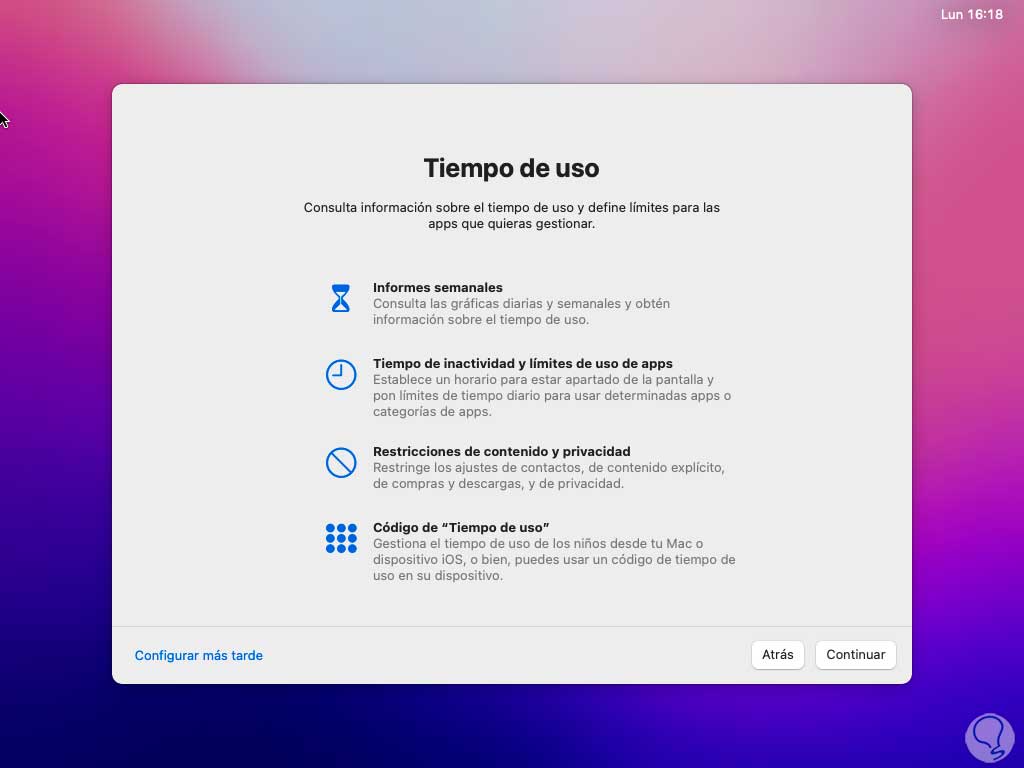
It is possible to configure the Time and use function:
step 35
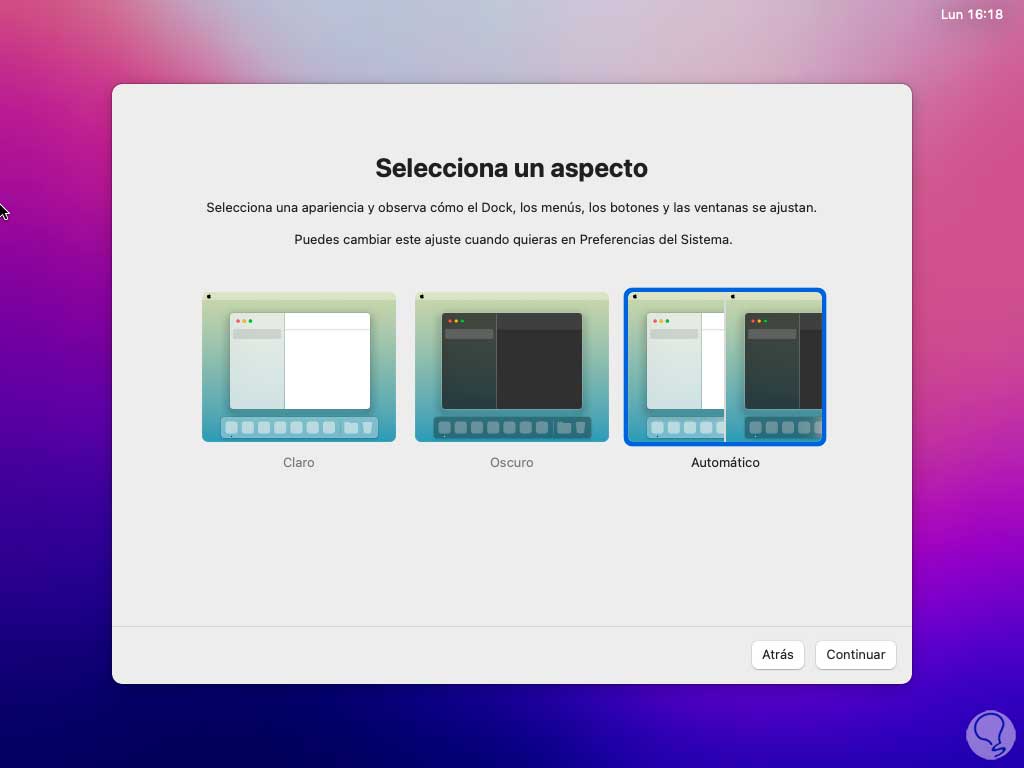
We define the theme that the system will use:
Step 36
With this we will have access to macOS restored from scratch:

As we can see, it is a simple but functional process when the equipment does not respond to basic or advanced management and support solutions, it is possible to back up our data and thus be able to once again enjoy an efficient system without errors.