Photo editing is an almost mandatory complementary task if we want the results to have a truly professional character. Having tools like Lightroom Mobile will be the basis for a complete workflow that makes the quality of our work exponential. When we take photographs, we must always try to give them all the ideal settings that can come close to what we need, but we must be aware that we cannot control everything and many times the composition we want to make is too complex or simply does not turn out as we would like. That is why doing a complete post-production later will be the solution so that that photograph is as perfect as possible..
In portrait photographs where some skin imperfection may not give the totally perfect results that we are looking for or when a street photograph contains elements that detract from our composition, the ideal is to use correction tools that allow us to make everything that we do not want disappear. be present in our image. That is why we are lucky that Lightroom Mobile offers us options within it to be able to make this type of adjustment to our photos even from mobile devices.
Lightroom Mobile Correction Tools
The tools that we find for the correction of imperfections in Lightroom Mobile are:
- Correct. It will use a texture from a source zone and will make it match both in color and tonality with that of the destination area that we determine.
- Clone. We will be able to choose an origin zone and a destination where a duplication of pixels will be carried out.
- Put off. Eliminate elements of the image by making an automatic fill in the area that we select.

These different correction tools are based on different methods of action on which to make changes to our photographs. If you have a photograph where imagine that you have an object that has slipped into your composition, how can you use the remove tool and it will automatically make it disappear, generating an area of new pixels that it has taken from nearby areas of the image. If you prefer to be the one who delimits the replacement area, you can work with the clone tool or the remove tool to delete those areas of your photograph. In addition, we will take into account that the clone tool will not only serve us to correct in the form of deletion, but we will also be able to duplicate areas and parts of our image in a visible way..
Next, we are going to show you how we use these 3 options that Lightroom Mobile gives us and that they are going to be really useful to be able to make corrections and clones in our photos from mobile devices.
To stay up to date, remember to subscribe to our YouTube channel!
SUBSCRIBE ON YOUTUBE
How to Fix or Clone Photos in Lightroom Mobile
We already know that editing our photographs will allow us to change, rectify and even improve different aspects of them. Photographic post-production is almost a necessity when we talk about the workflow in photography and for this reason it will practically always be present when we want professional results in our work. When we take photographs many times elements, objects or people appear that I want and that can ruin our position if they are not eliminated. Hence, it is useful to know tools that provide us with various correction options that enhance the level of our work.
Lightroom Mobile is one of those tools or applications that will allow us, with its options, to make all kinds of corrections to our photos so that we can delete everything that we don't consider necessary in our photography. This is really useful since we are talking about how from our own mobile device we will be able to make corrections as complete as removing skin blemishes, removing people or objects, and even working with cloning image areas. All this taking into account that we are talking about an application designed for use on mobile devices..
You will no longer have to resort to your computer when you notice that there are areas in your image that you do not want or that can be improved, this is where Lightroom Mobile will be able to help you at any time in a complete and professional manner. Next, we are going to show you the different options and tools that Lightroom Mobile offers us and that will help us to correct, delete or remove parts of our image automatically or through the manual selection that we will make.
Step 1
The first thing we will do is find the photograph on which we are going to work in Lightroom Mobile. To do this we can search for it in an album or folder where we have already imported it or add it new from the import icon or the camera that appears on the screen.
Step 2
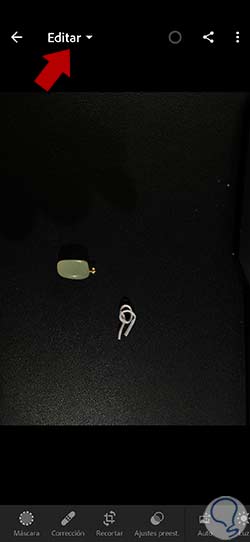
Once we open the image, we make sure that we are in Edit mode by looking at the upper drop-down of the image.
Step 3
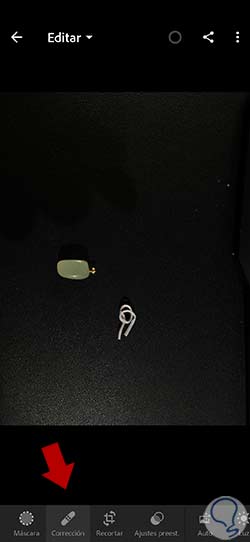
To carry out correction tasks we have a series of interesting tools in Lightroom Mobile that allow us to make effective corrections from our mobile device. To see the available options, click on the "Correction" option.
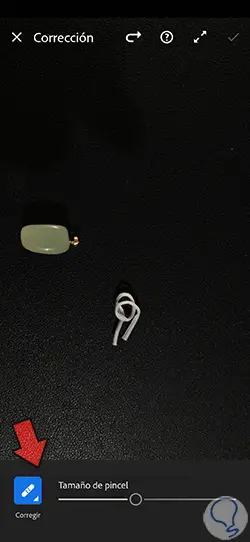
Step 4
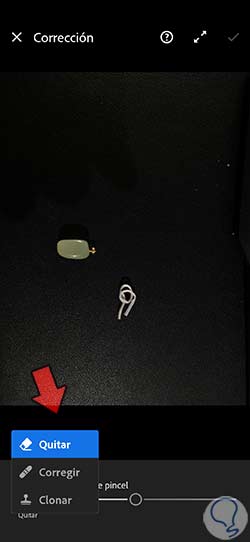
Here an options panel will open that we can display by clicking on the first one that appears at the bottom. Next to it we will see a brush size slider to start the correction. Among the options that we can use will be:
step 5
Let's start by making a correction to the image. For this we could correct using any of the three tools, but we will start using the fastest for this task, "Correct".
Click on the "Correct" option in the drop-down menu and adjust the size of the brush to start painting.
step 6
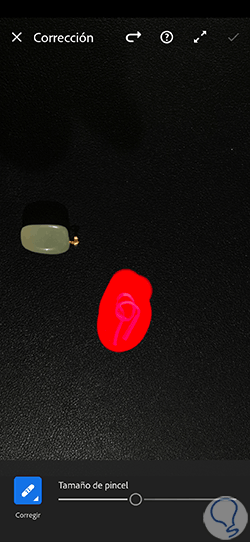
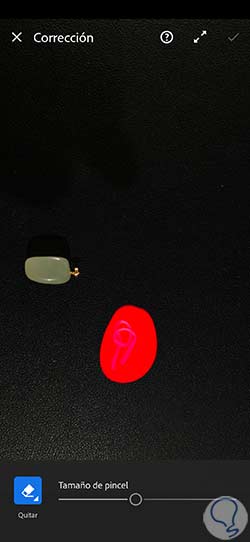
Now we are going to paint over the area that we want to correct. They can be corrections of imperfections in the skin, dust, some object that we do not want to show... In this case we are going to use the tool to correct by eliminating an element that we do not want in our photograph.
To do this we are going to paint over it and we will see the delimited area in red. We hold down while we paint the area.
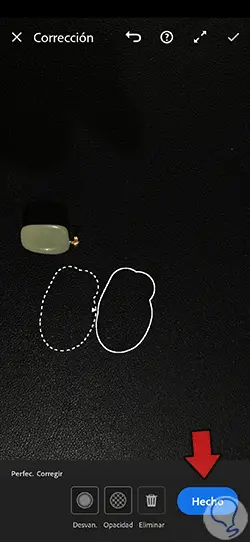
step 7
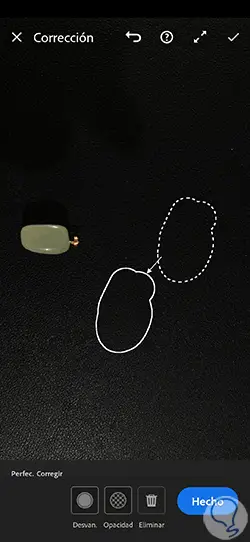
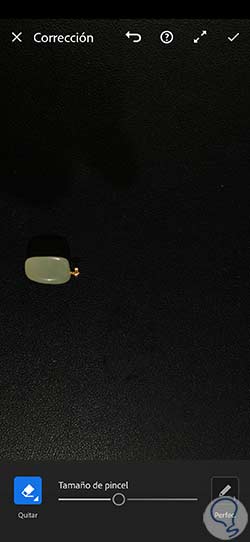
Once we release the selection we will see two delimited areas. The first one with a continuous line will be what we want to eliminate and the one with a dashed line will be the area of origin from which we will take the correction pixels.
It is best that you select a similar area so that the correction is as natural as possible. You can move the selection to where you want both the source and the end.
step 8
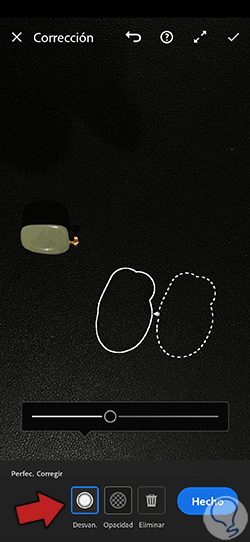
At the bottom you will find different configuration options to make the correction. You can play with "Fade" to make the limits of the selection less marked, as well as its "Opacity". If you are not convinced, you can “Delete” the selection and make another one again.
step 9
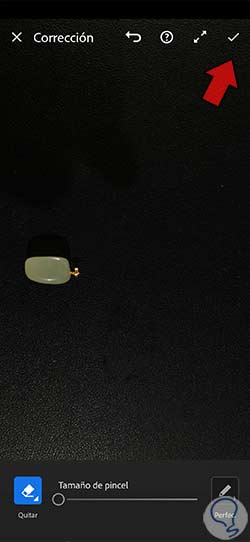
Once we are convinced of our correction, we will click on "Done" to apply the changes we made to the image.
step 10
If we need it, we can continue correcting our photograph before saving it completely. In this case we are going to continue using the "Clone" tool. We can use it to carry out a process similar to the previous one where we clone an area to replace another or use it to duplicate a visible part.
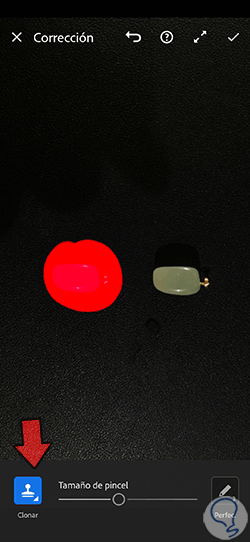
In this case we will want to duplicate a part of the image by cloning. To do this we choose "Clone" in the drop-down part and adjust the size of the brush.
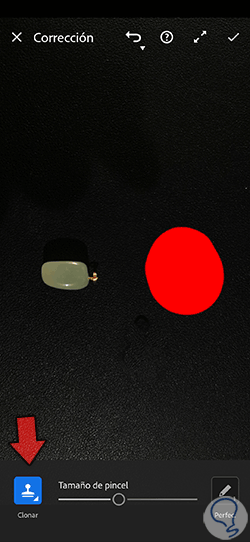
step 11
Now we will hold down the area where we want the cloning to be displayed and we will see it represented by a red area.

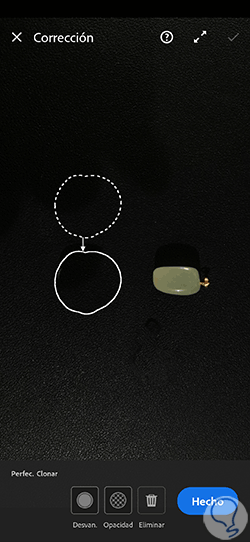
step 12
Once we release the selection we will see that two circles are created. The continuous line area will be the area where we are going to clone and the broken line is the area from where we will take the clone reference.

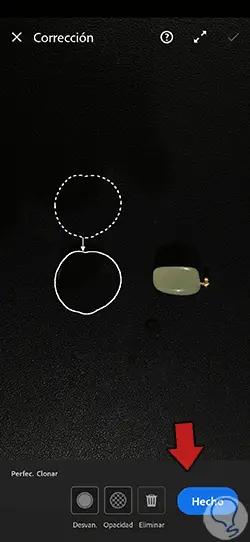
step 13
We will move the reference area until we find the area that we want to clone and that it appears in the new area.

step 14
At the bottom you have options with which to configure that clone as "Fade" and blur the limits or configure the "Opacity".
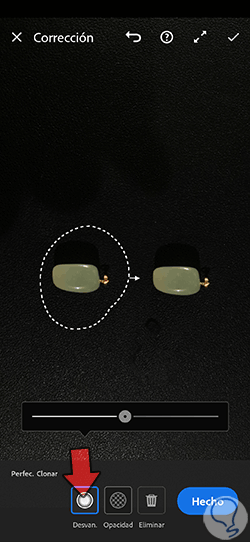
step 15
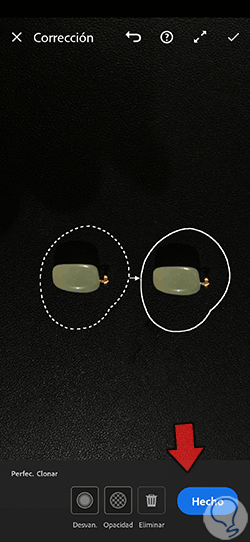
Once you have it ready you can click on "Done" and that the changes are applied correctly.
step 16
If we wanted to use this “Clone” method to delete a part instead of duplicating it, we would have to do the first initial step in reverse. We would paint the area that we want to eliminate red.
step 17
After releasing we could move the clone source area circle to choose from where to select the pixels that will replace the current ones.
step 18
Once we click on "Done" we will see that we have used cloning to remove an imperfection in our image.
step 19
We already have our image with two types of correction applied, by the Correct method and by the Clone method. But we have another one that we can use to directly eliminate unwanted areas in our photographs, “Remove”. This will eliminate a part of the image that we indicate.
To do this, we are going to select this option from the lower drop-down panel and adjust the brush size.
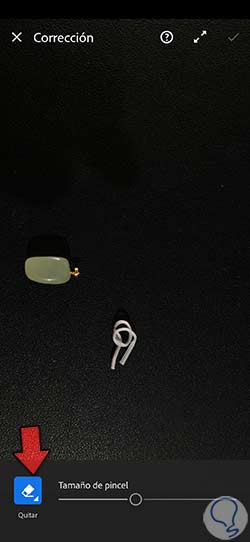
step 20
Next, we keep pressing the area that we want to eliminate so that the delimited area is painted red. If it is a very small area you can only tap the area with your finger instead of holding it down.
step 21
When we release we will see that a substitution is automatically made in the area and what we have selected is eliminated. This is very useful for removing small blemishes quickly and effectively.
step 22
Once you finish with all the necessary correction changes, we are going to apply all the changes in our photograph by means of the upper check that appears.
Step 23
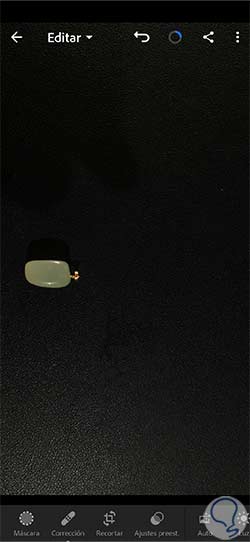
We will already have our corrected image using the different Correction tools that allow us to use Lightroom Mobile and be able to improve our photos completely.
With these tools present in Lightroom Mobile we will be able to improve all those possible imperfections that are in our photographs and that are ruining the composition that we have created.