The values that we apply in the different adjustments that we are going to see today will be totally subjective since everything will depend on the final result that we want to achieve. It will not be the same to look for a very defined subject with a high value of detail than a subject with softened details where we do not want such an emphasized style. Depending on the type of portrait we want to make, we will have to adjust our edition to achieve it. What you do have to keep in mind is that you do not need to edit each of the options that you will see within Lightroom Mobile and that is that normally we do not need to make major modifications if the photograph has been taken carefully..
You can use all the modifications that we are going to see to adapt them to your photographs and even create preset adjustments or presets that help you edit your upcoming photographs in a much faster way without having to start from scratch. Take an initial look at your photography and you will surely notice things that can be improved and where light and color are usually the two most transcendental elements in these editions. The digital edition allows you to make constant changes, so do not worry if an edition does not convince you, since you can modify it and create a new one that can convince you more.

There are various elements that we have to take into account both when taking the photograph and later when editing it. Evolution of what we want we can work on all these elements or on some only, but it is interesting to mention them so that you take them into account and try to edit them to try to improve the portrait with Lightroom Mobile..
Elements to improve a portrait photograph
The main elements to take into account when editing a portrait photograph are:
- Create a nice composition
- Eliminate unwanted parts or areas
We can customize each of these options according to our photography, thereby achieving different results that we did not even expect. Next, we are going to see different sections that we can configure with Lightroom Mobile and that will improve our portrait by giving it a more professional character. If you think that you have a portrait photograph that needs a touch of attention, don't worry, since you will see that you have a wide variety of options with which to increase its potential.
To stay up to date, remember to subscribe to our YouTube channel!
SUBSCRIBE ON YOUTUBE
Enhance portrait with Lightroom Mobile
Before starting to edit, you must take into account that you can do it on our photography, it will depend on the type of image you have, your tastes and the goal you want to achieve. The interesting thing is that you choose your own settings and create independent styles based on the example that we are going to use today. We are going to see different parts that we can modify in our portrait and that can completely change the result we had. As always, we advise you to try as many times as you need and work with each of the parameters provided by the tool to be able to modify our portrait.
There are various elements that we can modify within our photography and you do not have to use all of them in yours, but we do want to show them to you so that you take it into account when you have to do portrait or any other type of editing. Even if you think that your photography does not need any type of editing, we encourage you to try playing with the different parameters that Lightroom Mobile offers us and thus achieve more professional and attractive results..
Although we are talking about Lightroom Mobile being an application oriented for mobile devices, the truth is that it contains the necessary tools to make complete modifications to our photography, achieving much more remarkable results. You will no longer have an excuse for your images to look more professional since even from your mobile you will be able to edit them completely.

Let's see how we can modify elements of our photography such as light and color, but also the possibility of improving different ways such as skin retouching or improving the look or smile.
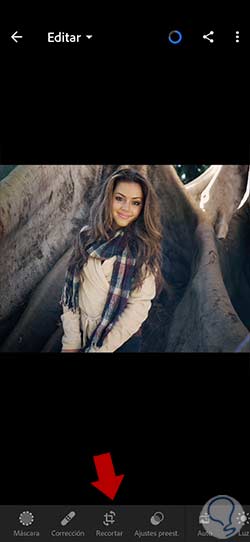
Step 1
We open our photography to edit within Lightroom Mobile. We are going to start by making a framing adjustment giving more prominence to our subject. To do this, we are going to click on the “Crop” option.
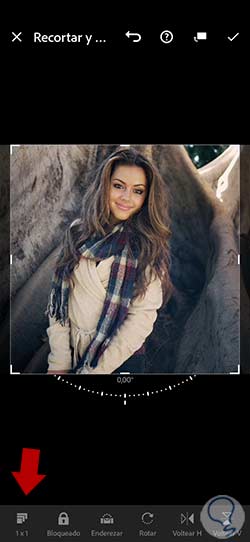
Step 2
Next, we are going to modify the current proportion by clicking on "Custom" or the one that currently exists. We will be able to choose a different proportion thus changing our framing, something that we may need if we seek to upload it to Social Networks with specific measures.
Step 3
We will move our image within the new frame and adjust it with respect to some composition rule. Once we finish we will apply the changes with the upper check that appears.

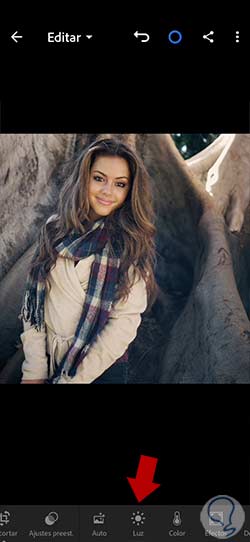
Step 4
We will have our image with the modified frame. The next thing we are going to modify in our image will be the "Light" so for this we click on this option in the lower panel.
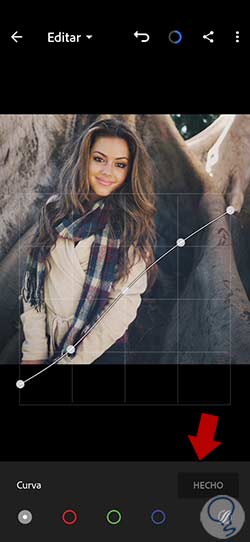
step 5
Within the light configuration we will begin by clicking on "Curve" to make a general adjustment of the lighting.

step 6
We are going to create points by clicking on the curve and moving each one of them to give a certain light configuration. You can use a configuration similar to the one we used in the example.
Apply the changes with "Done" once you have finished configuring it.
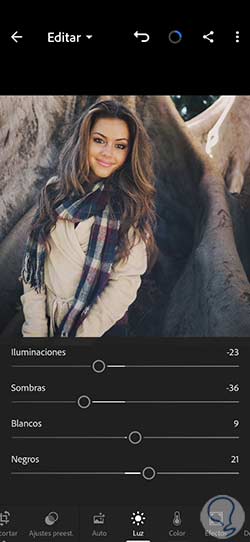
step 7
We will continue giving values to the different elements of "Light" and among those that we highlight here below with some values that you can use or modify:
- Exposition. Its modification will depend on the exposure from which we start since it may not be necessary to touch it.
- Contrast. +10. We are going to apply a bit of contrast to tie together the highlights and shadows of our image.
- illuminations. -23. It helps us to act on the illuminations. If you have very burnt areas of light, lower this level to compensate.
- Shades. -36. Here we will play with the shadows and their level will depend on the intensity you want to give them.
- Whites. +9. It allows us to play with the white component or areas of brightness in our image.
- Blacks. +21. They are the areas where the brightness is 0 and since they are so dark, details are lost in them. Its edition will depend on what we want to achieve, but it can help us recover dark areas where we don't see detail well or darken them even more.
step 8
We are going to continue with the edition of our photograph working on the "Color" and which we can access from the lower panel also of tools.
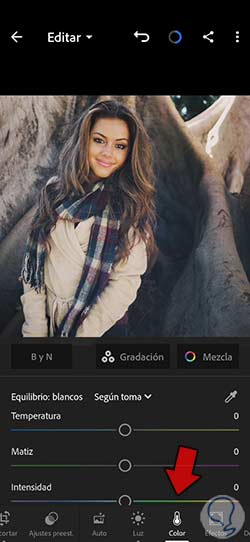
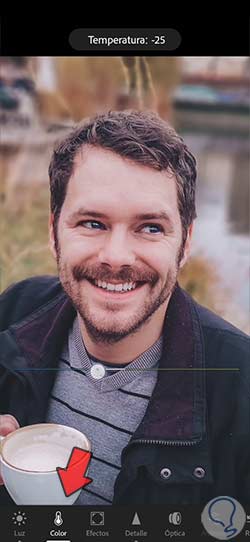
step 9
Here we can start by setting the color that will predominate in our scene, as well as the white balance. We can modify the aspects of:
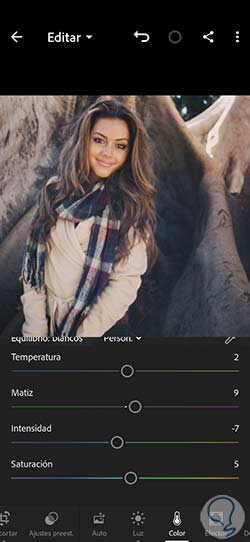
step 10
The adjustments we make here will depend on whether we want to give our image a warmer or colder look, although you can try which one you prefer to stay with.
We are going to continue editing the color of our image individually and segregated by entering the "Mix" option.
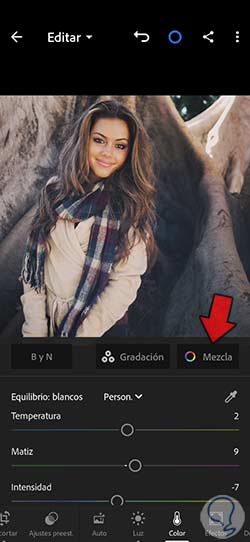
step 11
We will be able to play with each individual color in our photography in case someone wants to modify it and give it a different look.
Once you finish modifying each color individually you can click on “Done”.

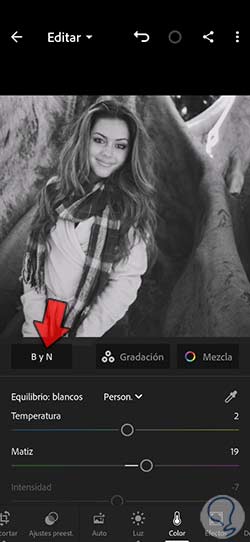
step 12
One option to take into account in your portrait photographs is to convert it to black and white. To do this, you have the "B and W" option, click on it to alternate between this mode and the color mode.
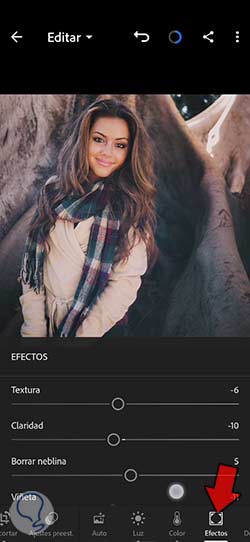
step 13
Let's continue our editing by going to the “Effects” section. Here we will have different options that will affect the sharpness and appearance of our photography:
- Texture. -6. It will help us soften or enhance the details of the image. In this case we want to soften the details to create a softer effect on the subject's skin.
- Clarity. -10. It will allow us to give more depth to the photograph by increasing the crazy contrast. It is advisable to adjust it by zooming in to the image to see how the halos are generated near the edges. In this case we will lower the level a bit.
- clear haze +5. Here we will adjust the level of haze in the image, being able to add or remove its amount.
- Bullet point. -eleven. We will use it if we want to give a black or white vignette effect around the image. Here we will put negative levels to give a little amount of black vignetting.
step 14
The next section on which we will work will be that of "Detail" where we can make adjustments regarding the focus of our photography. Here we're going to bring the sharpening up a bit to compensate for the previously applied texture level.
We will always apply this effect by increasing the level of "Mask" to soften its effect.
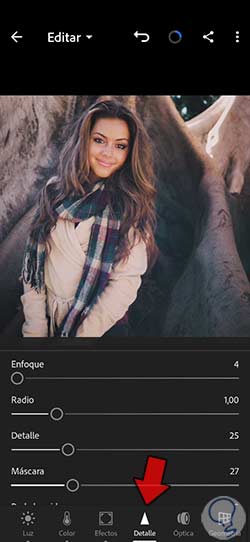
Note
To see the changes with respect to the original image, you can hold down the image and switch between before and after.
step 15
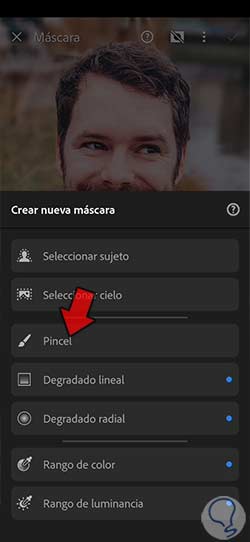
An interesting effect that we can give to our portrait photographs is to blur the background to emphasize the prominence of our subject. For this we are going to work with the "Mask" section that Lightroom Mobile gives us.
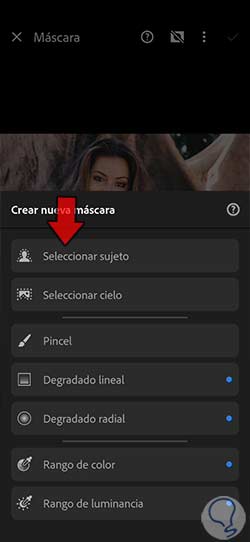
step 16
We will click on the “Create new mask” icon to generate a new layer mask using the “+”- icon

step 17
We see different options to work photography by areas. In this case we are interested in selecting the option "Select subject" so that the person is automatically selected.
step 18
We will see that after a few seconds our subject is selected automatically. What we want is to work on the background so we are going to invert this selection with the icon that appears at the bottom left.
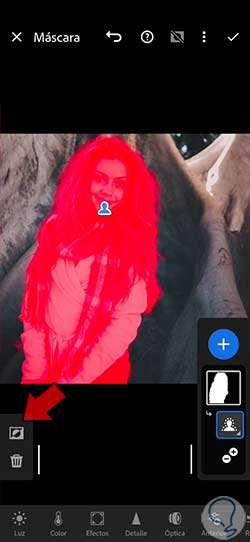
step 19
We already have our background selected to be able to work with it only. The next thing will be to modify its focus and for this we will click on the "Detail" option.
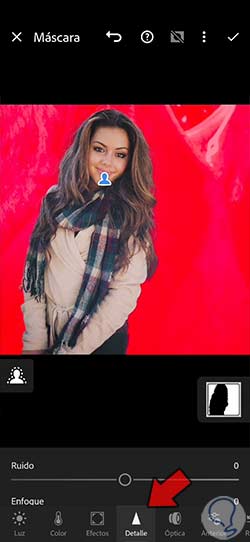
step 20
Here we can play with the focus regulator for the background and since what we are looking for is to lower its focus, we will move the regulator to the left until we find a level that convinces us.
Once you have the configuration applied, we are going to click on the upper check for the changes to take effect.

step 20
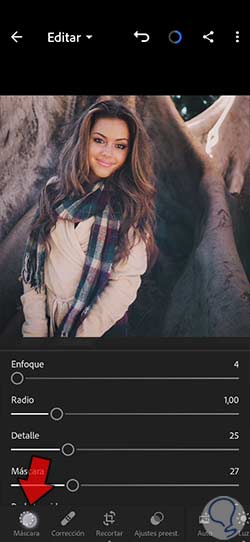
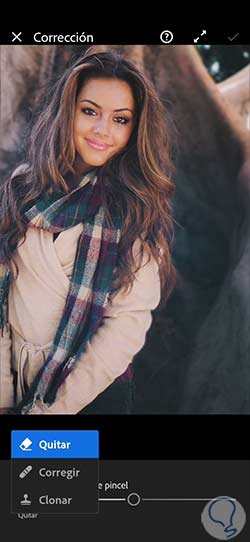
Other improvements or retouching that you can do in your portrait photographs can be to work on some imperfection in the image in general or some skin imperfection that does not convince us.
For this we have the "Correction" section.
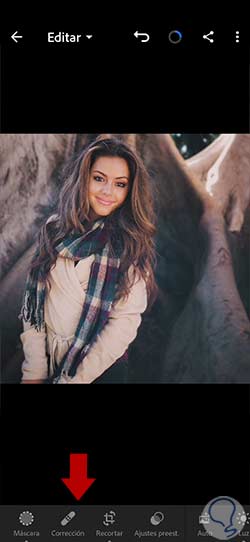
step 21
Here you can use its three available options to be able to correct areas with some kind of imperfection that we don't like by painting over it.
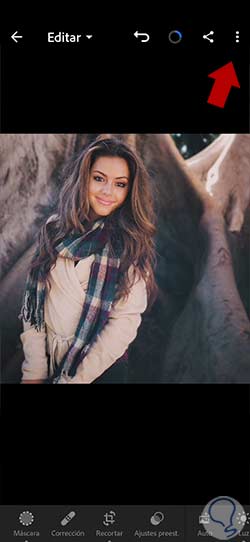
step 22
If we like the editing of the photograph, what we can do is save it as a preset or preset adjustment and thus be able to use it in other photographs. To do this, click on the three upper points.
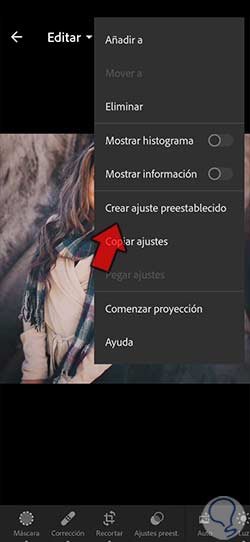
Step 23
We will select the “Create preset” option to start creating our own:
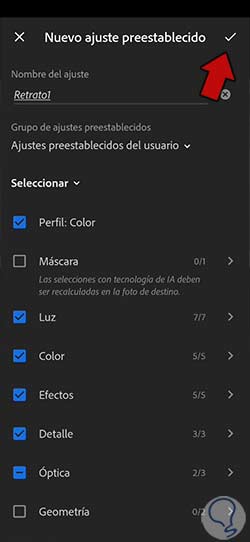
step 24
We select the adjustments that we have made in our photograph and apply changes with the upper check so that the preset is generated.
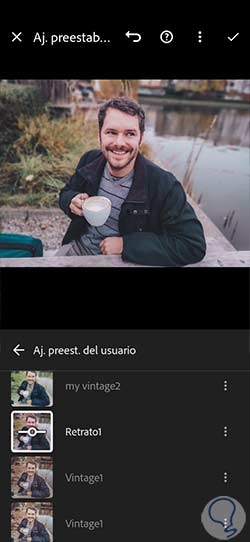
step 25
Since we already have our portrait preset created, we can apply it to other photographs later if we want and not start from an edition from scratch. Within any photograph, go to the “Presets” area to select the one you have created.
step 26
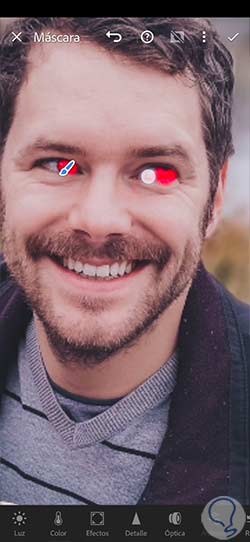
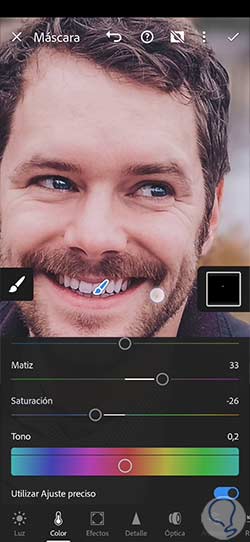
You may also need to do some other type of enhancement to your portrait such as enhancing your eyes or smile. To achieve this we will need to work with “Mask” options.
step 27
We will create a new mask and use the “Brush” mode to manually select the area we want.
Step 28
We are going to paint over the area we want to work on and which in this case will be the eyes. You can modify the settings of the brush such as the Size to adjust it to the area to be painted.
Step 29
Then we can work on this area and modify it as can be by editing the "Light", "Detail" or "Color".
step 30
We can apply this process of working our image by areas in others where we want to improve or modify them, but without affecting the rest of the photograph. For example, we could use the same selection procedure to create a whiter smile.
In this way we will be able to improve our portrait and give it an improved and personalized final style thanks to the Lightroom Mobile options.
In this way we will be able to improve our portrait and give it the final appearance that we like the most depending on the result that we are looking for and using the Lightroom Mobile application.