Night photography is a type of photography that requires more attention than we can take in any other situation. This is so because we find ourselves in a normally low light situation in which we will have to take into account a series of parameters to prevent our photographs from being too dark, thereby losing a lot of information. Although night photography requires a series of adjustments and many times accessories for good results, the truth is that we can get really fantastic photos if we work on it..
A night photograph can transmit totally different objectives to those we capture during the day and that is why knowing how to work with night photographs will broaden our range of resources when creating photographic content. A fully lit city at night will be a very different result than the same city in broad daylight. Although you will need to practice a little more to get the workflow in night photography, the results that you can achieve will surely convince you to do it again.
When we are working with professional photography, the equipment usually has various settings and accessories and here there will be many possibilities that we have to adjust the moment of photography. Don't worry if you also want professional results from your mobile phone, as we are going to see that with a series of tips before taking the photo and some later adjustments with our Lightroom Mobile editing tool, we will achieve very good night photography results..

Tips for mobile night photography
The basic elements that you have to take into account when taking night photography with your phone will be the following:
- Always try to work with the manual mode of the camera.
- Use night mode if our mobile has it.
- If we do not have more lighting, we can play with the Exposure time since the longer the time, the greater the amount of light the sensor will capture. Of course, for this we will need the mobile to be static since with any movement the image will blur. We can control this with the shutter speed offered by our professional or manual mode.
- Use the HDR mode if we have it available on our phone since using a high dynamic range will differentiate dark areas from those with more light.
- Avoid using zoom, especially if it is digital zoom since we will normally be losing quality in it.
- Try to use a tripod or position your mobile so that it hardly moves.
- Play with the ISO value but do not exceed its use as it could generate too much noise in your photo.
- Try to use the lights you have nearby to get extra lighting, especially if we are taking pictures of subjects.
- Avoid using the camera flash. Unless it is a moment where there is no other choice, the ideal is to avoid the use of flash since being a light projected in a single direction, the result will be flat images, with too many shadows and hardly any volume.
- You can use the flashlight of other mobile devices to generate more ambient light or use plugins such as light bars.
- The use of the wide angle lens is recommended to capture more of the scene.
In addition to all these tips that we have listed when taking night photography, we advise you to practice during the day the different options in manual or professional mode that your mobile camera has, since it will be easier for you later to configure the different parameters when you are in the middle of photography. night. In addition to all of the above that we have mentioned, the ideal thing is that you check before leaving that you have all the necessary accessories, analyze a little the area where you are going to take pictures and always try to be accompanied in case you need any kind of help. If you also want to take pictures with different levels of light, for example, when it is getting dark, the ideal is to go well in advance to situate yourself comfortably and have room to take pictures at different times.
Next we are going to see an edition for night photography once we have our image already made. Many times, although we take this series of precautions before taking the photograph, it is true that there are many settings that may not have turned out as expected and that is why a good edition will greatly improve our result. It should be noted that depending on the type of photography and the style we want to achieve, these settings may vary, so we advise you to take these values as a reference but always try to modify them based on your image..
To stay up to date, remember to subscribe to our YouTube channel!
SUBSCRIBE ON YOUTUBE
How to Edit Night Photos in Lightroom Mobile
As we have already been commenting, night photography requires that we work in advance on a series of adjustments that almost guarantee optimal results. In order to be able to recover a greater amount of information later, it is ideal that we work in raw formats since many current mobile cameras allow photography to be taken directly in this format. As it is an uncompressed format, we will have a large amount of information that we can later recover in the edition. The minimum shutter speed with which you will work in night photography will be around 15-30 seconds and that is why working with a tripod or with a static support will be essential to avoid out-of-focus photography.
Within the settings of the Camera in manual mode we will try to play with the ISO value at levels that do not interfere with the sharpness of our image. For this we advise you to raise the ISO to the maximum and zoom in on the image to see the level of noise it will generate and from there establish the minimum value that is useful for you to start working on night photography. The better you adjust the aperture and the shutter speed, the less we will have to depend on the ISO value and the better the final quality of the image will be.

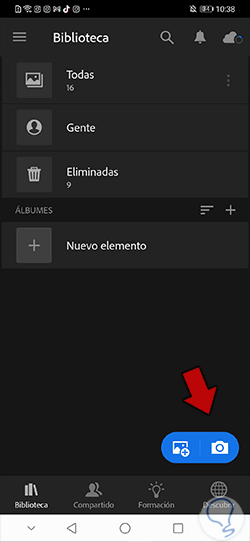
If your mobile camera does not have a manual or professional mode by default, you can directly use the one that comes with the Lightroom Mobile application and that you can open from the camera icon on the main screen:
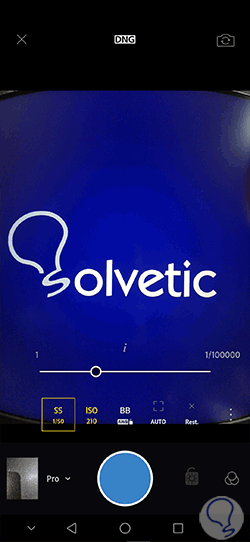
Then we will choose the "Pro" mode in the camera dropdown so that the different parameters that we can configure for our night photography appear:
- SS: Allows you to set the shutter speed for the level of light entering the sensor. It corresponds to the inverse of the exposure time.
- ISO: Allows you to configure the ISO level that we will use in the scene, forcing the light level.
- BB: Allows you to determine a level of White Balance according to the light source.
- Focus: Determines whether to use manual or auto focus.
- Exposure Compensation: If you move your finger to the right or left you can regulate the exposure level. You can lock it in the padlock icon.
- DNG: It is a RAW file format that allows photography in native mode.
Once we have taken our photograph, how can we edit to maximize its results to the maximum. I remember that you can adjust the different parameters depending on the type since not all images are the same.
Step 1
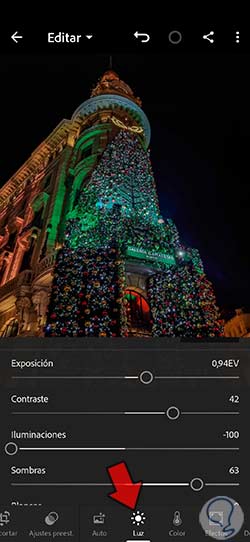
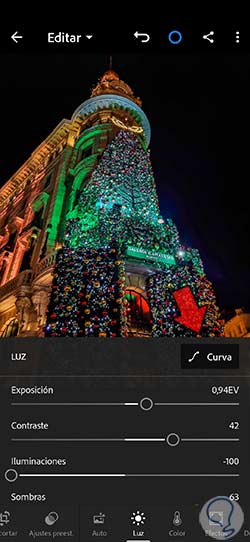
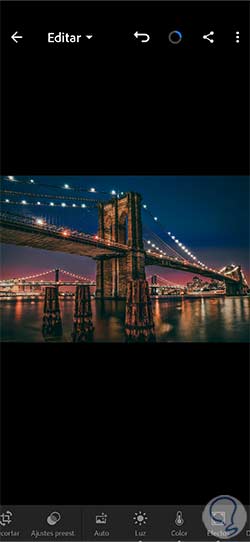
Selects the sharpest photograph of the same scene taken. Once we have our photograph open, we will begin editing its lighting. This section is quite important since the absence of light is what characterizes night photography and that is why its work is somewhat more complex. To edit the lighting, click on the "Light" option in the lower panel.
Once in here we will be able to move each of the regulators that make up this setting. The normal thing is that we need a little more exposure, the contrast is enhanced and in case there are too powerful Illuminations, we lower them extolling the Shadows.
In this case we will have values of:
Step 2
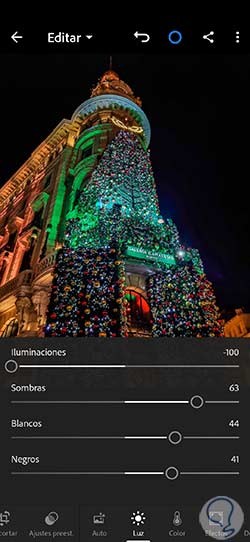
We will continue editing the “Light” section. We are also going to work on the "Whites" and "Blacks" to get those levels up that may have fallen by the wayside when taking the photograph. In this case we use approximate values of:
Step 3
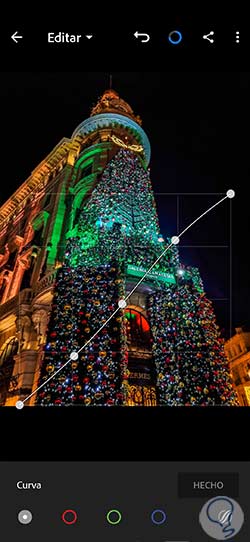
You can also work on the lighting by playing directly with the "Curve" and that you can find as an option in the "Light" panel.
Step 4
Here we can click on the curve line to create different points that we can modify to give the appearance of light that we want in our photograph. The normal thing will be to raise the darker areas a little without losing that feeling of contrast.
step 5
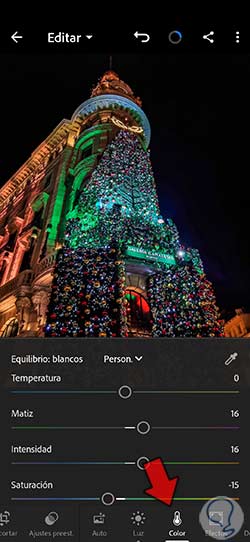
We will continue editing our photograph by clicking on the “Color” category. This section will also depend a lot on the final style that we want to give to our photography. In this case, as it is a night photograph, a colder tone usually looks good, which we can regulate with “Temperature” or “Hue” depending on the base color of our image.
We will also make adjustments to the "Intensity" and "Saturation" according to the more vivid or duller style that we want in our photography. As we want to highlight the colors and the nocturnal vibrancy, we are going to enhance the "Intensity" of the color, lowering its effect a bit with negative values in the "Saturation".
step 6
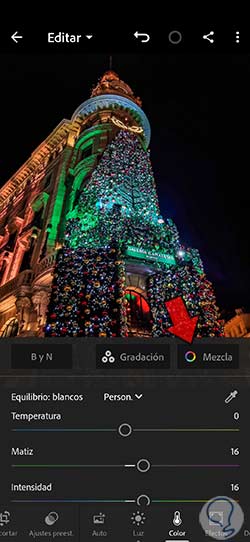
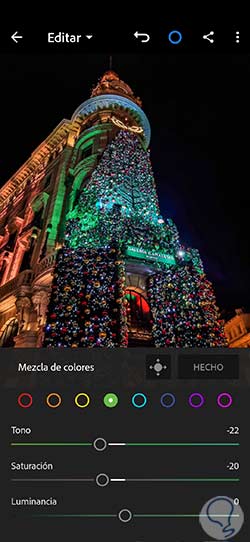
Lightroom Mobile allows us to do segmented color work, so if you want to work on a specific color in the photograph. If a certain color needs more Luminance or you simply want to vary its hue or saturation, you can click on "Mix".
step 7
Here we can click on each of the colors and modify its components without affecting the rest of the colors in our photographs. Click on “Done” to apply the changes.
step 8
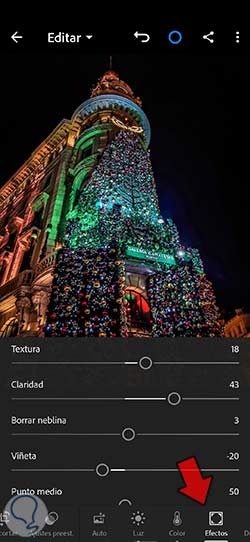
We return to editing our photography and this time we will go to the "Effects" section. Here we will find a series of parameters that will greatly modify the final appearance of our photograph. You can see the adjustments that we have applied but you can adjust it according to the result of your image.
- Texture: +18. It will help us to improve the focus of our photography on small details since Lightroom Mobile will look for small areas with contrast where the final detail will improve there.
- Clarity: +43. It helps to give volume to our photographs since it highlights shapes and dimensions of the image. It will help us to give volume to buildings or cars for examples in city photography.
- Clear mist: +3. It allows us to improve the level of detail in photographs that have a certain level of fog or even create the fog effect with negative values.
- Bullet: -20. It will create a vignette effect around our image, giving it a black or white appearance depending on the value we put in our slider. It is not mandatory to configure it but if you like this type of effect you can put a little amount to frame your image in some way and focus attention.
step 9
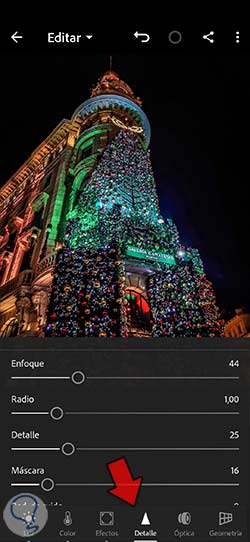
We continue our editing now working on the "Detail" level. Although with the "Effects" we have already managed to enhance the sharpness of our photography, we can improve it even more from this section. Here we are going to give a level of "Focus" that will depend on the need of your photography, being able to apply some level of "Mask" to soften its application. You can magnify your image and see the magnified result of the sharpening level of your image.
In this case we use these levels:
Once we have finished editing our photograph we can make a before and after comparison by holding down our photograph and releasing.
If you want to try styles that give a different look to your night photography, you can go to the “Presets” and choose some style that catches your eye to apply it quickly and have different options.
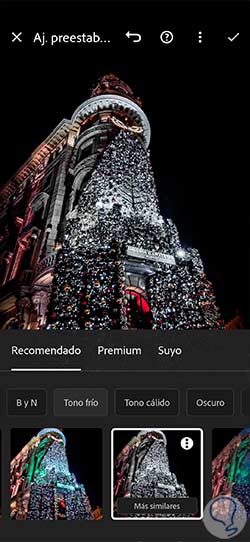
We encourage you to make different settings to achieve different looks for your night photography depending on the parameter settings you choose:
Note
If you want to store the settings you generate and make them a preset to use whenever you want, you can create a preset in Lightroom Mobile to use whenever you want.
In this way we will have managed to edit our photos at night with Lightroom Mobile and give them much stronger and more vivid than they previously had. We can modify the settings according to our needs and tastes, thus creating unique results.