Photo editing is currently booming due in large part to the expansion of your content life predominantly through social media. There are many people who live from the content they create and who increasingly seek to differentiate themselves from the rest in some concrete way. Whether you are a professional in the photography sector or not, the ideal is that you aim to create high-quality images with a differentiating appearance that transmit or attract the attention of other users in some way. Although fashions and trends have a place and play a leading role everywhere, going further and creating our own style and differentiating imprint will allow us to stand out and create valuable material..
Today it is no longer strictly necessary to go anywhere with a computer to do our photo editing, since thanks to the development of mobile cameras and editing software we have a perfect kit to be able to photograph and develop photos from anywhere. In this sense, Lightroom Mobile will offer us the possibility of working with high-quality photography files and editing them to achieve practically professional results. Although the edition is an important part, the truth is that you will always have to take into account a series of elements when you take your photographs to get the file with the best possible configuration, something that will undoubtedly help us later in the edition.
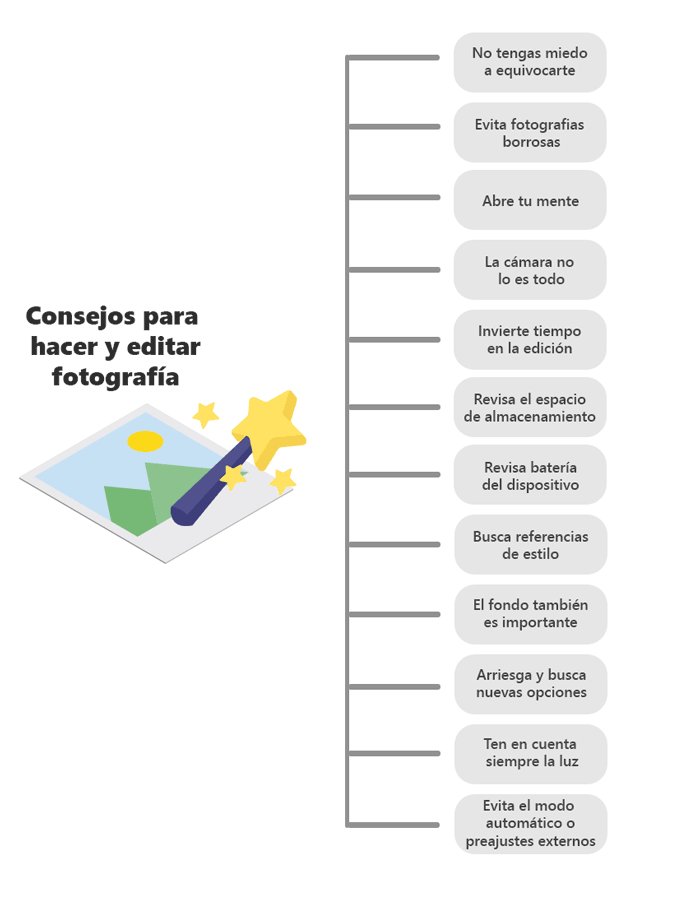
Tips when taking and editing photography
Some tips to keep in mind when we take a photograph or carry out the editing process are:
- Don't be afraid of making mistakes and taking bad pictures. The best thing is that you do tests without stopping and get practice in it until you find your style.
- If you don't want scares in editing with blurry photos that we can't fix, try taking photos on static, smooth surfaces or using tripods.
- Even if you have some experience, we never get to know everything, so it opens your mind to learn new things.
- The camera is not everything, so with the best camera, but without knowing how to use it and without knowing anything about editing, you will not be able to achieve great results.
- Being in a hurry is not a good ally to have a good photograph, so always try to invest time in taking a good photo, as well as time when editing.
- Check the memory of your mobile device or camera since both photos taken and edited in good quality will take up final space.
- Check the battery level of your device to avoid staying halfway through a photo session or editing.
- Look for references of styles that you like and then investigate the settings of the editing tool to get them, adapt it to your needs.
- Both when you take the photo and when you edit it, keep in mind the background of the photo as it can make or break your photo.
- Take more risky and daring photos in composition and editing.
- Check that in your camera settings you have enabled the maximum resolution and if possible that it allows the RAW format.
- Always take light conditions into account both when taking the photograph and when editing it.
- Avoid always using automatic mode when shooting or presets when editing. The best way to learn will be to do everything manually and from scratch.
Taking into account this list that we offer you of advice when taking your photographs and editing them later, we are going to list a series of mistakes that we can normally make when we are editing in applications such as Lightroom Mobile and that will help improve our final results..
Common Lightroom Mobile mistakes to avoid when editing
The editing process does not only include opening any photo editing application and applying a preset that a third party has made. Although the tools that can facilitate these tasks in a few seconds are currently immense, the interesting thing about photo editing is investing time and effort in learning how our camera works and how we can enhance our photographs later in professional applications such as Lightroom Mobile.
Whether or not you have an idea of the different adjustments that we could experience in a photograph, we encourage you to practice from your own mobile phone or Tablet with this Adobe application that allows us to even work from raw files allowing maximum quality editions. Although having a screen the size of a computer will always help us to see details more precisely, the truth is that thanks to advanced hardware and software technologies, we can get complete and professional editions directly from our mobile phone.
To help you in the world of photo editing and in the use of the Lightroom Mobile tool, we are going to list a series of common errors that we can find when doing our photo editing, we must take it into account, it will save you from having to redo your edits. Keep in mind that the subjectivity of the edition may mean that you extrapolate a common error in a virtue of your photography, but always with a certain meaning..

Familiarize yourself with the tools and devices
The first thing you should do is determine with which device we are going to take the photograph and then with which tool we are going to edit it. If you are going to take your photography from your mobile and then edit it with Lightroom Mobile, the ideal thing is that you investigate the different modes that it brings in your camera and how to use them, as well as exploit the professional or manual mode. Then you can browse TechnoWikis and see how to use Lightroom Mobile to see what this tool offers us at the editing level.

Invest time in your editing
A good edition does not always have to require hours of investment since everything will depend on your photography and the result you are looking for. Ideally, you should always spend time editing your photos and do it quickly and running. Avoid using third-party pre-made edits and spend time creating your own settings and styles to set yourself apart from the rest.

Poor editing tool selection
Currently there is a very wide catalog of applications in the mobile field that allow us to make edits to our photographs, so it is very difficult to choose which one we want to work with. Always try to look for tools that allow you to work with and export files in raw format such as RAW or DNG since the final quality that you are going to achieve at the time of the result will be much higher. Also, always choose applications that allow completely manual editions as it will be the difference from a normal edition to a professional one. In this sense, Lightroom Mobile is going to offer you a complete variety of adjustments that will allow you to develop your photography professionally from your mobile devices.

Be careful when using cloning
The cloning tools in our editing processes can help us a lot when we need to faithfully reproduce an area with the aim of duplicating it, or if we want to rectify a part, use this cloning to replace an area. Many times to remove imperfections such as pimples or spots on the skin, or specks of dust, this cloning process is key to solving it. In Lightroom Mobile you have these options, so we recommend using them to improve your photography. What you should take into account is to choose the areas that we clone well to avoid making the edition too evident. Use Lightroom Mobile cloning and enhance the enhancement of your photos.

Correct White Balance
The White Balance allows us to balance the levels of the RGB (Red, Green and Blue) color components, looking for the brightest area of the image to have a white color, as well as the darkest to black. In professional cameras we have more complete options to regulate the white balance and in mobile cameras we will also have options in the manual / professional mode that will allow us to determine our white balance. Depending on the configured white balance, we will achieve that the color and light that appears in our photograph is as similar as possible to the light source.
Therefore, if you have not taken it into account when taking the photograph, the ideal is that you rectify it in your editing process.

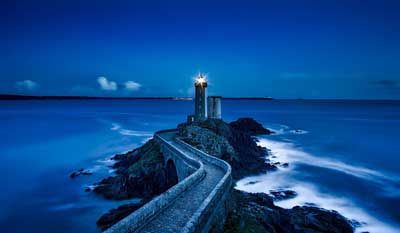
Images that are too underexposed or overexposed
Light is one of the aspects that you have to take into account the most when taking a photograph or editing it, since it can determine the final result of our work. Whether we have a burnt or overexposed image or a photograph that is too dark or underexposed, we have to take into account the dynamic range to know how to determine the relationship between the brightest and darkest areas. As we normally can't control all the light in the scene, we will need to use the manual settings of the camera and further editing in Lightroom Mobile to get a good light balance, don't forget about that.

Overfocus the photo
Sharpness is important in our photographs since it will be key to being able to see our images in detail. The problem is that many times in the edition we apply too much extra sharpness to the photograph, subtracting its real appearance from its aesthetics. In types of photography such as portraiture, excessive focus can give us unnatural results, so using in these cases even a reduction in sharpness will improve the final result. Remember then that sharpness can be an editing error, so carefully use the "Clarity" or "Focus" option that makes an unreal effect in situations such as a sky, a sunrise or a portrait.

edition dependency
Editing is a fundamental part of the creative process in photography and although it is almost always linked, the truth is that if we set the idea that it will always be there, over time we can neglect the moment of creating the photograph. We must avoid taking photographs automatically and in any way based on the idea that the edition can rectify everything. Although today having a RAW format file allows us to rectify practically any mistake, we must also move away from this idea and avoid abandoning the good practice of wanting to take good pictures from our camera. Practice with the various camera settings to get the best possible results right from the start.

Picture too out of focus or blurry
Sometimes due to being in a hurry or making a bad manual focus adjustment, we find images with a certain blurry or out-of-focus aspect that ends up diluting the meaning of our photography. If we also have a photograph where there should be a game of depth with the background that should be more blurred but our first term is also blurred, in the end the objective will not have been achieved and we will have a flat image with no meaning. Try to make a correct game of the out-of-focus areas of the image and avoid that those that should be sharp also become blurred. Work well with focus and stability to get good results.

Misuse of the watermark
The watermark is one of the options that you can also put in your editions with Lightroom Mobile to further promote your brand or just protect the rights of your photography. You can totally use a watermark on your photos, but be careful when personalizing it and choosing how and where to place it, since if you make it too big or in key areas you could ruin your photo. If you are going to use a watermark, the ideal is to justify its use, either because you do not want someone to take your photographs without permission or to promote your artist brand. Always use the watermark under a specific utility, taking into account that nowadays practically anyone who wants to remove an image from you can do it anyway in the Internet world.

Not thinking about what we want to achieve
Before beginning to carry out a photographic project, the ideal is to establish the bases that will make it up, determining what type of photography we want to carry out and what result we want to obtain after going through the edition. Photography comprises a complex creative process that cannot be established under fixed guidelines since the user's subjectivity will be essential to determine the entire process. You can take the photograph that you like the most under the rules that you prefer and you can edit it with the settings that you see most convenient according to the final objective that you want, in the end its use will be justified if you have set a goal to achieve.
That is why it is important that you know the devices and tools that you are going to use and throughout the process you are aware of the steps you are taking, also taking into account what limitations exist and what positive and negative aspects you can find.

Color is fundamental, exploit its possibilities
Color is another of the essential elements of our photographs and that is why we must not forget it when we are in full editing. The color adjustment can totally change the appearance of our photography and even what it transmits, so its editing will be essential. Within Lightroom Mobile you can make a complete color configuration where you will even be able to do an individual color edition using Lightroom Mobile to achieve totally personalized results.

Don't just focus on monochrome styles
Many times when we edit, we look for a monochrome style where a color is present under different shades throughout the photograph. Although sometimes this style can be very aesthetic, if we make excessive use of it we will end up providing flatter images.
Too much presence of noise in the photograph
Noise is one of those phenomena that occurs in our photos and that we generally don't want to appear. Situations in which we have images taken in low light conditions or photographs that have undergone too much editing as a successive application of filters and effects, result in that grainy or noisy appearance in our photography that ends up reducing its sharpness. That is why it is indicated that you work with images that are in high definition and also use professional editing tools such as Lightroom Mobile that allows us to edit in raw formats and export with little loss of information.
Also avoid making exports in different applications since normally in each one of the ones you carry out you will be generating compression and with it a loss of quality that can also translate into that noise that we see.

Over-editing the photograph
We have already mentioned that the editing process is one of the steps that is almost always linked in our photographic workflow and that is why it is one of the parts that we must take into account. Although editing can be our great ally since it will allow us to recover photos that we previously considered lost, we must also avoid excessive editing and avoid the premise that we have to use each of the settings that appear in our editing tool. editing to get the best result in our photography. Not all images will need the same editions or the same investment of time, so the first thing you should see is what you think can be improved in your photography.
Here more is not always better and that is why with time and practice you will be able to realize more and more quickly what it is that we must modify in a concrete way in our photography, avoiding adding adjustments that instead of adding improvement are subtracting final quality.

Improve the framing of the photo
The framing is an important part to take into account in our photographs since it determines how we distribute the photographic load in our composition. Although there are many people who do not notice it when they see an image, the truth is that if we made a comparison of a good framing with a bad framing, you would surely detect it in a moment. Under a good framing is having followed some well-known guidelines such as the vanishing point, the law of thirds or the golden ratio, which govern the bases of composition in photography. When we take a photograph, the ideal is to try to find a good frame, avoiding that we later have to restructure it in post-production.
In addition, it must be taken into account that our image will not always be oriented to the same objective and that means that the proportion of the photograph will surely change depending on where it is going to be published, since a web blog will not be the same as a social network like Instagram. . When changing the proportions in editing we will also have to frame the photograph and that is why it is one of the first steps that you will see done, although you can modify it at any time since it is usually a non-destructive adjustment as in the case of Lightroom Mobile. To redefine our framing, take into account what will be our main point of attention in the image and place it in one of the points that determines one of the laws of photographic composition. Take into account the empty spaces that you leave in your photograph because if they are not justified, these negative spaces around our subject should be avoided when they are too pronounced. Using the rule of thirds will help you a lot to improve the framing in your photographs.

too much saturation
Normally the objective of editing with tools like Lightroom Mobile is the search for a natural look behind it. One of the adjustments that you have to be careful with is also saturation because, as we will see later, vignetting or HDR can play in our favor in the composition, but if what we are trying to do is look for a sensation of reality then we will try to avoid polarized settings where the amount we are using is excessive. For this reason, if you play with saturation and raise it too high, you will be giving an unreal aspect to your photograph since those highly saturated colors are not found in reality, thus creating an artificial aspect that can ruin your photograph.

Using the RAW format
It is normal that you probably know more widespread file formats such as JPG or PNG, but the truth is that in professional editions it is best to work with RAW files. By taking photographs in RAW format, we will be getting, among other things, high quality images, with a greater dynamic range and raw information of the photograph that will allow much more complete editions without losing information. This type of format does not remove or discard information in the image, something that does occur in compressed formats such as JPEG. Everything we see when taking the photo will be collected, later allowing a complete processing when we go to the developing workflow.
Current mobile cameras usually include this option, so always try to take photos in this type of file and use it to make more professional editions without loss of information.

Excessive use of filters and effects
Either from Lightroom Mobile or from any other application, it is common to apply filters and effects that instantly edit our photos, giving them a different look. Although this can solve our lives at a specific moment for content in which we do not want to invest a lot of time, the truth is that sometimes abusing this type of adjustment can cause the initial objective to be distorted in our photography and we are unable to convey the message what we were looking for Ideally, you should edit the photo yourself, even creating a custom adjustment, but if at any time you prefer to use one like the ones provided by Lightroom Mobile, we recommend that you try not to abuse them and not always apply them with the greater intensity or even apply several at the same time.

Not using spot correction
On many occasions we only look at a global edition of all our photography and we do not spend a few minutes looking at small imperfections that could be improved, thus enhancing the result of our photography. For this reason, a mistake that we can sometimes make is not taking advantage of the specific correction tools that applications like Lightroom Mobile offer and that will allow us to eliminate small specific elements of our image. If you're photographing someone and you think a blemish or skin blemish might be ruining your photo, don't hesitate to use the spot correction tools that are included in this application to correct everything that you think is excessive in your image.

Edit in excess if we have JPG format
Taking into account that JPG is an image format that applies compression, we will be talking about the fact that there is already a loss of quality when working with this format. As mentioned above, the ideal is to work with RAW files that allow us to have a raw photograph with the greatest amount of information possible. Although it is a heavier format, the truth is that we should have the highest possible quality, so working with it will promise us better qualities. In case of working with JPG files, try not to make too deep retouching, especially if you have to modify aspects such as light or shadows, since we are working on compressed information that, when edited, can give us unwanted effects such as noise in the image, something that It would not happen if we worked with RAW formats.

Too much light in photography
In the editing process in Lightroom Mobile, although increasing clarity may seem a priori to give more personality to our photography and highlight the details, the truth is that excessive use can have a completely opposite effect, resulting in 1 of the errors that we should avoid in our editions. The ideal setting would be to make touch-ups through masks and the use of the brush in the range of mid-tones that we only want to modify, avoiding touching the clarity of the entire photograph. In specific types of photography such as portrait photography, raising the clarity a bit only on your face can give quite positive effects in our photography, highlighting this area from the rest of the image.

Edit over the original file
A mistake that we often make in editing is to work directly on the original file, which can cause these changes to be irreversibly applied to our photography. That is why the ideal is always to work in a non-destructive way that can begin by opening a copy of the photograph that we want to work on. One of the positive aspects that Lightroom Mobile includes is the possibility of reverting one or any change that we have made to the photograph, so we can go back if we are not convinced by any adjustment that has been made.

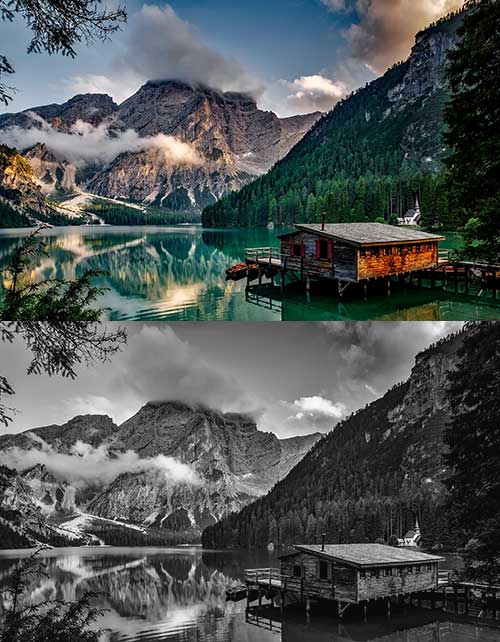
Bad editing in black and white style
Black and white photography is a very interesting resource that could completely change the message of our photo. You can do the test yourself by changing a color image to black and white and see how the emotions they arouse have varied. Although there are images where black and white work very well, you have to keep in mind that you cannot simply use it to try to improve an image that has many errors, since it probably won't work. If we also have an image such as a landscape in which there are many elements and many colors to begin with, its conversion to black and white will not provide us with all the information, so you have to make sure that it compensates you by changing the color mode of your photograph.
Misuse of vignetting
Another error that we can find when we are editing our photographs is the excessive and inappropriate use of vignetting. The use of vignetting is quite interesting when it has a justified purpose and normally I don't like to use it when we want to focus more attention on the central part of our photograph, thus leaving a rather aesthetic framing effect. Although its use can give very good results, it must always be taken into account that it must be applied with moderate adjustments, since if we overdo it, the vignetting itself may become more relevant than the photograph itself, and also keep in mind that not in all situations will work fine.

Null or bad edition of the background
This is a mistake that a user can make at any level of photo editing because sometimes we focus so much on the main object or subject that we ignore the fact that there is a background that can also be edited and that could even change the final appearance of the photo. our composition. If for us the background is a secondary element, we must also take it into account and apply the necessary editions, always looking for a balance between that background not having a too strong appearance or not having it too much. Think that a very prominent background will end up downplaying the main element of the photograph, so working from an edition that could saturate the background would be downplaying importance and even playing with the blur.
Abusing HDR
HDR or high dynamic range is a style of photography in which both shadows and highlights and reflections have a large dynamic range. Depending on the type of photography, HDR can enhance the style of our image, giving very powerful results visually, since there is a great evident contrast that highlights the different details of our photography. The problem comes when we apply HDR levels excessively, even creating white trails around the different elements of our photograph that are completely far from a natural appearance. Therefore, if you like HDR, try to apply it sparingly, avoiding reflections that are too white, made some dark ones that end up losing detail when they darken even more.

Using presets or presets
You probably already know what editing tools like Lightroom Mobile provide a library of presets or presets that contain different styles of presets that allow us to apply a set of settings in just a few seconds. Although its use can facilitate and speed up our development workflow, the truth is that if you want to pass the beginner's threshold in photo editing, we recommend that in case of using this type of presets you use them as a complement and also make a manual photo editing. In addition, normally these for adjustments have been created in a specific image and therefore the changes are adjusted to that photograph, so once you use any type of adjustment already created, the indicated thing is to customize it and adapt it to your own photograph.

Apply unnatural contrasts
Contrast is another of the basic adjustments that we usually need to retouch in a photo when we work with applications like Lightroom Mobile. The contrast helps us to be able to differentiate one element from another and that in photography we can normally find when we witness changes in colors, lights or tones. When we want to touch up the saturation, we must try not to exceed it and many times less quantity is a better result since, for example, if your image has few colors the contrast will be more intense and pronounced. This also happens in images where if we apply too much contrast we can lose information in color saturation since we will be over-saturating. That is why it is always best to try to apply a measured contrast to prevent us from ending up negatively affecting the mid-tones of our photography and damaging the final result. IN black and white photos the contrast tends to work quite well.

Don't be left with just one option
The positive thing about working with non-destructive choices like the ones that Lightroom Mobile allows is that we can create different versions of the same photograph and that we can then compare to stay with the one that most convinces us. When I am not sure if what you are doing is the final one, simply apply different modifications to your photo and export it each time to compare later and decide.

Bad configuration when exporting
Once we have done all the editing of our photo, the last step will be to export it to continue using it outside of Lightroom Mobile. Once we have reached this point, we must consider what we will use our photography for, since depending on the final platform that will receive your photograph, we will have to take into account some settings or another. Many times we need our photography in the highest possible resolution for possible subsequent editions or for deliveries where a format such as RAW or DNG is specified and we export the image with a compressed format such as JPG. This means that all the editing we have done in high quality will be losing if we apply this compression when exporting.
In the same way, if we need our photography to end up on a specific social network, we must take into account that each one applies proportions of specific characteristics so that the content is uploaded optimally. Therefore, exporting in Lightroom Mobile for Instagram will not be the same as doing it for a professional blog. Always make an export manually after editing your photo by selecting the parameters in a personalized way and avoiding fast and uncontrolled exports.

In this way we will have a list of common mistakes that we can make while editing in Lightroom Mobile or when we are going to take a photograph to later edit it with good quality.