What we should know is that perfection does not exist in photography and that everything will depend on what we have and the goal we want to achieve. No matter how much theory tells us, when it comes to working on a practical level everything will depend on what we are looking for and how the content adapts to our modifications. In addition, it is necessary to take into account that there are factors such as trends at any given time that may greatly influence the styles that are applied at any given time. There are effects that, although they play a leading role over time, the truth is that they usually have moments of more boom than others..
The matte effect in digital photography has been gaining more and more prominence, especially on social networks. Platforms like Instagram or Facebook have seen the increase in the publication of photographic content under this matte effect. The reason is that this matte effect, beyond being a simple personalization of our photographs, can have a great impact in terms of meaning and appearance in the style of our photographs. Using this matte effect can be a great ally to help us stand out on a specific platform against the large amount of content that is available. At a time when photography and video are in full swing, having a different style can help us gain visibility.
When we use the matte effect we will be achieving a reduction in reflections and glare in our photography. As we usually take pictures at any time and place thanks to our mobile cameras, it is normal that we find results in which there are too many shines or reflections and for this reason a matte effect will manage to alleviate this appearance of unwanted reflections, thereby improving the final appearance. of photography..
Benefits of the Matte Effect
Some of the general benefits of using the matte effect are:
- Reduction of reflections. The matte effect allows us to reduce reflections and glare in our images, thereby improving the clarity and sensation of the photograph.
- Texture improvement: The matte effect can help improve the texture of our photography such as surfaces, skins in portraits or materials in certain objects.
- Contrast increase. The matte effect can enhance the contrast of photographs thereby improving sharpness and quality.
- Provides artistic style. The matte effect will give us an artistic touch to the photographs that can be transformed into a feeling of greater elegance and sophistication due to that sensation of softness.
- Reduction of brightness and very illuminated areas. The matte effect can reduce the glare effect that may exist in our photographs, thus improving the final visual quality.
In addition, we can point out that the use of the matte effect can help us hide or make certain imperfections in our photography go unnoticed, such as spots or unwanted marks. If we don't have a complex editing program at hand to remove these imperfections, editing based on a matte effect can help us make these elements disappear. In this case, the Lightroom Mobile platform is perfect for editing our photography and achieving a completely personalized matte effect, as we will see below.
To stay up to date, remember to subscribe to our YouTube channel!
SUBSCRIBE ON YOUTUBE
How to Make Matte Effect in Lightroom Mobile
When we talk about the matte effect in photography, we are talking about a configuration that seeks an opaque stylish finish where there is hardly any gloss and that could be considered as an opposite extreme to those finishes where a glossy profile stands out with hardly any reflections. Using this effect in certain photographs can provide us with a series of benefits both aesthetically and practically. Using a matte effect can be positive when we want to reduce reflections in our photography or reduce lights that are not desired in the photograph, thus making details that we consider important acquire more prominence and ease when it comes to being distinguished. In this sense, and we find photographs where there are very shiny objects or that contain very shiny surfaces such as glassy materials,
The matte effect can also be a great ally if we want to give our photography a somewhat elegant and sophisticated style, because thanks to its smooth and velvety-looking finish, we will generate great visual attraction. It also tends to produce a more artistic sensation and even an effect of careful work that provides professionalism. There are images that we can find in sectors such as fashion, portrait photography or artistic photography itself..
Another moment in which matte photography can give us some kind of benefit is on the physical plane, since a photograph printed with a matte effect will prevent our fingerprints from being marked as strongly as a glossy photograph can, also allowing them to be easy to clean. It should be noted that the matte effect is not oriented to any type of photography and that, if we have, for example, an image with very bright colors, applying a matte effect can reduce that color intensity and with it the objective of standing out with the color as protagonist. It is also not highly recommended in images that stand out for a very prominent definition or, on the contrary, low-quality or out-of-focus images where a matte effect can worsen the result.
Next, we are going to teach you a regulatory process to achieve the matte effect but that you can customize based on your photography since not all of them are the same, but it will help you have a guide from which to start to achieve this type of style. Lightroom Mobile will provide us with the necessary adjustments to be able to do this entire process professionally from our mobile devices.
Step 1
Let's start by opening our image in Lightroom Mobile from our gallery or importing it to start working with it.

Step 2
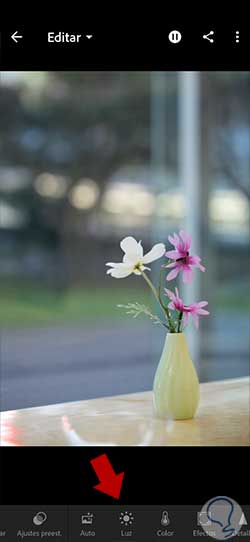
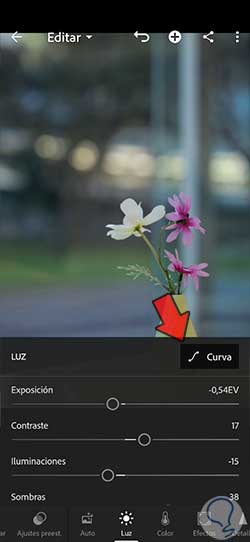
We are going to start working on our photography from the "Light" section since it is the main one to configure this effect.
Step 3
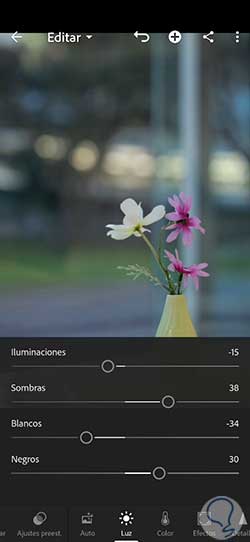
Once here we are going to give in the different sections a configuration that will be similar to the values that we leave you below:
Step 4
Another lighting element that is important to configure to give our Matte effect is the "Curve". Here we will have to customize it so we are going to click on this option to edit it:
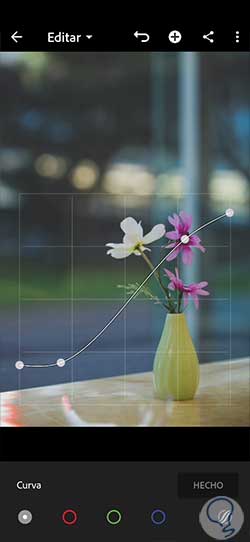
step 5
In this curve we will customize the appearance of our photograph using the different points that we can create by clicking on it. In this way, the objective will be to raise the shadows and lower the highlights of our photography to generate that matte effect. In addition, we recover contrast that we have lost in this process by creating some points that achieve it as we see in this curve:
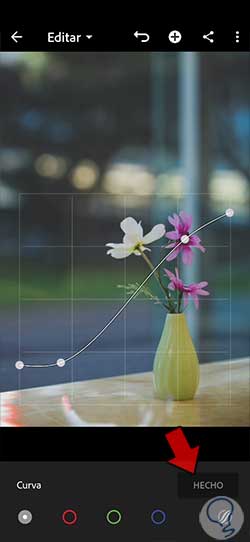
step 6
Click “Done” when you are finished editing this light curve.
step 7
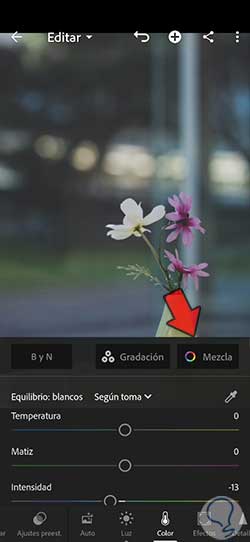
The next section that we are going to configure within our photography will be “Color” to give our image more personality. For this we want to seek to reduce the intensity of the color to reduce that effect of presence that color has in general in photography:
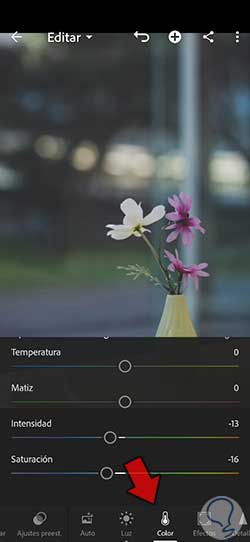
step 8
As we say, we are looking for a desaturated effect in the general color of the photograph. In the event that a specific color has too much presence in our photography, we can access it individually from the "Mix" option that we see.
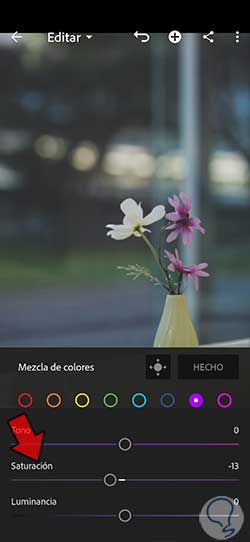
step 9
We will see that we have configuration options for each color individually using Hue, Saturation and Luminance. In case of finding that some color still has too much Saturation, we can reduce it locally.
You can do this step now and also return to it later if you apply a specific color effect and need to rectify locally.
In this case we want to reduce colors that have a lot of presence such as pinks, green and even yellows if we also want to subtract Saturation from them, so we will lower their respective Saturation sliders.
step 10
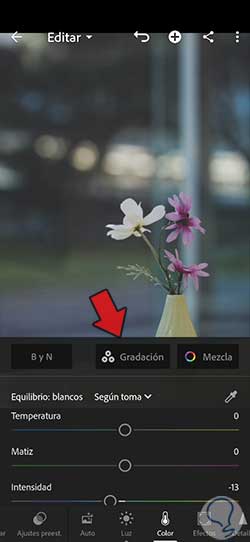
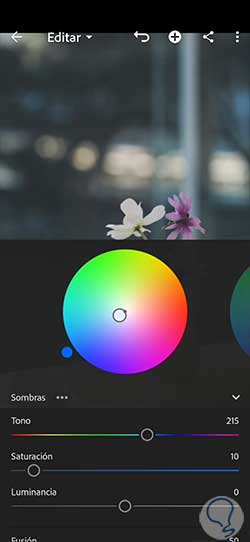
We can continue configuring the color of our photograph by working on the lighting and shadows by clicking on the "Gradation" option.
step 11
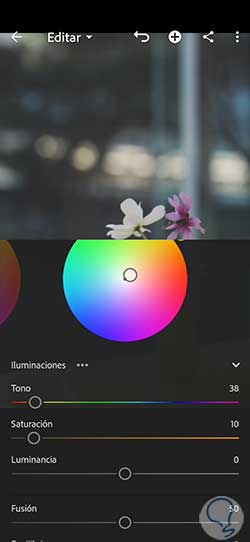
In the Illuminations part we will put a configuration similar to this one that we propose:
step 12
In the Shadows section we will choose a configuration similar to this one. Click on the “Done” option when you are finished.
step 13
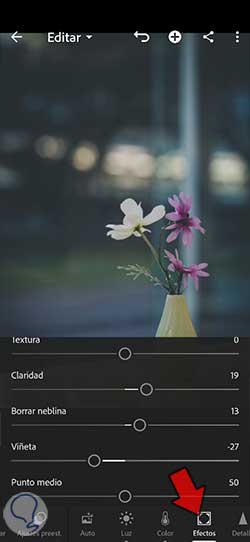
We will go to our next section to continue working on our Mate effect. To do this we are going to enter the “Effects” panel. Like the other tweaks, we depend a lot on the type of image we have, but we are going to look for an edition that has values similar to the following:
step 14
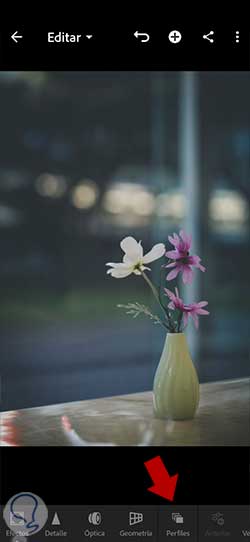
Another option that we can apply to our photography is the use of color profiles made by us or that are available in the Lightroom Mobile gallery. This will give our image a quick effect, further customizing the matte effect.
To do this we are going to go to the lower option under the name of "Profiles".
step 15
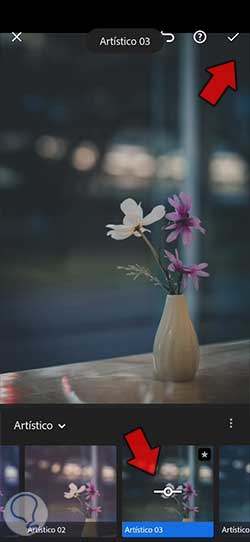
Here within a category we can choose a color profile that we like and thus apply it. The difference with applying a color profile and not a preset is that the Light configuration that we have made will not be modified.
If you prefer to start from a preset or preset, we recommend that you apply it at the beginning of the whole to avoid modifying all your settings.
Click on the setting to be able to choose the level of presence of this effect thanks to the regulator it has.
Note
If when applying the color profile you notice too much Saturation or the need to readjust some parameter, you can go back to any of the sections where we have been before and rectify it.
step 16
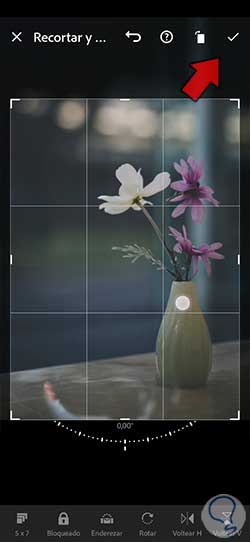
When we already have our matte effect achieved, we are going to finish our image by rectifying its framing. To do this we will enter the lower option of "Crop" that we see:

step 17
From here we can reframe our photograph manually, helping us if we want with the different predefined proportions that Lightroom Mobile provides us. It depends on the platform where our image ends, remember that you will need some measurements or others.
step 18
When we consider that we have finished our photograph with the matte effect, we are going to check the before and after to see the difference that has been created:
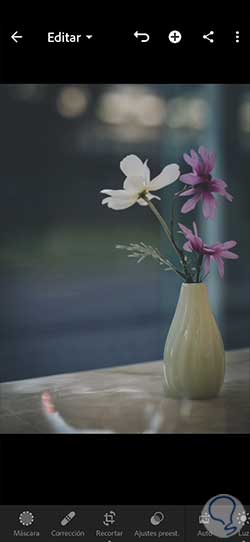
step 19
To be able to use our matte effect on any other photograph, we advise you to create your own preset and use it whenever you want. To do this, we will click on the three upper points in our photograph:
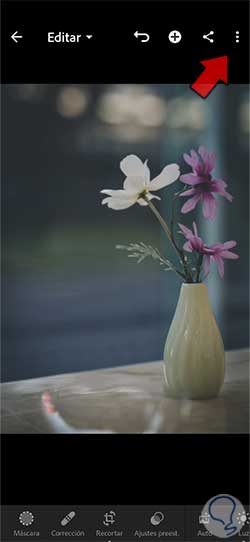
step 20
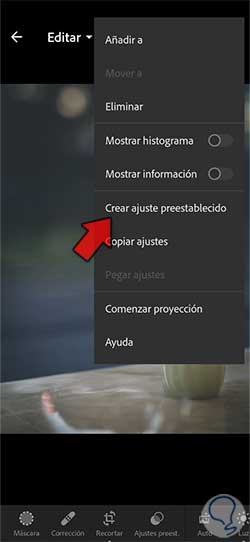
In the options that appear, click on the "Create preset" option to generate a new one.
step 21
In the new window we are going to select all the settings that we want to be saved in our preset. We give our preset a custom name and apply the changes using the check we see in the upper right:

step 22
When we already have our preset created, we can apply it to any other photograph from the "Presets" section. You can modify any setting as it is normal for each image to require different settings.
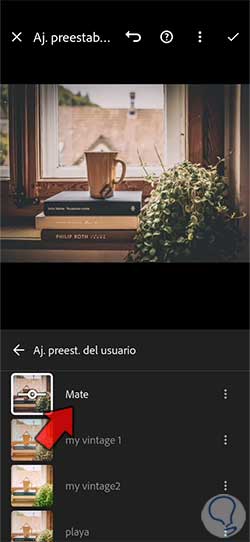
In this way we will be able to create the matte effect in our photographs using Lightroom Mobile and create personal styles in our images working from any mobile device.