Lightroom Mobile is one of the digital tools that can help us edit our photos with a higher professional profile. It is nothing new that today there is a constant publication and a habitual use of digital platforms for the constant uploading of audiovisual material. At a time when there is an immense amount of multimedia material, our ability to stand out comes down to differentiation. For this reason, working with different and quality photographs will be a good letter of introduction for our public, thus increasing the possibilities of interest in it. For this reason, creating effects and styles in our photographs that stand out will be very important to achieve an editorial line that defines us and identifies us easily..
If we use the photo edition for web publications such as Social Networks, we will have several advantages that can help us improve the quality of the images that are published and, in addition, increase the participation and commitment of our followers. When we like the work of an artist or content creator, we will be attentive to their news and that is why we must not forget to take into account that editing can improve our final product. Some advantages that editing can give us for our photography for the digital showcase are:
The edition in our photographs
- Visual interest: Digital photography editing can make images more visually attractive, which can increase their impact on the viewer and attract more attention on Social Networks or on the platforms where we publish.
- Brand strength: Digital photo editing can help us create a consistent and recognizable visual style for the brand or artist, which can help strengthen your identity online and build fan loyalty.
- Error correction: Photo editing can also help us correct common errors in photographs, such as lighting, contrast or white balance, thus being able to improve the general quality of the image on the visual plane.
- Focus detail: Editing our photography can help us, it can also focus attention on important details of the image that we consider most predominant, which can increase the effectiveness of the message that we want to convey with it.
- Greater flexibility: Editing our photos allows us greater flexibility to adjust the images according to the specific needs of the platform on which they will be published, which can improve the appearance of the images and the interaction with the public. It will not be the same to make publications for our blog than for a Social Network like Instagram. The post style as well as the image settings will be different.

We could say with this that using the edition for our photographs, even for Social Networks, will help to improve the final quality of the images, including the correction of errors or the empowerment of the brand as authors. This can also help the public to grow and become more interested in our content or product.
To stay up to date, remember to subscribe to our YouTube channel!
SUBSCRIBE ON YOUTUBE
How to Make the Black Paris Effect in Lightroom Mobile
The use of custom effects can help us highlight our photos in digital environments in a more powerful way. That is why today we come to propose the creation of the Black Paris effect in Lightroom Mobile. The Black Paris effect in Lightroom Mobile is a style of photo editing that has become popular with the Lightroom community of photographers and content editors. Its configuration is characterized by being a specific combination of dark colors and ethereal warm tones, thereby generating a somewhat romantic and nostalgic atmosphere in the image.
The term Black Paris originates from the French city of Paris, which stands out for its cobbled streets, historic buildings and predominantly elegant and nostalgic atmospheres in the city. Therefore, this effect aims to somehow represent this atmosphere in the images. To do this, we will have to make adjustments and use editing processes in Lightroom Mobile that allow us to adjust the lighting, contrast, saturation, detail and other complementary parameters in a personalized way..
The Black Paris effect editing process in Lightroom is typically characterized by:
- Increased warm tones like oranges and reds
- Desaturation of cool colors like blue or green
As this effect does not come predefined in our Lightroom Mobile, we will need to make the adjustment manually and then if we want to create the preset ourselves, thus achieving a personalized editing technique that requires skill and creativity in photo editing.
Step 1
The first thing we will do is open our image in the Lightroom Mobile application. Once we have it open, we are going to start our edition by clicking on the first section and which in this case will be “Light”.
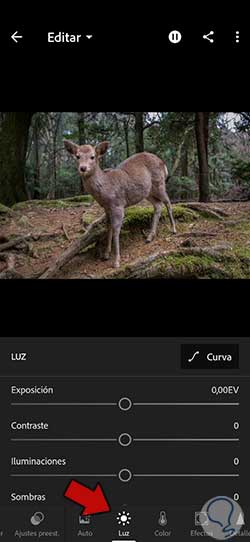
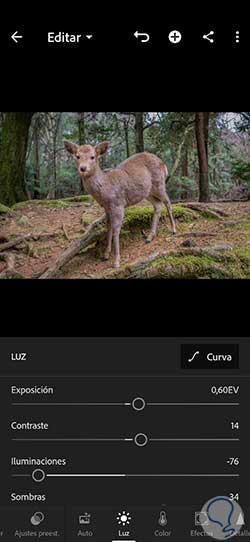
With this we will customize the lighting of our photography. We will put values similar to the following:
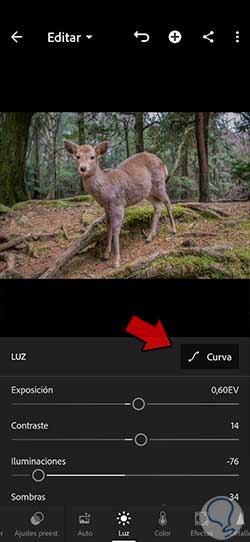
Step 2
We are going to further customize the appearance of our image in its lighting by clicking on the “Curve” option.
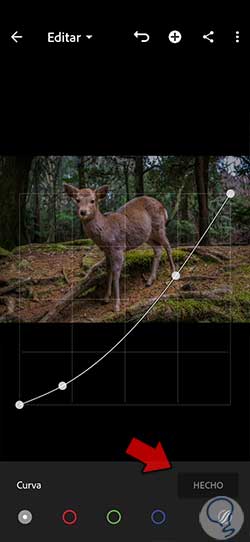
Step 3
Here we are going to customize our Curve by clicking on it and generating new modification points to achieve a look similar to the following.
Click “Done” when you are finished editing this light curve..
Step 4
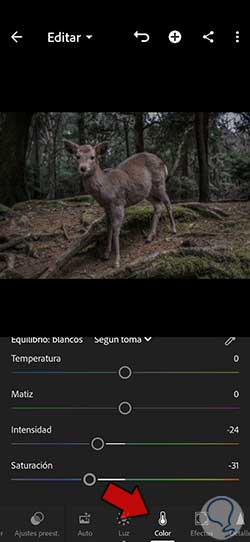
We continue with the editing of our photography and now we will go to the "Color" section. In here we are going to give a general color configuration similar to this:
- Temperature: We leave it the same
- Tint: we leave it the same
step 5
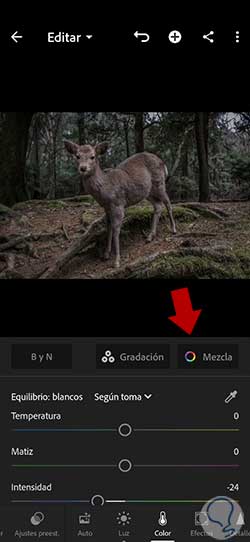
To achieve the effect we are looking for, we are going to apply an even more personalized configuration by segmenting by color. To do this, we are going to click on the option that we see of “Mix”.
step 6
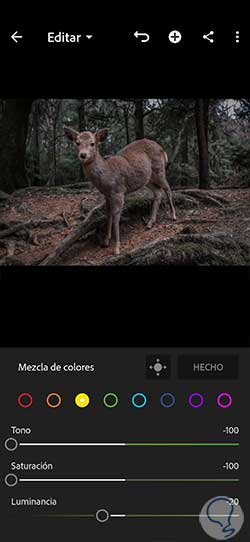
We will see that we have each color individually and with the possibility of being edited with Hue, Saturation and Luminance. We are going to give each color a configuration similar to the following that we leave you:
step 7
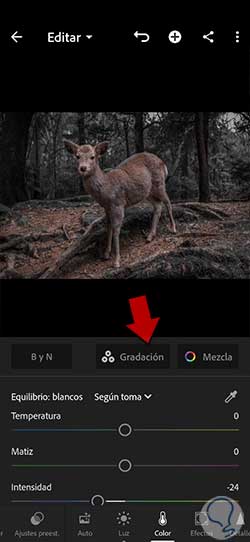
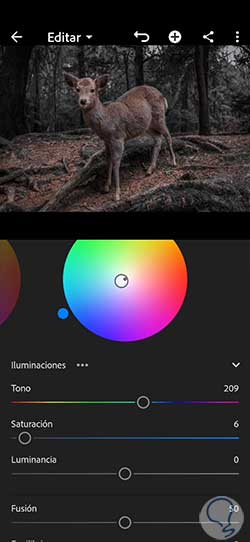
Here we are also going to give a larger configuration by clicking on the "Gradation" option.
step 8
In Illuminations we will put a configuration similar to:
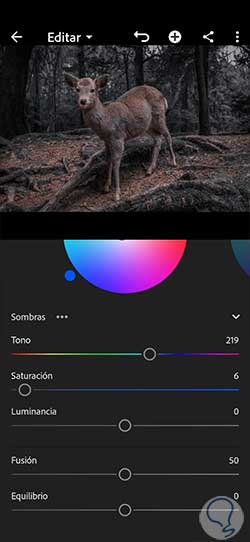
step 9
In Shadows we will put a configuration similar to this:
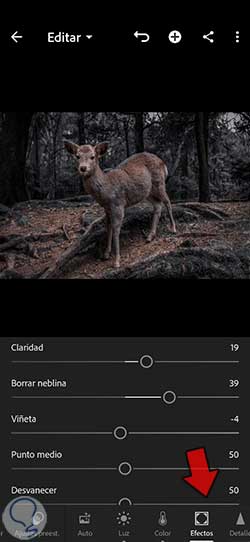
step 10
When we have the color of our photograph ready, we are going to continue with the next section, which in this case will be “Effects”. Here, although it will depend on the image, we will give values similar to these:
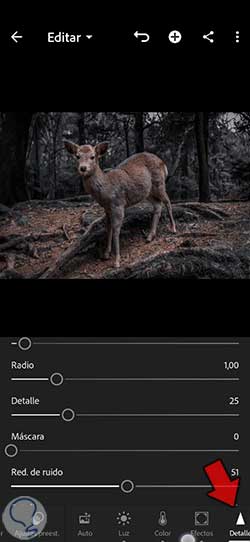
step 11
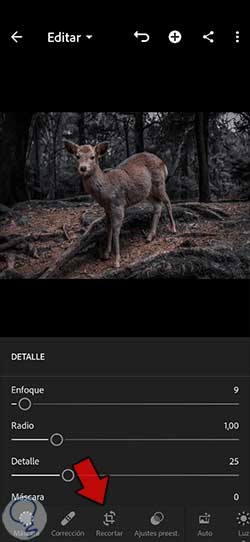
The next section that we are going to customize will be “Detail”. Once we enter here we are going to configure the following aspects with values similar to these:
step 12
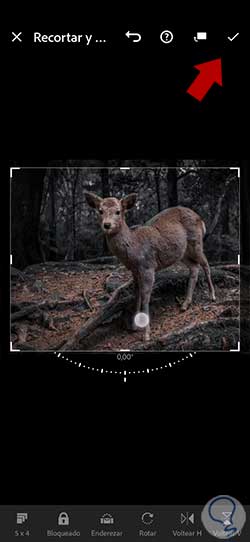
Finally, we are going to reframe our photograph from the lower option of “Crop”:
step 13
Here we can reframe the image in a personalized way, being able to choose already created proportions if, for example, you are going to publish the image on a specific Social Network. Click on the upper check to apply the changes made.
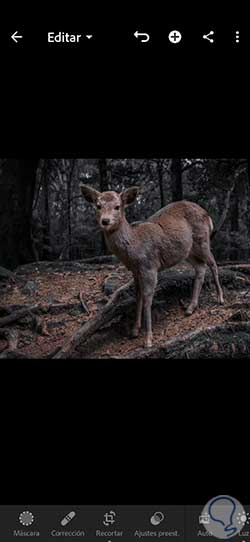
step 14
We would already have our photography ready and we could make a comparison between before and after our edition:
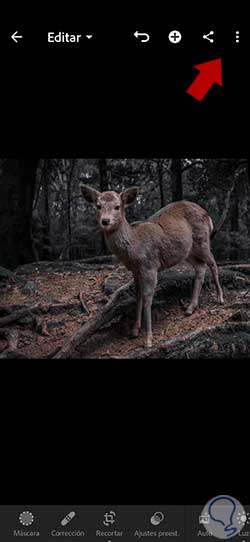
step 15
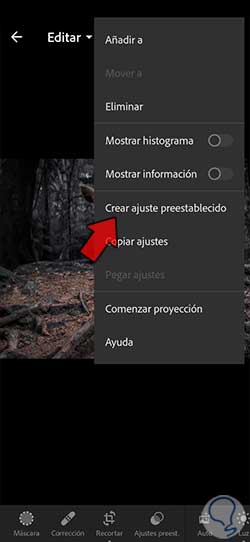
Our Black Paris setting would now be ready to use in our photography. As we surely want to use it in other images, the ideal is that we generate a preset or preset adjustment that allows us to use it later. To do this we are going to click on the three upper points in our photograph:
step 16
In the drop-down that appears, we are going to click on “Create preset” to create a new one.
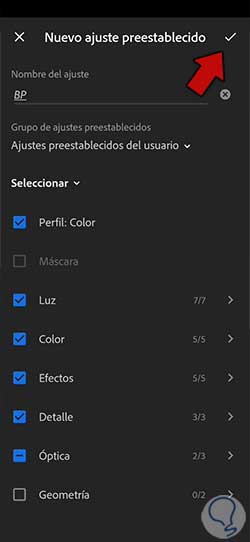
step 17
In this window we must click on the options that we want to be saved in our preset that we have made. We will also put a specific name and save the changes by clicking on the upper check that appears.
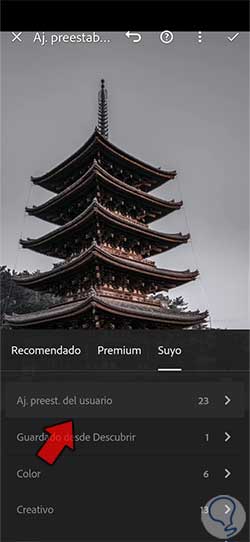
step 18
Having already generated our preset, it will be really easy to go to any photograph and apply this preset with the Black Paris configuration in Lightroom from the "Presets" panel.
In this way we will already have our Black Paris effect created with a personalized preset and with the possibility of using it whenever we want in our editions with Lightroom Mobile.