Although you will already know it by now, editing in terms of digital photography becomes practically essential and what changed the way in which images were worked with. If you want professional results where careful and meticulous work can be seen, relying on editing will make your photography have a much more attractive and effective presence. That is why tools like Lightroom Mobile will be a necessary base to be able to edit our photos at any time from a mobile device, but with professional results..
Photography and its inseparable editing can be applied in a multitude of fields and it will be our experience and knowledge that will determine what configurations and adjustments in the editing flow will be necessary and positive for each of them. One type of configuration can link very well with one type of photography, but become completely unrelated to another, so we must always start from the idea of what we want to convey and where we are going to end up publishing that photograph. All this will determine what is most appropriate and what we will be able to get the most out of our photography with.
If your goal is to place a good photograph on social networks, you should know that you have to have as many resources as possible to make your content more attractive than the rest of what already exists, something that is complicated but that you can achieve. Thanks to image editing tools such as Lightroom Mobile, we will be able to apply corrections and settings that increase the visual impact of your photos..
Among the options that we have to modify the appearance of our photographs we will find the use of filters and effects, something really trending on social networks. Although there are already tools that by default allow you to apply this type of edition automatically, we recommend that in order to raise a level of professionalism in your photography and in your editing workflow, you go to a more personalized level, that is, be you. Whoever creates those effects from scratch and customizes them according to the needs of each photograph. Avoid making and using something already created previously and that everyone uses without distinction, and start generating your own library of settings that you can customize at any time.
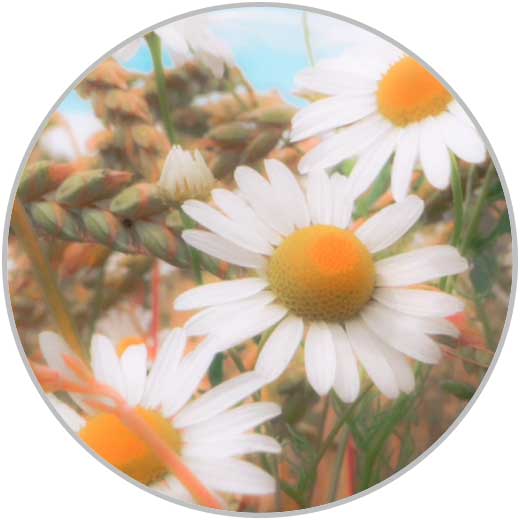
Today we present you 1 of the effects that can make more sense to your photography if you know how to apply it well. With effects like Dreamy or reverie you will be able to create a different atmosphere when viewing your photography and completely modify its aesthetics. Surely it is the end when you preview a before and after when you are aware of the great change that your photography has been able to acquire. We will see that with this effect we will soften the appearance of our photography and we will play to enhance the more pastel and warmer tones, being a very beneficial configuration in fields of photography such as events or portraits..
To stay up to date, remember to subscribe to our YouTube channel!
SUBSCRIBE ON YOUTUBE
How to Make Dreamy Lightroom Mobile Effect
With the Dreamy or dream effect we can look for different objectives but at the same time they merge into a fairly representative configuration that is easy to distinguish. This effect is widely used as a resource in digital photography in certain images and is usually characterized by a sensation of softness with a diffuse appearance where pastel colors and warm tones tend to predominate. In certain types of photography such as portrait or landscape photography, we can achieve a mysterious or fanciful sensation by adjusting some parameters such as clarity, brightness or contrast.
We already know that in social networks the rise of the publication of audiovisual and especially photographic content is a fact that is constantly reproduced and that is why if our objective is to improve the presence of our images we will have to find different styles or a way of attract the attention of the user that makes us stand out. That is why the Dreamy effect can be a good way to give our photographs another orientation and get the viewer to notice them and also generate a certain sensation.
Dreamy Photography Uses
If you wonder when you will be able to use this type of effect, we could mention some photography styles where it would fit quite well:
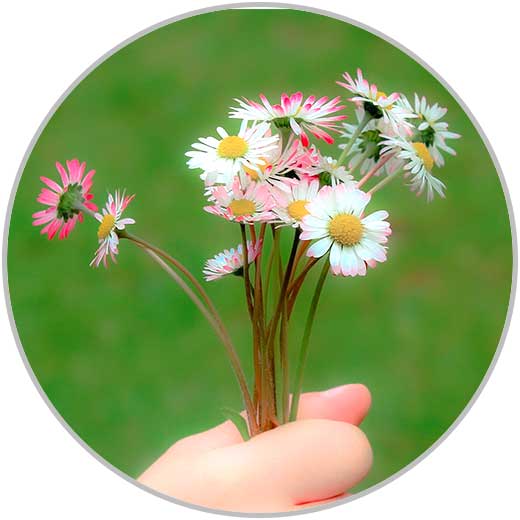
- Portrait photography: The Dreamy effect can be used as a resource that is also quite present in portrait photographs as it makes the textures and lines of the skin blur and creates a smoothing effect that is more pleasing to the eye. A type of portrait photography that usually works very well is in wedding or couple sessions where we will create a more idyllic or romantic atmosphere that will favor the image of the protagonists.
- Event photography: The Dreamy effect can be positive in photographic moments such as those mentioned before, similar to those of a wedding or a party where we seek a greater presence of warm tones and seek a more dreamy environment and predisposed to generate emotions around those images.
- Photography on Social Networks: The Dreamy effect is one of the favorite filters to apply to our photos when we are on social networks and this dreamy effect on certain products can attract more attention from users who they can potentially be final buyers. Therefore, the Dreamy effect can be a great ally in marketing issues for products associated with the user, such as beauty or fashion, where all these characteristic adjustments create more attractive photographs.
- Landscape photography: The Dreamy effect can give a different result to your landscape photos when the environment invites you to enhance that romantic and softened-looking feeling. If your image has a lot of colors and a lot of contrast, this type of effect may not be the most appropriate for your image. If what you are looking for is to give the photograph an aspect of tranquility and serenity where the green and blue tones have an appearance, this effect can be positive.
- Travel photography: The Dreamy effect can also be a great ally in our travel photography as it can bring a more mysterious or idyllic atmosphere to that space that we have photographed.
Once we have analyzed what types of photographs we can find to make an effect like Dreamy work, we are going to see how to get a standard configuration for this effect and even how to generate reusable presets in any other photograph quickly whenever you want.
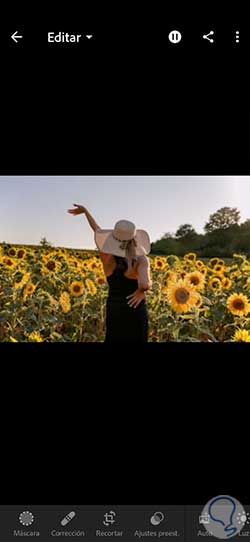
Step 1
The first thing we will do is open our image in Lightroom Mobile to start editing it in a personalized way. You can open it from the Lightroom gallery or import it from your phone.
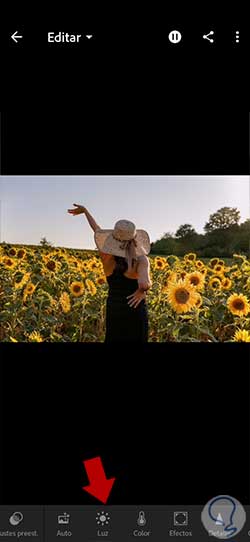
Step 2
The next thing will be to start editing our photography in the lighting plane, so for this we are going to click on the lower tab that corresponds to the "Light" category.
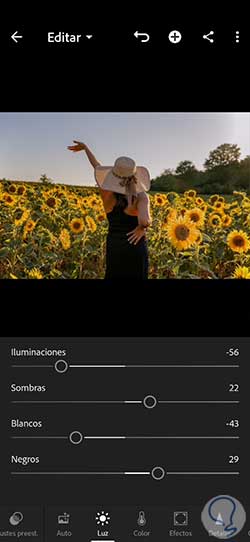
Step 3
We are going to configure some lighting settings that will be similar in the following ones in order to end up achieving the Dreamy effect that we are looking for by configuring the light.
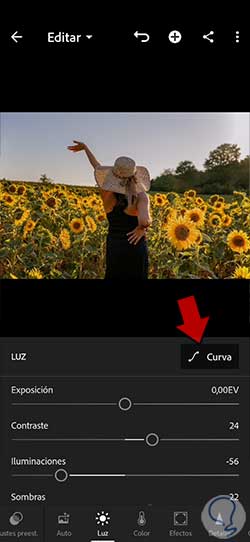
Step 4
We will continue editing our lighting by working with the different segmented curves. To do this, click on "Curves".
step 5
Here we are going to modify each of the curves that we show you to get a configuration similar to it:
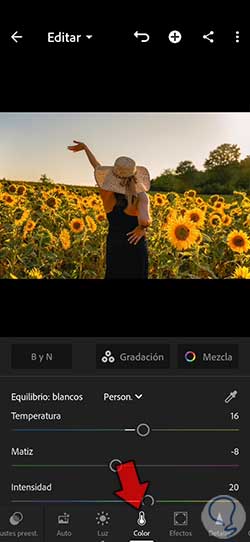
step 6
Now we continue editing what is related to color in order to achieve the final effect we are looking for, for this we will click on "Color". As you already know, depending on the photograph, you may need to modify the values a bit, but in general the settings are as follows:
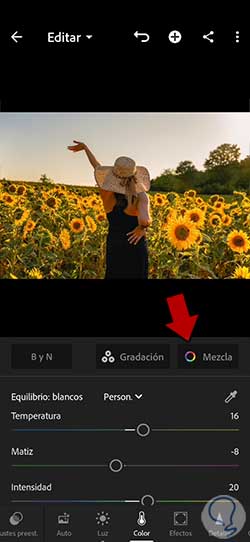
step 7
We are now going to make a more complete configuration of the color by making a segmented adjustment of each color by clicking on the "Mix" section.
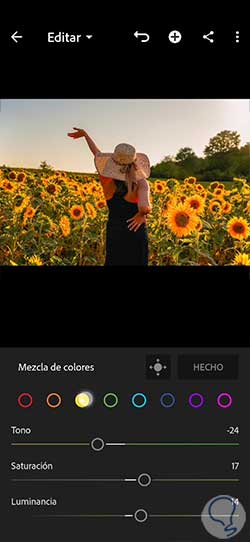
step 8
Once here we will click on each color and we will give values similar to those that we indicate based on Hue, Saturation and Luminance. When you finish, click on the "Done" icon to apply the modifications made.
step 9
When we also have the color environment of our photograph ready, we are going to apply a series of adjustments that will change the appearance of our photograph a lot. To do this, click on the "Effects" section:
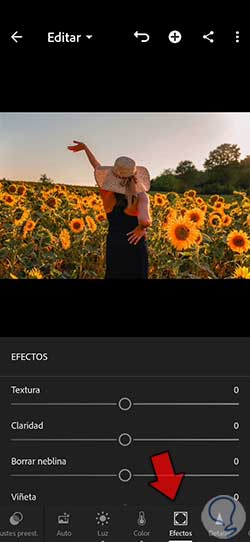
step 10
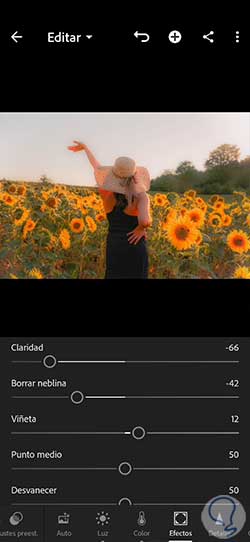
We are going to give here a series of values similar to the following to achieve the dreamy effect we are looking for. In case you want to enhance it more you can vary the values:
step 11
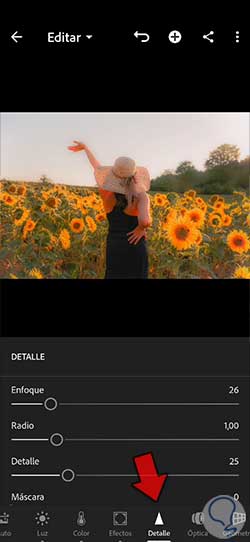
We continue our editing and this time we will continue to make adjustments to our photography. In this case, we are going to modify aspects such as the Focus or the Noise Reduction to be able to give a little more detail to the image, but correcting any noise that may have been created. We will then click on "Detail" and give values similar to these:
step 12
With these configurations we would have already achieved our Dreamy effect. Another modification that we can make to our photography if we need it is to reframe it by changing the measurements. Many times, depending on where we are going to publish the photograph, specific measures or others are required, as can happen on Instagram. For this reason we can go to the "Crop" section in the lower section.
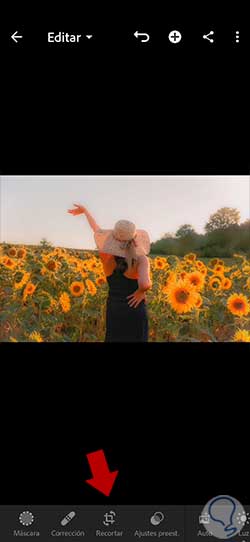
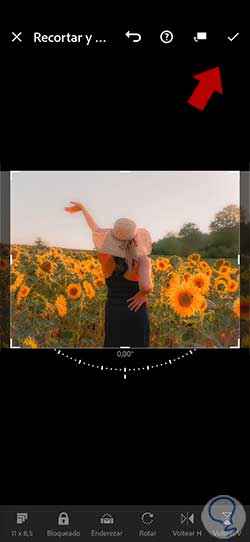
step 13
Here we will be able to do a manual reframing or use predefined measures to establish the new appearance of our photograph.
step 14
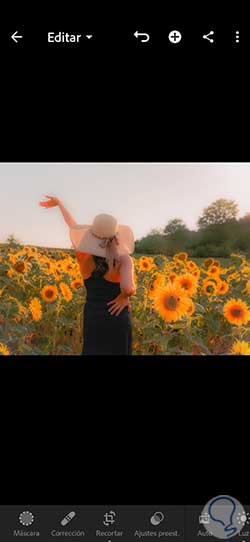
Let's do a before and after comparison of our photo to see how applying the Dreamy effect in Lightroom Mobile has affected:
step 15
Our effect would already be finished and we would have managed to modify the appearance of the photograph. It is probably a style that you want to reuse in another image, so the ideal is that you copy the adjustments when you need them or generate a preset to easily use at any time. To do this we are going to click on the three upper points of our image:
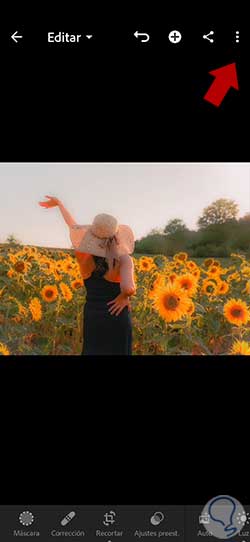
step 16
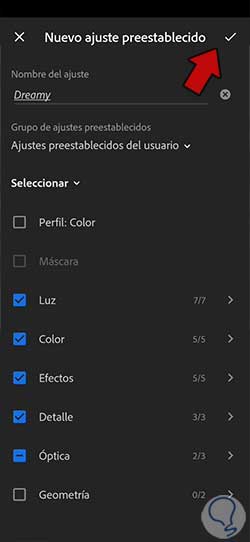
Among the options we will choose "Create preset" to generate a new one or if you only want to copy the settings then you can "Copy settings". In this case we are going to create a new preset.

step 17
On the next screen we will be able to choose which settings we want to add to our preset. We are going to give it a personalized name to distinguish it from the rest of the settings and we will apply the changes with the upper check to save it.
step 18
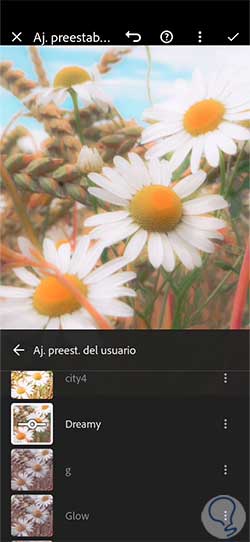
By having our preset already created we can easily apply it to any other photograph of our own presets. Remember that if you need to, you can modify any of the settings to adapt it to each image.
In this way we will have been able to create a Dreamy effect in Lightroom Mobile with the possibility of creating a preset that we can use whenever we want in any photograph.