The hard disk is one of the hardware elements that has a fundamental and vital role in the entire daily work process regardless of the operating system used, this is due to the fact that the hard disk is carried out some actions such as:
- Installation of the operating system itself.
- Installation of applications and programs.
- It serves as information backup.
So if something fails on the hard drive it can cause a series of critical problems in daily tasks or in corporate tasks and it is ideal to take the necessary safety and prevention measures before this occurs..
One of the most practical methods to always have the integrity and availability of the information is to clone our hard disk since in this way we will be migrating to a new disk all the information hosted on the source disk, this guarantees that all the integrity of The information will be available for use at any time.
A hard disk is still a physical device that can present faults such as:
- Errors in their sectors or heads .
One of the reasons why many clones are also usually done is to change from a hard disk, to a larger one, smaller or to change to another disk model such as SSDs that are much faster disks than conventional HDDs. ..
Now, to migrate this information between hard drives there is no better option than making use of SSD (solid state) hard drives which are much safer and more reliable than an HDD mechanical disk, but with the storage-level restriction, a disk HDD can be up to 2 TB. Nowadays on SSD disks you can also find that size, they have also dropped considerably, making them accessible to the vast majority.
In equipment in general, but especially in laptops and laptops we consider that they are a "must have" update the disks to SSD for efficiency, thanks to its greater speed improving the performance of daily use and for offering options of access, shutdown and security in SSD discs (are superior to HDDs)..
To keep up, remember to subscribe to our YouTube channel! SUBSCRIBE
Next, we will explain some practical and free utilities to carry out the cloning process of our hard drives in Windows 10 . Either from HDD to SSD, SSD to SSD or HDD to HDD.
To perform the cloning, regardless of the program you use, we remind you to use a case with USB adapter for 2.5 or 3.5 discs.
- USB adapter case for 2.5 discs
- USB adapter case for 3.5 discs
1. Clone an HDD SSD using Clonezilla

Another of the useful and practical options to clone hard drives in Windows 10 is Clonezilla , the difference of this application is that its execution must be done from a bootable CD, DVD or USB as an ISO image.
Clonezilla is a program developed for the creation of images and the cloning of partitions or hard drives, it also helps to implement a system, create a complete backup and recover that copy.
We currently have two types of Clonezilla which are:
- Clonezilla SE (server edition).
For this case we will use Clonezilla live which allows to create a backup and restore of a single machine since Clonezilla SE is focused on a massive implementation, since it can clone up to more than 40 computers simultaneously.
Clonezilla saves and restores only the blocks used on the hard drive, which has a positive impact on the efficiency of the clone.
Among its most outstanding features we have:
- Compatible with file systems such as ext2, ext3, ext4, reiserfs, reiser4, xfs, jfs, btrfs, f2fs and nilfs2 of GNU / Linux, FAT12, FAT16, FAT32, NTFS, Mac OS HFS +, FreeBSD UFS, NetBSD and OpenBSD, minix, VMFS3 and VMFS5 of VMWare ESX.
- You can clone disks on GNU / Linux, MS Windows, Intel-based Mac OS, FreeBSD, NetBSD, OpenBSD, Minix, VMWare ESX and Chrome OS / Chromium OS both 32-bit (x86) and 64-bit (x86-64) .
- You can reinstall the boot loader, including grub (version 1 and version 2) and syslinux.
- It is compatible with LVM2.
- It supports MBR and GPT formats.
- Supports unattended mode.
- You can encrypt an image thanks to ecryptfs which is an enterprise cryptographic stacked file system compatible with POSIX.
- It supports multicasting.
- The image file to use can be hosted on the local disk, an ssh server, a Samba server, an NFS server or a WebDAV server.
- Integrates AES-256 encryption.
- It is based on Partclone (default), Partimage (optional), ntfsclone (optional), or dd to create an image or clone a selected partition.
Step 1
The first step to use Clonezilla is to download the ISO image in the following link:
Clonezilla
This image must be recorded on either a CD, DVD or USB media and configure the boot of the computer from any of these options through BIOS.
We start the team and the following window will be displayed:
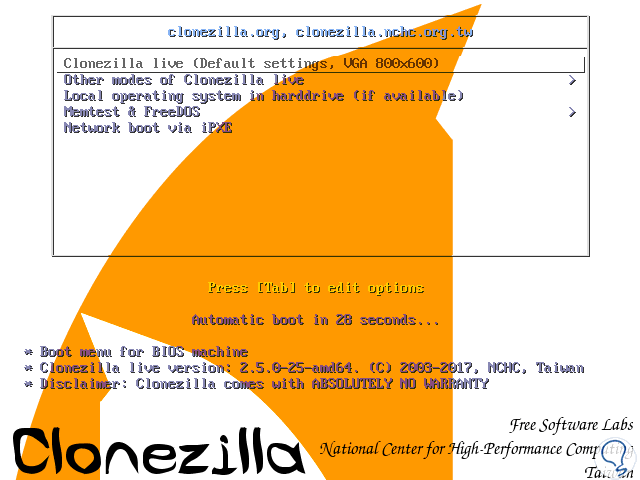
Step 2
There we select the default option (Clonezilla live) and press "Enter", the following will be displayed:
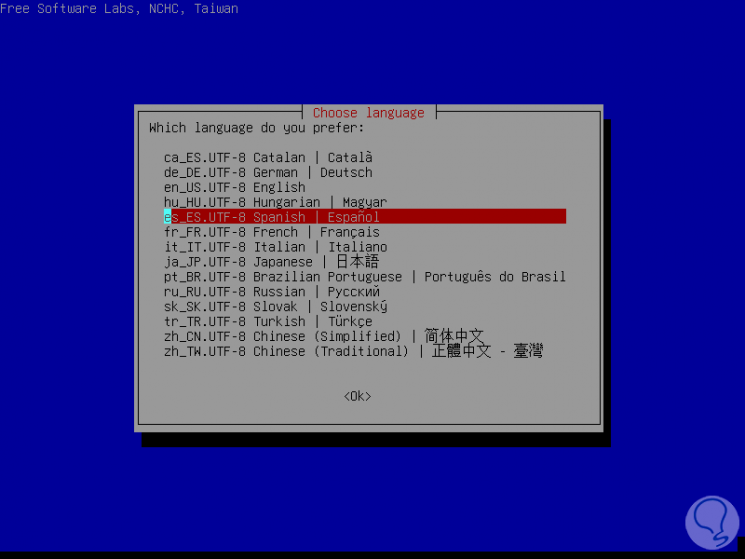
Step 3
Select our language and press "Enter" to confirm and then define the keyboard parameters:
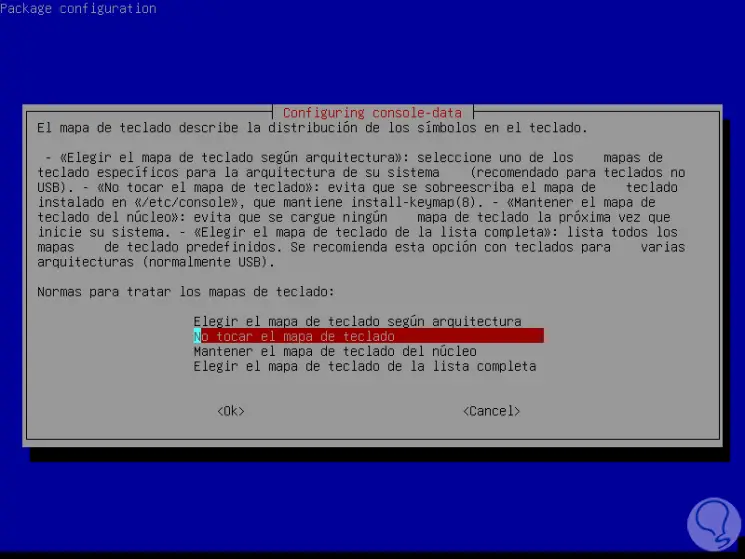
Once this is defined, we press "Enter" and we will be redirected to the following window:
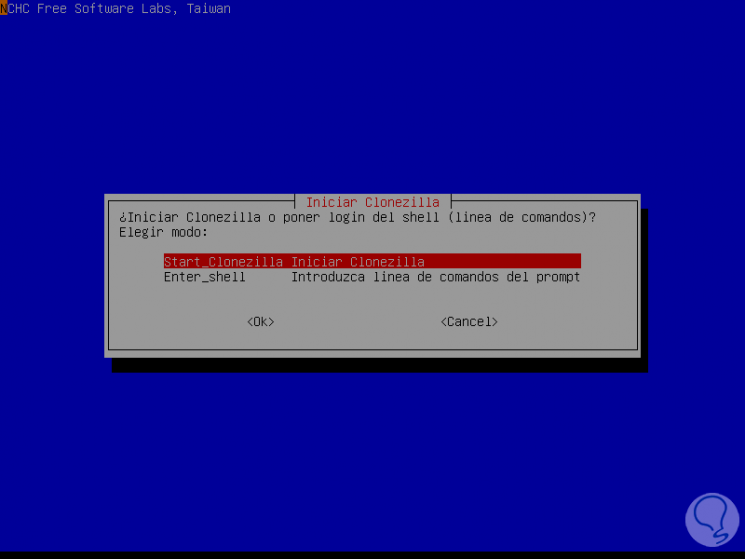
Step 4
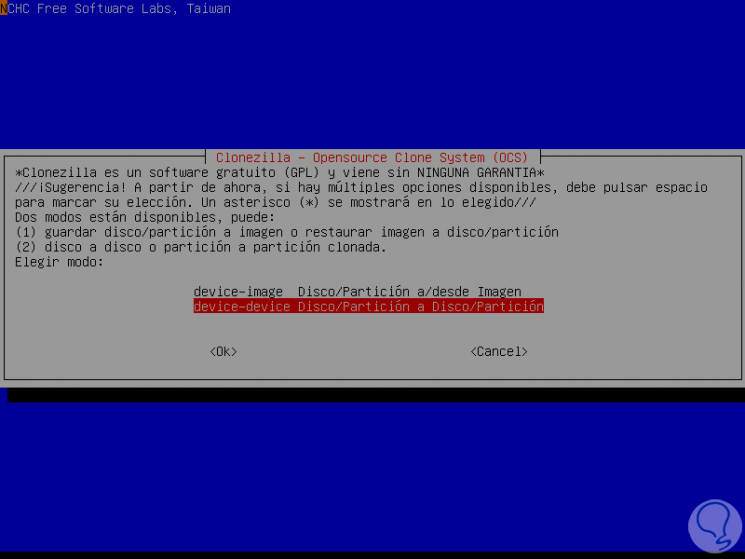
There we select the "Start Clonezilla" option and the following window will be displayed where we select the "device-device Disk / Disk Partition / Partition" line:
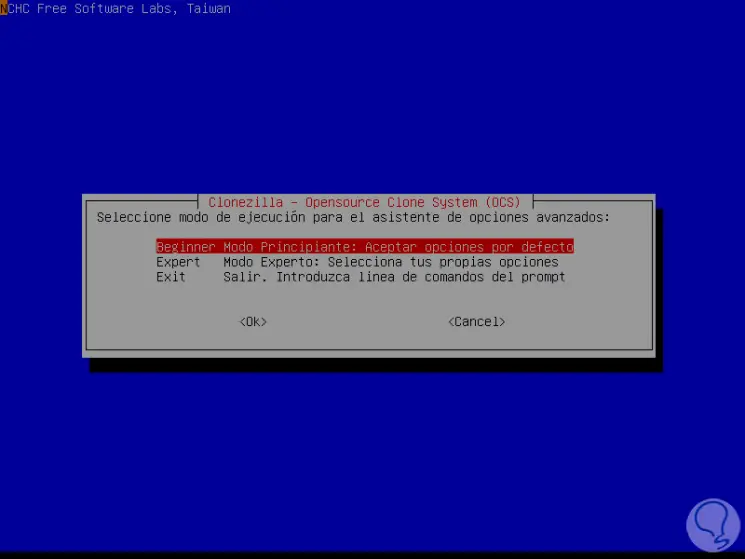
Press "Enter" and now select the "Beginner" option:
Step 5
In the following window we will define the type of cloning to be performed, in this case we select the disk_to_local_disk line:
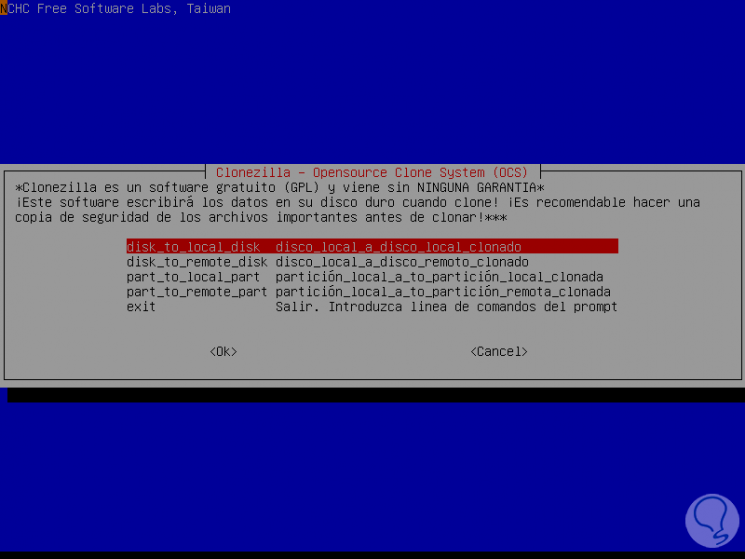
Now we must select the source disk which is going to be cloned:

Step 6
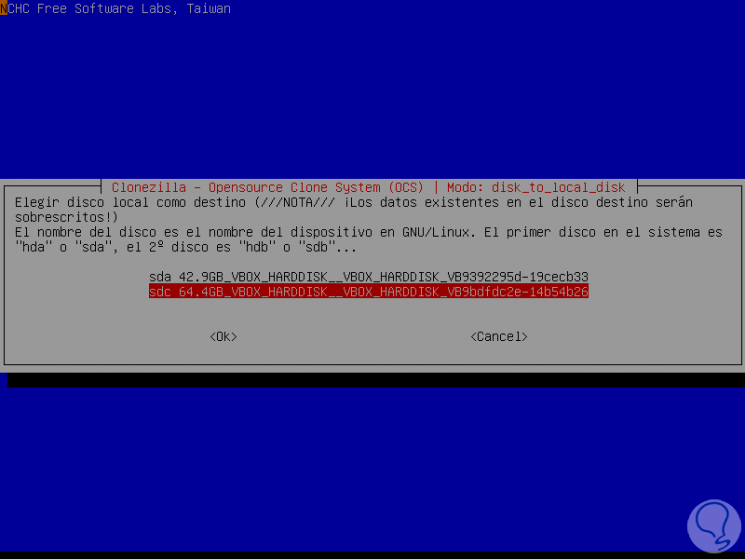
Press "Enter" and now select the disk to be cloned, the destination disk in this case:
Press "Enter" to confirm and the advanced options will be displayed where it will be possible to configure:
Sfsck
This option skips checking and repairing the file system if necessary.
Fsck
This option executes the analysis and repair of the file system before cloning interactively.
Fsck -y
Repair the file system thoroughly which may take longer.
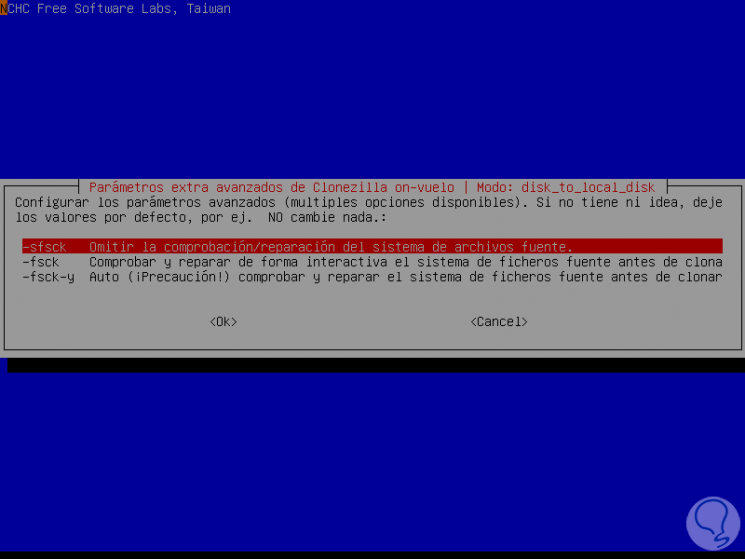
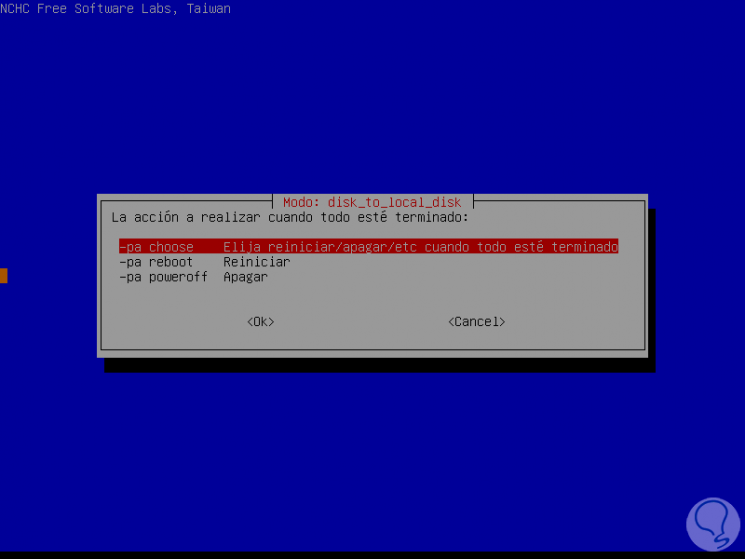
Step 7
Select the first option and press "Enter" and now define the action to be taken when the process has been completed (Shut down, restart or the possibility of choosing at the end):
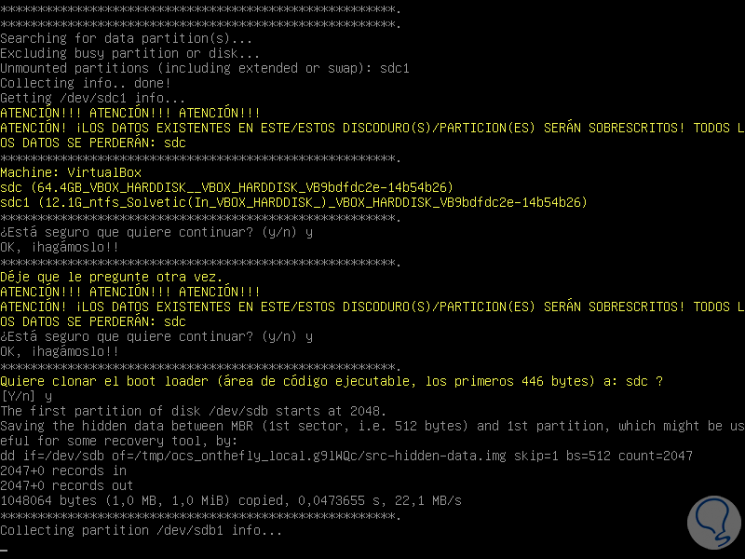
We define the best option and press "Enter" and we will see the following message in the command console:
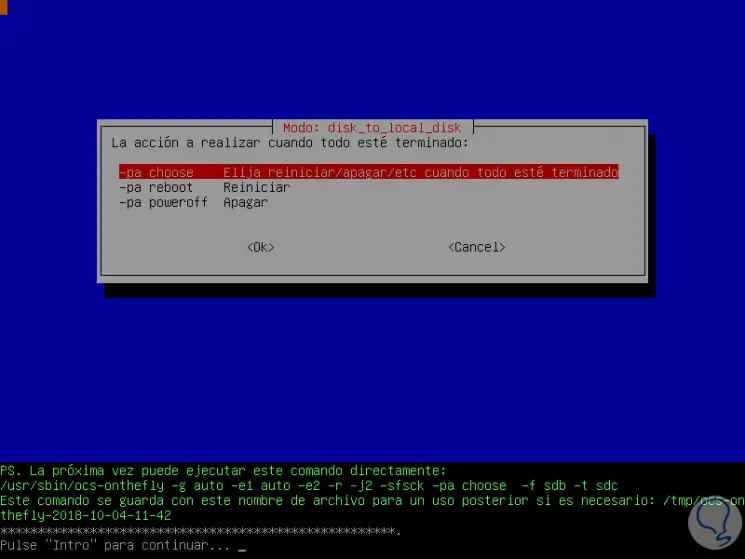
Step 8
Press "Enter" to execute the cloning task of the selected disk:
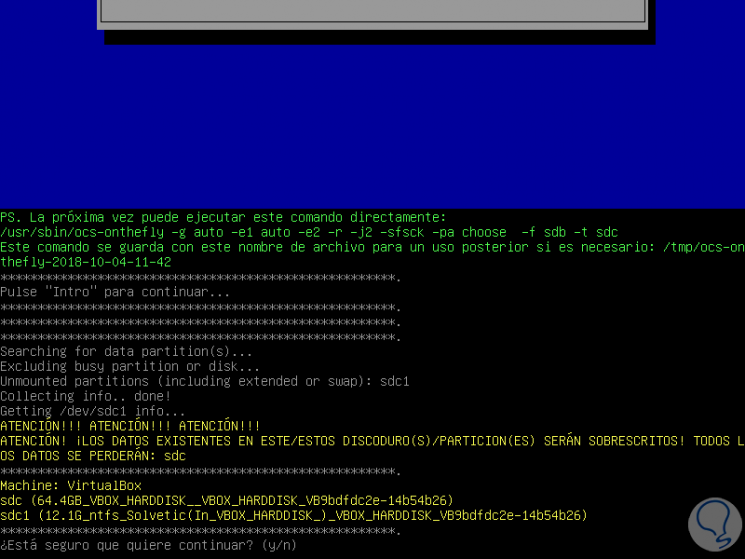
Enter the letter and to confirm the action and follow the process.
Step 9
We can see the cloning status at some point graphically:
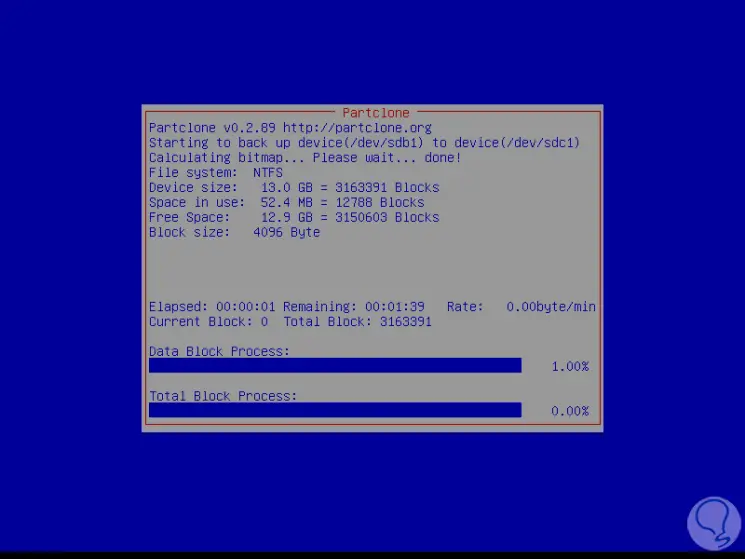
Once finished, the following will be displayed:
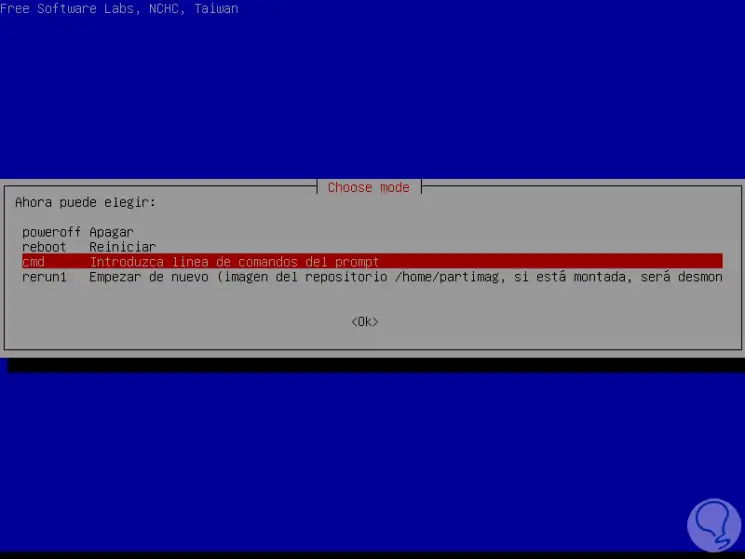
There we define what type of action to complete the process.
2. Clone an HDD SSD hard drive using Partition Wizard Free

Partition Wizard, which some of you know as Partition Magic is a long-known program. It has always worked correctly and in an easy and simple way you can make cloned disk among many other options offered on hard drives of all kinds.
To clone, it would be to make a copy of the disk, and in this tutorial we focus on explaining step by step how to clone HDD to SSD hard drive that is one of the most demanded topics by users. With these steps you will leave doubts about how to use it without problems since they offer a large button within the main menu of the free Partition Magic Free tool.
At disk level you have many functions that are better to discover but to highlight the most important in general are these:
- Clone or migrate hard drive to another HDD or SSD hard drive. This option today is very useful to be able to reinstall the operating system along with all its configuration. Keep in mind that it takes very little time to perform disk cloning.
- Partition resizer is a program that allows us to partition easily and graphically through a friendly graphical interface. It helps us organize the disk and partitions in basic, dynamic, GPT, MBR, single disk or RAID disk versions.
- It allows us to quickly convert the disk or partition between basic and dynamic disks, MBR and GPT disks, NTFS and FAT32 partitions. And you don't lose data, by doing it simply and quickly.
As we said it is best to try it and when using it you will see all the possibilities it offers.
Step 1
First we must download the program Partition Wizard free version through the official website from this link:
Partition Wizard
Step 2
Once downloaded and installed, as you can see in the following image, the different hard drives that we have installed on the computer will appear.
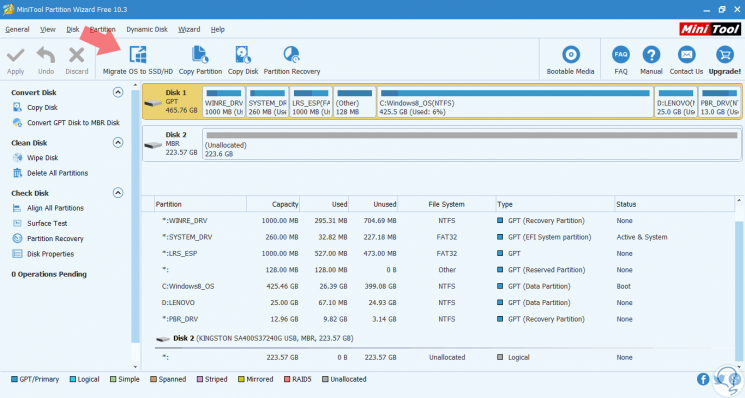
As you can see, we have in this case two disks, one that is Disk 1, with 500 GB that we want to clone to a 256 GB SSD (Disk 2). We have put the SSD hard drive in a USB connection adapter and connected to the laptop / laptop to first clone the disk.
If you do not have a USB adapter for HDD or SSD hard drives, we recommend this link of the USB hard drive adapter.
- 2.5 "HDD hard drive enclosure
- USB adapter case for 3.5 discs
Step 3
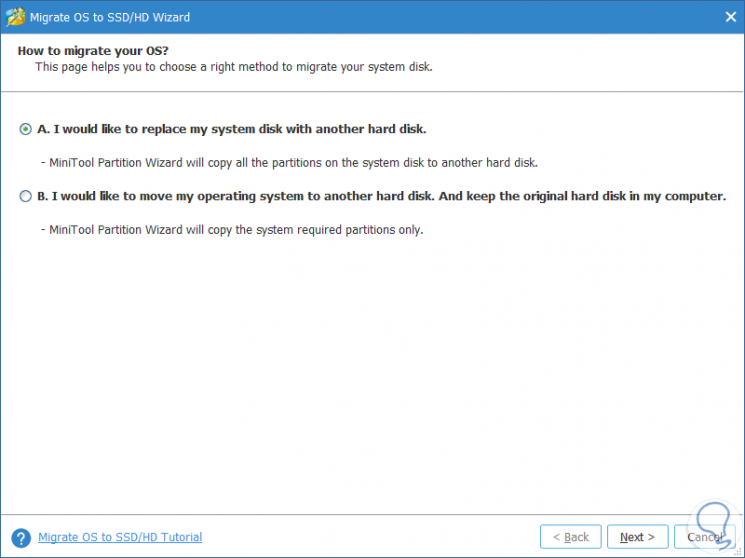
Now we must select Disk 1, which is what we want to clone in the new SSD. You see above the option "Migrate OS to SSD / HD". The following window will appear, where we can select one of the two options.
- I want to replace my system disk with another hard disk. This option will make you a complete clone of all partitions to another hard drive.
- I want to move my operating system to another hard drive and keep my original system on the computer. What this option does is copy only the partition (s) selected or required by you.
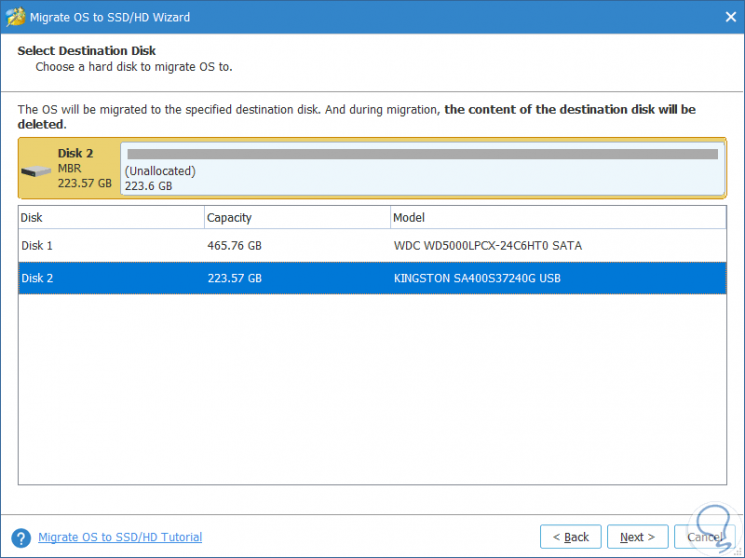
Step 4
Now we must select the clone destination disk. This data will logically erase all data. We select the 256 GB SSD as you see in the image.
Step 5
Click on "Next" and now two interesting and important options will appear as well.
- Fit partitions to entire disk. (Fit partitions to the entire disk space of destination).
- Copy partitions without resize. (Copy partitions without resizing).

In our case we recommend and we must select to adjust partitions to the size of the destination disk so that in the case of being smaller or larger the destination disk, it will be adjusted to place the correct size to make the most of it or as is our case, adjust it to the maximum partition size offered by the destination disk.
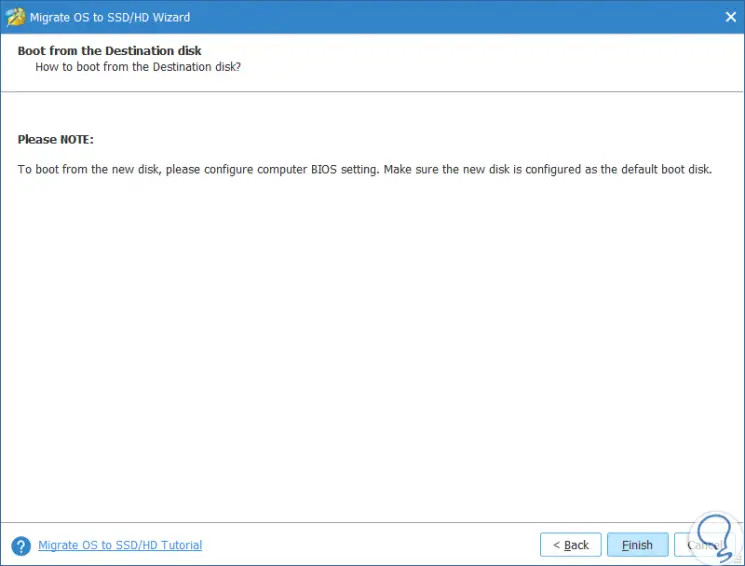
A new warning will appear, which once cloned, you must manually replace the computer disk and if necessary adjust it in the BIOS.
Step 6
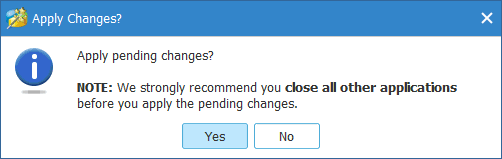
We will see at the top left that a button that says "Appy" appears. That would be to start the disk cloning procedure.
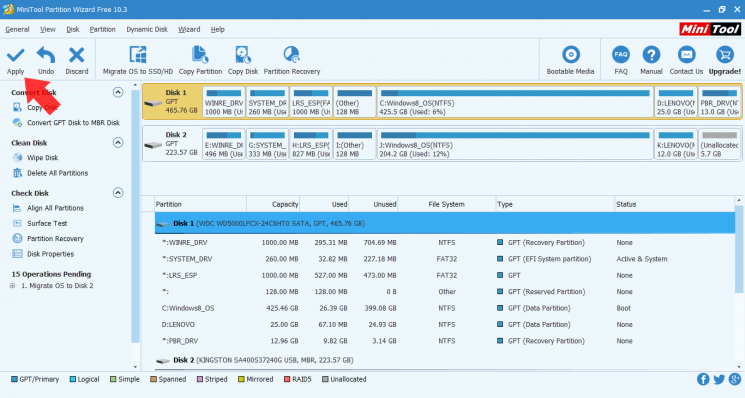
We must close all programs and accept all changes for the cloning process to begin.
Step 7
The cloning process will continue and its course will continue until a message appears as shown below:
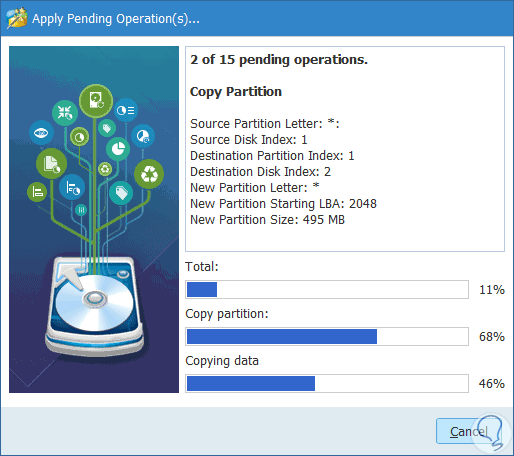
It tells us that since we have it, it cannot finish cloning without restarting, since the partition of disk C is in use. We must click on "Restart Now" and the device will restart to continue automatically with the cloning process.
3. Clone an HDD SSD hard drive using AOMEI Backupper

AOMEI Backupper has a version called Standard which is the free version to carry out all backup tasks, where it will be possible to clone a hard drive from either a large disk to a smaller one thanks to an intuitive interface and with a simple method and best of all, the normal system tasks will not be interrupted or the use of any program.
By default, this application clones only existing data on the hard disk, but integrates a "Sector by sector" option which can clone the data that has been deleted which makes it a functional tool for backup tasks.
AOMEI Backupper is compatible with 32-bit and 64-bit versions of Windows 10.
Among its main features we find:
- It will be possible to backup all the contents of a system unit to an image, including the Windows operating system and its applications.
- Ability to create scheduled backups to backup data automatically.
- Allows you to automatically backup multiple files to local, external or network storage.
- Compatible with HDD and SSD, MBR, GPT and removable drives.
By downloading this application, some utilities such as:
Step 1
This application can be downloaded at the following link:
AOMEI Backupper
Step 2
Once downloaded AOMEI Backupper, we proceed to its execution and this will be the initial environment of use:
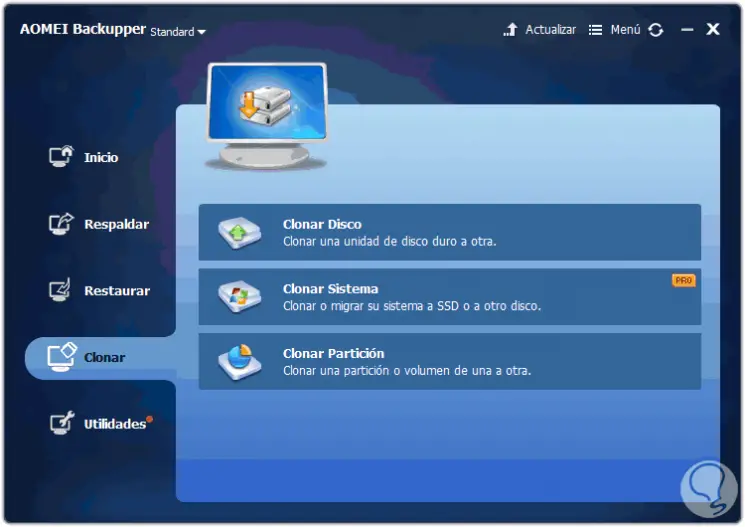
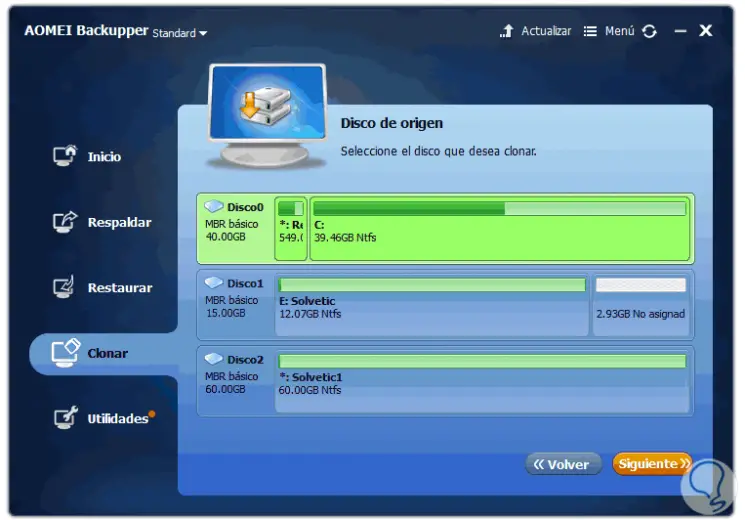
Select the "Clone" option and define the Clone Disk category, after this we must select the source disk, that is, the disk that will be cloned:
Step 3
Once this is defined, click on "Next" and now we must define the target disk, that is, where the disk will be cloned:
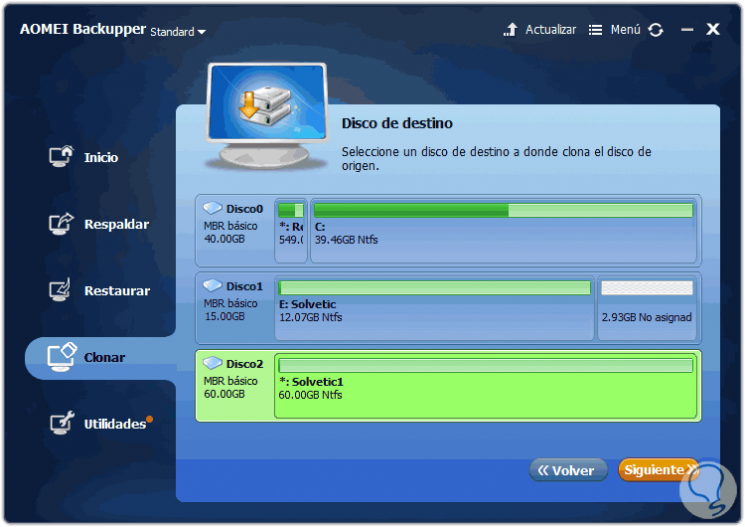
Step 4
Click on "Next" and the following message will be displayed:
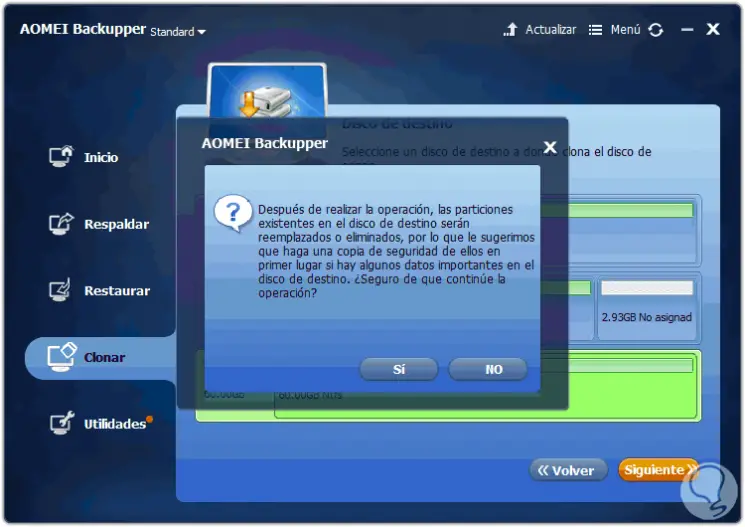
Click on "Yes" and we can access the cloning options offered by AOMEI:
Step 5
There we have options such as:
Edit partitions on the destination disk
With this option it will be possible to resize partitions in order to use full capacity when cloning a small hard drive to a larger one.
Clone sector by sector
Selecting this option will copy all the sectors, whether they are in use or not, therefore, this option increases the time of the cloning task, to take into account is that, if the Windows 10 hard disk is cloned using sector by sector, it will not be possible to resize partitions on the destination disk.
Align partition to optimize SSD
This option improves performance if the target disk is an SSD as is the case.
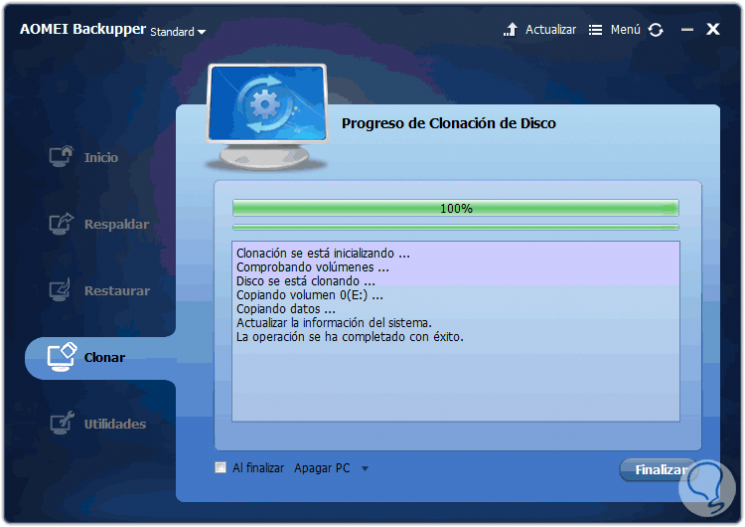
Once we define the best options, click on the "Start Clone" button and the utility will start the process of checking and copying data from the source disk to the destination disk:
Once this process concludes we will see the following:
Step 6
Click on "Finish" to exit the wizard and at the bottom we can specify tasks to perform when the process concludes as:
- Suspend it or hibernate it.
Thus, AOMEI Backupper offers a simple but practical cloning interface.
4. Clone an HDD SSD using Macrium Reflect

Developed by Macrium, this free backup software, disk images and cloning is an alternative to take into account thanks to its different features and usage options, and although it has professional versions, the free version gives us enough tools to carry out the complete cloning of our disk to another SDD disk without problems.
All the tasks performed in Macrium Reflect, are safely stored in a backup file which can be recovered in a simple way, in addition to this, Macrium Reflect supports backups in local, network and USB drives.
Among the novelties when using Macrium Reflect we have:
- Instant virtualization of Macrium backup images thanks to the viBoot 2 function.
- Integrate Task Scheduler 2 ideal for creating automatic backups.
- It is licensed for use in a business environment.
- We can create live images of the running Windows operating system.
- It is possible to examine the contents of the backup in Windows Explorer.
- Supports the creation of differential images.
- It allows to restore non-boot systems.
- Contains flexible templates for programming copies.
- It will be possible to start backups instantly on a Hyper-V virtual machine.
Step 1
Macrium Reflect can be urged from the following link.
Macrium Reflect
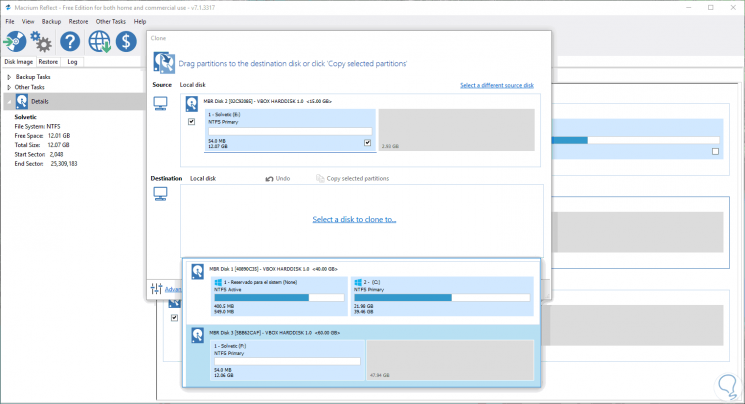
At the time of running this utility this will be your environment:
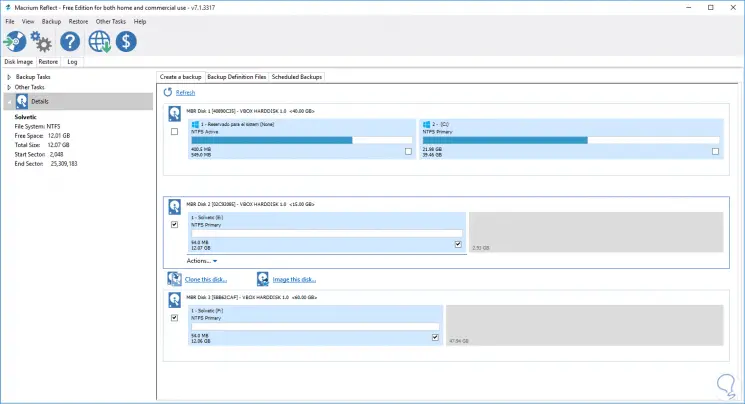
Step 2
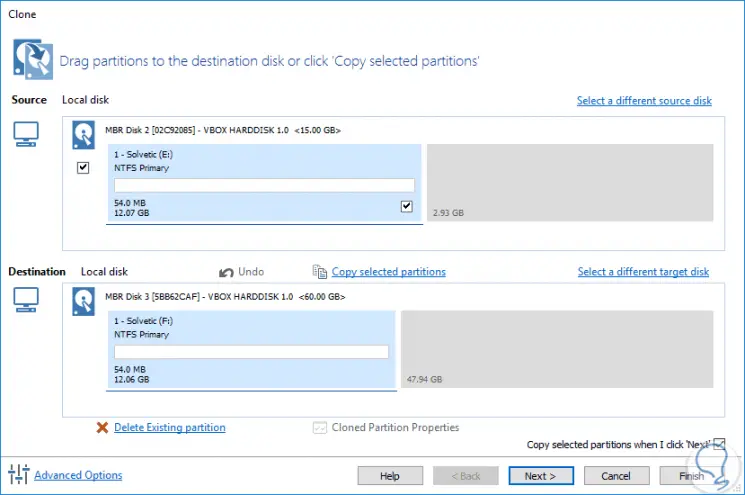
There we activate the box of the hard disk to be cloned and click on the "Clone this disk" line and then the following window will be displayed where we click on the "Select a disk" to clone to line and in the pop-up window we select the disk of destination:
Once defined the disk we will see the following:
Step 3
There we click on the "Next" button and the following window will be displayed where we will have the opportunity to create a scheduled task for disk cloning, if this is the case, click on the "Add Schedule" line located at the bottom:
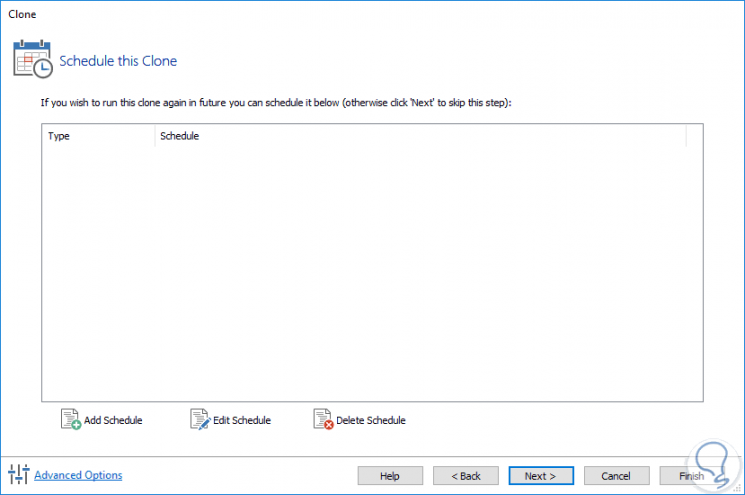
If we are not going to create a scheduled task, click on "Next" and we will find the summary of the task to be executed:
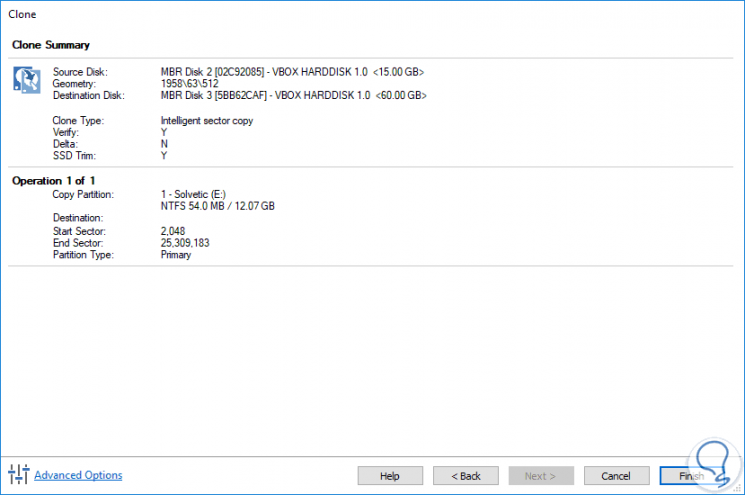
Step 4
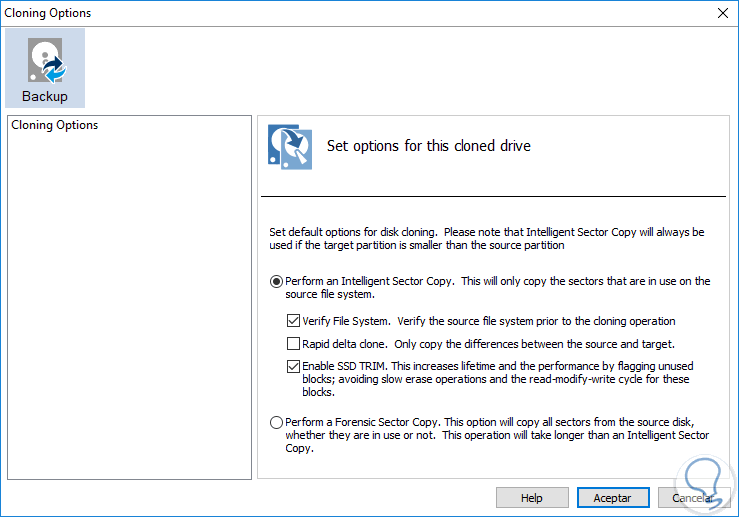
If we click on the Advanced Options line we can define variables such as:
- Perform a smart sector scan which clones only the sectors that are in use optimizing time.
- Enable file system checking.
- Enable enhancement for SSD.
- Perform a forensic analysis which is responsible for copying all sectors of the disk both used and unused.
Step 5
Once this is defined, click on "Accept" to apply these changes.
Click on the "Finish" button to execute the cloning and the following window will be displayed where we define:
- Execute the task immediately.
- Save the task in XML format.
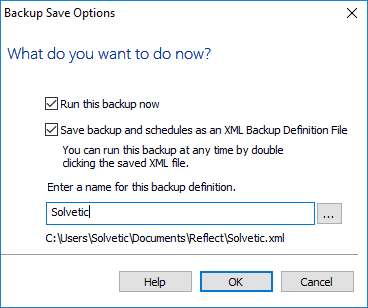
Click on "Ok" to start the hard disk cloning process using Macrium:
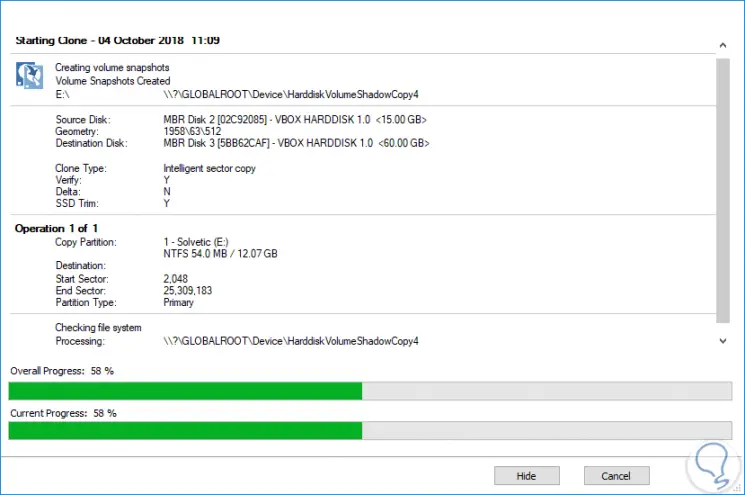
Step 6
We will receive notifications of each step in the Windows 10 action center.
Once the process is finished we will see the following:
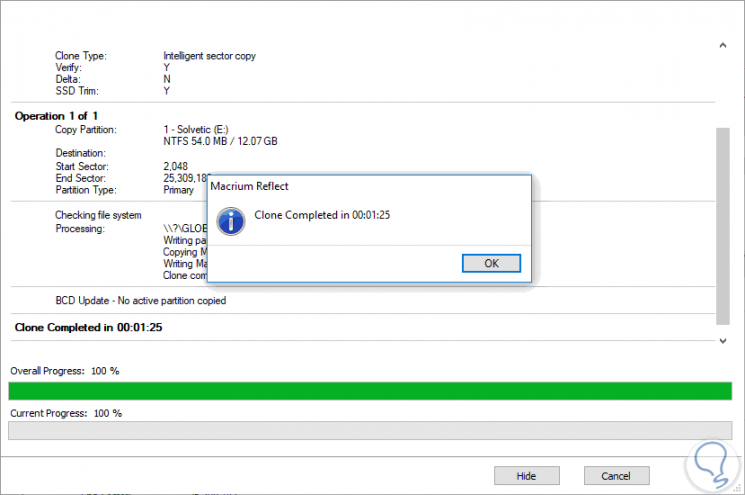
In the center console we will also see the action executed:

In this way Macrium has created a disk clone in a safe, fast and complete way.
We can see the different options offered by these tools to clone our disks in a safe and total way in Windows 10 .