We currently have several options when using a hard drive because in the market we find both hard drives (HDD) and solid state hard drives (SDD). In general, if our team has a solid state disk we will notice a greater speed of access to programs and applications, greater security and better performance functions. With the classic HDD discs we will receive a greater storage capacity and more savings at the moment of acquiring them. Both have the mission to help us host the operating system, save our files and perform many more daily tasks..
One of the best practices that we can carry out with hard drives is to create a backup of the most important information of these or completely clone the hard drive . This is useful for the moment we want to have all the information on the disk in a new computer.
If we do this manually, it is a tedious and extensive task since if we handle large volumes of data imagine everything that may take to take the copy of this information . But do not despair that TechnoWikis brings the ideal solution to clone our disk to another one in a simple way thanks to the Clonezilla utility that we will analyze in detail in this tutorial..
What is Clonezilla
Clonezilla has been conceived as a utility through which it will be possible to create images, clone partitions and disks in a simple but safe way.
Clonezilla is available in three editions to select the most appropriate based on the tasks to be executed, these are:
- Clonezilla SE (Server Edition)
If you still doubt Clonezilla you should know that by using this utility it will be possible to clone up to 40 computers simultaneously because Clonezilla saves and restores only the blocks that are used on the hard disk, thus increasing the performance and valid data in the cloning process .
Clonezilla Requirements
The requirements to use this utility are really simple:
- An X86 (32 bit) or x86-64 (64 bit) processor
- A boot device either a CD / DVD drive, a USB port, PXE boot or a hard drive.
Clonezilla features
Some of the features of Clonezilla are:
- Compatible with unattended mode thanks to which all actions are performed automatically through commands.
- The created images can be encrypted thanks to the ecryptfs function, which is a system of stacked cryptographic files compatible with POSIX.
- Compatible with different file systems such as ext2, ext3, ext4, reiserfs, reiser4, xfs, jfs, btrfs, f2fs and nilfs2 from GNU / Linux, FAT12, FAT16, FAT32, NTFS s, HFS +, (4) FreeBSD UFS, NetBSD and OpenBSD, minix and VMFS3 and VMFS5.
- The boot loader, both grub (version 1 and version 2) and syslinux can be reinstalled
- Supports LVM2.
- Supports MBR boot and GPT.
- It is fully compatible with multicasting thanks to which we can make massive clones.
- The image file may be available in various locations such as the local disk, an ssh server, a samba server, NFS servers or a WebDAV server.
- Compatible with Bittorrent.
- It has the AES-256 encryption system.
As we have multiple features we must also know that there are certain limitations such as:
- The image can not be scanned or mounted on the disk.
- The destination partition must be of equal or greater size than the source partition.
- The option of differential and incremental backup is not yet available.
1. How to download Clonezilla in Windows 10
Step 1
The download of Clonezilla is available at the following link:
Clonezilla
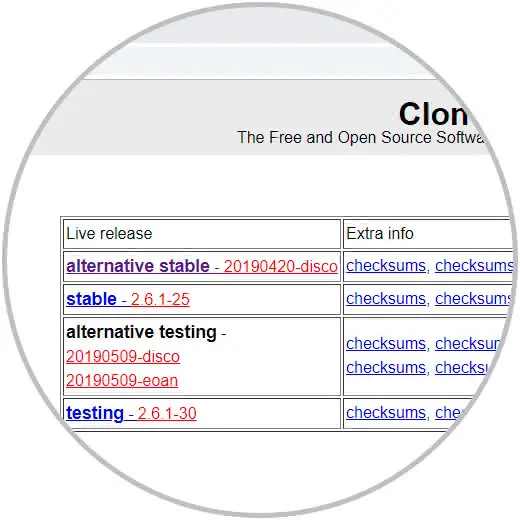
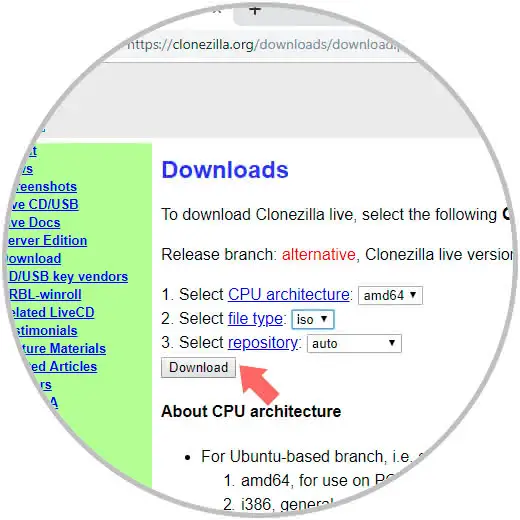
Step 2
There we will click on the stable version and then select. Click on the Download button to start the process of downloading the utility.
- Type of architecture to download
- Repository selection (we can leave the default value)
2. How to configure the computer to use Clonezilla in Windows 10
Now we must configure the way Clonezilla is to be used, for this we have two options:
- Record the ISO image on a DVD
- Set up a USB medium as a boot device
Step 1
If we choose the USB option we can use Rufus for this purpose, it can be downloaded at the following link:
Rufus
Step 2
Once the utility is downloaded, we configure the following:
- In the field Device we select the USB drive to use
- In the Boot Choice field, we select the ISO image that we have downloaded
- We define the automatic partitioning scheme
- We add, if we wish, a label to the USB
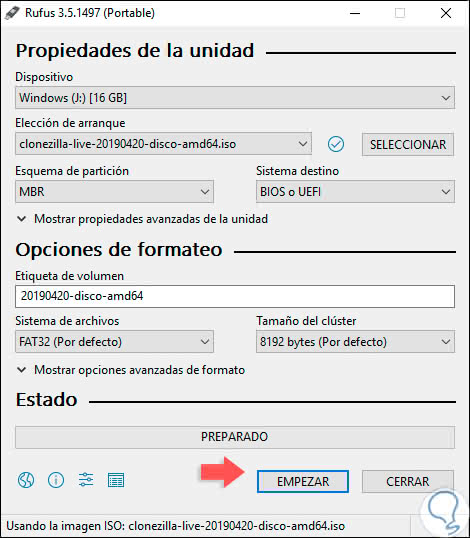
Step 3
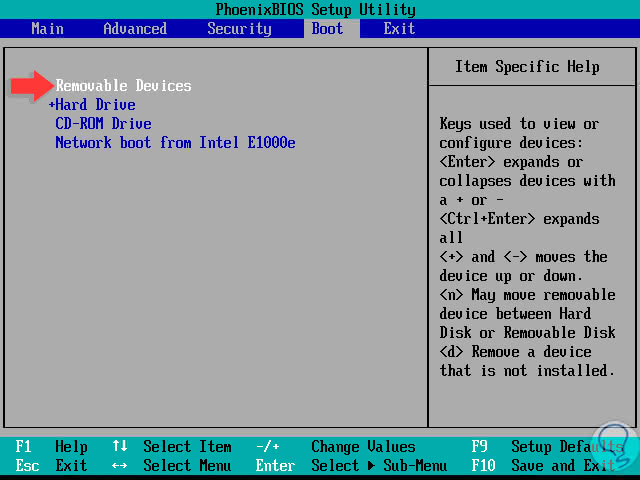
Defined this click on the Start button to create our boot media with Clonezilla. Created the previous step, we must access the BIOS or UEFI of the computer where the disk has to be cloned and choose the medium with which we will start. If we have recorded the ISO image on a USB medium, we select "Removable Devices" and if it has been recorded on a DVD we select CD-ROM Drive and press the F10 key to save the changes and restart the computer.
3. How to clone hard drive with Clonezilla in Windows 10
Step 1
At this point we are ready to take full advantage of Clonezilla, for this the system will boot and we will see the following:
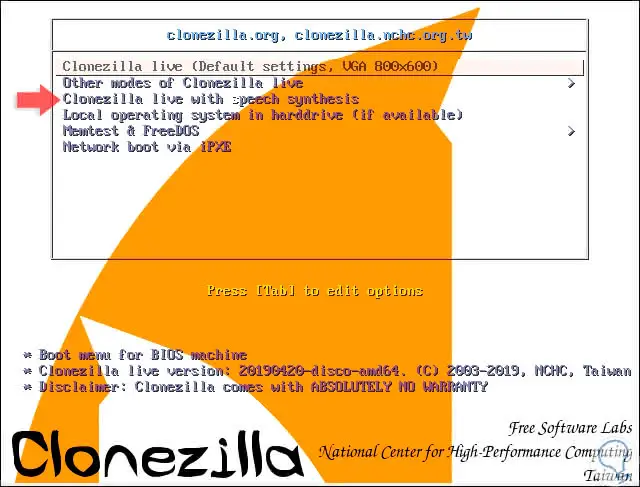
Step 2
There we select the option Clonezilla Live (Default Settings, VGA 800 × 600) and press Enter and we should wait for Clonezilla to be loaded to select the language and region of the keyboard to be used:
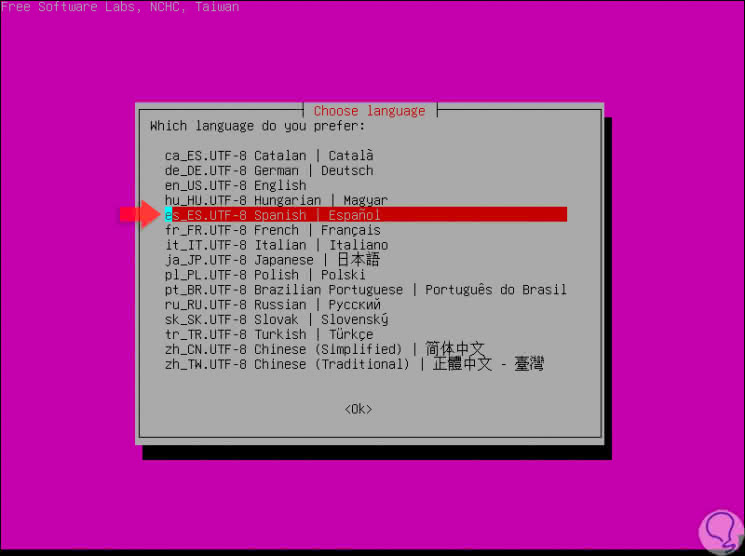
Step 3
When modifying the default language, the following message will be displayed:
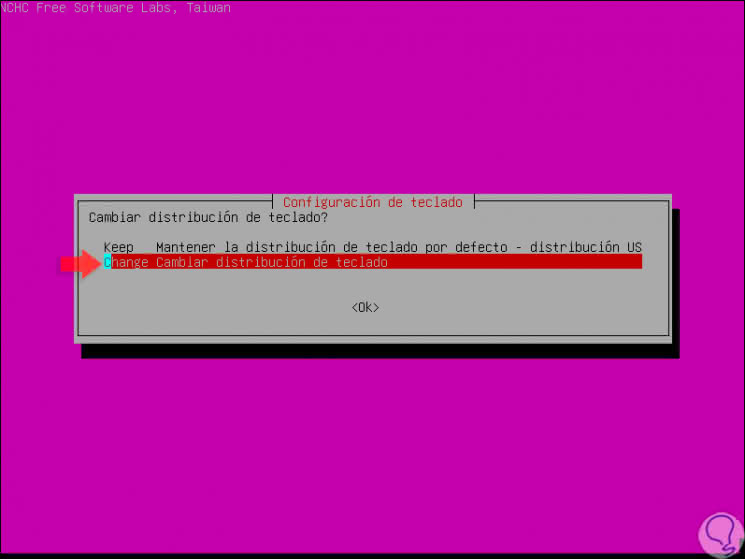
Step 4
There we select Change and once selected we will see the following which is the Clonezilla main screen, there we select the option "Start Clonezilla Start Clonezilla":
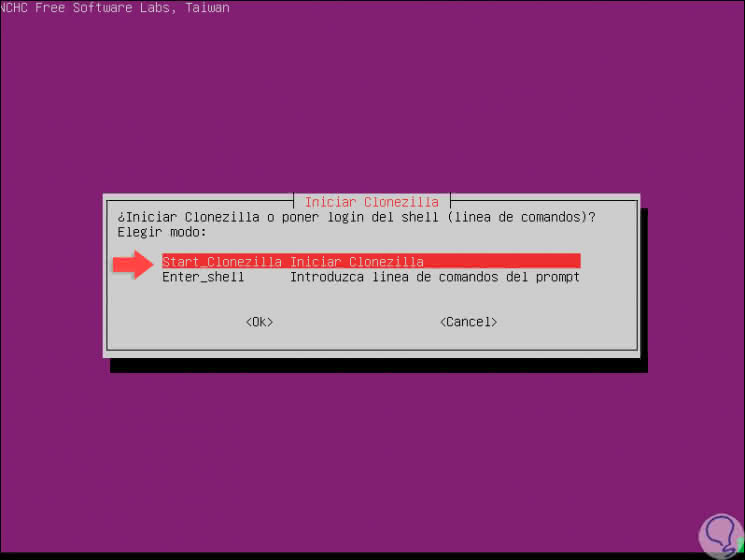
Step 5
Press Enter and you will access the Clonezilla options screen:
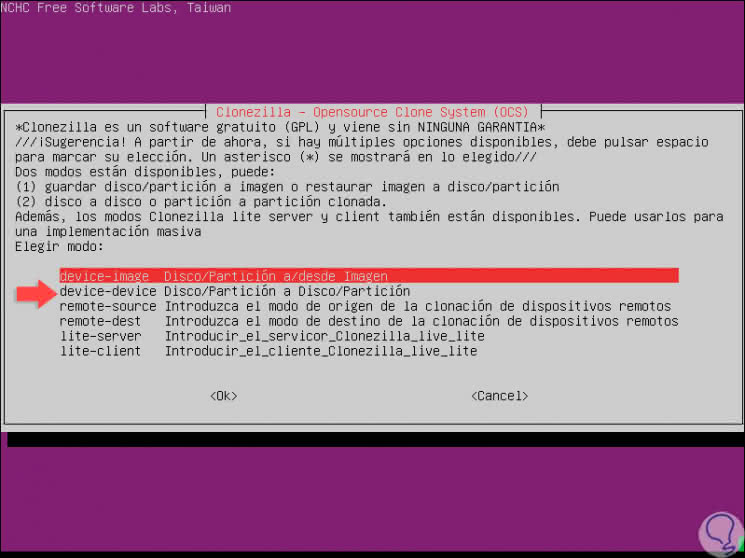
Step 6
For our case we have two options that are:
- device-image: this option allows us to create a copy of the device to a disk image.
- device-device: with this option it will be possible to directly copy the source disk to another locally installed disk
Step 7
For this case we select the device-device option and we will see the following:
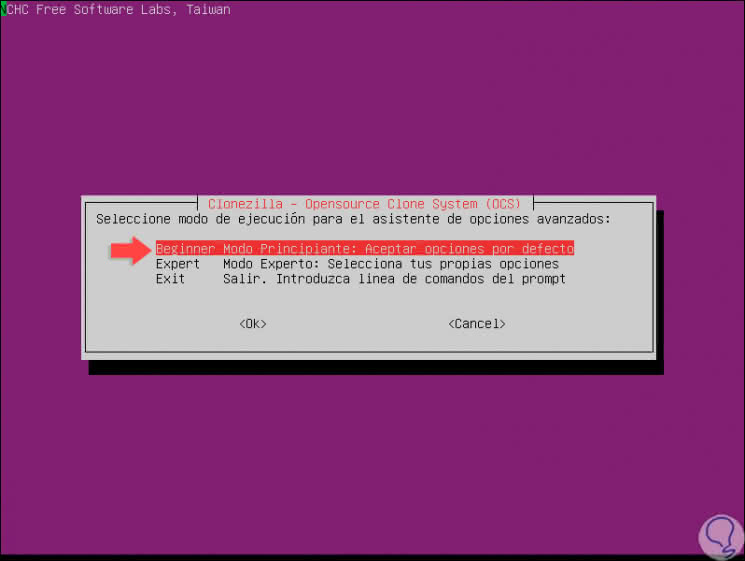
Step 8
There we can select the desired execution mode based on the knowledge of the utility, we recommend selecting "Beginner - Beginner Mode" to avoid making mistakes and now we will see the following:
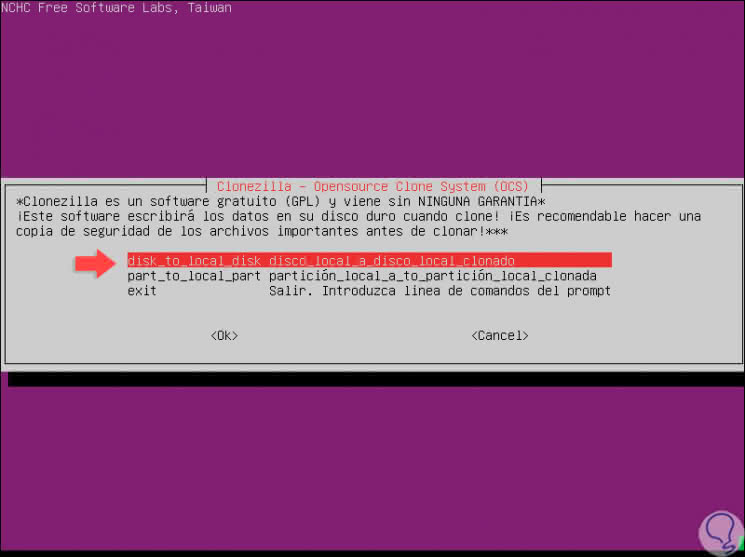
Step 9
The options to use are:
- disk to local disk: this option will clone the current disk to another available local disk.
- part to local part :: with this option it will be possible to clone a partition from one disk to another available local disk partition.
Step 10
We select the first option and later we will see the available hard drives with details such as:
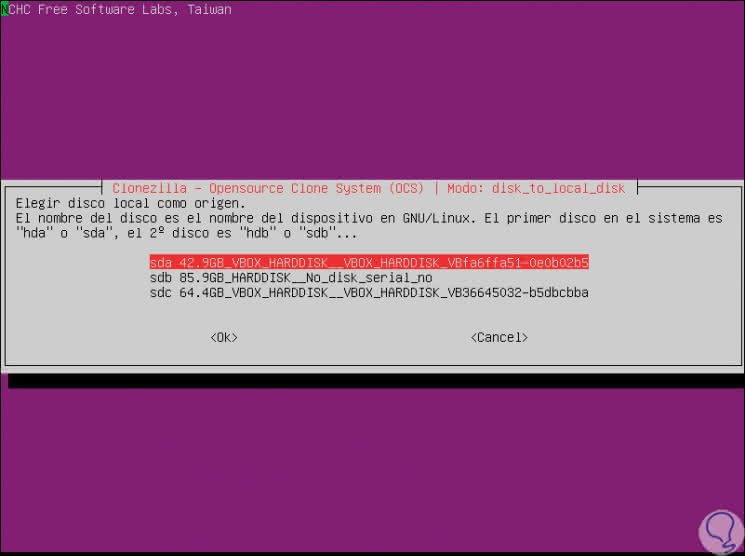
Step 11
One point to keep in mind is that because Clonezilla is a Linux-based utility, all units will be visible with the Linux namespace so we use a different operating system like Windows.
There we select the disk to clone and press Enter, now we will see the following:
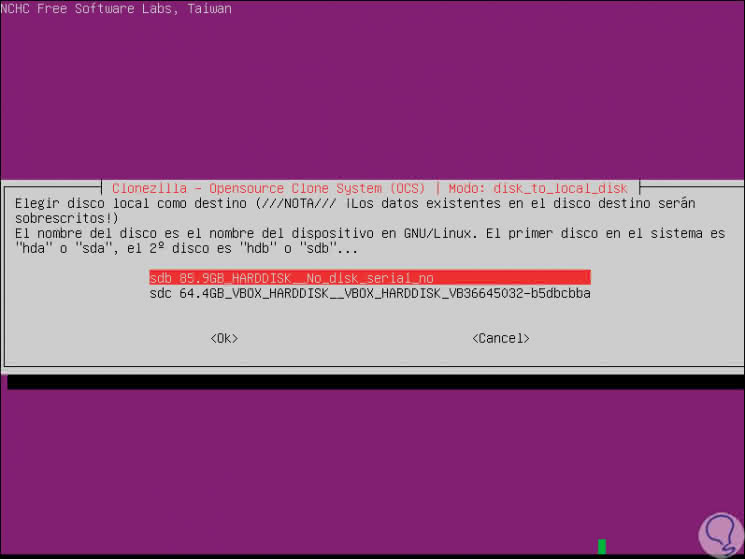
Step 12
There we must select the destination hard disk, in this case we will select disk 3 and press Enter, the following will be displayed:

Step 13
As we can see, Clonezilla integrates some commands to define the cloning success, there we can omit the error checking which will make cloning faster, execute fsck to check and correct errors or execute fsck -and to repair the filesystem
In this case we select the first option and press Enter and then define what action to take when everything is finished:
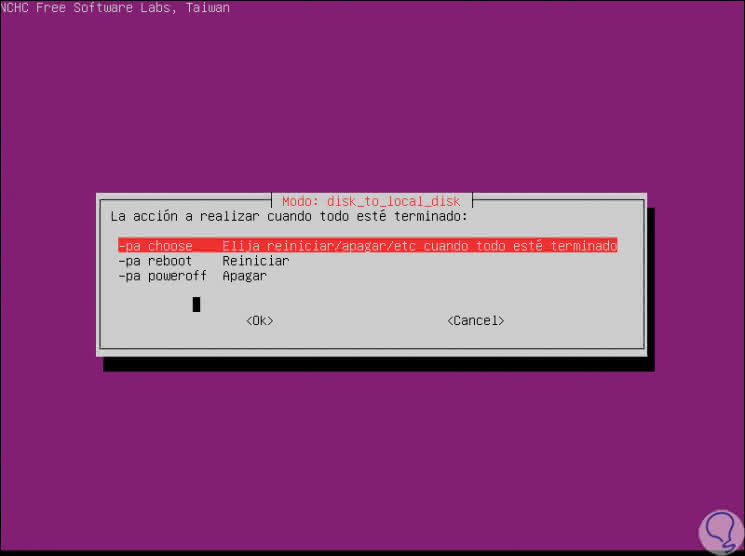
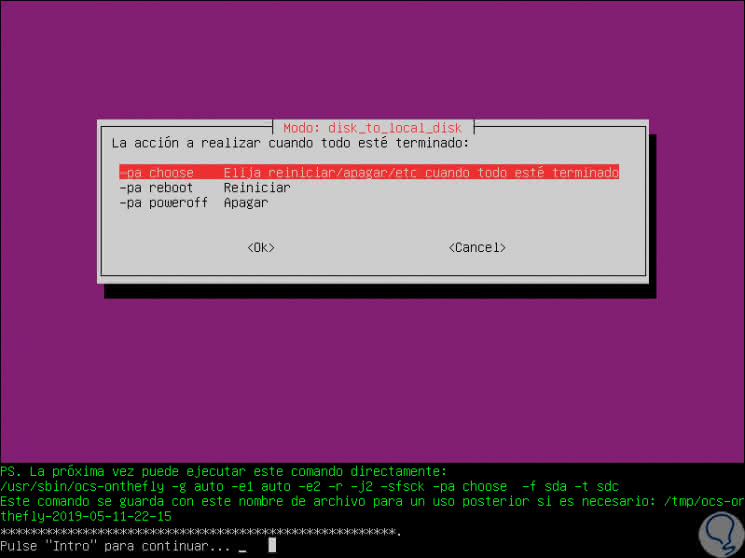
Step 14
Press Enter and at the bottom we will see a message and we must press Enter to continue:
Step 15
After an analysis we will see a warning that all data will be lost on the destination disk:
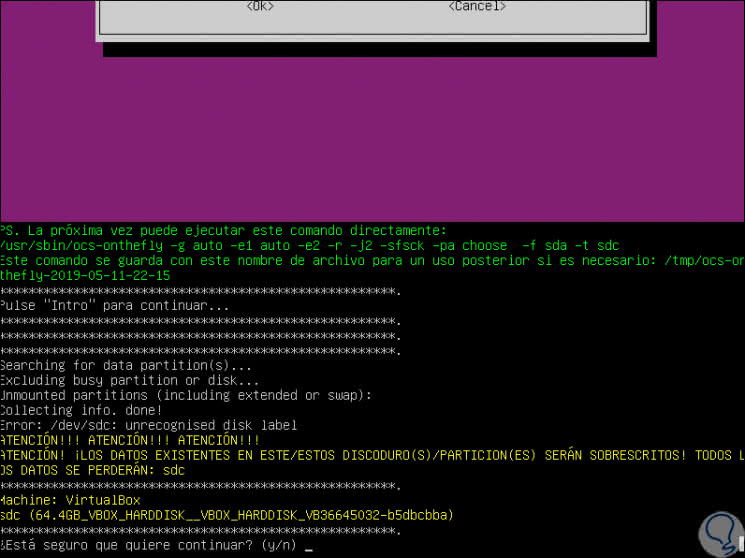
Step 16
Enter the letter y and press Enter and another set of questions will be launched:
Step 17
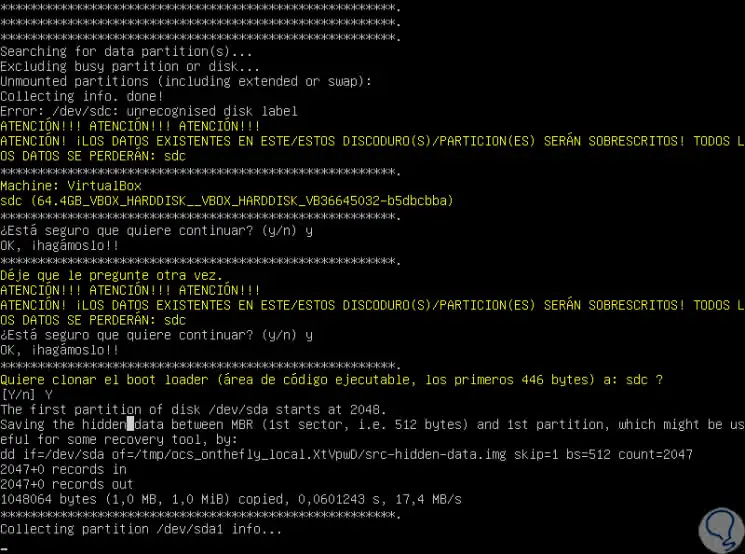
After this it will be possible to visualize the process of the cloning work of the disk
with Clonezilla:

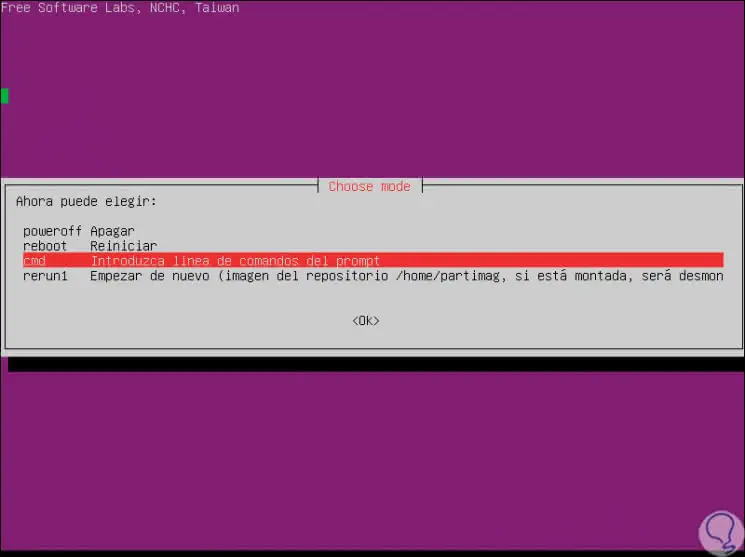
Step 18
Once the process is finished we will see the following. There we can turn off or restart the computer as we consider.
In this way, with the use of Clonezilla we have cloned our hard drive with some of the options available for that purpose and the best thing of all is that this is an integral, safe process and always keeping the disk data which are delicate..