Hard drives have evolved significantly in terms of capacity, brands, technologies and designs, but finally their function remains the same and is to allow the operating system to be installed, server as backup of information and logically be the place where we keep all the files we create and edit day by day..
Even today there are mechanical hard disks (HDD) but solid state disks (SDD ) are taking a lot of strength, which, although they have less storage space, their security, performance and integrity are much greater.
HDD hard drives are composed of mechanical parts which make use of magnetism in order to save and store data and files while SSD hard drives are responsible for storing files directly in microchips using interconnected flash memories with which the speed of reading and writing will be much better..
Since many computers currently have HDD hard drives , a security solution is to clone that disk into an SSD in order not only to preserve the information but to significantly improve the overall performance of the disk and it is important to keep in mind that a disk Hard is not eternal and is exposed to errors such as:
Common disk errors
- Electrical failures and more
Each of these things can create a conflict with the disk and prevent not only that we do not have access to the information, but that we cannot run the operating system together with its applications. It is possible to clone our hard disk to a smaller SSD using two traditional tools for this and this is possible since what will be cloned will be the space used but not the general size of the hard disk, that is, if your HDD hard drive is of 500 GB, but you have only used 70 GB, it is possible to clone that disk in a 256 GB SSD since 70 GB will be cloned but not 500 GB.
Let's see how to achieve this in a simple but effective way thanks to TechnoWikis..
1. Clone an HDD hard drive to a smaller SSD hard drive with Clonezilla for free
Clonezilla is one of the best known utilities for cloning disks and partitions for various operating systems, Clonezilla will allow us to implement the system, create backups and then recover the system from those created copies.
Clonezilla options
Clonezilla offers us three options of use that are:
- Clonezilla SE (exclusive for servers)
Clonezilla features
Some of Clonezilla's most prominent features are:
- It is compatible with file systems such as ext2, ext3, ext4, reiserfs, reiser4, xfs, jfs, btrfs, f2fs and nilfs2 of GNU / Linux, FAT12, FAT16, FAT32, NTFS of Windows, HFS + of Mac OS, UFS of FreeBSD , NetBSD and OpenBSD, (5) minix of Minix and VMFS3 and VMFS5 of VMWare ESX.
- It allows you to clone disks or partitions of operating systems such as GNU / Linux, Windows, macOS, FreeBSD, NetBSD, OpenBSD, Minix, VMWare ESX and Chrome OS
- Compatible with 32 and 64 bit architectures
- An image can be restored to multiple local devices
- Images can be encrypted with ecryptfs
Step 1
Your download is available at the following link. There we select the ISO option to later burn that image to a bootable DVD or USB since Clonezilla works from the operating system boot.
Clonezilla
Step 2
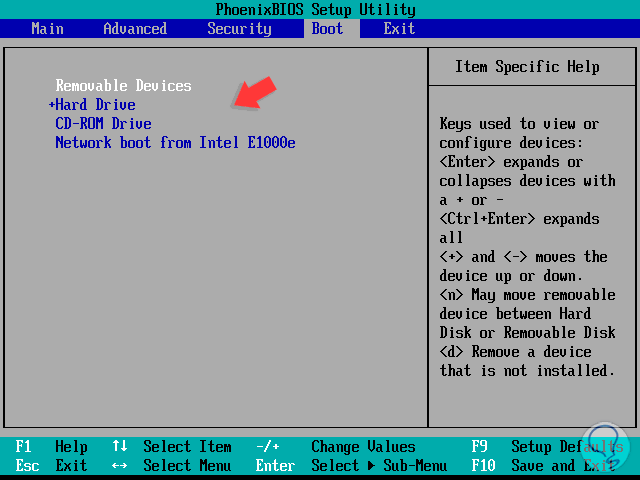
Once we record the ISO image, we must access the BIOS or UEFI of the equipment and there define in the Boot tab from where the image will be executed (DVD or USB):
Step 3
Once started we will see the following window:
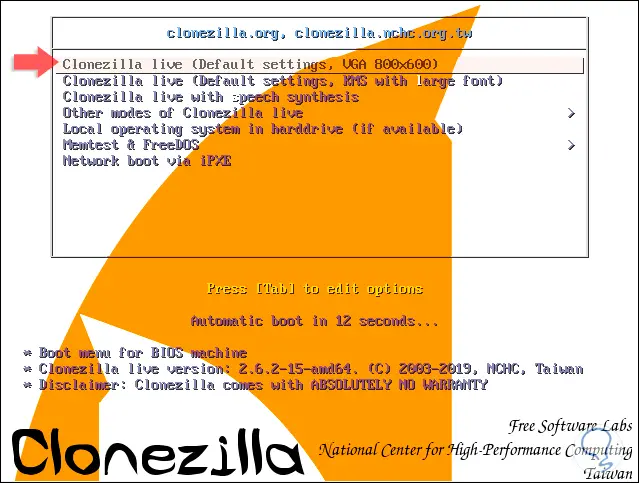
Step 4
There we select “Clonezilla live†and after that we define the execution language:
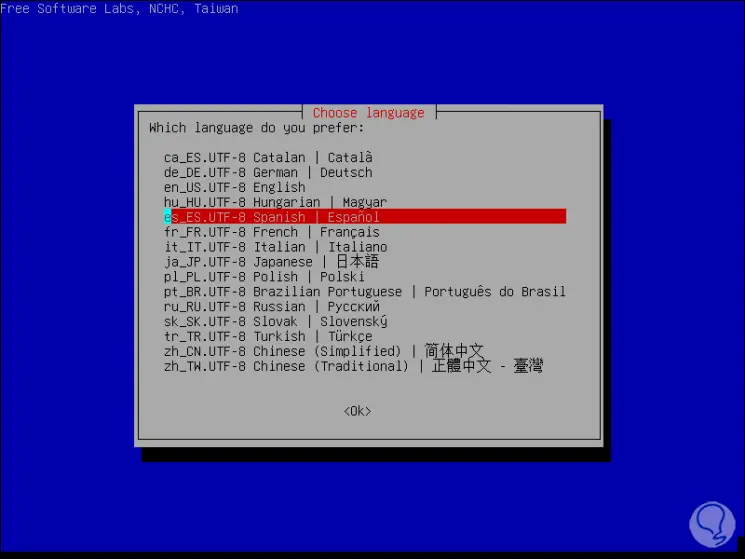
Step 5
Press Enter and in the following window we leave the current keyboard configuration:
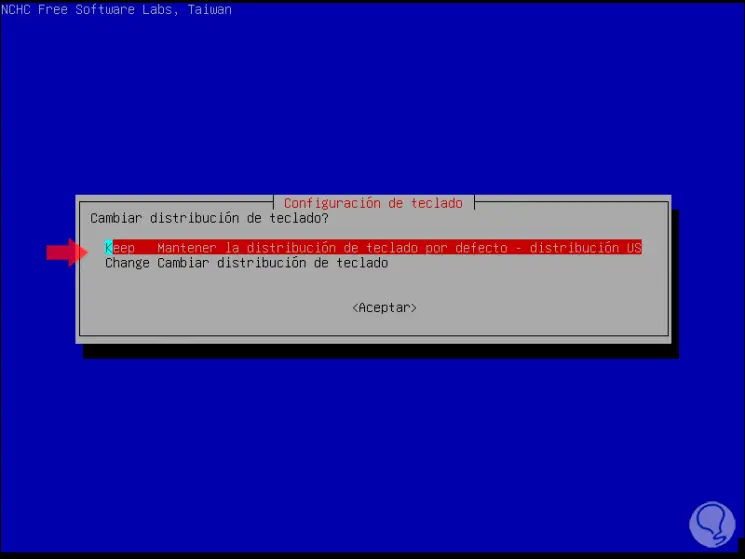
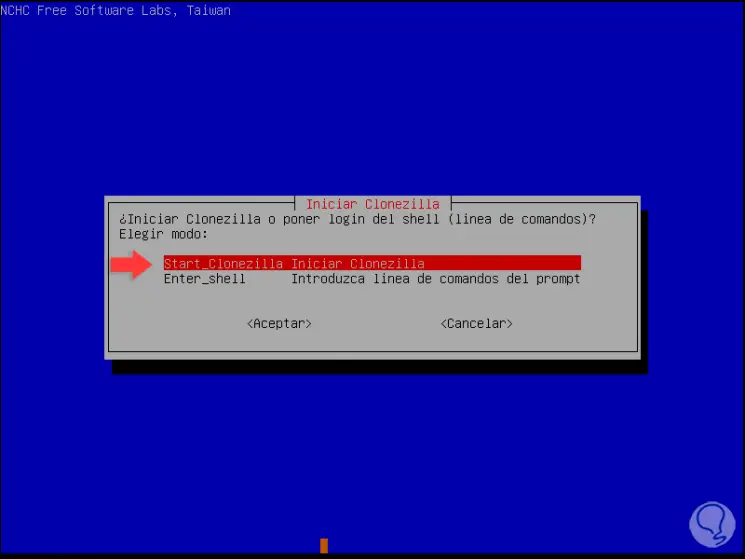
Step 6
Press Enter and in the next window select “Start Clonezilla Start Clonezillaâ€:
Step 7
Once we select this option, the Clonezilla options will be displayed where we will select “Disk / Disk Partition / Partitionâ€:
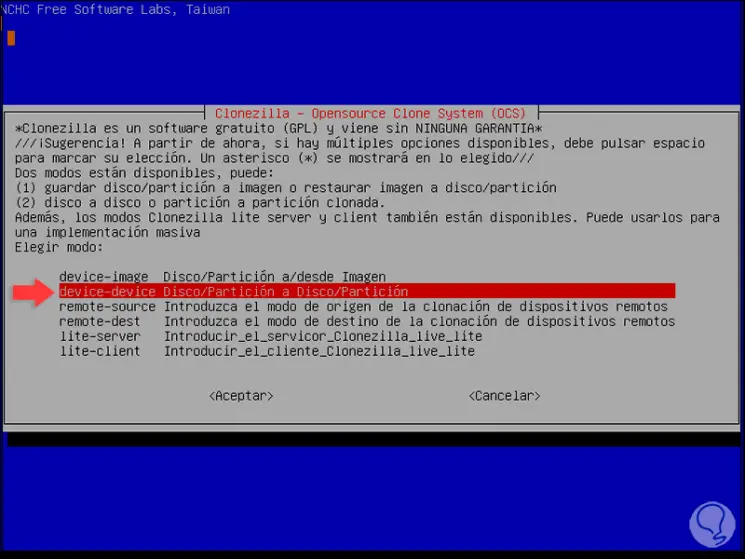
Step 8
This is because we are going to clone an HDD disk to an SDD disk, press Enter and in the next window we select the Expert line Expert Mode:
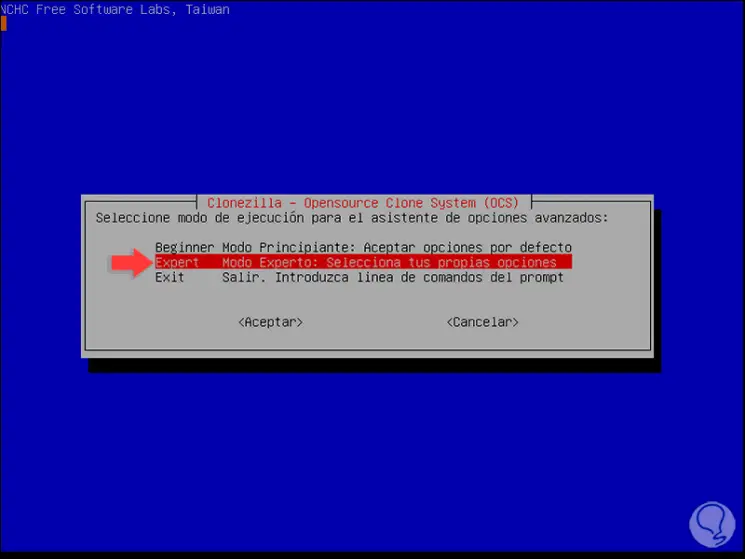
Step 9
Press Enter and in the next window we select the local disk line to cloned local disk:
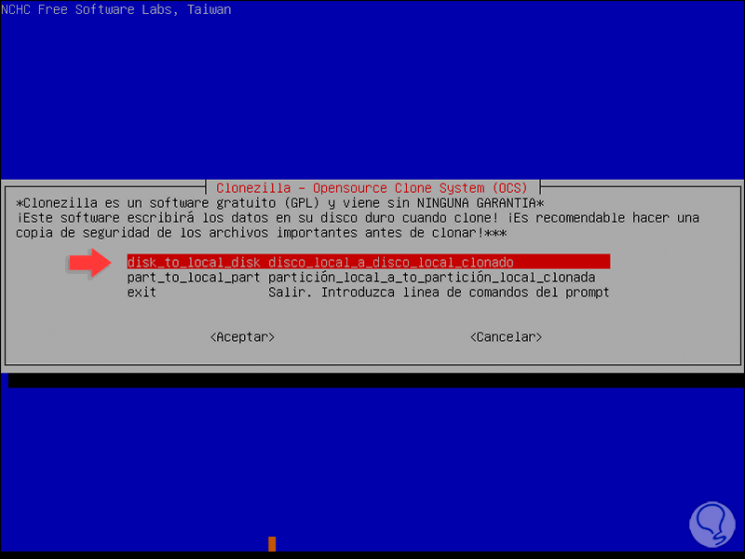
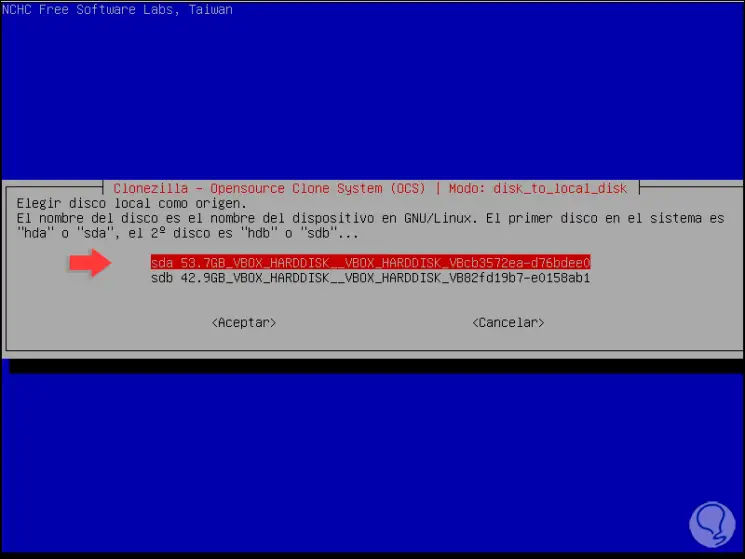
Step 10
Press Enter and in the next window we find the connected disks, there we first select the source disk which has a size of 53.7 GB:
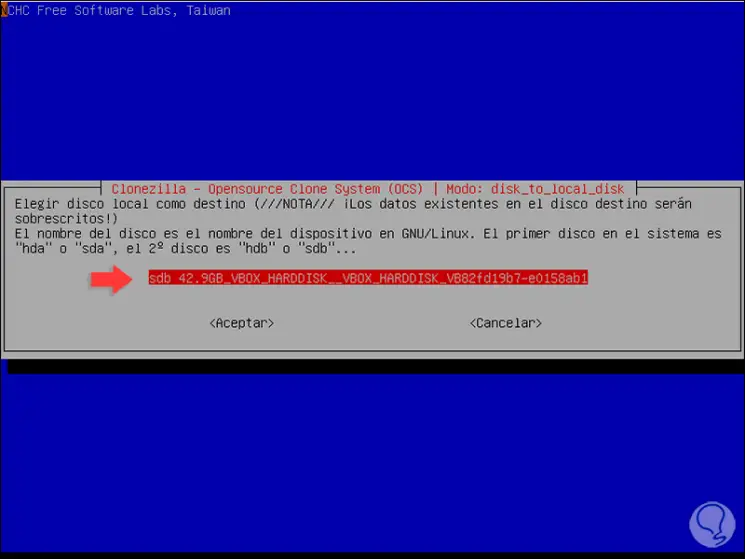
Step 11
Press Enter and now select the destination disk which will be the SSD disk with 42.9 GB in size:
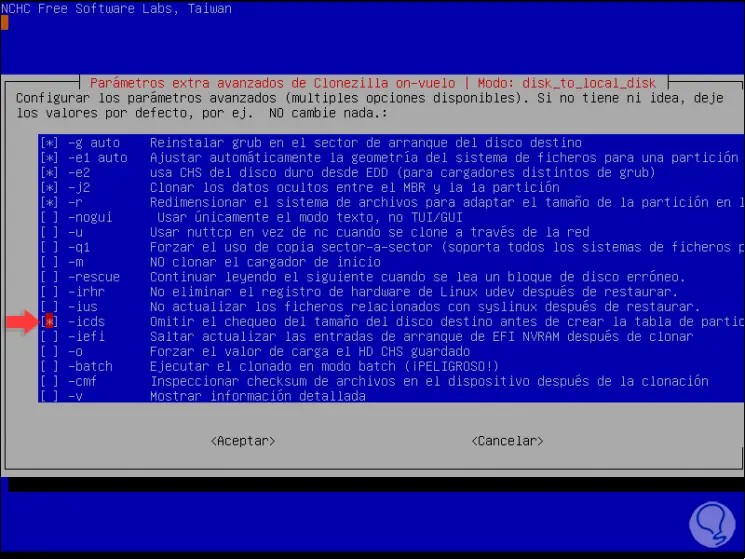
Step 12
Select OK and in the next window we activate the “-icds box by pressing the space bar:
Step 13
Select "Accept" and then we will have the following options:
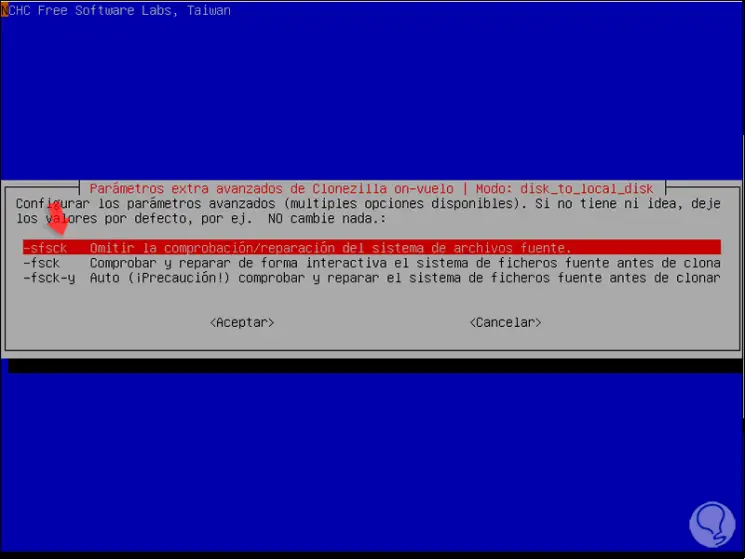
Sfsck
This option skips checking and repairing the file system.
Fsck
Using this option runs an analysis and repair of the file system before cloning interactively in order to avoid errors.
Fsck -
and this option repairs the file system in an integral way.
Step 14
We select the desired alternative and then we will see the following:
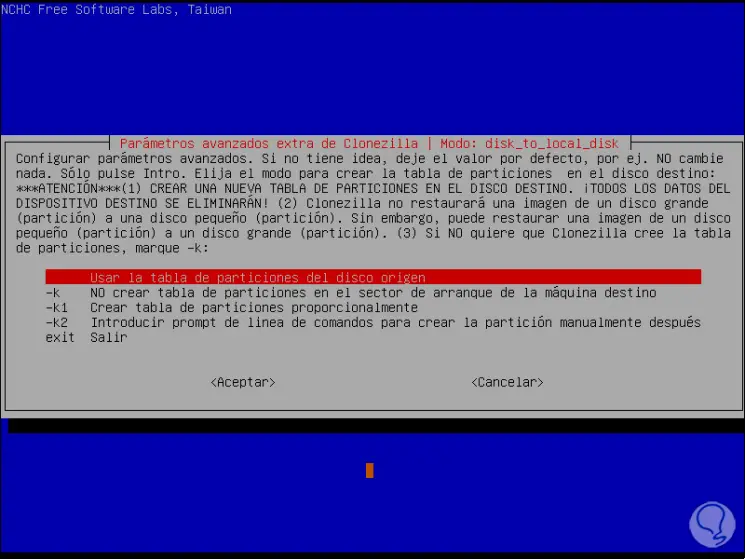
Step 15
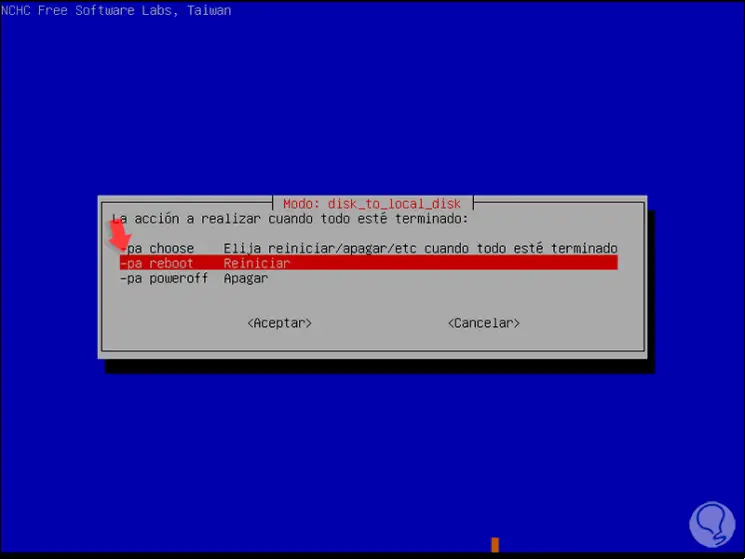
Being in expert mode these options are careful, there it will be possible to create or not the partition table in the boot sector so we recommend leaving the default option and pressing Enter. After this we select which task to execute when the commando process ends (restart, shutdown or display the message):
Step 16
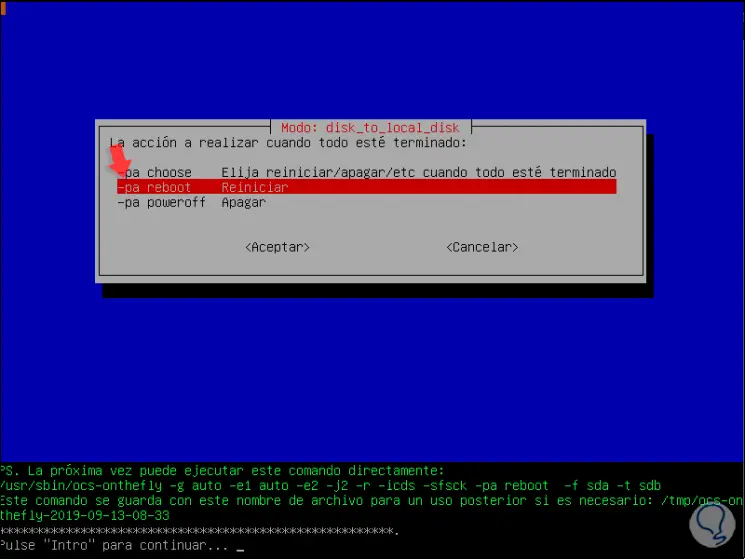
At the moment of pressing Enter we will see the following message:
Step 17
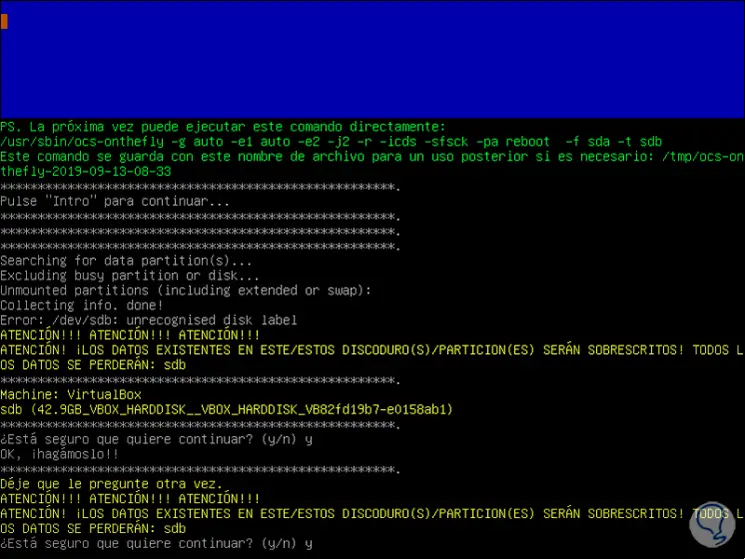
There we press the Enter key to continue and then we must confirm the following:
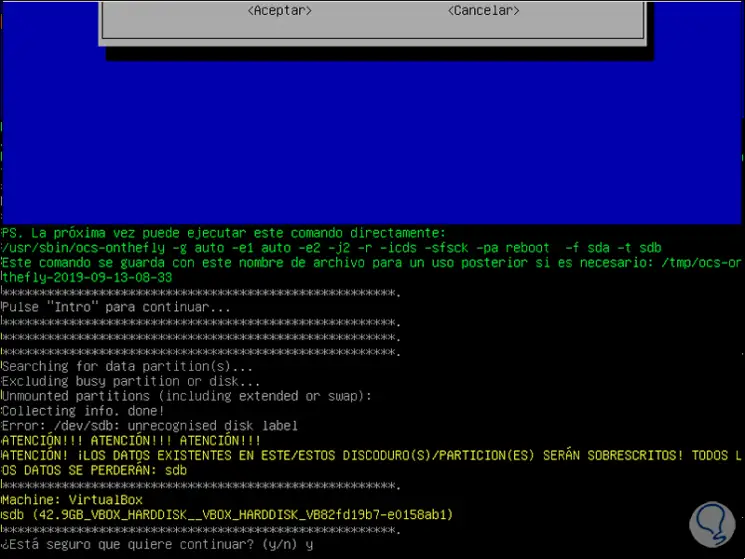
Step 18
Enter the letter y, press Enter and then confirm again:
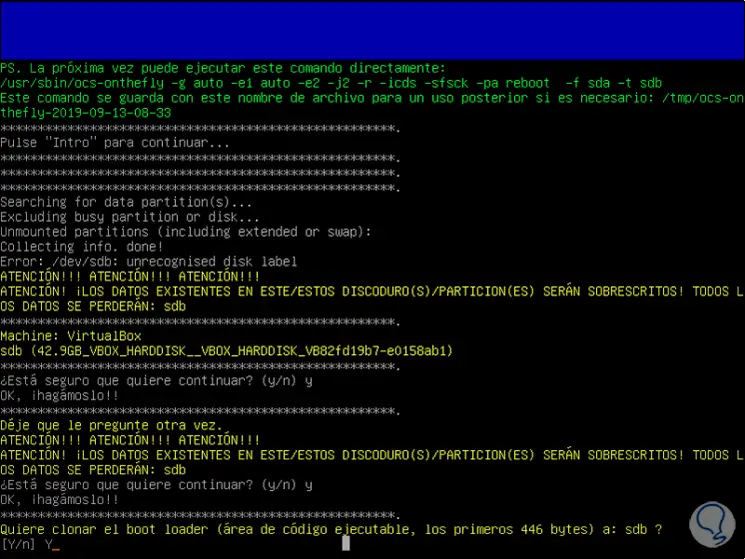
Step 19
After this we must confirm if we want to clone the boot sector of the system:
Step 20
A Clonezilla configuration process will begin when the letter is entered:
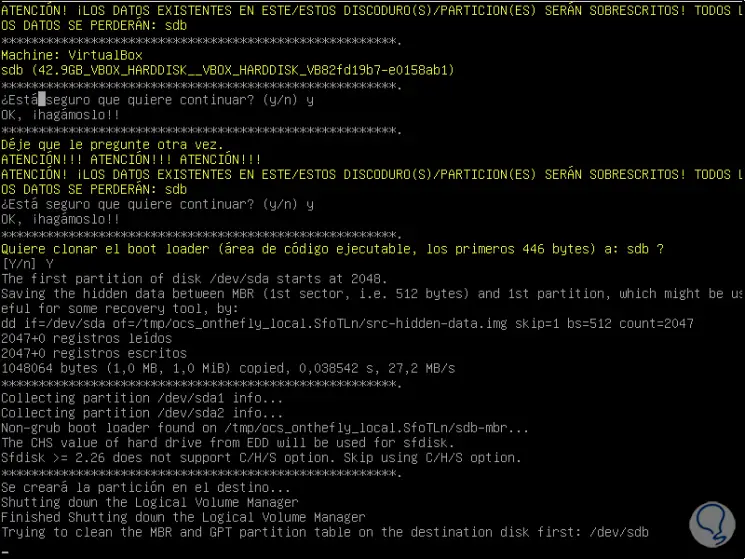
Step 21
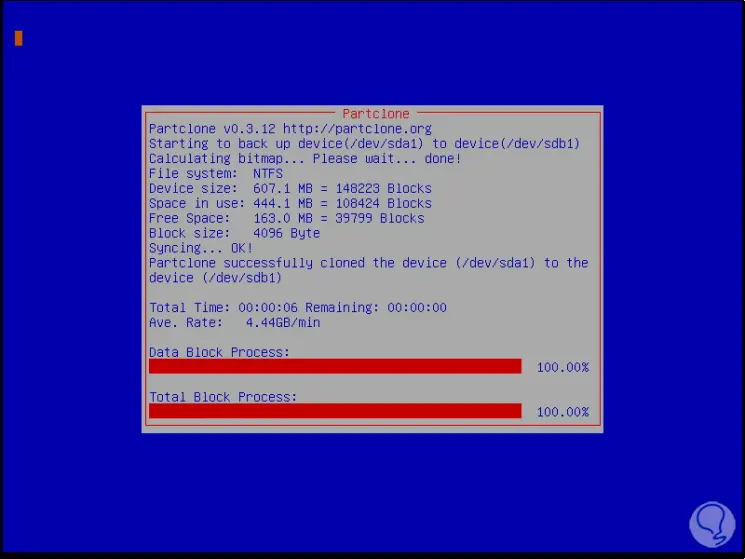
The cloning process is now started:
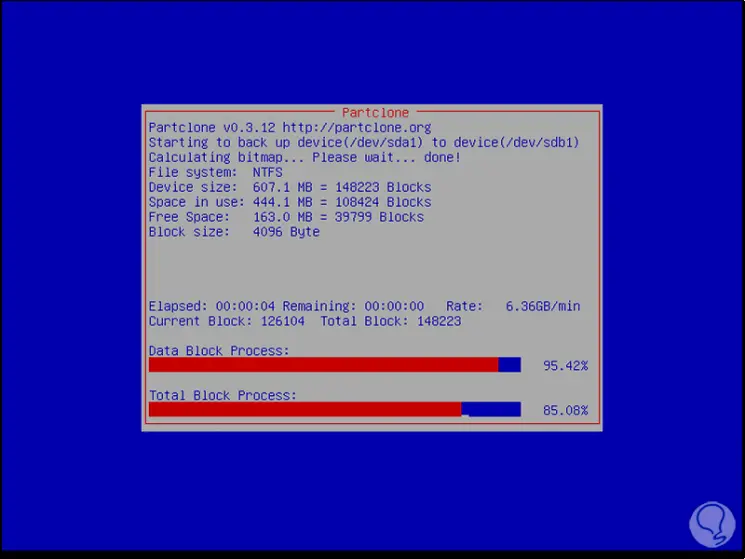
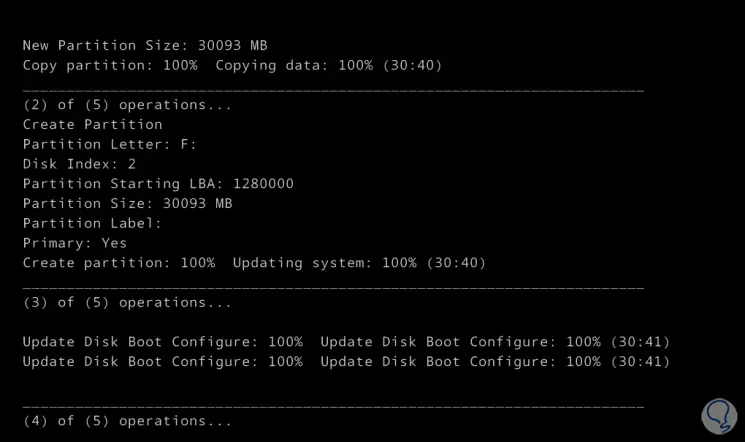
Step 22
We continue to see the entire process of space allocation and cloning:
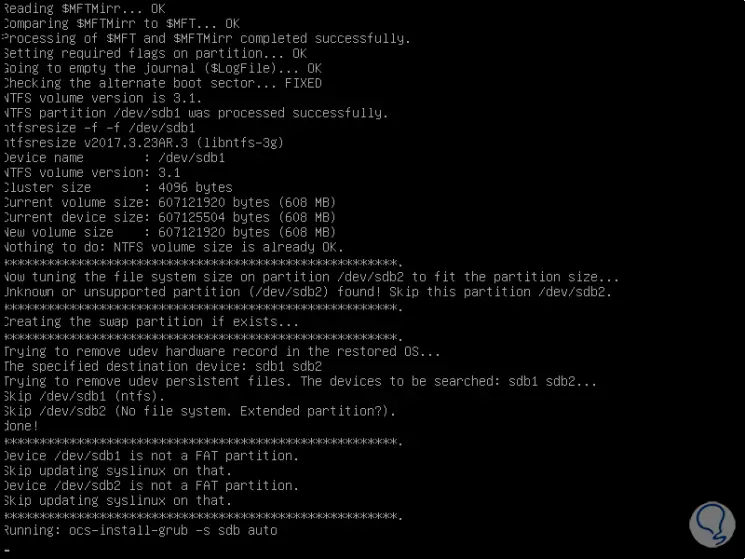
Step 14
After this, an internal process continues:
Step 15
Once this is finished we will see the following:
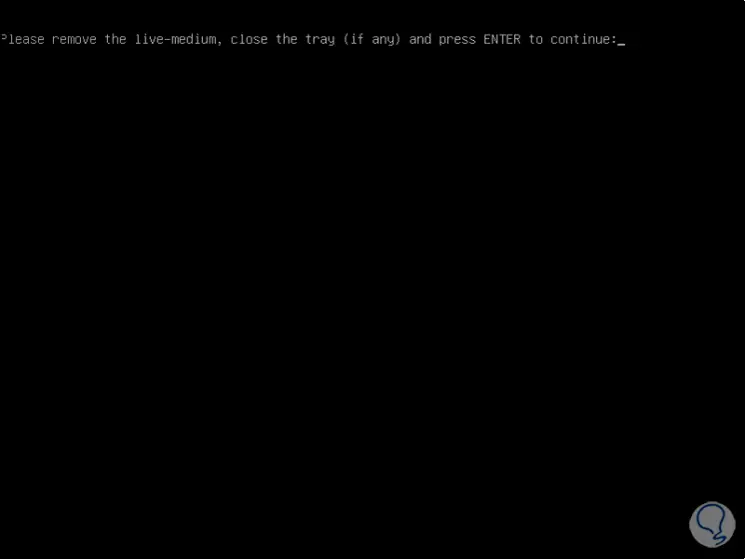
Step 16
There we must remove the medium in which the Clonezilla ISO is and proceed with the normal restart or shutdown of the equipment:
Step 17
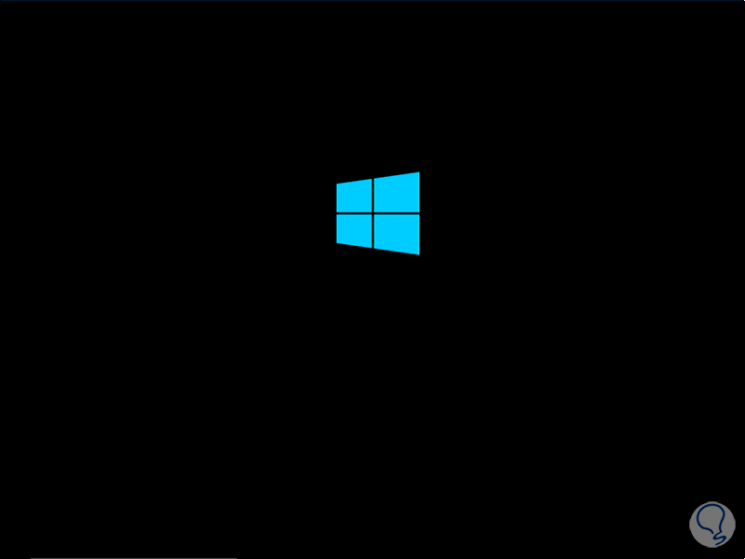
Then we access the system normally. Thus, Clonezilla is the first option we give you to clone your HDD hard drive to a smaller SDD.
2. Clone an HDD hard drive to a smaller SSD hard drive with free Partition Wizard
Partition Wizard or also Partition Magic is another of the integral solutions to clone our hard drives or partitions thanks to its integrated functions.
We have a free version which has an all-inclusive, thanks to which we can manage and control disk partitions, as well as utilities to improve the performance of the drive and others to perform analysis of the use of hard disk space.
Features Partition Magic
Among its functions we find:
- Manage disks and partitions completely
- Migrate an operating system to SSD
- Supports FAT12 / 16/32, exFAT, NTFS and Ext2 / 3/4 file systems
- Compatible with storage devices such as hard drives, USB drives, Flash drives, SD cards and many more.
Step 1
Your download is available at the following link:
Partition Wizard
Step 2
Download the executable and proceed with the installation, once done when accessing we will see the following:
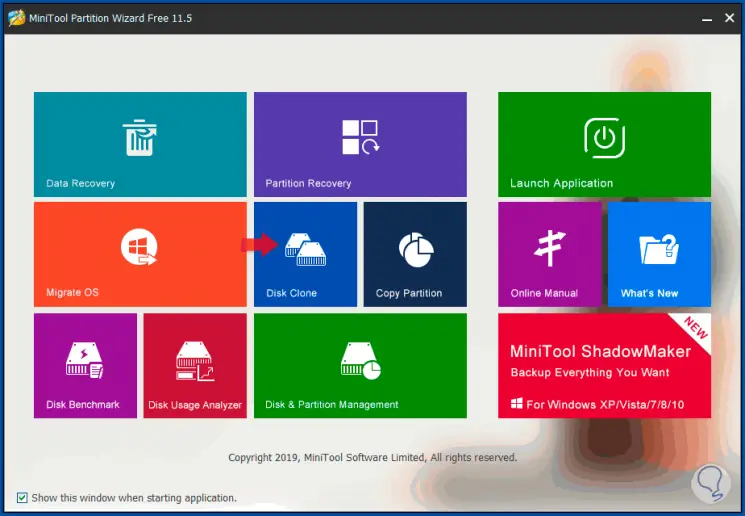
Step 3
In this menu of options we select “Disk Clone†and the following wizard will be displayed:
Note
Another way to access this option is to select the “Migrate OS†alternative.
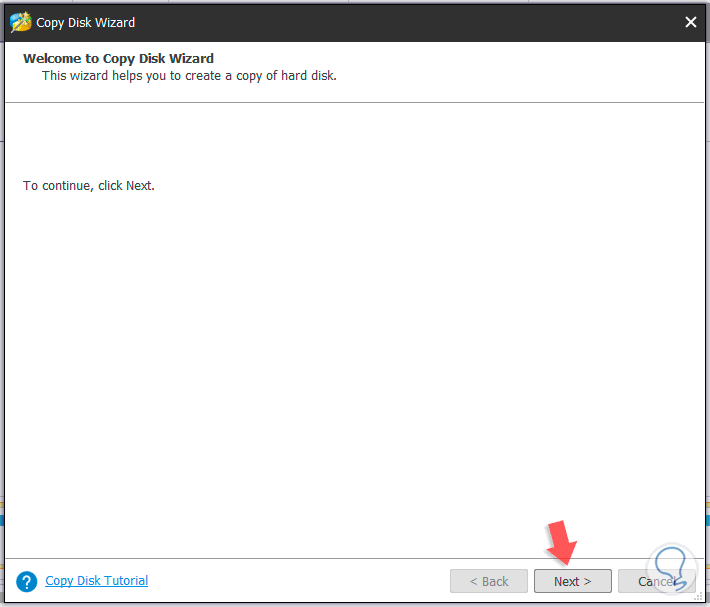
Step 4
There we click Next and then we must select the hard disk to clone:
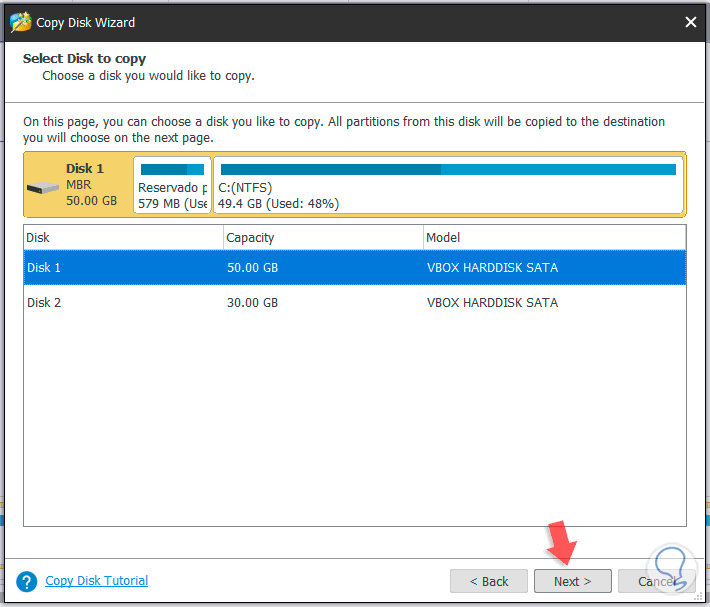
Step 5
Click on Next again and now we are going to select the SSD disk where the source disk is to be cloned:
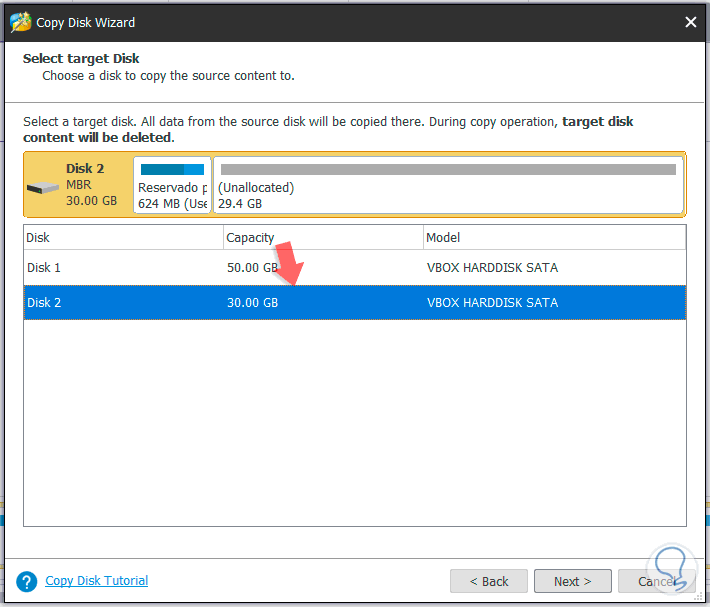
Step 6
Once the disk has been selected, click Next and the following warning will be displayed indicating that all data on the destination disk will be erased:
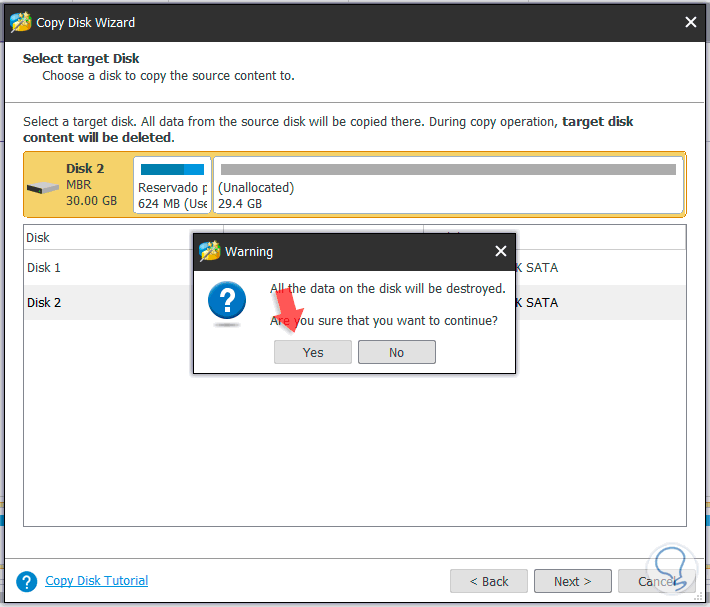
Step 7
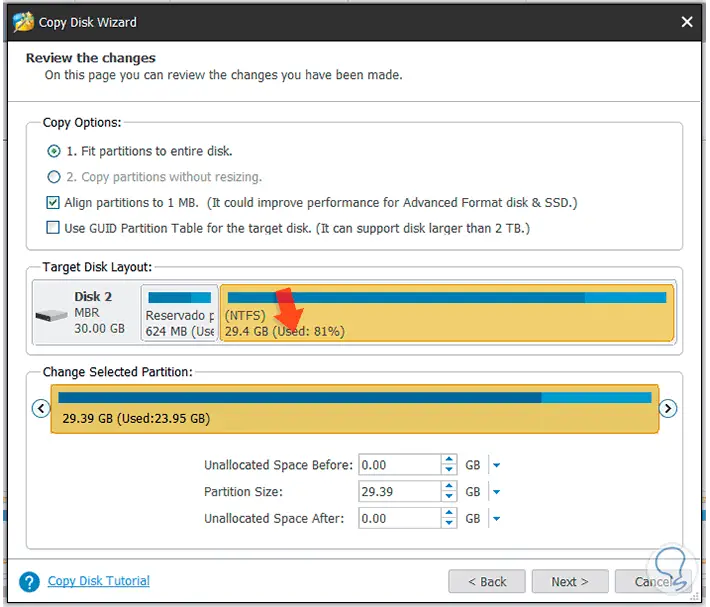
We click Yes and then we will see a summary of the tasks to be executed, there it is possible:
- Fit partitions to entire disk space (Fit partitions to entire disk).
- Set the partitions to 1 MB which improves the performance of SSDs.
- Use GUID in the partition table (only for disks larger than 2 TB in size).
Step 8
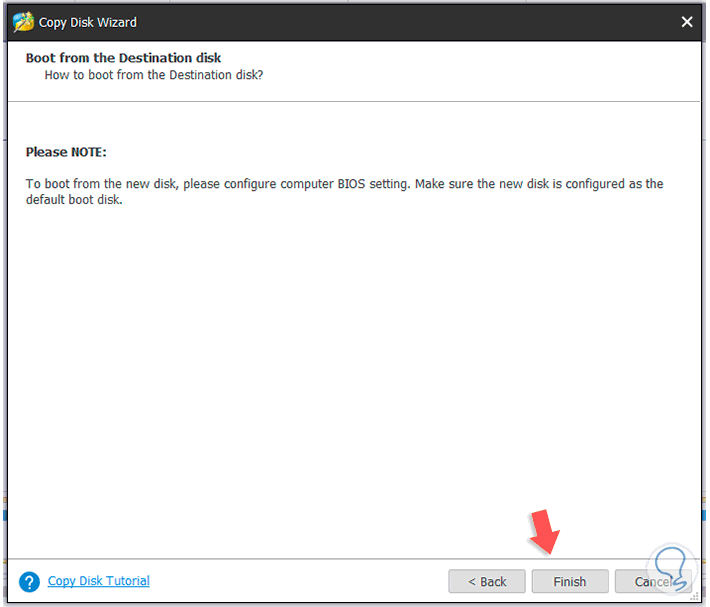
After this we select the disk at the top and if we wish we can specify details at the bottom associated with unallocated space, partition size and others, once defined this click on Next and we will see the following message. Click on the Finish button to complete the configuration and execute the process.
Step 9
We will be redirected to the main Partition Wizard window and we must click on the Apply button located at the top to see the following:
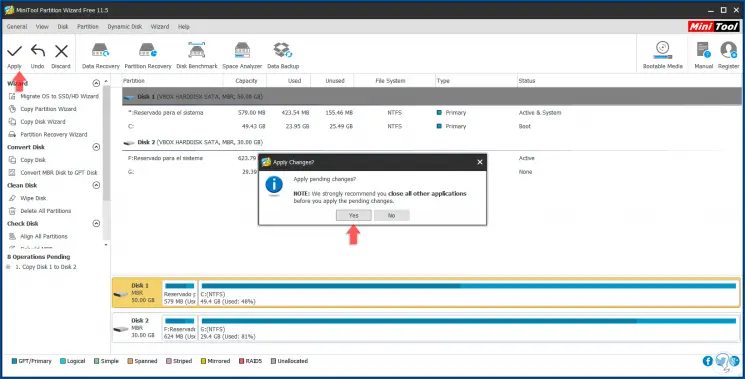
Step 10
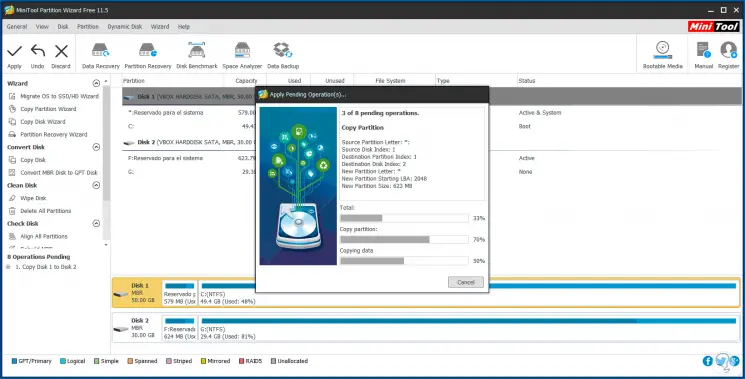
There we confirm by clicking on the “Yes†button and the disk cloning process will be given:
Step 11
However, in some cases it is possible that the following error will be displayed during the process:
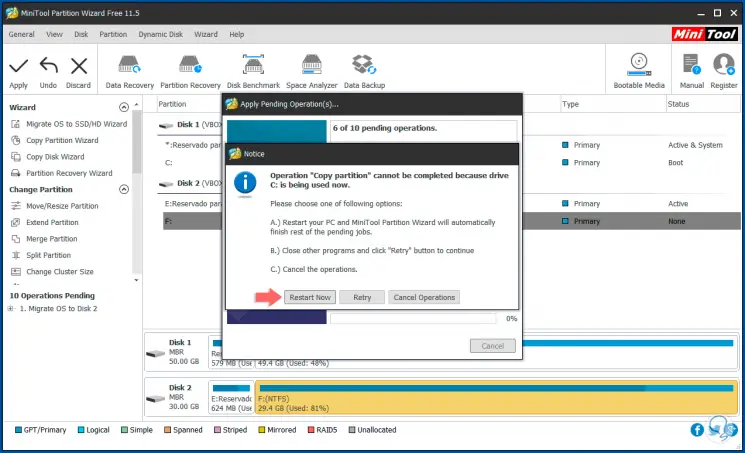
Step 12
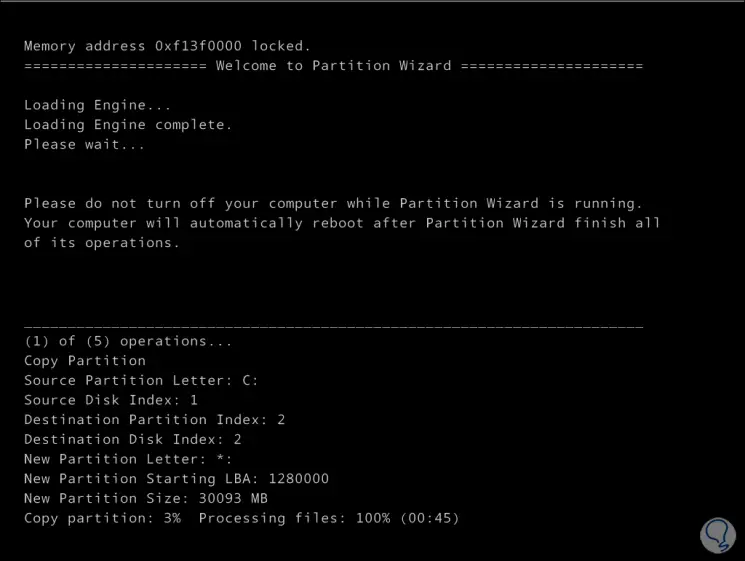
This is due to problems with the C drive of the source disk, in this case we click on the “Restart Now†button so that the process runs safely on system startup, the computer will be restarted and we can see The step by step of cloning:
Step 13
Then we will see that the final step is completed:
Step 14
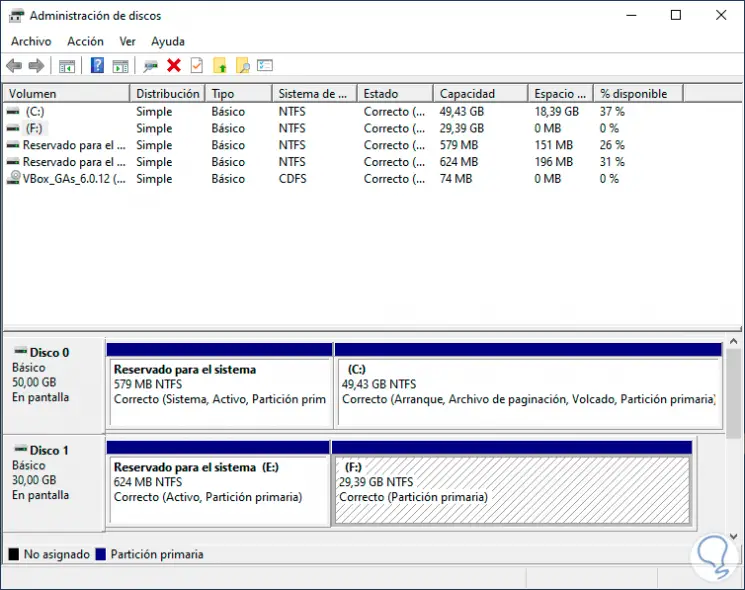
After that the system will be restarted and there we will see the cloning on the SSD disk that we have defined for this purpose:
We have both Clonezilla and Partition Wizard to clone our disks and thus have the integrity and information on hard drives and never fall short of access to the system.