Every day, we use lots of technological devices to perform many of the actions that are daily in our lives, both in the field of work or work and in the home..
Although as a general rule the mobile phone is the king device for its convenience of use and for the large number of actions we perform from them; Sometimes we need a larger screen, especially when we want to watch content from certain platforms such as YouTube or Netflix. It is also something very useful when we are browsing social networks like Facebook or Instagram .
On these occasions, a Tablet becomes the ideal device. It may be that when we are viewing content such as images or web pages we want to take a “picture†of what we are seeing to be registered, or what is commonly known as “Screen Capture†or “Screenshotâ€..
For this reason in this TechnoWikis tutorial we will explain how to take a screenshot on Apple iPad Air 3 step by step.
For this we will have to follow the steps that we indicate in the following video tutorial..
To keep up, remember to subscribe to our YouTube channel! SUBSCRIBE
How to make screenshot on iPad Air 3
- Go to the page, photo or video on which you want to take the screenshot.
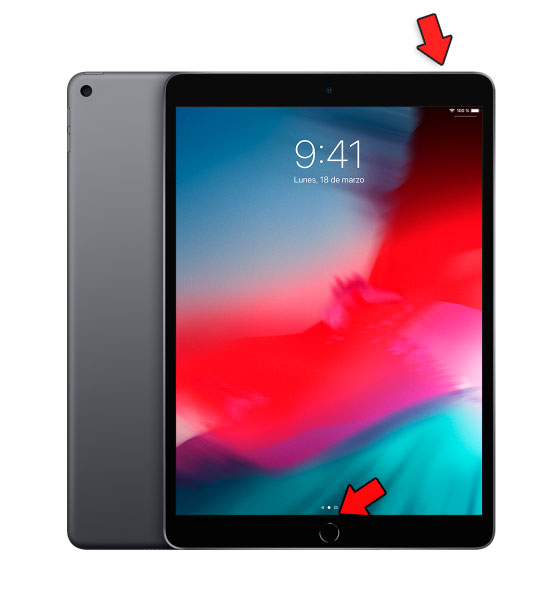
- Press the Power and Home buttons at the same time.
- The screenshot will be automatically saved in "Photos" on your iPhone.

Note
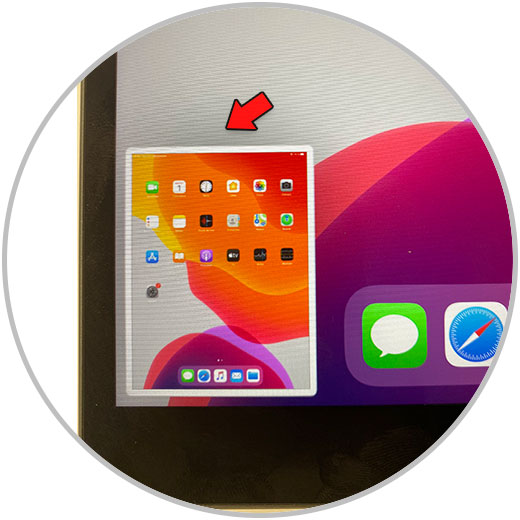
When we take a screenshot, a thumbnail will appear in the lower left corner of the iPad. If you click on it you will be able to edit the screenshot by trimming, adding text, drawing on it and a long list of possibilities.

With this you will have made a screenshot or screenshot on the iPad Air 3.