If you have an iPad Air, regardless of whether it is the 3 or the previous model, at some point the circumstance may arise that we need to put it in DFU mode to perform some actions, among which the device is factory reset ..
What is DFU mode on iPad?
DFU mode could be defined as an iPad firmware update mode. This mode will allow you to manage your iPad from iTunes without the need for iOS to boot. When the device is in this mode, the screen turns black and an image of a PC and a cable appears.

What is DFU mode on iPad for?
- Restore an iPad to factory settings
For this reason in this tutorial of TechnoWikis we will explain how to put your iPad Air 3 or iPad Air 2 in DFU recovery mode step by step.
For this you will have to follow the steps that you will see in the following tutorial with video that we leave you below:
To keep up, remember to subscribe to our YouTube channel! SUBSCRIBE
1. How to put iPad Air 3 or iPad Air 2 into DFU recovery mode
To put the iPad Air 3 or iPad Air 2 in DFU recovery mode you have to perform the following process that we detail below:
Step 1
First you have to turn off the iPad. In this link we show you how:
Step 2
Connect your iPad Air to a PC with an open iTunes via USB cable. Press and hold the Power and Home buttons simultaneously. When the Apple logo apple appears, keep pressing.

Step 3
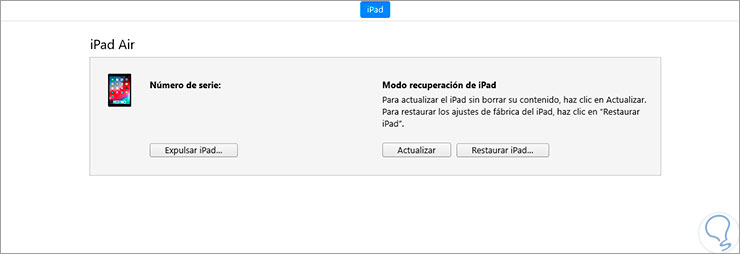
The iPad recovery mode will appear on the iTunes screen and here we have 2 options: Update the iPad or Restore it to the initial settings.
2. How to remove iPad Air 3 or iPad Air 2 from DFU recovery mode
To exit DFU mode the steps you have to do are the following on your iPad.
Step 1
Press the "Volume up" key with one tap.

Step 2
Then, press the “Volume down†key with one touch.

Step 3
Finally, press and hold the "Power" key until the apple logo appears. The iPad will restart and exit DFU mode.

It will be that simple to set or exit DFU mode on Apple iPad Air 3 or iPad Air 2..