Without a doubt, and given the technological era in which we live submerged, there are more and more devices or gadgets that are part of our daily lives and thanks to which it is easier to perform many tasks..
No one doubts that the mobile phone is the most used device, but there are occasions when the mobile screen is too small and the Tablet becomes a better option, especially when we are watching websites or consuming video on platforms such as YouTube or Netflix
There are certain occasions when we want to take a picture of the content of what we are seeing on the screen of our iPad, and for this we will need to take a screenshot of it as we indicate here:
But if we want to capture moving image, we will have to record the screen of what we are seeing on our iPad, and for this reason in this tutorial by TechnoWikis we will explain how to record screen on the iPad Air 3 step by step, for which we will have Follow the steps that we indicate in the following tutorial and video that you can see below:
To keep up, remember to subscribe to our YouTube channel! SUBSCRIBE
1. How to enable or disable display in control center on iPad Air 3
To activate or deactivate the option to record the screen on the iPad, the steps that you will have to follow are as follows:
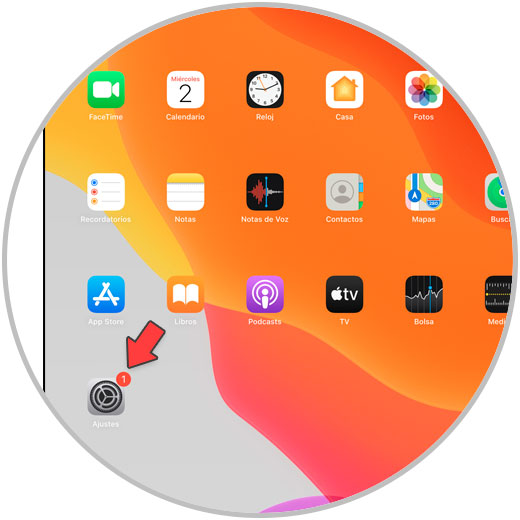
Step 1
Press the "Settings" icon on the iPad main screen.
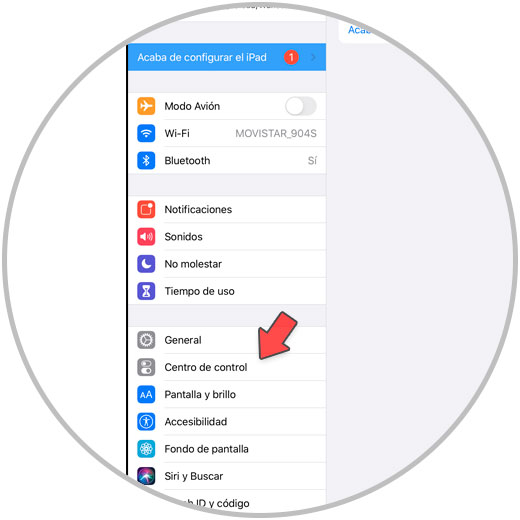
Step 2
Once inside, in the left column select "Control Center".
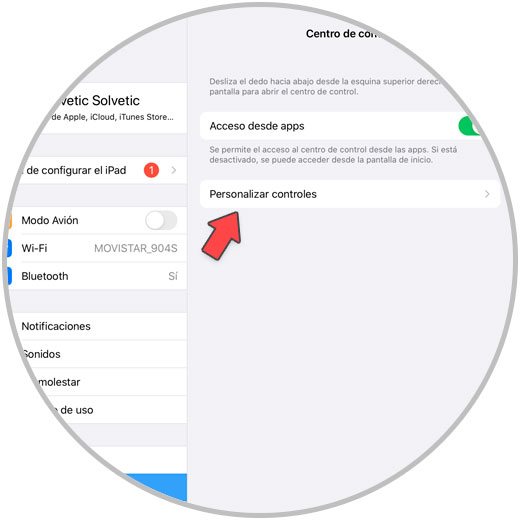
Step 3
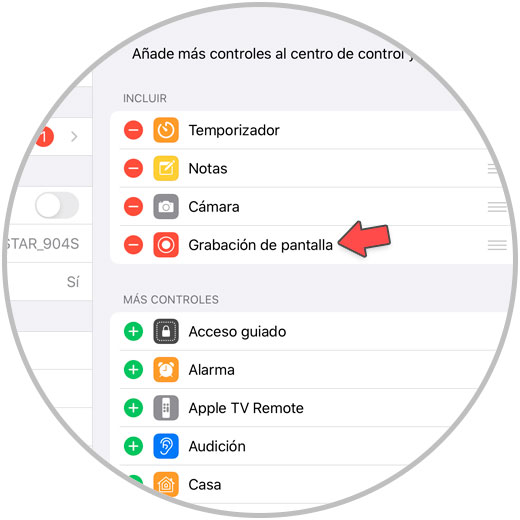
Functions assigned to the control center will appear in the left column. Select "Customize controls."
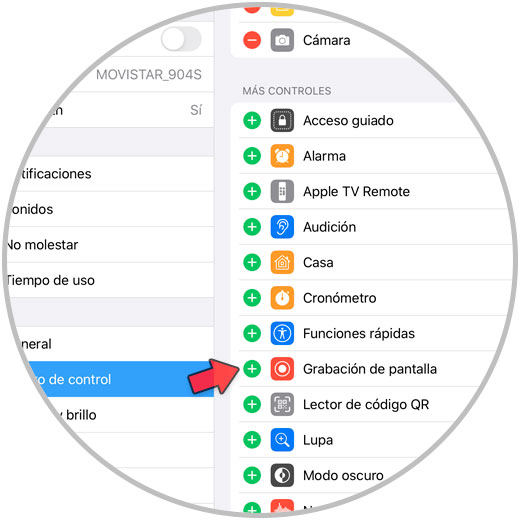
Step 4
In the upper part you will see the controls included in the control center, and in the lower part, the ones we can include. Click on the “+†symbol in “Screen recording†to add this option.
Step 5
Now the "Screen Recording" icon will be included in the control center.
2. How to record screen on iPad Air 3
To record the screen on your iPad the steps you are going to have to follow are these:
Step 1
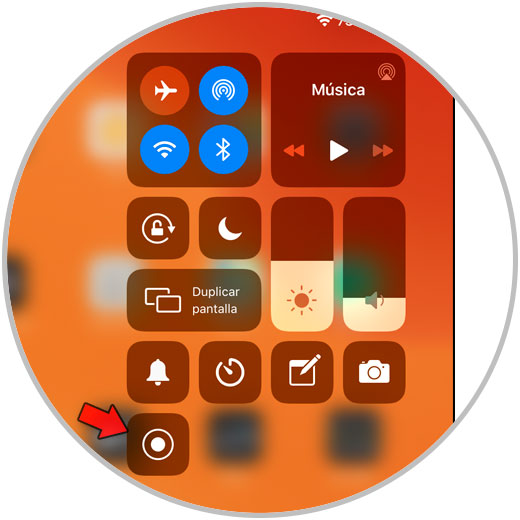
Swipe on the main screen from the upper right corner down to access the control center on your iPad Air 3.
Step 2
Once inside, press the screen recording icon to start it on your iPad.
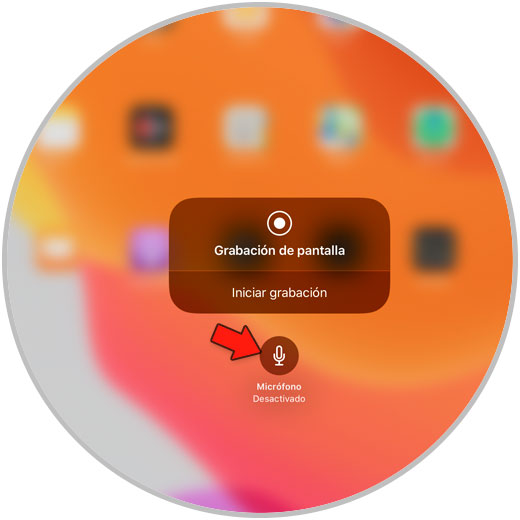
Note
If you press and hold the icon the following will be displayed, where you can select if you record the screen of your iPad with sound or without sound.
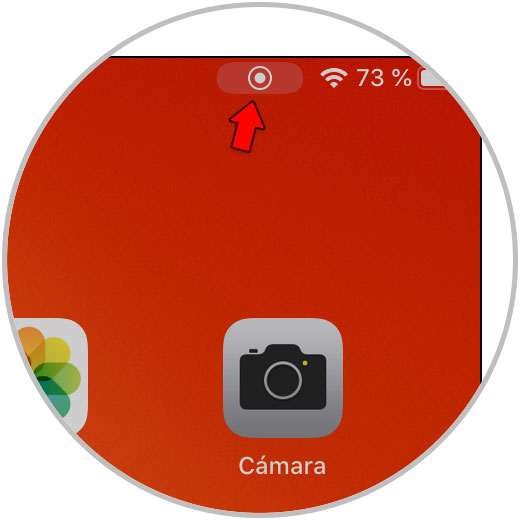
Step 3
When you start screen recording, you will see a screen recording icon appear in the upper right corner of the iPad to indicate it.
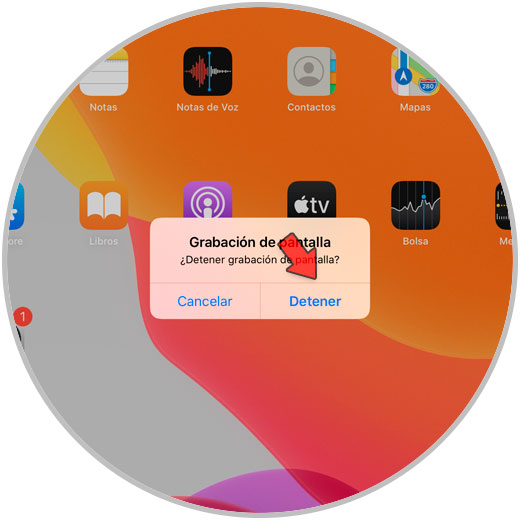
Step 4
Finally, to stop this screen recording, click on the record screen icon and in the “Stop†pop-up window.
These are the steps to record the screen on the iPad and enable and disable this option in the control center.