One of the most fundamental security mechanisms that current operating systems offer us is the implementation and activation of the firewall, although we have heard this term many times, we are not always aware of the high impact it has on the system both at a corporate and personal level . While it is true that certain companies offer firewall solutions on a physical level, which is a bridge between the external network and the local network, the operating system itself, in this case we talk about Windows Server 2019 , has its own integrated firewall which with a correct configuration it will give us the possibility to increase the security levels and thus guarantee the availability and integrity of all the elements that are hosted on the server, such as roles, services, shared folders and more..
In Windows Server Firewall, it is normal that it is often necessary to configure certain exceptions to allow communication of applications with the server, in this case these exceptions must be configured based on the requirements of the application and enable your access to have Control of all your capabilities.
Usage options
When using the integrated Windows Server 2019 firewall we will have management options such as:
- Authorize a connection (Allow).
- Block a connection (Deny).
- Redirect a connection request without notifying the sender of said redirection (Drop).
The set of rules that are managed by the firewall, give the possibility of installing a filtration method based on the security policies of the organization, normally we have two types of security policies thanks to which it will be possible to carry out actions as:
- Allow only authorized communications.
- Prevent any type of communication that has been explicitly prohibited.
In the administration of the firewall , the ports play a vital role since they are the ones that allow communication between the server and the external network. That is why these ports are where more than 95% of the attacks are carried out since they act as a door that opens for attackers. That is why the firewall blocks or closes most of the ports, this is obviously for security reasons but it is possible that some management application requests the opening of a certain port in the firewall so that its access is authorized. In this case as administrators we must allow that particular port to have proper authorization in the firewall..
This is why TechnoWikis will explain how we can open and authorize a port in the Windows Server 2019 firewall and thus ensure that the applications or services that use that port will have the required permissions.
To keep up, remember to subscribe to our YouTube channel! SUBSCRIBE
Open Firewall port with advanced firewall settings in Windows Server 2019
Step 1
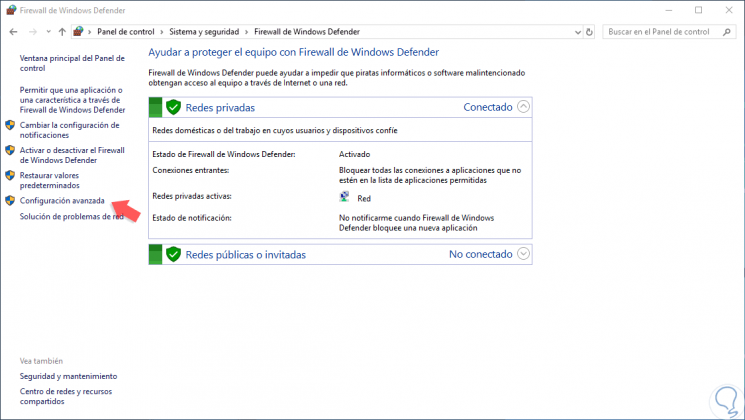
To start this process we must go to the next route. Alternatively we can go to the Windows Server 2019 search box and enter the term "firewall" and select the "Windows Defender Firewall" option.
- Windows Defender Firewall
Step 2
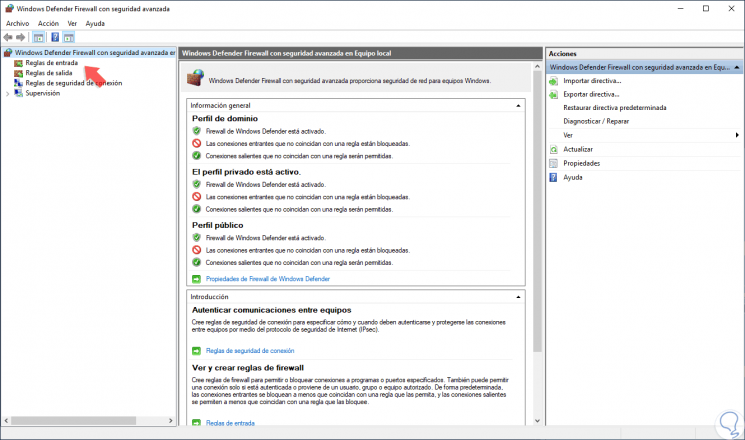
In the displayed window we will click on the “Advanced configuration†line and a new window will be displayed where we find parameters such as:
- Connection Security Rules
- Server firewall monitoring options
Step 3
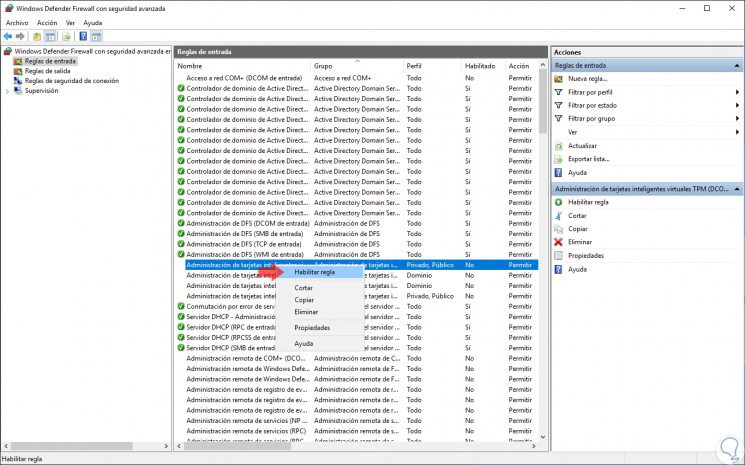
When selecting the "Inbound rules" section, all the preconfigured Windows Server 2019 rules associated with incoming network connections and packages will be displayed, some of these rules are not enabled by default so if we want to activate them, just right click on the rule and select the option “Enable ruleâ€:
Step 4
We can find specific details of the rules such as:
- Group to which it belongs
- Profile (Public, Private or Domain)
Step 5
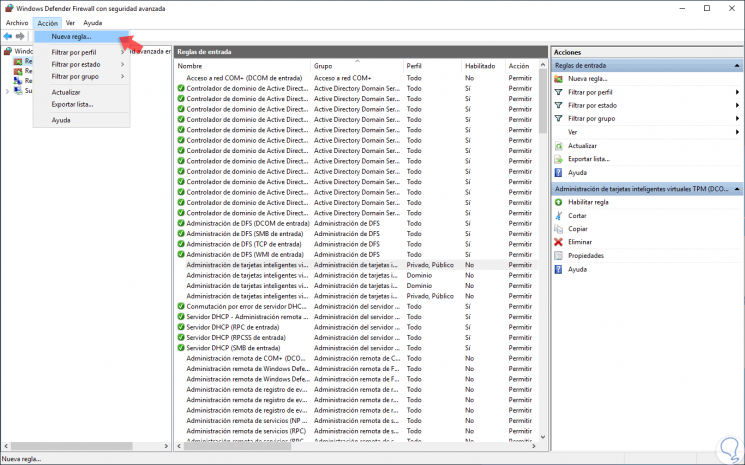
To create a new rule in Windows Server 2019, we have the following options:
- Right click on the "Inbound rules" section and select "New rule".
- Go to the "Action" menu and select "New rule"
- By clicking on the “New rule†option located in the right side panel.
Step 6
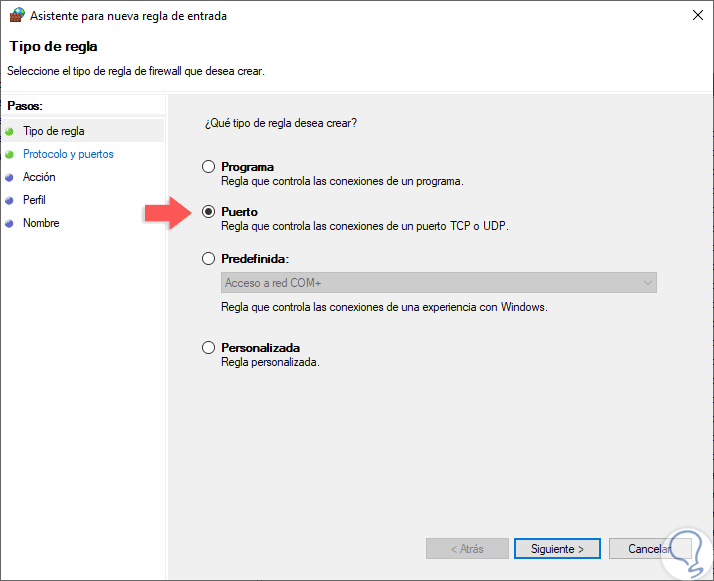
When selecting this option, the following wizard will be displayed where we define the type of rule to be created, in this case we select the “Port†box:
Step 7
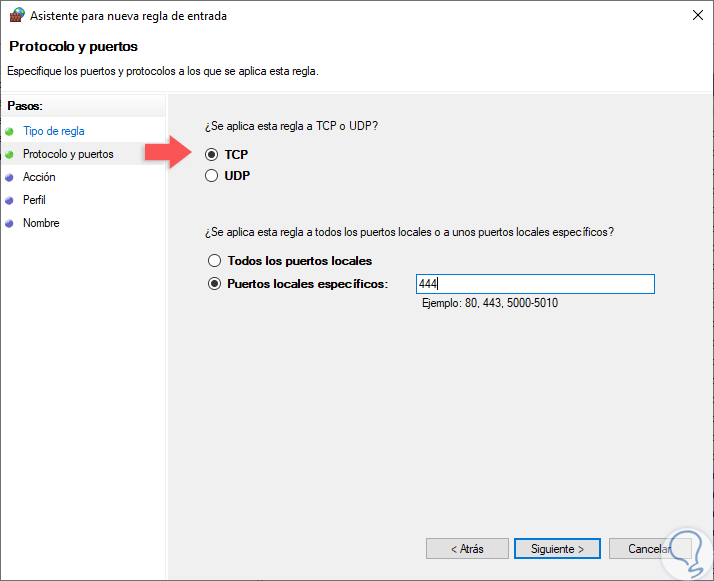
In the next window we will define the type of port to enable:
TCP (Transmission Control Protocol)
It is a connection-oriented protocol, that is, with TCP it will be possible to create connections with each other in order to send data flow, this protocol guarantees that the data is delivered to the recipient without errors and in the same order in which they were transmitted.
UDP (User Datagram Protocol)
It is a non-connection-oriented protocol, its development is based on the exchange of datagrams and facilitates the sending of datagrams through the network that it is necessary to have previously established a connection with the destination.
Step 8
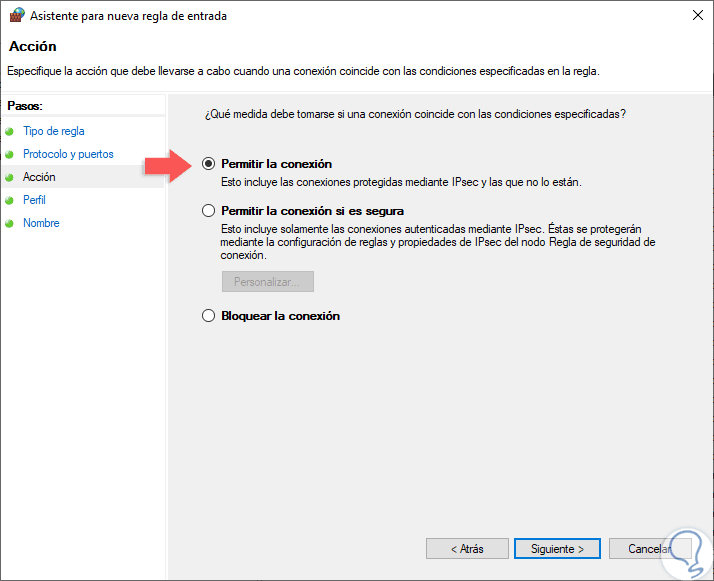
We can also select the "All local ports" box to enable all TCP or UDP ports on the server which is not secure, or check the "Specific local ports" box to determine which port is to be authorized based to the requirements. Defined this, click on the Next button and now we will define the action that this rule will have, the options are:
Allow connection
This option enables full communication through this port.
Allow connection if it is secure
This option allows data to be transmitted only if the connection is authenticated through Ipsec.
Block connection
This option prevents data from being directed through this port.
Step 9
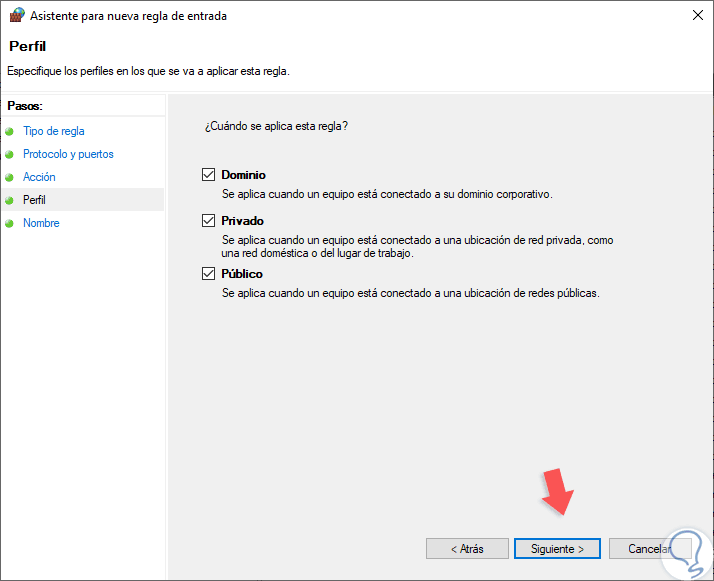
Select the option "Allow connection" and click Next, now we must define which firewall profiles to apply, remember that we can use it in Public, Domain or Private profiles:
Step 10
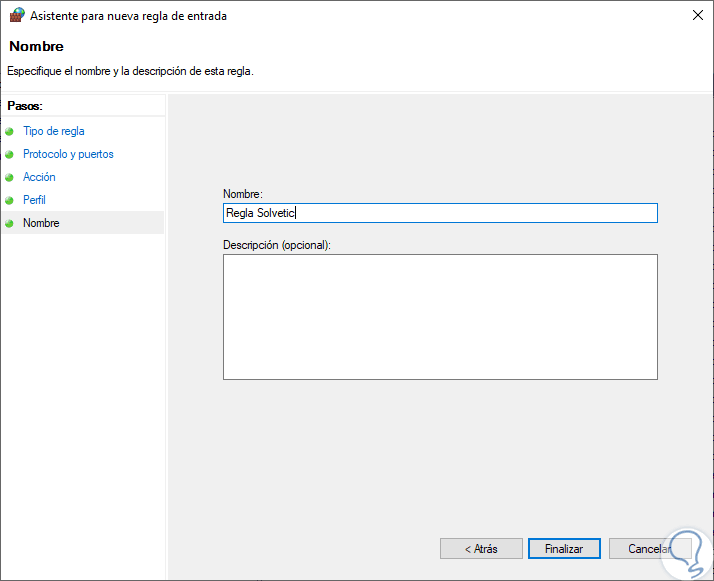
We can activate them all if we wish. Finally, we must assign a name and, if we wish, a description of the new rule to facilitate its use:
Step 11
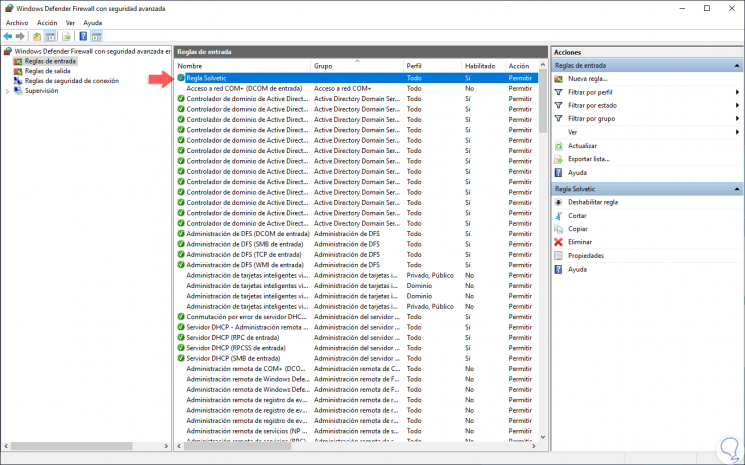
Click on the "Finish" button to complete the process and create the new rule in Windows Server 2019:
Step 12
There we can double-click on the rule and in the pop-up window go to the "Advanced options" tab and check aspects of that rule:
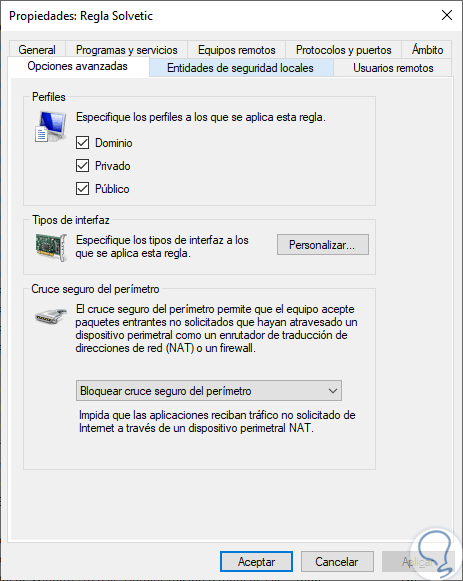
If we want there we can make changes at the security level of the new rule created. With this simple method, we can create and configure rules in the Windows Server 2019 firewall and improve the security of our network..