Remote support is a trend that takes more strength every day thanks to its practicality and efficiency since it prevents physical displacement to the place where the problem occurs, and the best thing is that this can be done from anywhere regardless of the time, the Traffic or weather..
One of the most used platforms worldwide to establish remote connections and carry out support tasks is TeamViewer. TeamViewer has a free and paid version through which it will be possible to establish an integral connection with any team worldwide with a few simple steps and with the best features that remote connection technology gives us, TeamViewer can be downloaded in the following link:
Teamviewer
Some of the most outstanding features of this platform are:
- Access recent connections to save time
- It has the option to share iOS screen for remote support in Apple environments
- Integrate the search in the list of Android computers and contacts
- It has an application integration for iOS files
- Enhanced QuickSupport Experience
- Support of various connection platforms such as Windows, macOS, Linux, Chrome OS, iOS, Android, Windows Universal Platform and BlackBerry
- No configuration required
Now, within the entire remote support process, it is quite possible at some point that we may need to use the audio , either to correct an audio application or to start a conversation with the remote user, and this fails when using TeamViewer. It is important that we have configured the audio in a correct way since this will allow us to make our use within the application adequate and we feel comfortable. Audio is very important in this regard since through it we will be able to establish adequate communication.
For this reason, TechnoWikis will explain through this tutorial how we can activate or not activate the sound in TeamViewer and thus get the most out of this great application..
1. How to set up sound in TeamViewer
Step 1
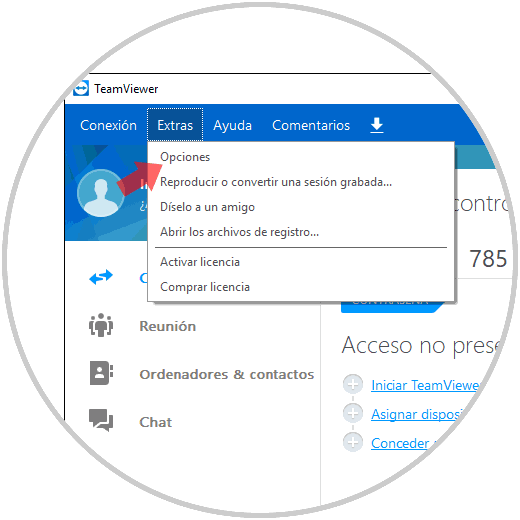
To start the process, we will access the TeamViewer application and once it is deployed, we will go to the Extras menu and there we will select the "Options" line:

Step 2
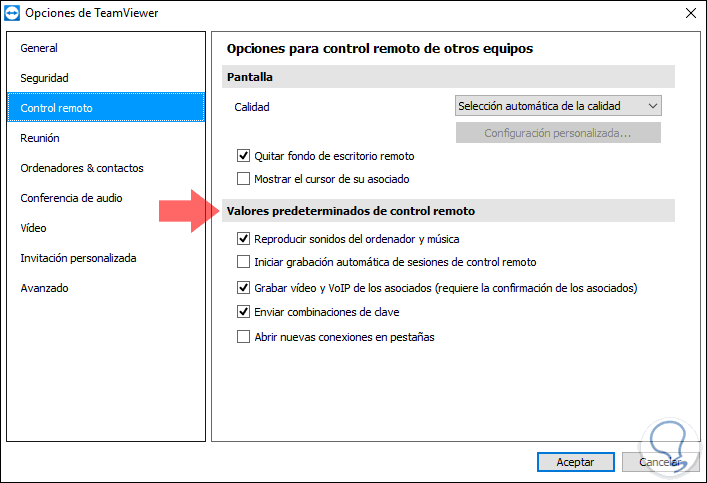
In the pop-up window that will be displayed, we go to the "Remote Control" section and go to the "Remote Control Defaults" section:

Step 3
There we validate that the "Play computer sounds" and music box is active so that the audio is active, if this box is unchecked the audio will not work correctly. So the audio should work correctly.
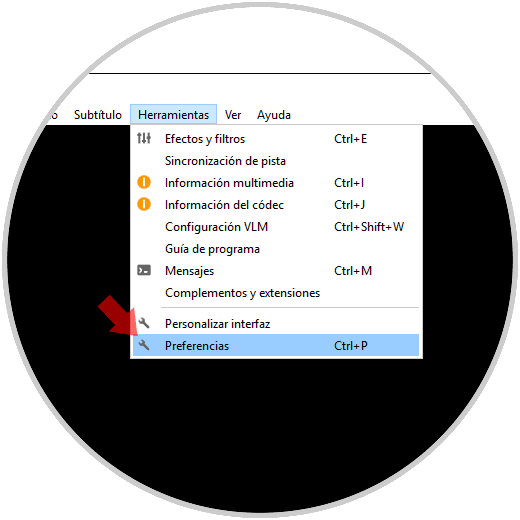
In the event that it still fails, we must review the application settings, for example, VLC, in this case we will go to the menu

Step 4
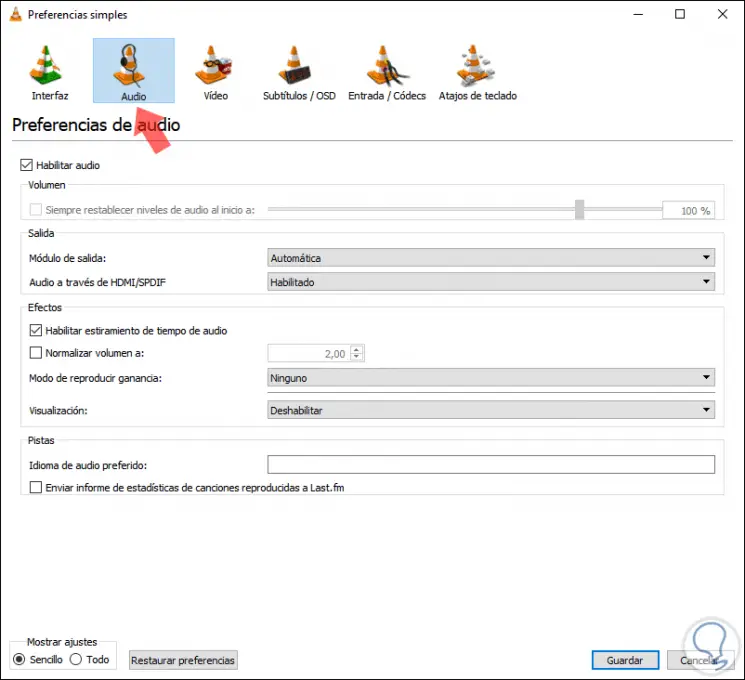
In the Audio section we validate the "Output module" section we define the correct option:

That simple we can manage the audio in TeamViewer and have full support in cases where it is necessary makes use of the audio . In this way we will be able to access all the sound configuration options offered by the program to make the changes that we consider appropriate in each case.