Automator is one of the macOS Mojave utilities, thanks to which it will be possible to automate hundreds of tasks in a dynamic way and with ease which results in the final administration tasks being much easier to carry out in any type of organization or for all types of users ..
Among the tasks that we can perform as frequent users of macOS Mojave is the resizing of our images either for file editing purposes, website implementation, etc., and Automator gives us the possibility to carry out the option of resizing our Images in a simple way.
TechnoWikis will explain how we can resize an image with Automator in macOS Mojave ..
Automator access and configuration
To access Automator we will go to Spotlight and at the time of access we will see the following:
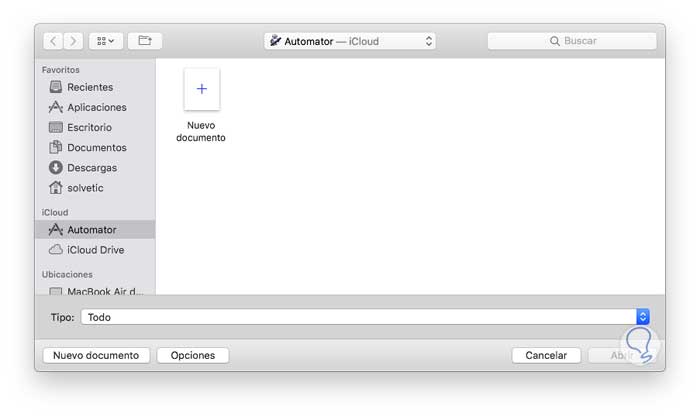
There we select the "New document" option and click on the "Open" button and the following will be displayed:
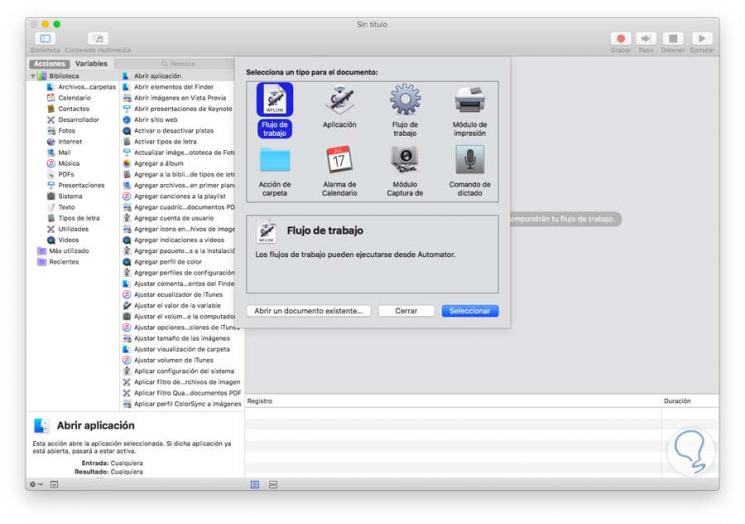
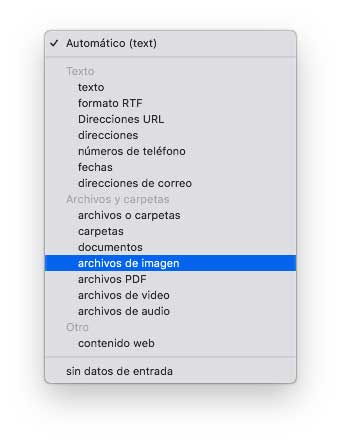
Select the "Workflow" option and click on the "Select" button and now click on the Workflow drop-down field that receives the current one and in the displayed options select "image files":
The following will be seen:
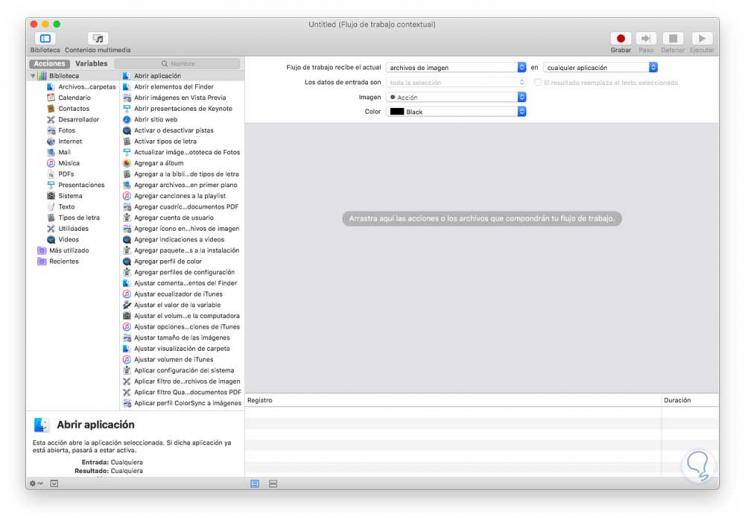
Now, in the search field in the "Applications" section we will enter the text scale and the following options will be displayed:
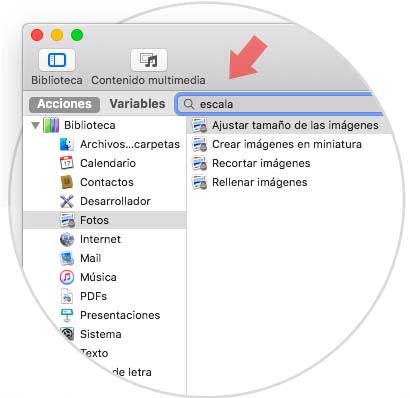
There we drag to the central panel the option "Resize images" and you will see the following:
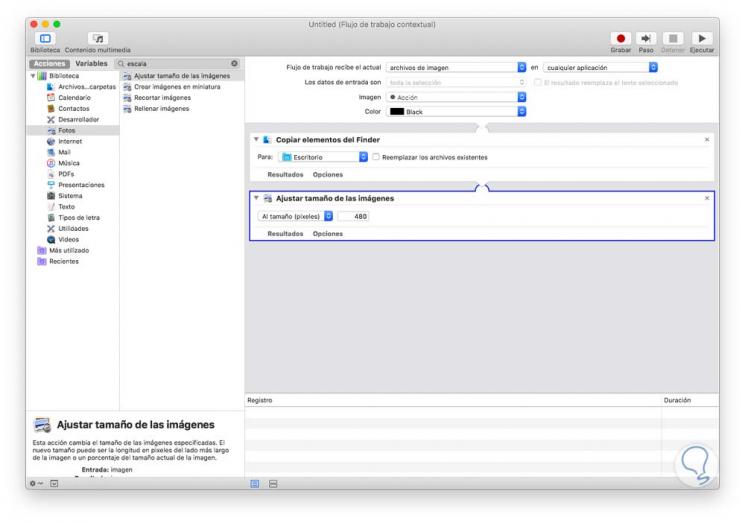
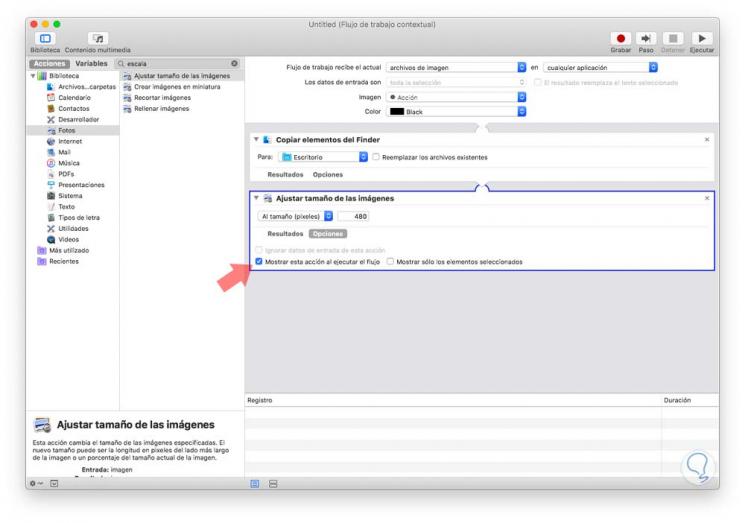
There we click on the "Options" line and check the "Show this action when executing the flow" box:
Now we go to the "File"> "Save" menu and there we will define the desired name for the created action:
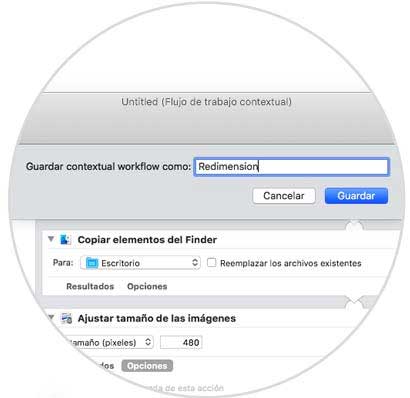
Click on the "Save" button to save the changes created.
[/color] + clic), y podremos ver que se despliega la opción de Automator que hemos creado, en este caso la lÃnea "Redimensión": Now, in the image that we want to resize, we will right click ([color = rgb (51,51,51)] ⌘ [/ color] + click), and we can see that the Automator option we have created is displayed, in this case the "Redemption" line:
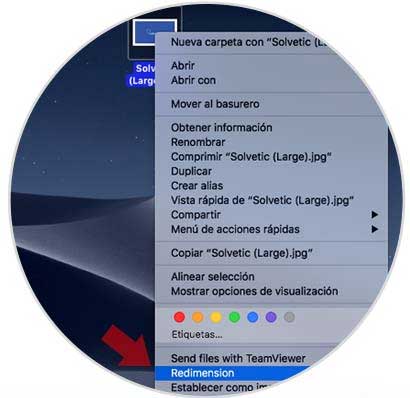
Clicking on this line will display the following window:
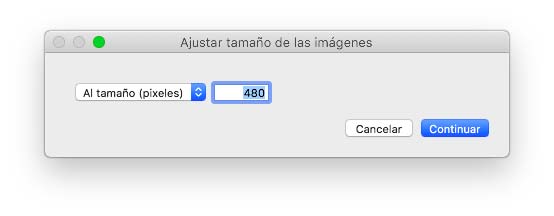
There we enter the desired value of the new size in the respective field and click on the Continue button to apply the changes..
It's that simple, thanks to Automator, we will be able to edit our images in macOS Mojave .