There are several solutions to host websites in a dynamic, simple way but with the best tools for a centralized administration of these websites..
Despite the wide range of possibilities to perform this action, without a doubt, Apache is the widest bet worldwide for everything associated with the web and has various platforms and utilities. In 2009 Apache already had 100 million websites monopolizing 70% of all of them.
Due to its popularity its use has been extended in a remarkable way, being Apache Maven one of the most striking for its versatility and ability to operate. It is for this reason that through this tutorial today in TechnoWikis we will see how to install Apache Maven on Debian 9 and CentOS 7 in a practical way..
What is Apache Maven?
Apache Maven has been developed as a software project management and understanding tool, which is based on the concept of a project object model (POM).
When we implement Apache Maven, it will be possible to manage the compilation, reports and documentation of a project from a central information point which is ideal for administrators and staff involved in the maintenance of websites. In addition, Apache Maven can be used to create and manage any Java-based project, which has a powerful tool.
Apache Maven Objectives
Apache Maven has set a series of objectives that will have a high impact on organizations such as:
- Provide project quality information.
- Provide a uniform construction system for support tasks.
- Generate guidelines focused on the development of best practices which are ideal for audit issues.
- Provide complete migrations to new functions.
Outstanding features of Apache Maven
Apache Maven has a number of features, among which we highlight:
- Immediate access to new functions without requiring high levels of configuration.
- Simple configuration of new projects.
- It has a large repository of libraries and metadata, which are available immediately and in real time.
- Better management of dependencies that include automatic update, dependency closures and more tasks.
- Apache Maven can build various projects in predefined output types, such as JAR, WAR and more.
- Better dependency management.
Now let's see how to install Apache Maven on Debian 9 and CentOS 7.
1 . Installing Apache Maven on Debian 9 Linux
To start the installation process we must first install OpenJDK 8, since Java Development Kit (JDK) is one of the essential components to install Apache Maven.
Step 1
To do this we will use the Java PPA repository and then verify the version with the following commands:
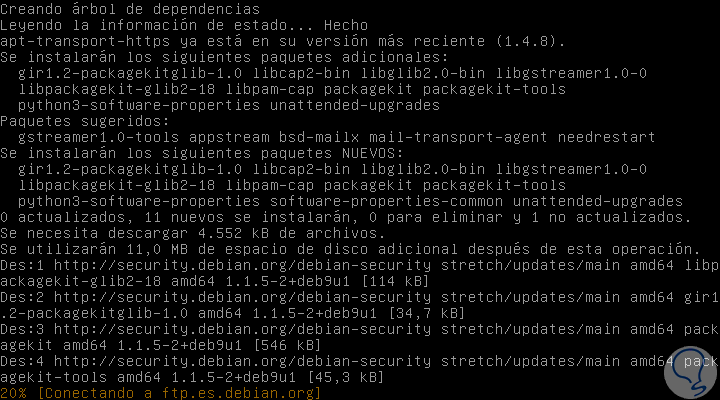
sudo apt install software-properties-common apt-transport-https -y
Step 2
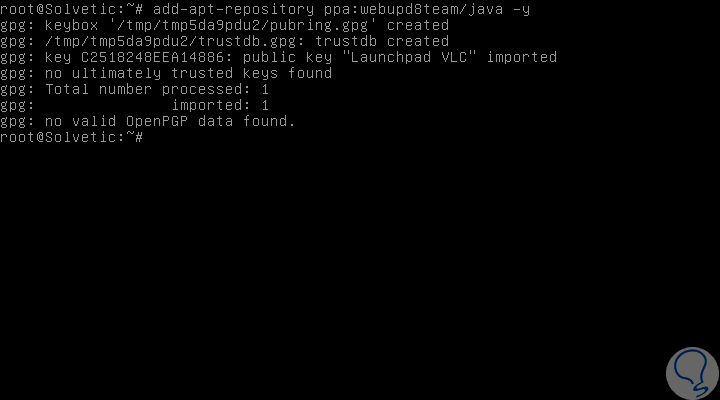
We proceed to install the repositories:
sudo add-apt-repository ppa: webupd8team / java -y
Step 3
We update the packages by running:
sudo apt-get update -y
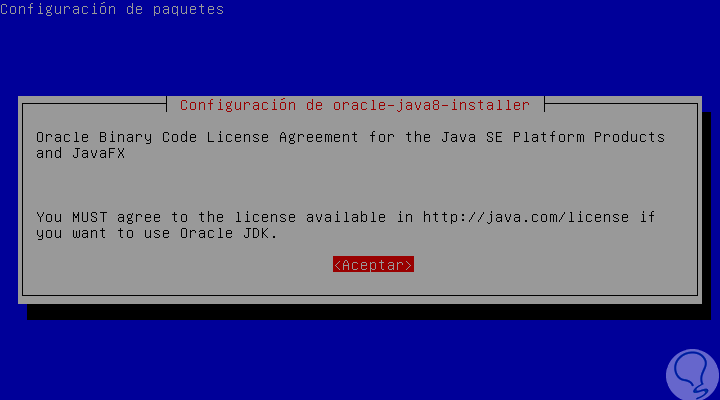
Once updated, we proceed to the installation of Java by running:
sudo apt-get install oracle-java8-installer

Step 4
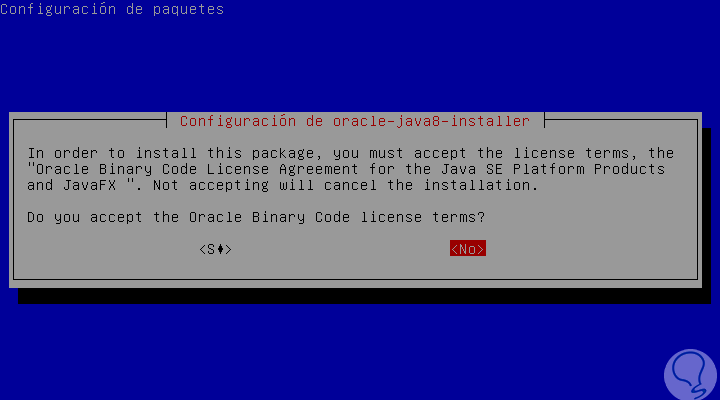
Enter the letter S to confirm the download and installation of Java, during the process it will be necessary to accept the user license:
Step 5
Later we will see the following. We accept the terms of the binary codes
Step 6
The Java installation process will be completed.
Step 7
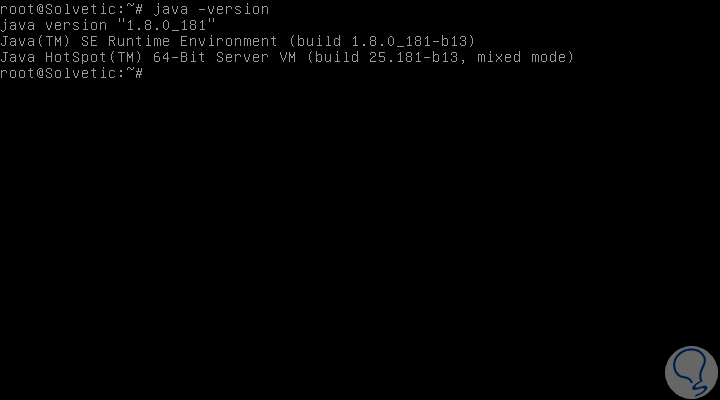
We proceed to validate the installed java version by running:
java -version
Step 8
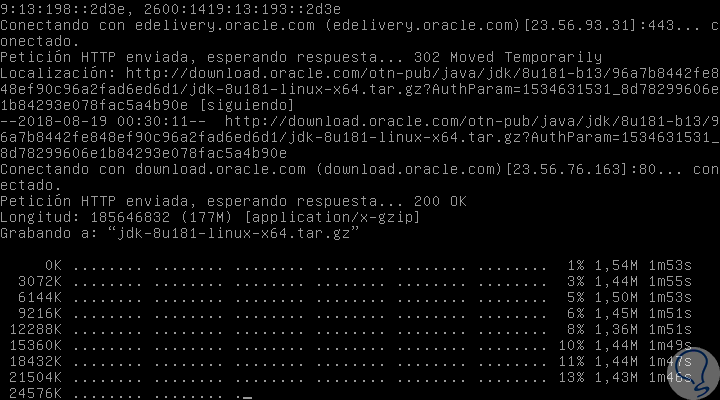
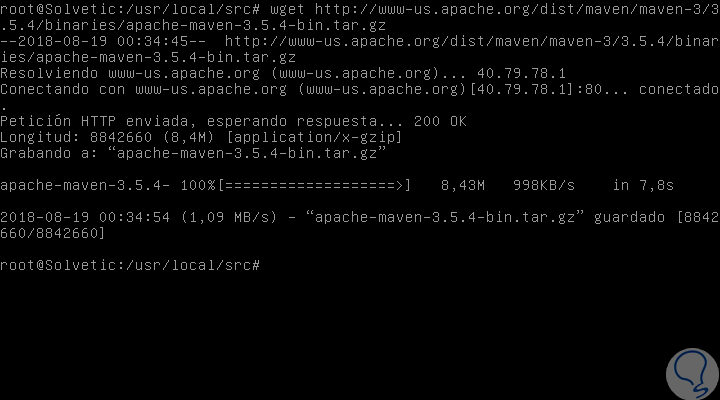
The next step is to use the wget command to download the latest version of Apache Maven in the main Maven directory which is / usr / local / src:
sudo cd / usr / local / src sudo wget http://www-us.apache.org/dist/maven/maven-3/3.5.4/binaries/apache-maven-3.5.4-bin.tar.gz
Step 9
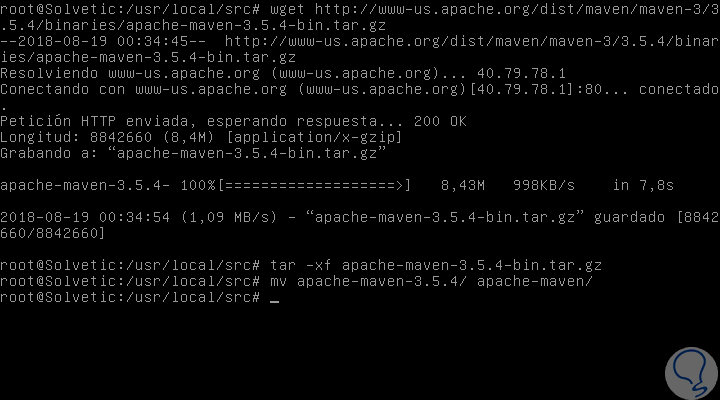
We proceed to extract the file and rename the Apache Maven directory:
sudo tar -xf apache-maven-3.5.4-bin.tar.gz sudo mv apache-maven-3.5.4 / apache-maven /
2. Setting up the Apache Maven environment on Debian 9 Linux
The next step is to configure the environment variables for Apache Maven files in the system and for this we must create a new configuration file 'maven.sh' in the /etc/profile.d directory as follows:
sudo cd /etc/profile.d/ sudo nano maven.sh
In the file we will paste the following lines:
# Apache Maven Environment Variables # MAVEN_HOME for Maven 1 - M2_HOME for Maven 2 export JAVA_HOME = / usr / lib / jvm / java-8-oracle export M2_HOME = / usr / local / src / apache-maven export MAVEN_HOME = / usr / local / src / apache-maven export PATH = $ {M2_HOME} / bin: $ {PATH} 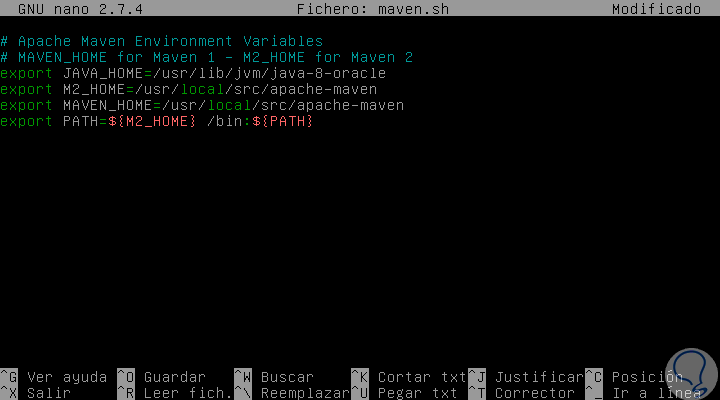
We save the changes using the following keys:
+ O Ctrl + O
We leave the editor using:
+ X Ctrl + X
Now we allow the configuration file 'maven.sh' to be executable and then load the configuration by executing the source command like this:
sudo chmod + x maven.sh sudo source /etc/profile.d/maven.sh
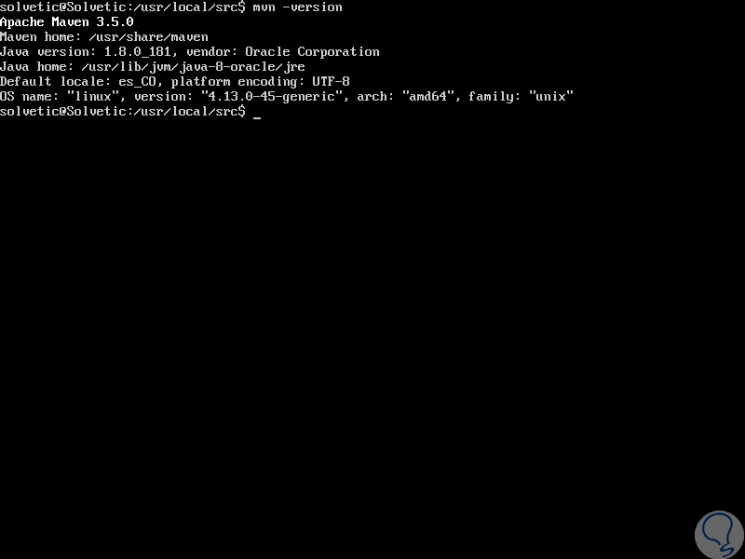
Finally, we can validate the version of Apache Maven installed by running:
mvn –version
3. Installing Apache Maven on CentOS 7 Linux
Now we will see the steps to install Apache Maven on CentOS 7.
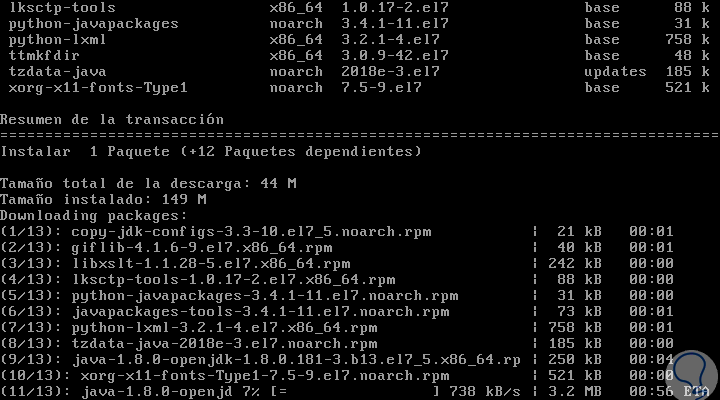
OpenJDK 8 installation
To perform this installation of Java, we must execute the following command:
yum install -y java-1.8.0-openjdk-devel
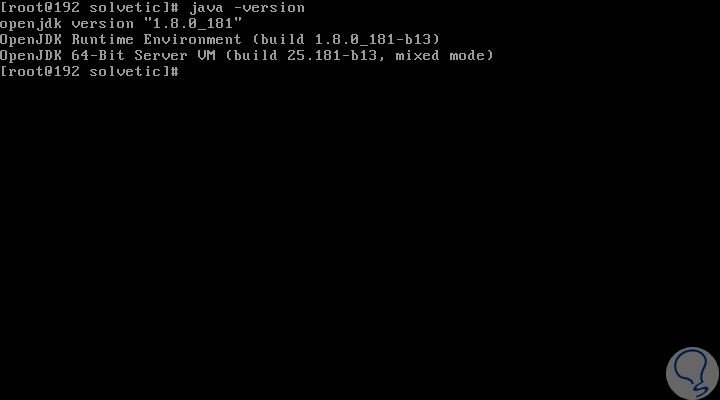
Once installed we proceed to validate the installed Java version:
java -version
Apache Maven installation
4. Setting up the Apache Maven environment on CentOS 7 Linux
Like Debian, we will configure the environment variables for the pre-compiled Apache Maven files and for this we will create a configuration file 'maven.sh' in the /etc/profile.d directory:
cd /etc/profile.d/ nano maven.sh
There we will paste the following lines:
# Apache Maven Environment Variables # MAVEN_HOME for Maven 1 - M2_HOME for Maven 2 export M2_HOME = / usr / local / src / apache-maven export PATH = $ {M2_HOME} / bin: $ {PATH} 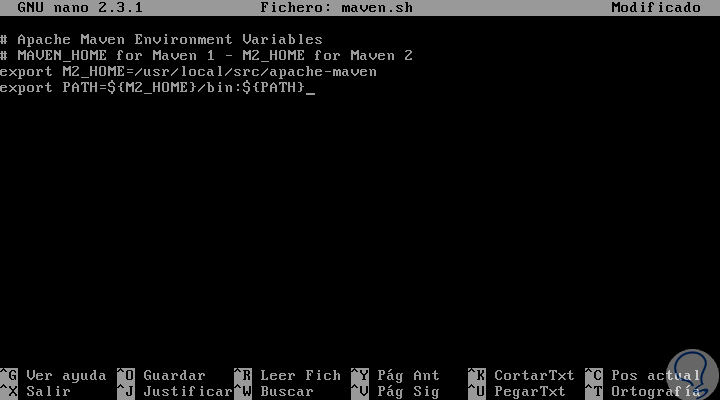
We save the changes with the keys:
+ O Ctrl + O
We leave the editor using the keys:
+ X Ctrl + X
Now we will allow the file to be executable and load the configuration using source:
chmod + x maven.sh source /etc/profile.d/maven.sh
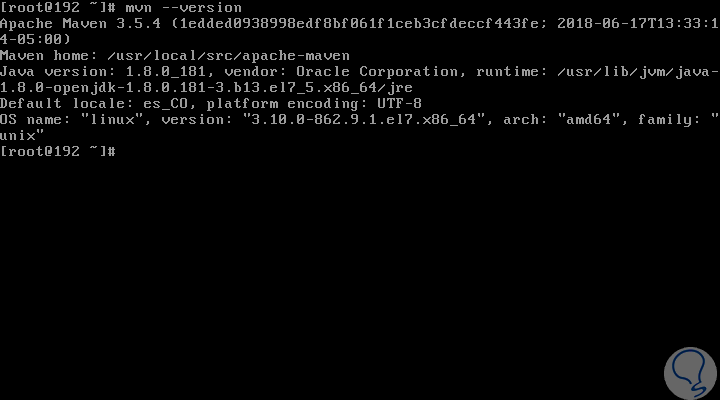
Finally, we validate the Apache Maven version with the following command:
mvn –version
Thus, we have seen how to install Apache Maven in these two well-known Linux distributions and thus get the most out of Apache Maven which we have seen has great functionalities for each type of user and organization..