To stay up to date, remember to subscribe to our YouTube channel!
SUBSCRIBE ON YOUTUBE
In Linux environments there are hundreds of processes and services that must be managed on a daily basis, but it is no secret to anyone that one of the most delicate are those related to the network, this includes protocols such as TCP, UDP, checking port status and stability. of the connection, this is a really extensive task but thanks to netcat we can have a centralized administration on these..
Netcat is a utility which is capable of reading and writing data through network connections using the TCP or UDP protocols. In a simple way, without much explanation, Netcat is in charge of creating a TCP connection to the port that we specify on the destination computer or host, when detected, a standard input will be created sent to the host and all the information that is collected will be returned using the connection in a standard outlet. In addition to this, Netcat can be used as a server, in this mode it is in charge of listening for incoming connections and carrying out the reading and writing tasks, some of the things that we can do with Netcat are:
functions
- Forward TCP and UDP ports to other sites.
- Works with iPv4 and iPv6.
- Supports proxy connections using SOCKS4 or HTTP (CONNECT method).
- Available for Linux, Windows and macOS systems.
parameters
There is a group of parameters that we can use with Netcat which are:
- -c (string): Specifies the shell commands to run after connecting to the host.
- -e (filename): Indicates the filename to execute after connecting.
- -g gateway – Indicates the source routing hops of the gateway, supports up to 8 hops.
- -i – Indicates the delay interval in seconds for scanned ports.
- -l: is the listening mode for incoming connections.
- -n: Allows only numeric ip addresses that do not have dns.
- -p (port): Refers to the local port number either individually or in range.
- -b: Allow udp transmissions.
- -r: Randomize local and remote ports.
- -s (addr): is the local source address.
- -t: enable telnet negotiation.
- -u: udp mode is used.
- -v: activate verbose mode.
- -w (seconds): This is the amount of time to wait for final connections and reads in seconds.
- -z: is the zero I/O mode which is used for scanning.
Now TechnoWikis will explain how to use Netcat in Linux, in this case it will be Ubuntu.
How to use netcat
Step 1
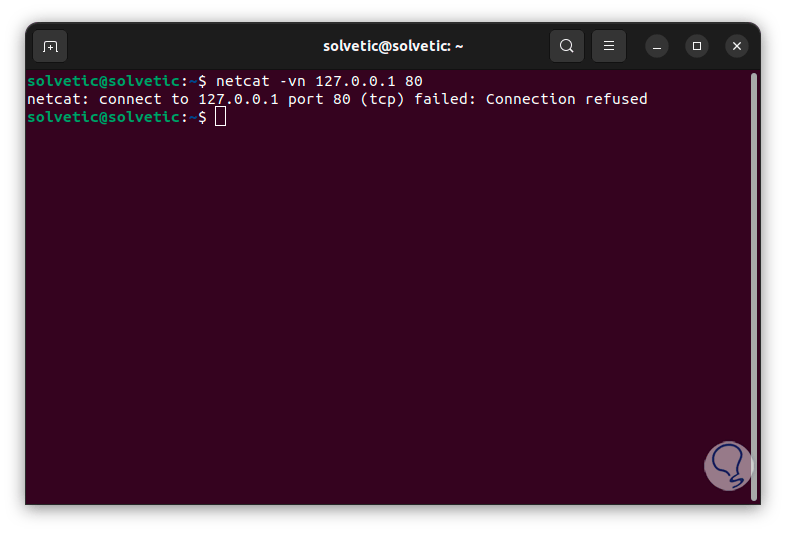
To start we are going to open the terminal and it is possible to use the following command to analyze the local connections of the system, there the port must be specified:
netcat -vn 127.0.0.1 #port
We will see the current status of that port in the system.
Step 2
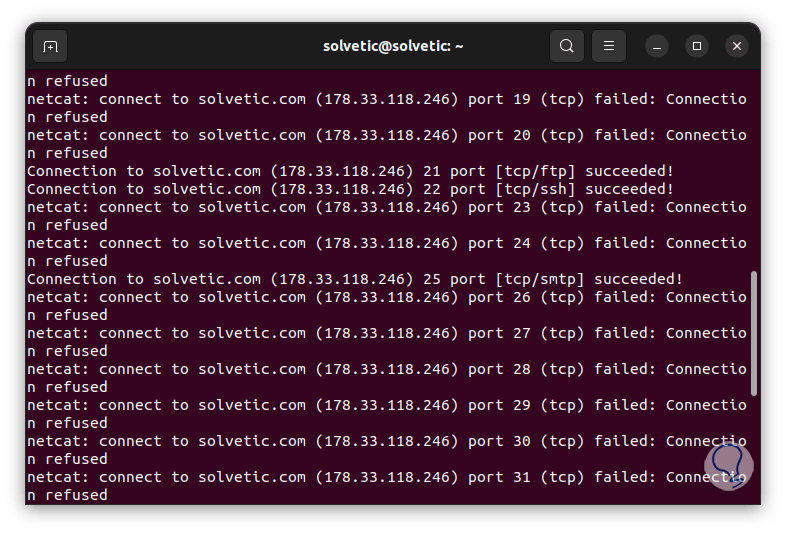
It is possible to carry out the analysis to an Internet domain and we can use a range of ports to receive the status of these, in this case we will use the following syntax:
netcat -z -v domain.com (port range)

Step 3
We can detect when a port is active since its legend tells us:
Step 4
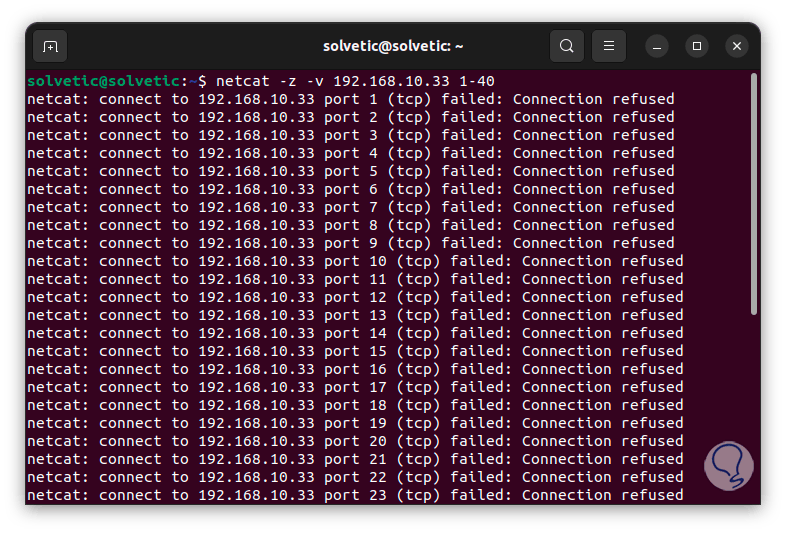
Now it is possible to carry out the analysis on a remote computer by entering the following command together with its respective IP address:
netcat -z -v IP_Address (port range)
step 5
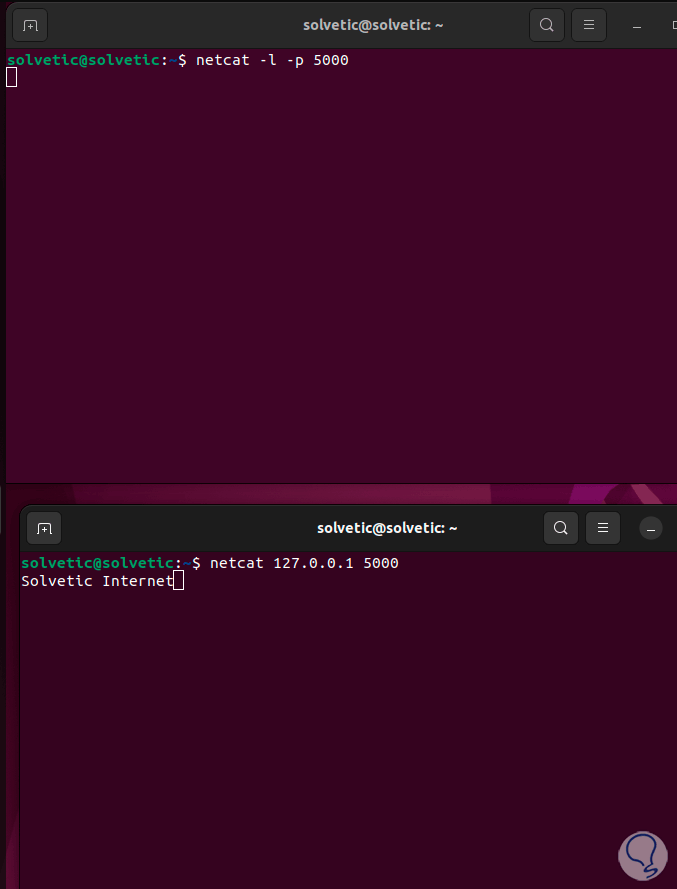
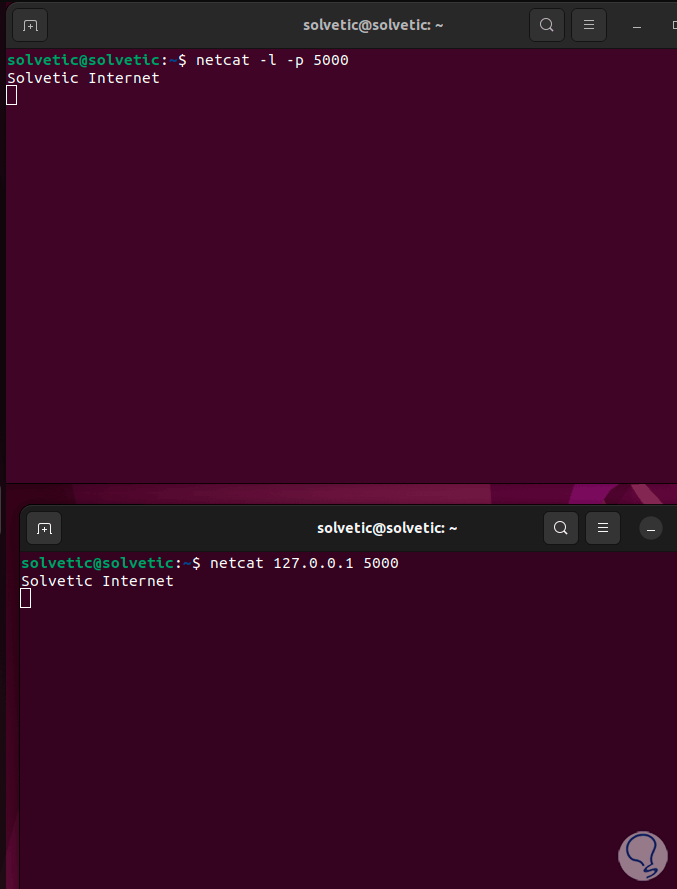
One option of this command is to send messages between the local terminals, if we want to use it we will execute the following in the terminal indicating the port to activate listening:
netcat -l -p (port)
step 6
Now we open another terminal in the system and there we are going to use the following command with the local address of the equipment and the port that we have activated:
netcat 127.0.0.1 (port)
step 7
Now when something is entered in the console it will be reflected in real time in the other window when pressing Enter:
step 8
Now it will be possible to work between two computers, first of all on the main computer we are going to enable the listening port with the command:
netcat -l -vv -p (port)
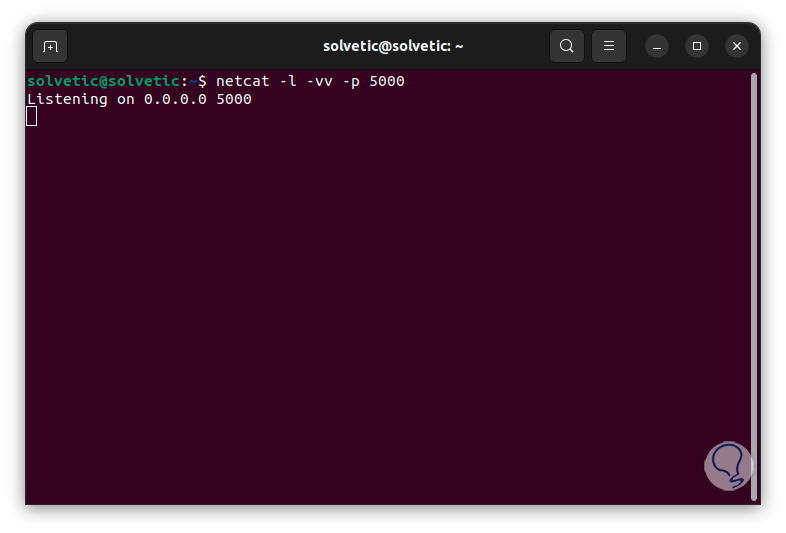
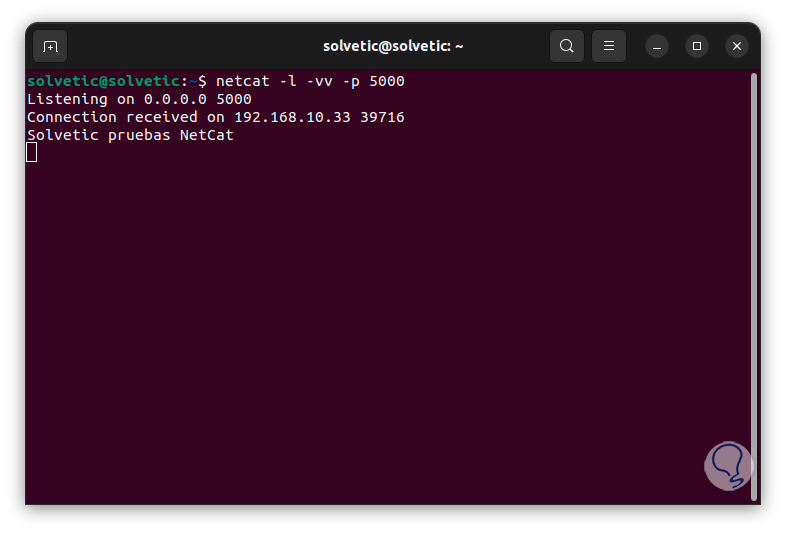
step 9
We see that the port remains active in listening mode, now on the other computer we are going to establish the connection with the main one using the following command:
netcat Remote_IP_address (port)
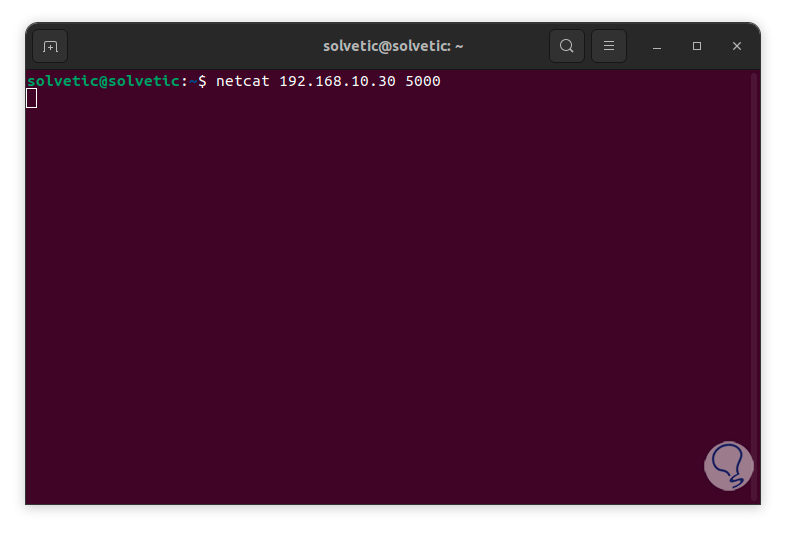
step 10
We see that the port is activated, now we enter some text:
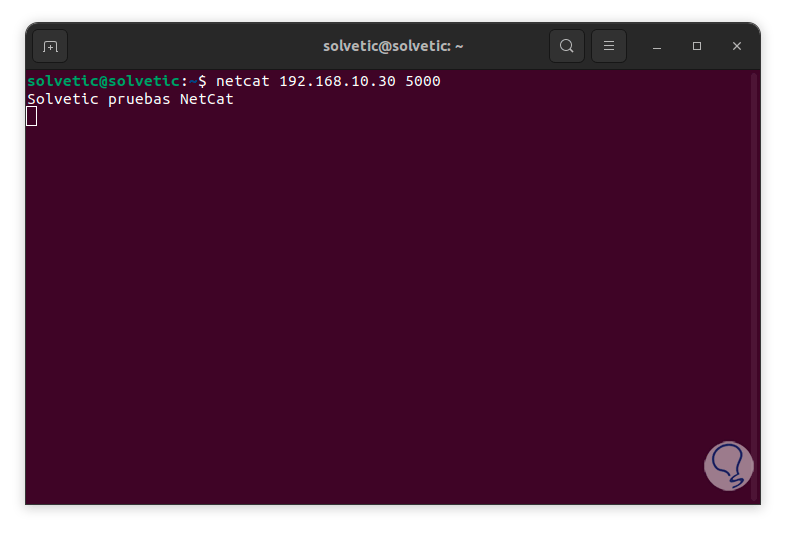
step 11
When we press Enter this text will be reflected on the remote computer in real time:
step 12
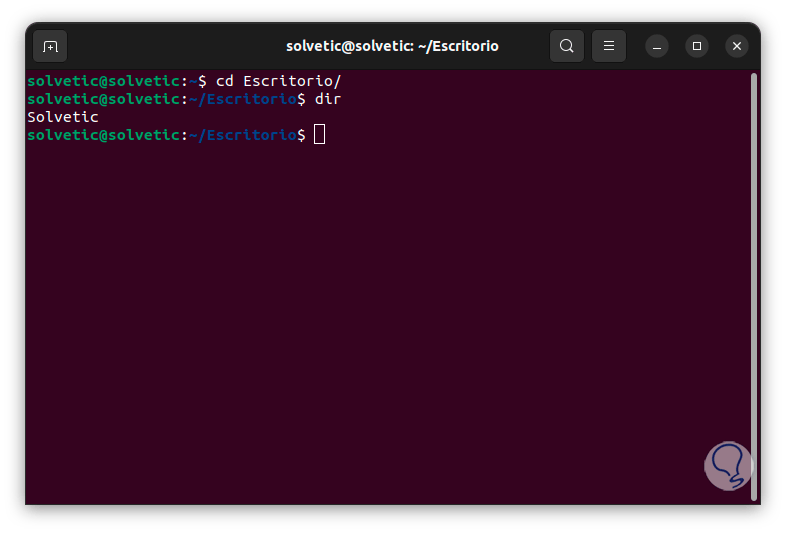
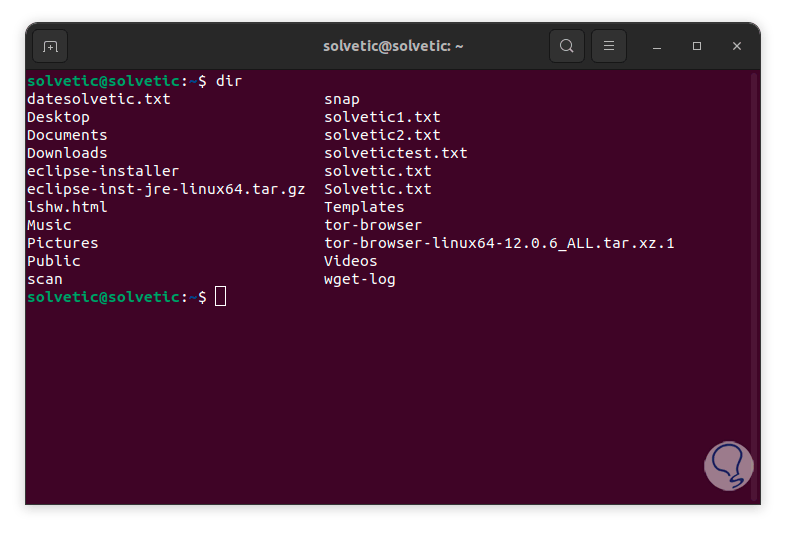
It is possible to transfer files with this command as we mentioned, to begin with we will go to the file path and see its name with the "dir" command:
step 13
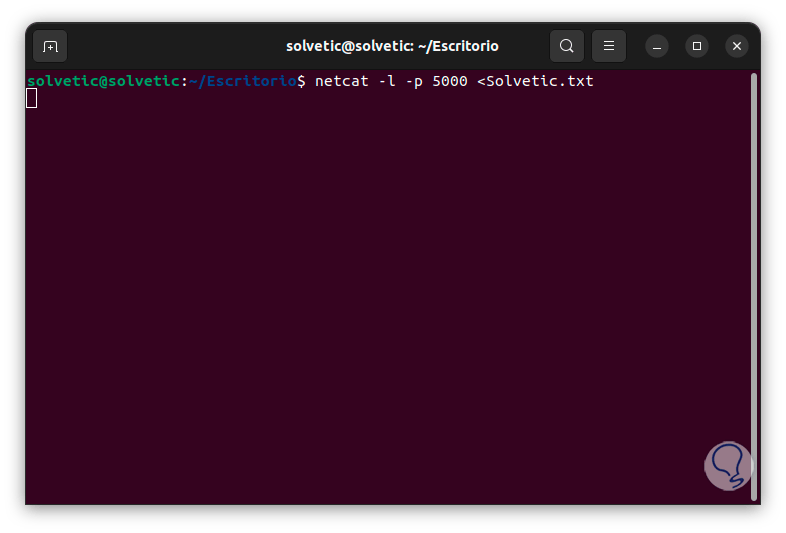
In this case it will be the "TechnoWikis.txt" file, now in the terminal we execute the following to upload this file:
netcat -l -p (port) <file
step 14
On the remote computer we are going to execute the following to download this file that is available:
netcat “name” >file
step 15
We execute the "dir" command to validate that it has been loaded correctly:
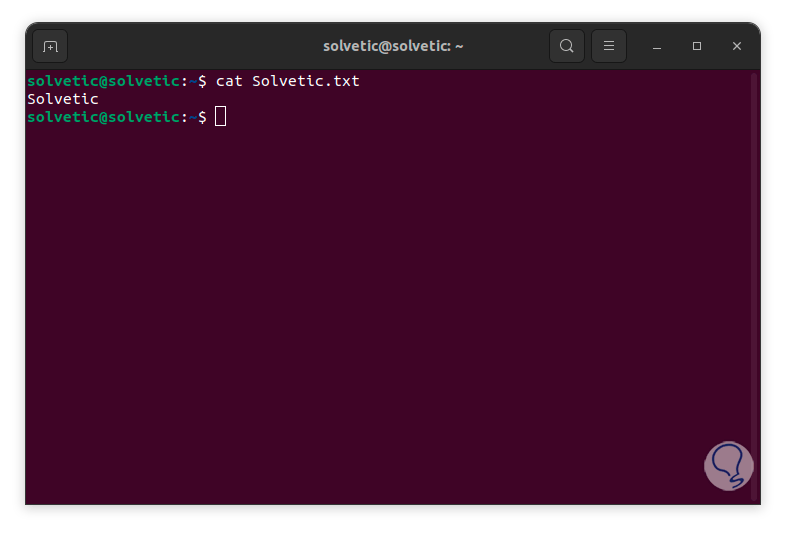
step 16
Now with the “cat” command we are going to see the content of the file that was transferred remotely:
cat “file”
There are some more options that Netcat offers us, but with these alternatives we will have the ability to access complete TCP and UDP results, but not only this, but also to be able to send messages between computers and be able to transfer files safely and quickly, make the most of it. to this command so that the administration scopes are more and more complete..