To stay up to date, remember to subscribe to our YouTube channel!
SUBSCRIBE ON YOUTUBE
The icons have been present in all editions of Windows and serve as a reference point to know the content of said element, for example, when we see the Recycle Bin icon we know that is where the deleted files go, etc. . By default, Windows 11 has created default icons but it will be possible to customize it and set our own icons, TechnoWikis will teach you how to do it..
Many users prefer to have a completely personalized interface, thus being more comfortable when navigating Windows 11. Therefore, Customize Windows 11 Icons can be a good option to convert a standard desktop into one tailored for any user. We show you several options to change Windows 11 icons.
Note
For compatibility and quality we recommend that the icons to use are in the .ico format, on the web you can find many free pages of them.
1 Customize Windows 11 desktop icons
Step 1
First of all, we are going to see how to change some of the icons already established on the desktop, for example This computer, the Trash or the network, for this method, we right click on some free place on the desktop and there we click on the option “ Personalize":
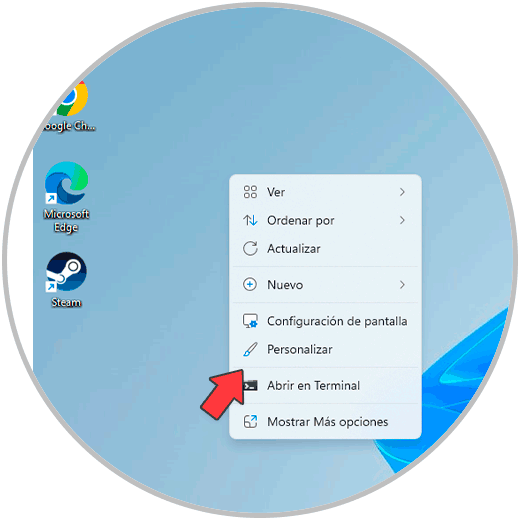
Step 2
By clicking there we will see the following. There we click on “Themes”
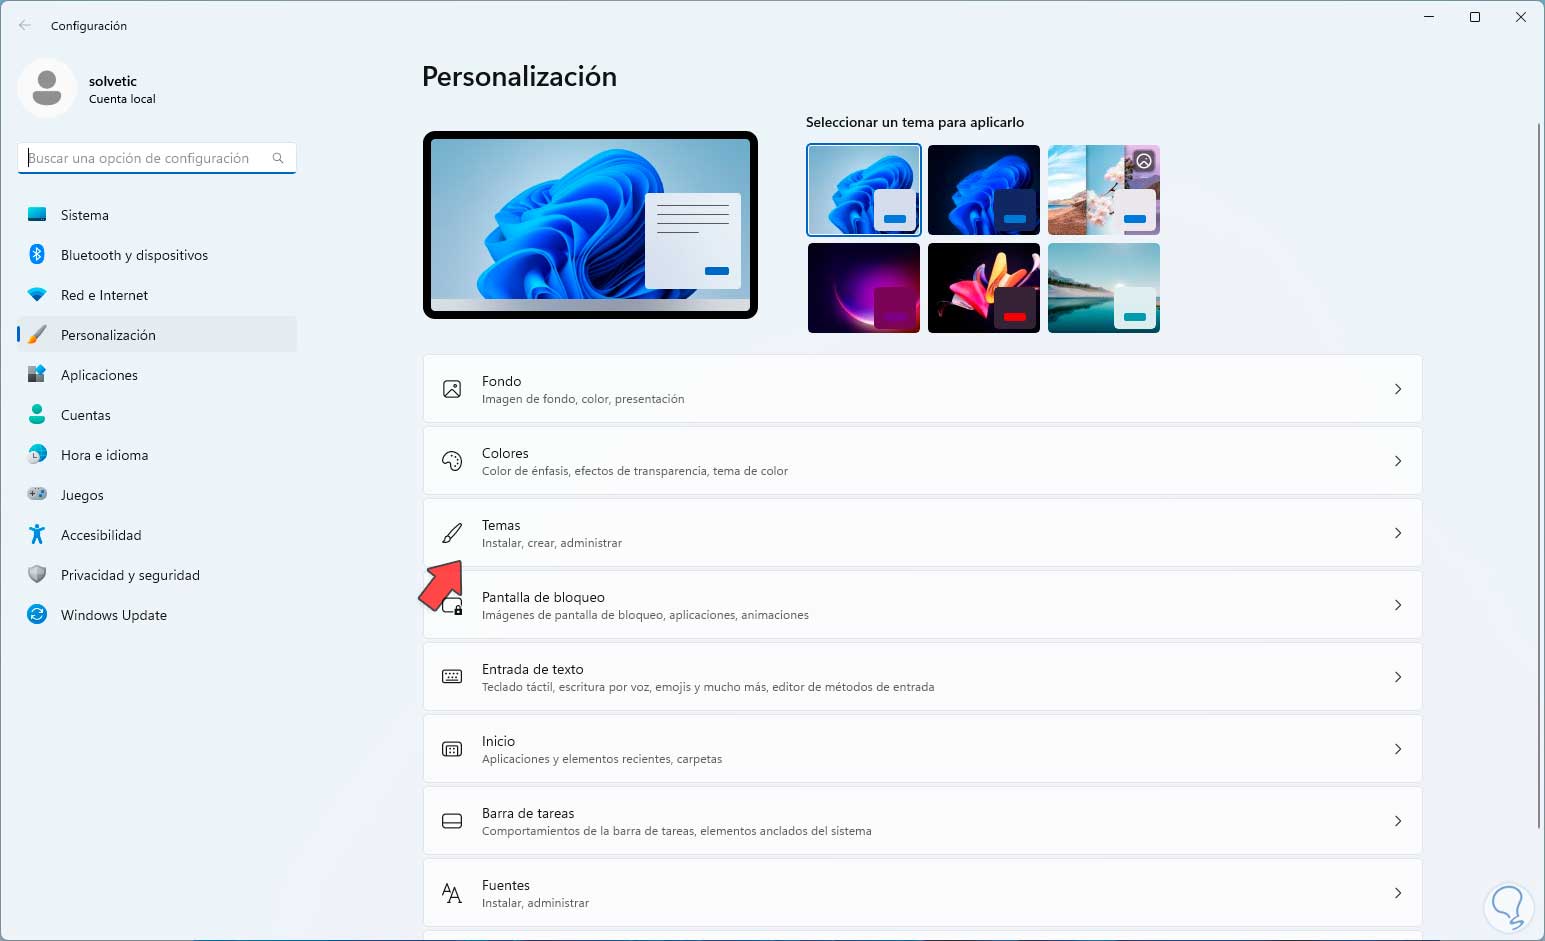
Step 3
and then we click on “Desktop icon settings”:
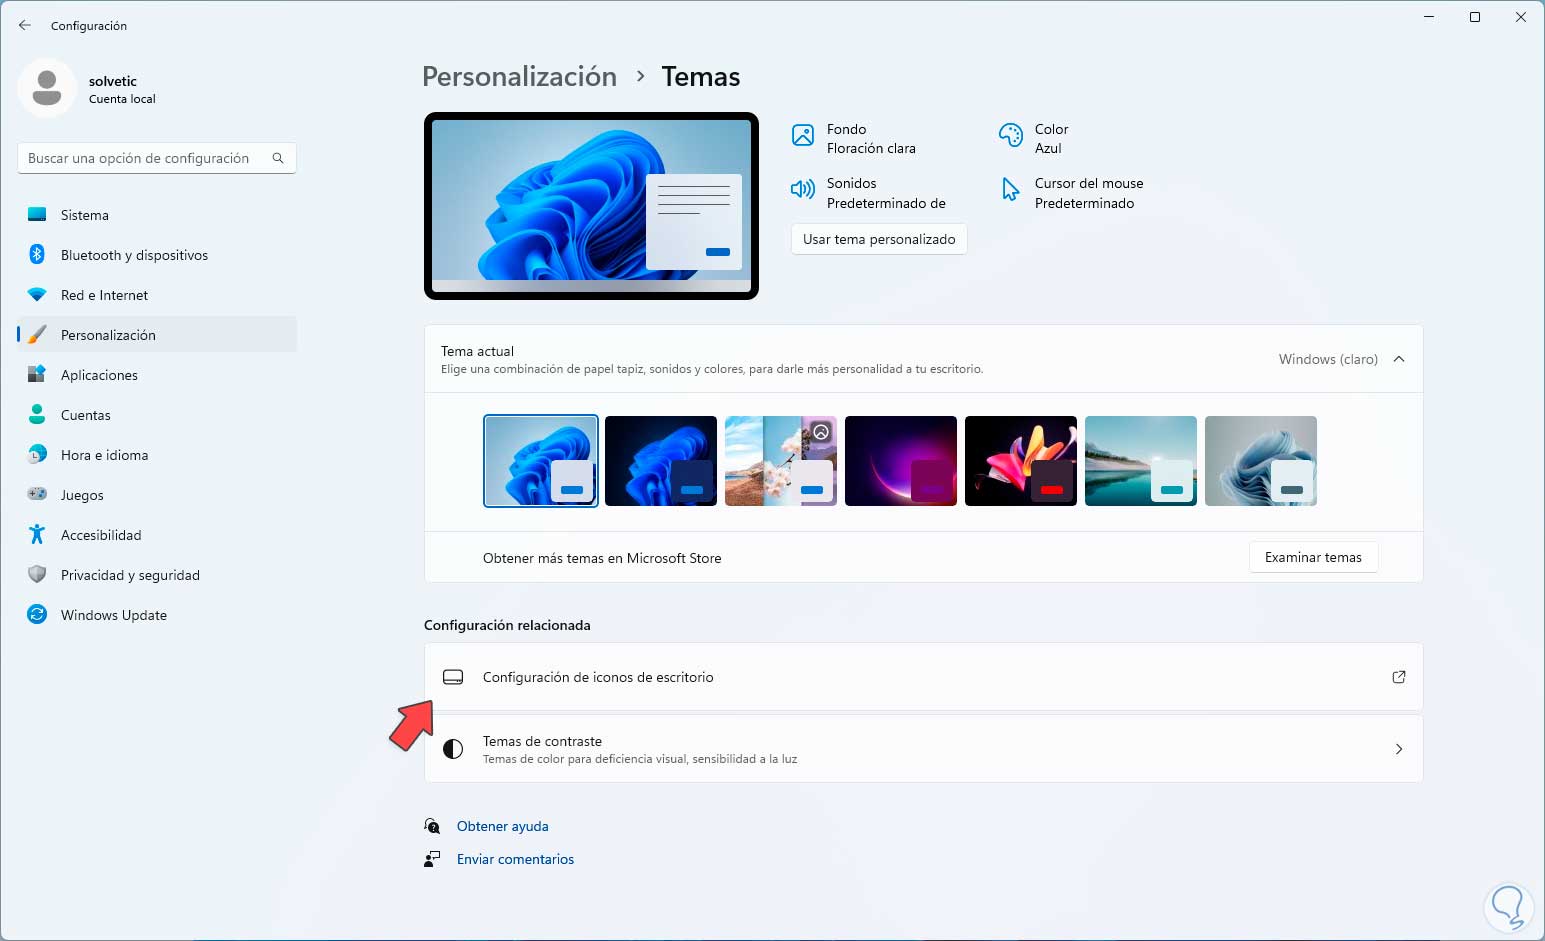
Step 4
The following window will be displayed. There we are going to select the icon to change, then click on “Change icon”:
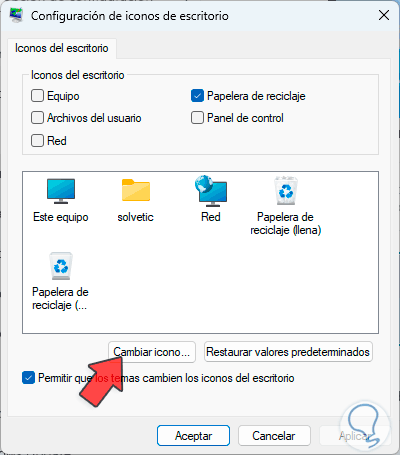
Step 5
By clicking there, we go to the location where we have the new icon to establish:
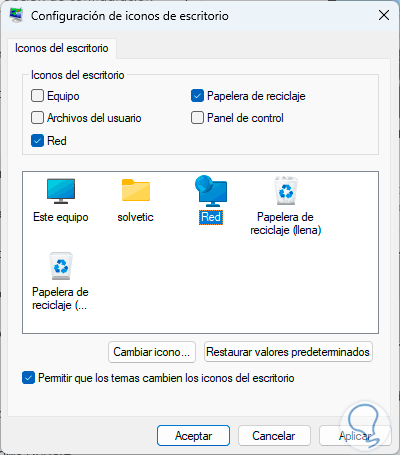
Step 6
Once selected we click on “Open”, this will be added:
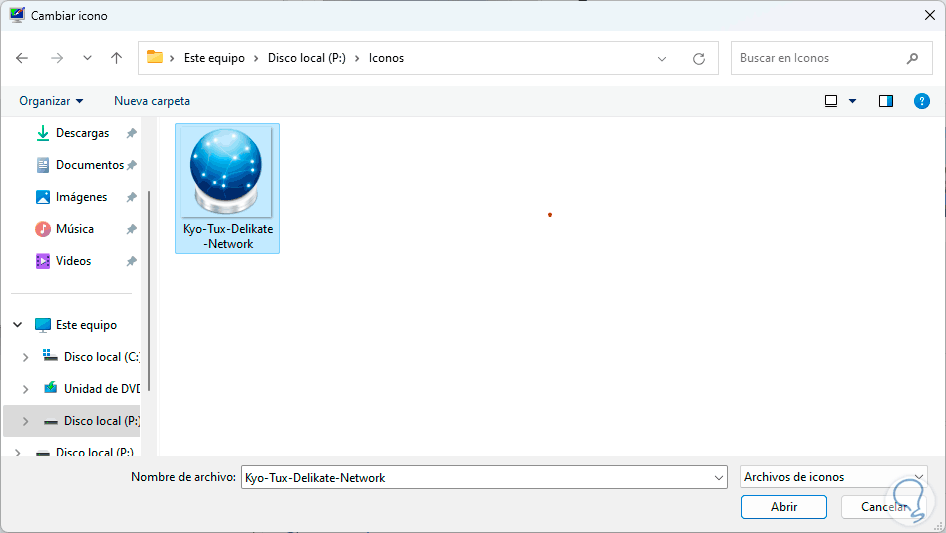
Step 7
We click on “Accept” to see the following:
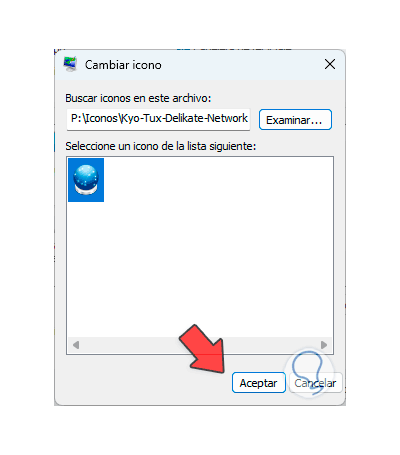
Step 8
There we click on “Apply” and then “Accept” to confirm this process:
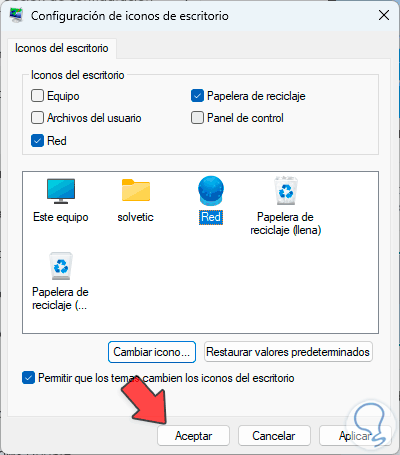
Step 9
There it will be possible to see the new icon.
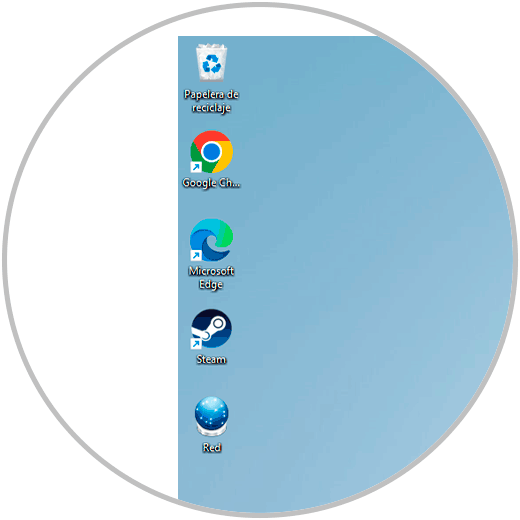
2 Customize Windows 11 folder icons
Step 1
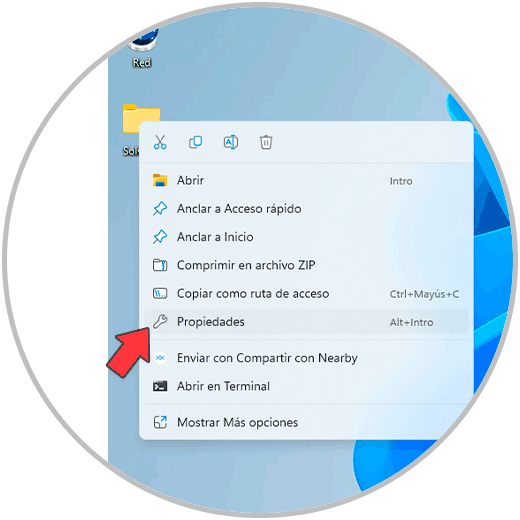
Another option to do is to change the icon of a folder hosted on the desktop, to do this we will right click on the folder, then select the “Properties” option:
Step 2
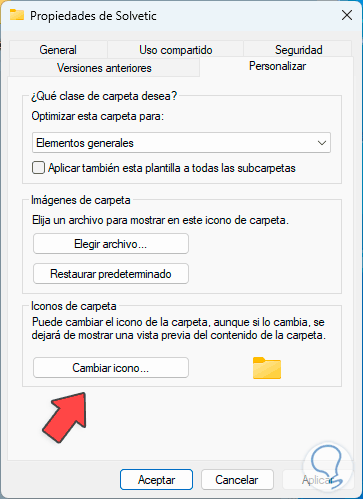
In the window that opens we will go to the “Customize” tab. There we click on “Change icon”, we will see the following:
Step 3
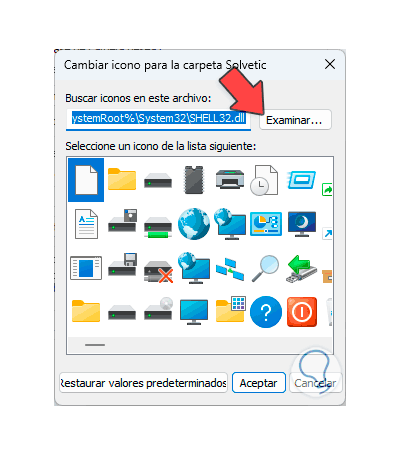
We click on “Browse” to choose the new icon to use:
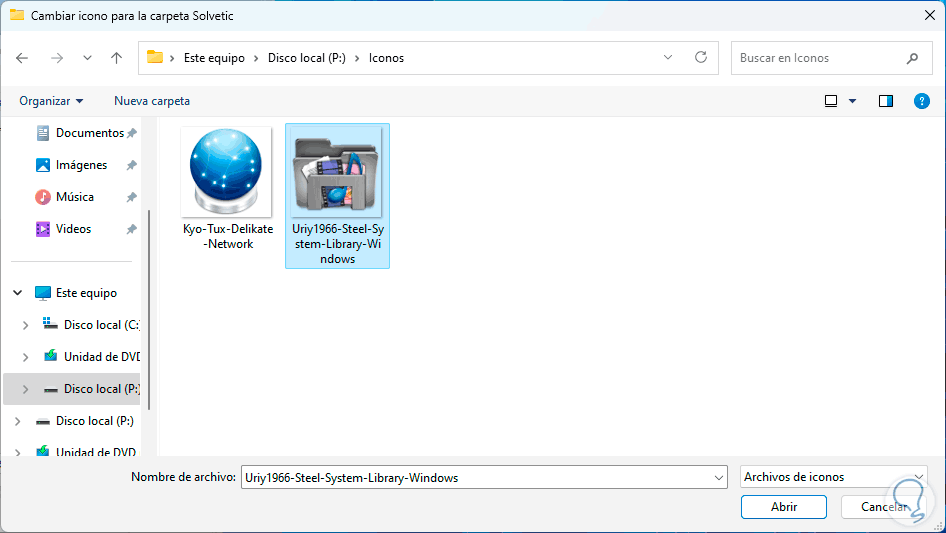
Step 4
We click on “Open” to add it:
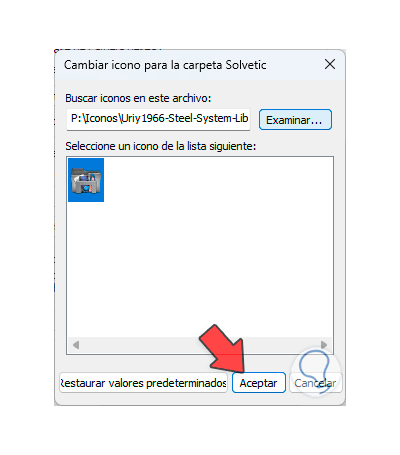
Step 5
We click on “Accept” so that it is established in the preview:
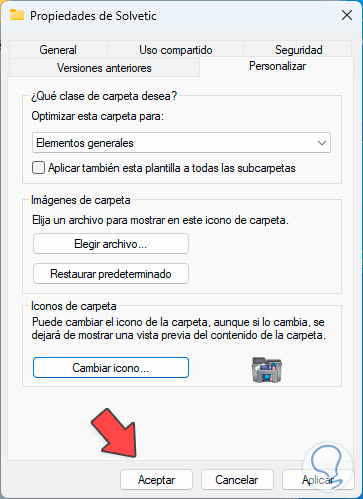
Step 6
We click “Apply” and “Accept” to save the changes
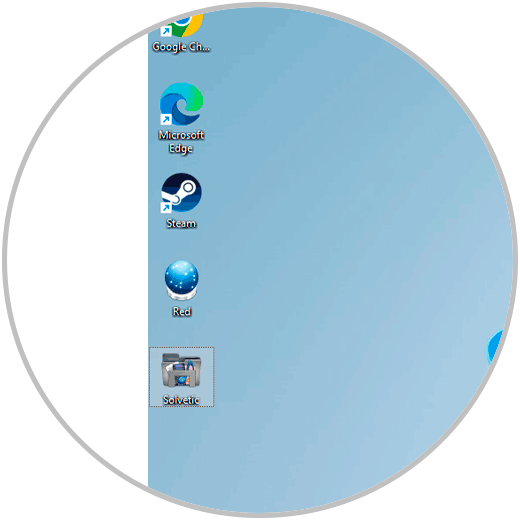
Step 7
We can now see the new icon in the folder in Windows 11:
3 Customize shortcut icons Windows 11
Step 1
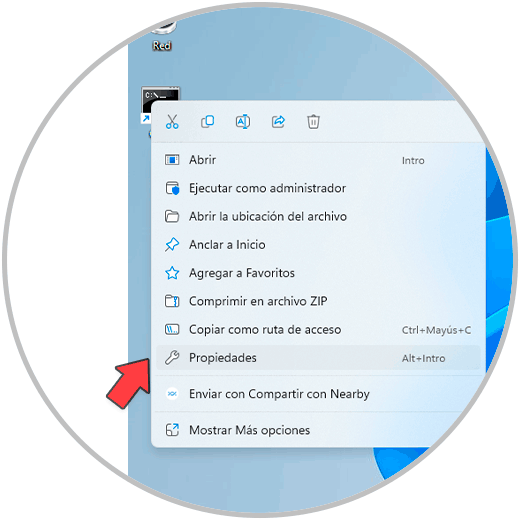
Finally we can change the icon of a shortcut on the desktop, in this case we right click on the shortcut and then click on “Properties”:
Step 2
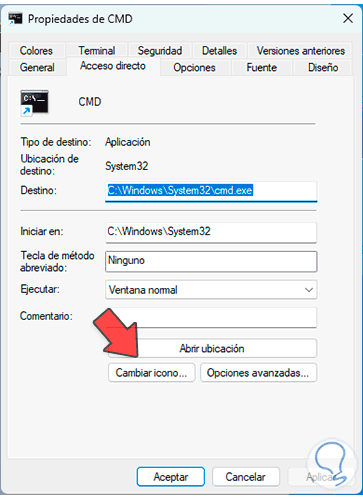
The following will open. In the “Shortcut” tab, click on “Change icon”
Step 3
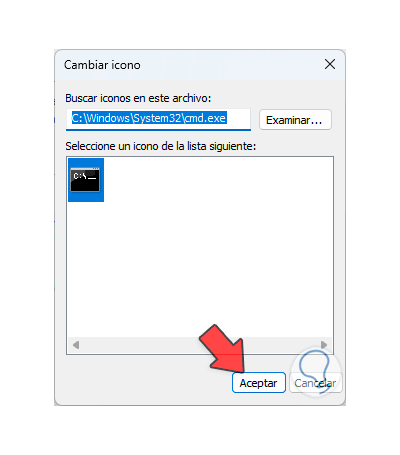
The following will open. We click on “Browse” to choose the new icon:
Step 4
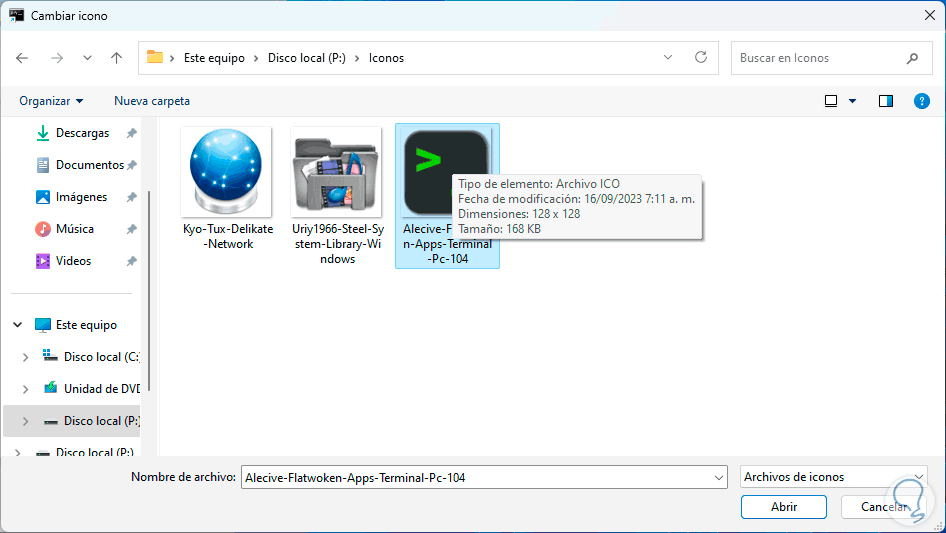
We click on “Open” to select it:
Step 5
We click on “Open” to link it:
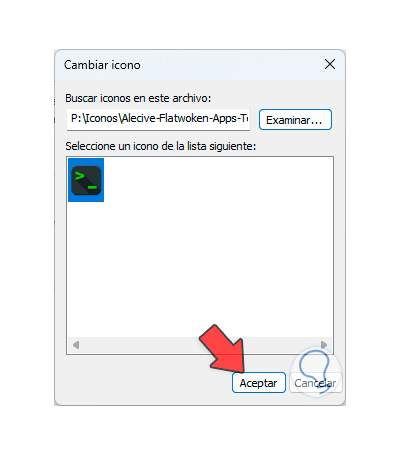
Step 6
We apply the changes by clicking “Apply” and “Accept”
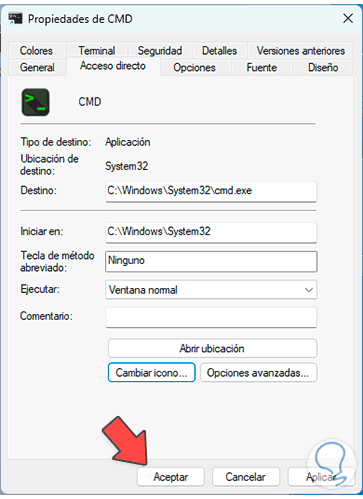
Step 7
We will see the icon set on the shortcut:
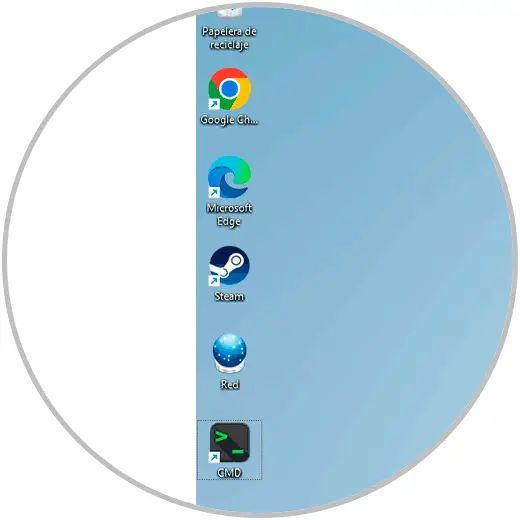
These are the ways to change the icons on the different elements of the Windows 11 desktop..