To stay up to date, remember to subscribe to our YouTube channel!
SUBSCRIBE ON YOUTUBE
One of the default functions of Windows 11 is the automatic update not only of the system but also of the applications and drivers, remember that the drivers ensure that the user experience will be as complete as possible, for example, we know about of network drivers for correct Internet access, audio drivers to be able to play our music, etc..
For various reasons, as users we may not want Windows 11 to perform these updates automatically, especially due to space or restart issues, which is why at TechnoWikis we have some ways to avoid this automatic restart.
1 Turn off automatic driver updates from Settings
Step 1
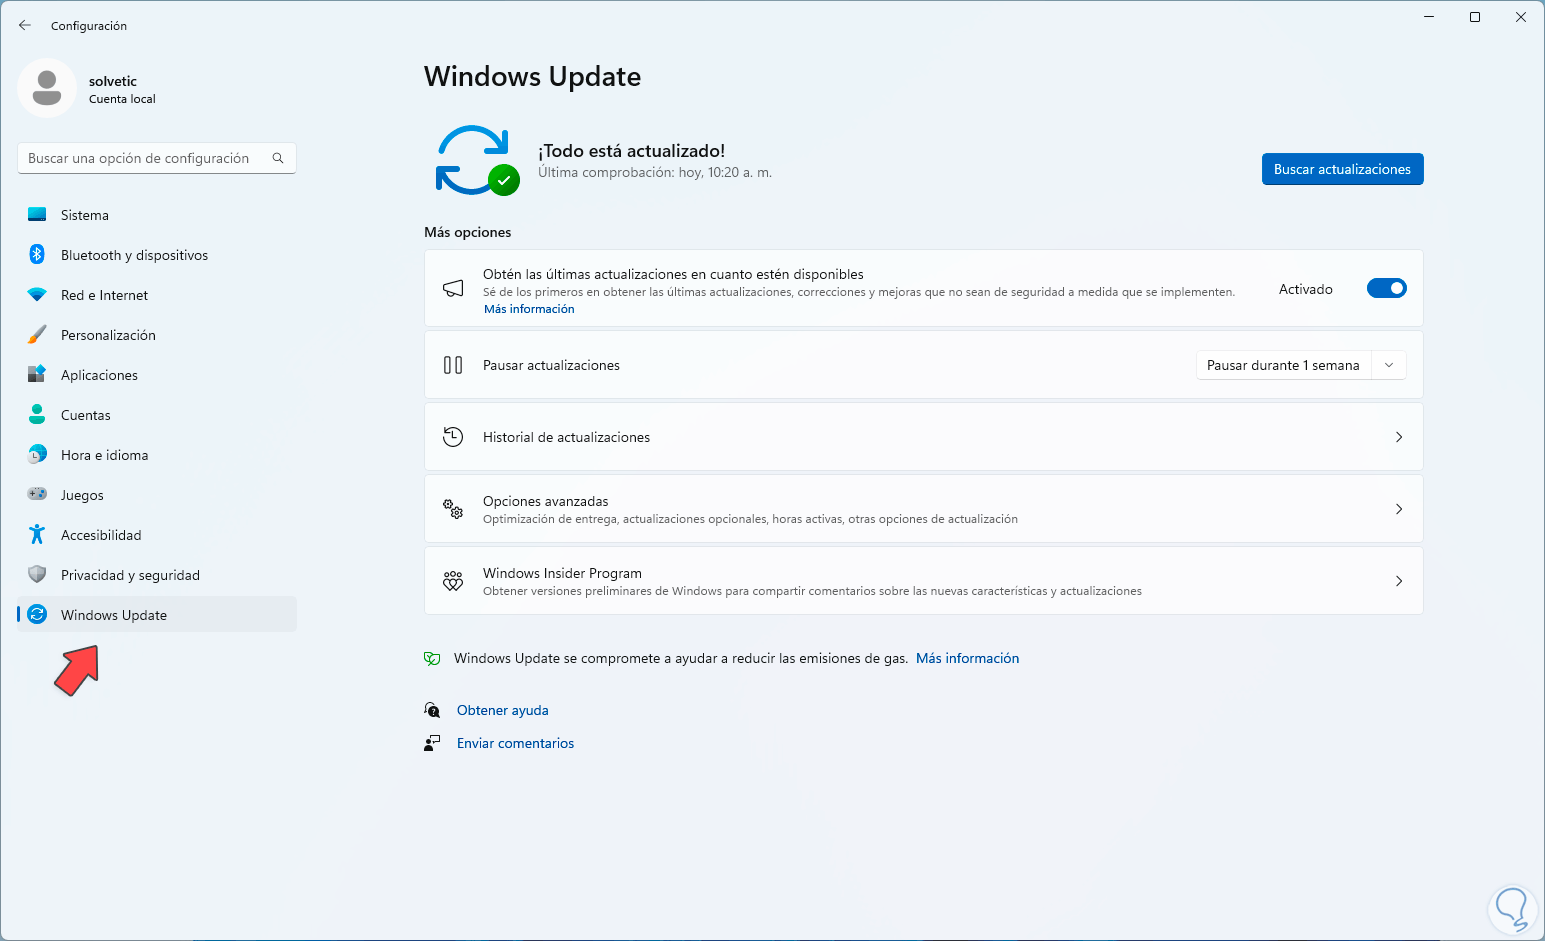
This is one of the most common methods to avoid automatic updates in Windows 11, to do this, we go to the “Start – Settings – Windows Update” route:
Step 2
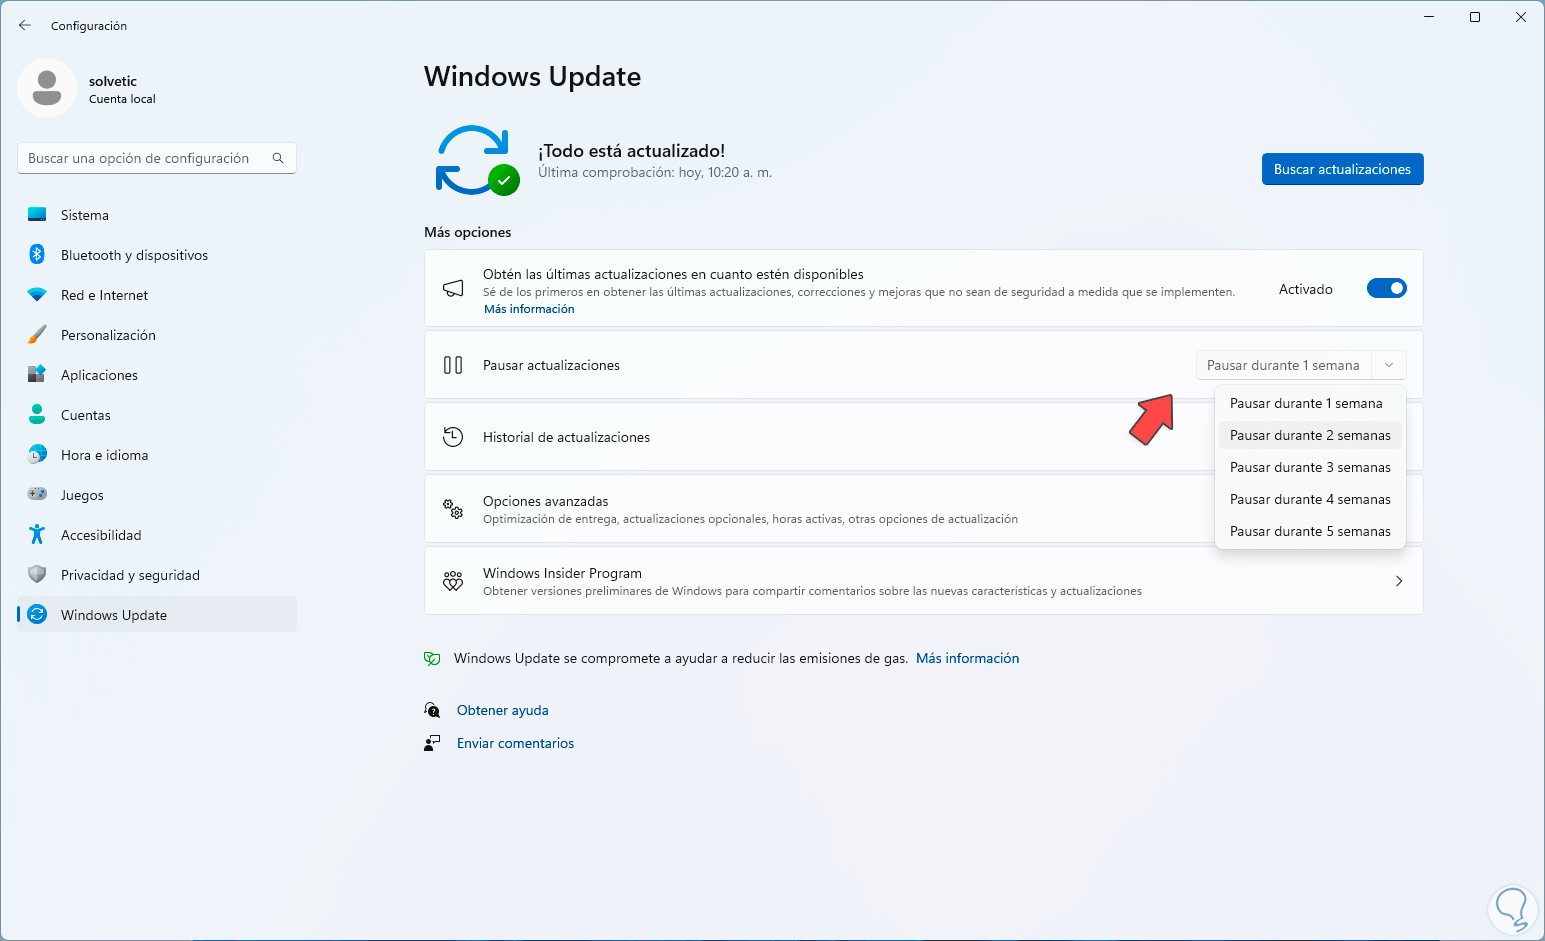
There, we click on the drop-down menu in the “Pause updates” section, we will see the options to use:
Step 3
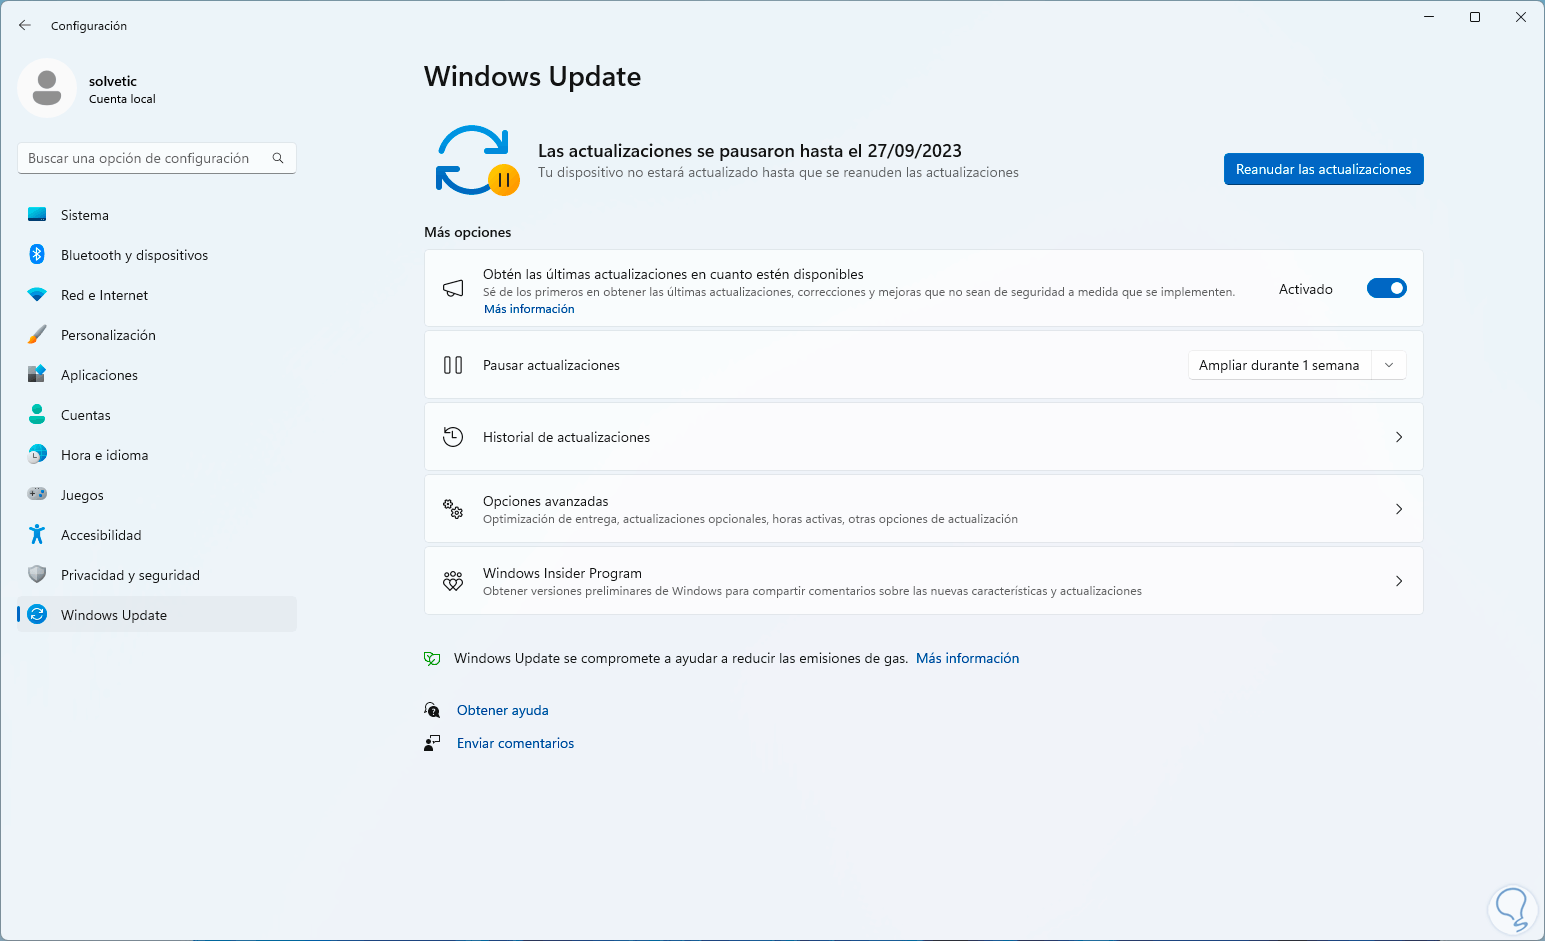
If we need to avoid these automatic updates we can pause them with one of these options:
Note
If we need to use the updates again ahead of time, we must click on “Resume updates”.
2 Disable automatic driver updates from utility
Step 1
Microsoft still provides us with a utility with which it is possible to manage updates and hide them, to do this we click on the following link from any browser:
Hide updates
Step 2
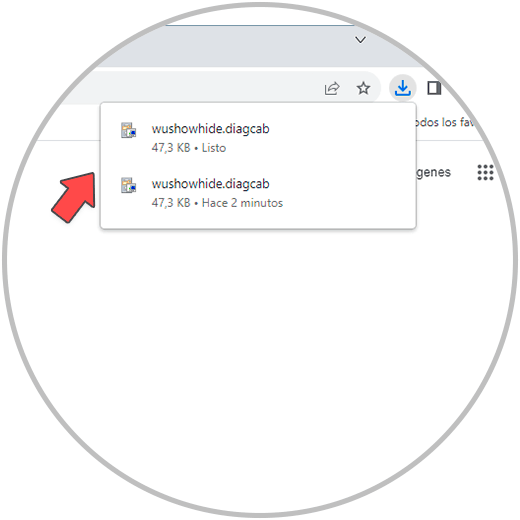
Clicking on it will automatically download:
Step 3
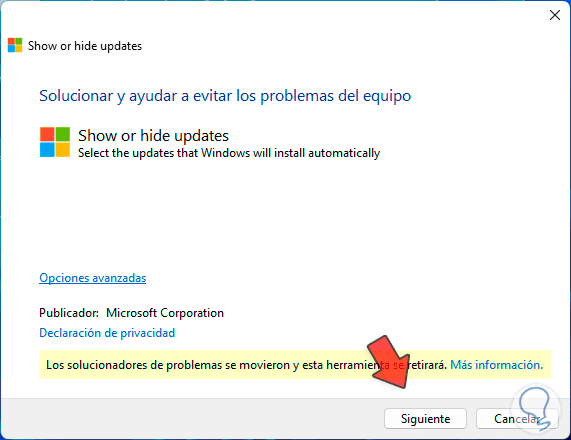
We click on the executable and the following will open:
Step 4
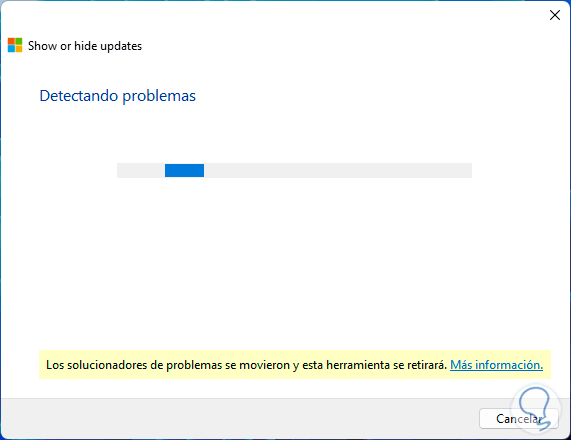
We click on “Next” to proceed to the analysis:
Step 5
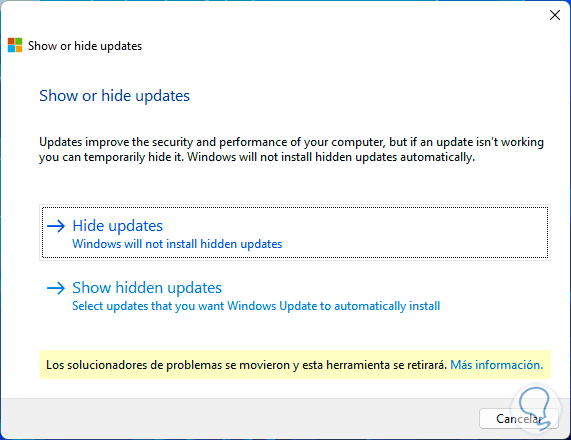
Then we will see the following:
Step 6
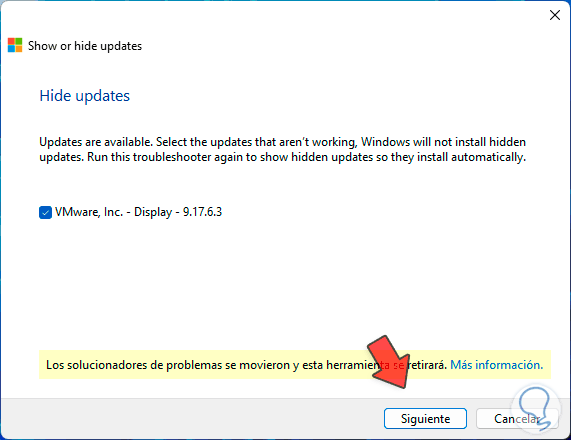
There we click on the “Hide updates” option, then we activate the box for the desired update:
Step 7
We click on “Next” to proceed with the process:
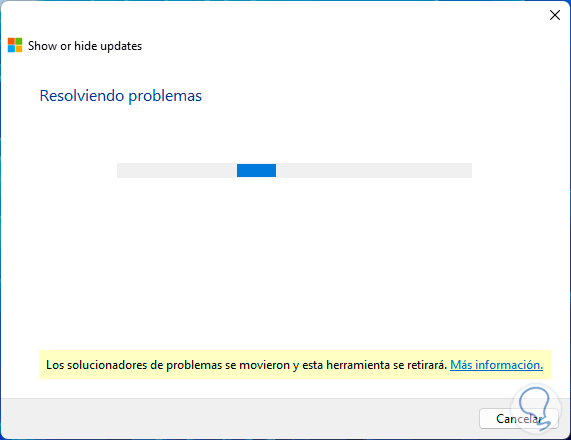
Step 8
We hope that this process reaches its end:
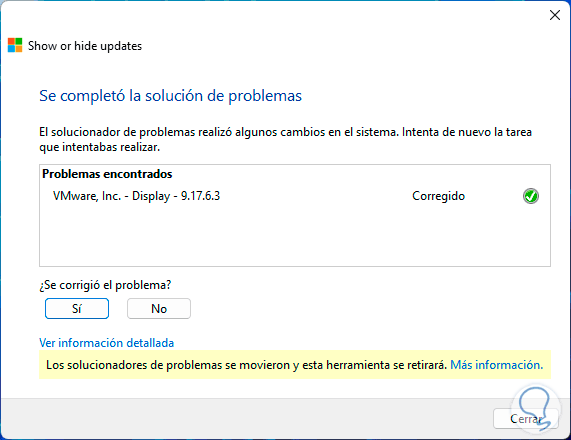
3 Disable automatic driver updates from Control Panel
Step 1
Through the Control Panel it will be possible to access an option to manage Windows 11 driver updates, in this case we open the Control Panel from the Start menu:
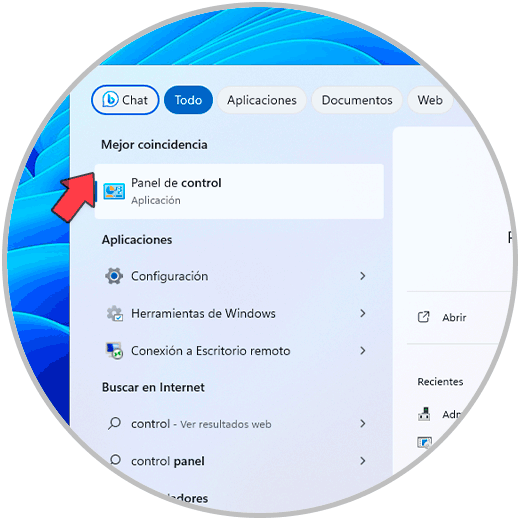
Step 2
We will see the following:
We click on “System and security” and then see the following:
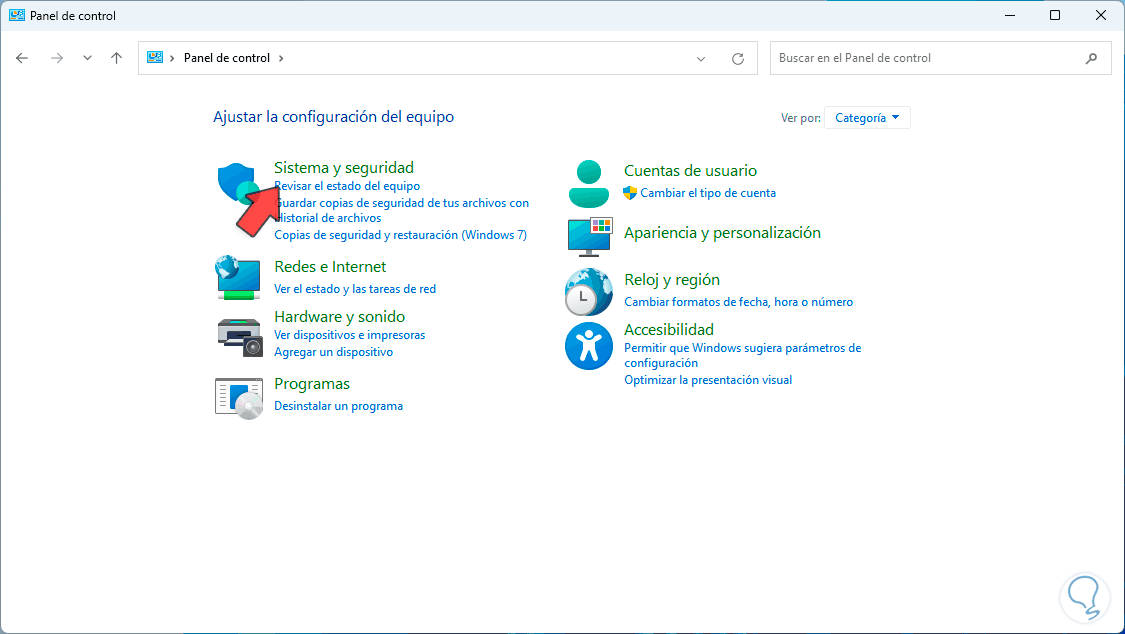
Step 3
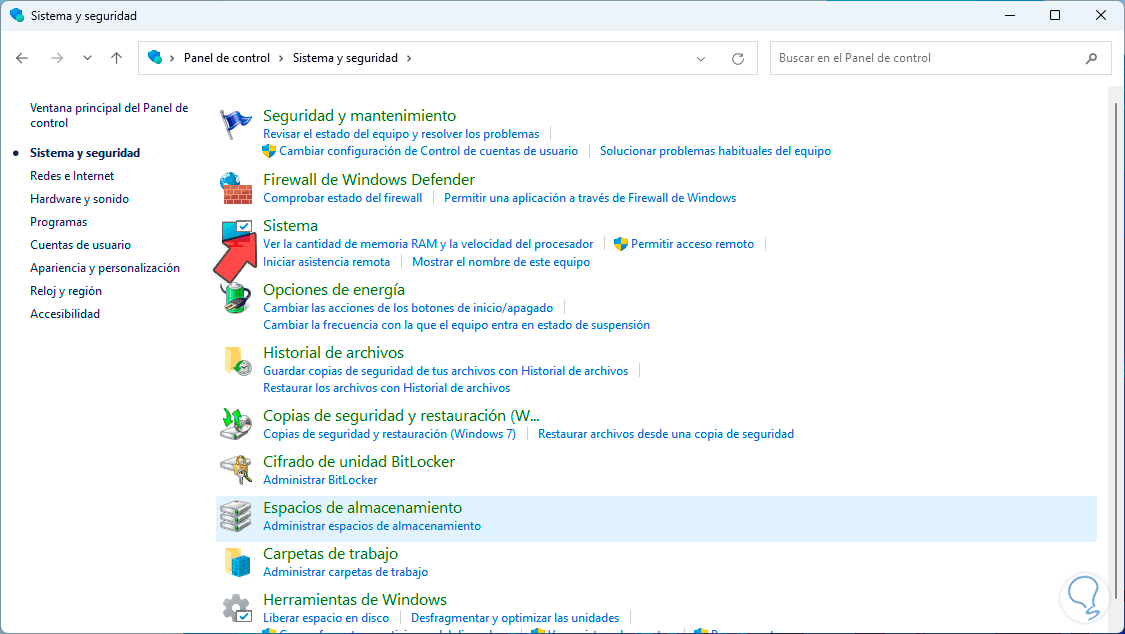
There we click on “System”, the Configuration utility will open:
Step 4
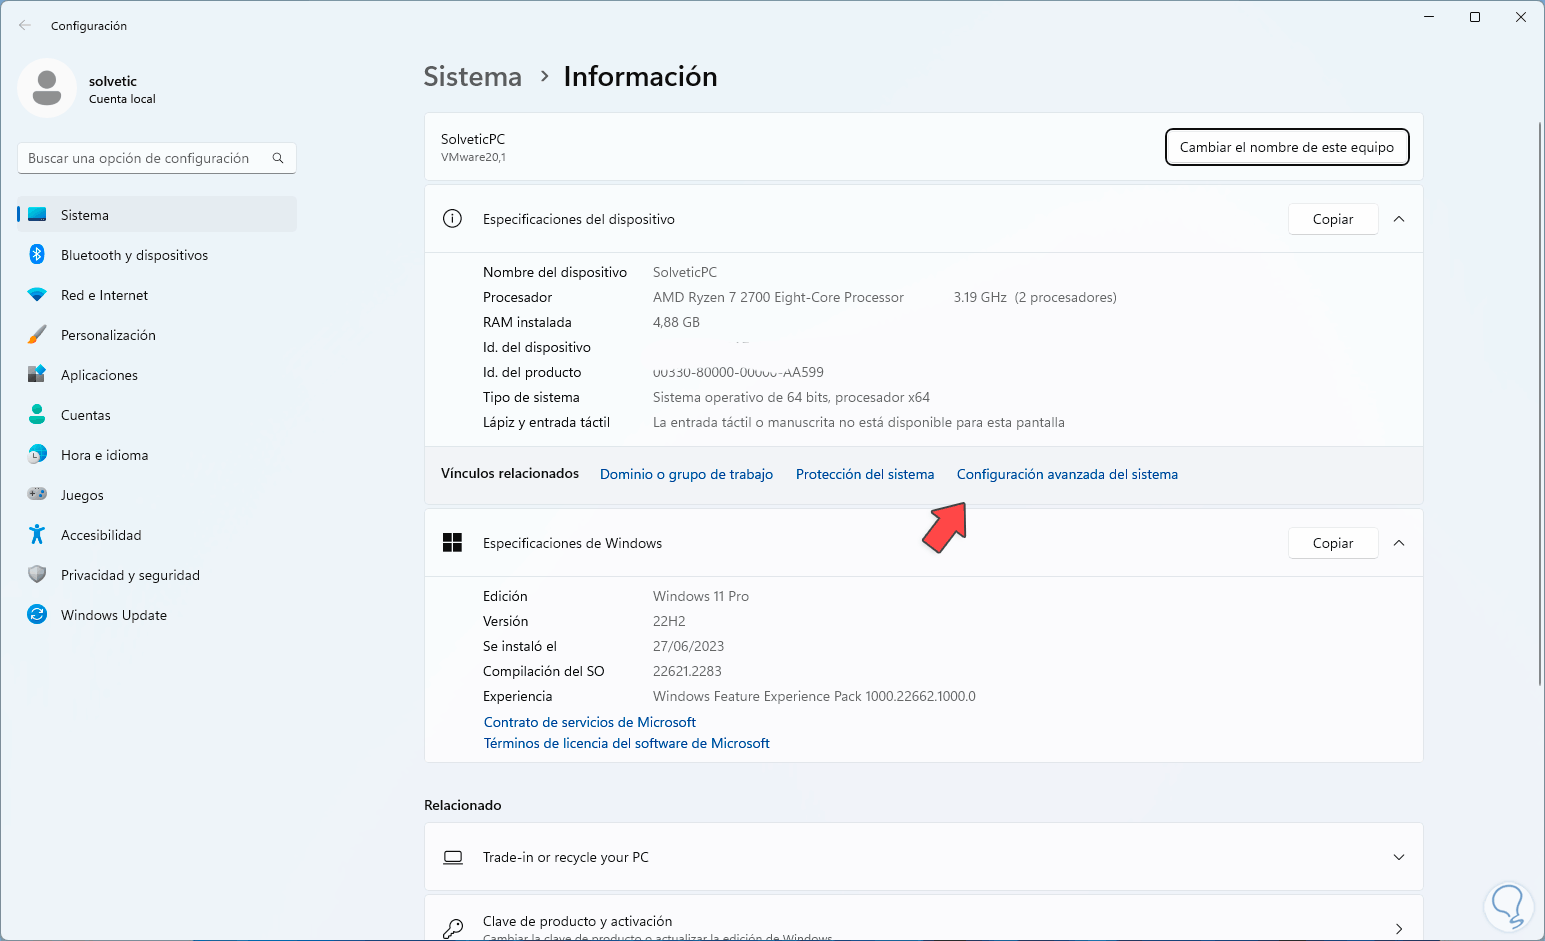
We click on “Advanced system configuration” and in the pop-up window we will go to the “Hardware” tab:
Step 5
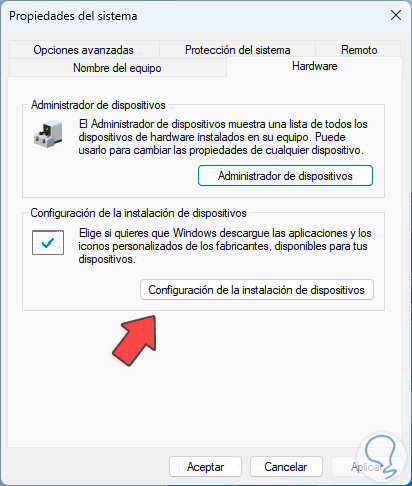
We click on the “Device installation configuration” option, the following will open:
Step 6
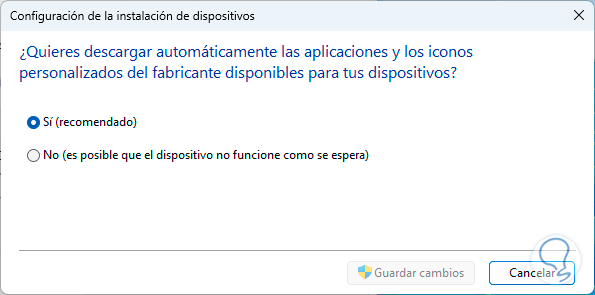
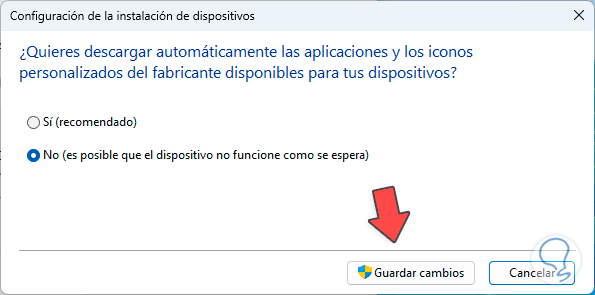
There we activate the “No (the device may not work as expected)” button:
Step 7
Click “Save Changes.”
4 Disable automatic driver updates from Group Policy
Step 1
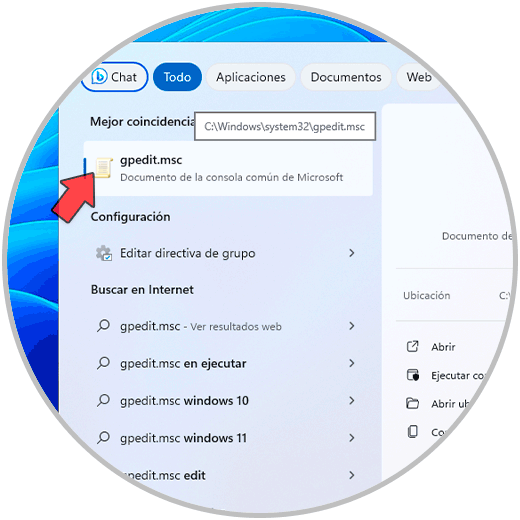
Through the local Windows policies it will be possible to configure that Windows 11 does not perform updates automatically, for this in the search engine we enter “gpedit.msc”, click on the utility:
Step 2
There we are going to go to the route:
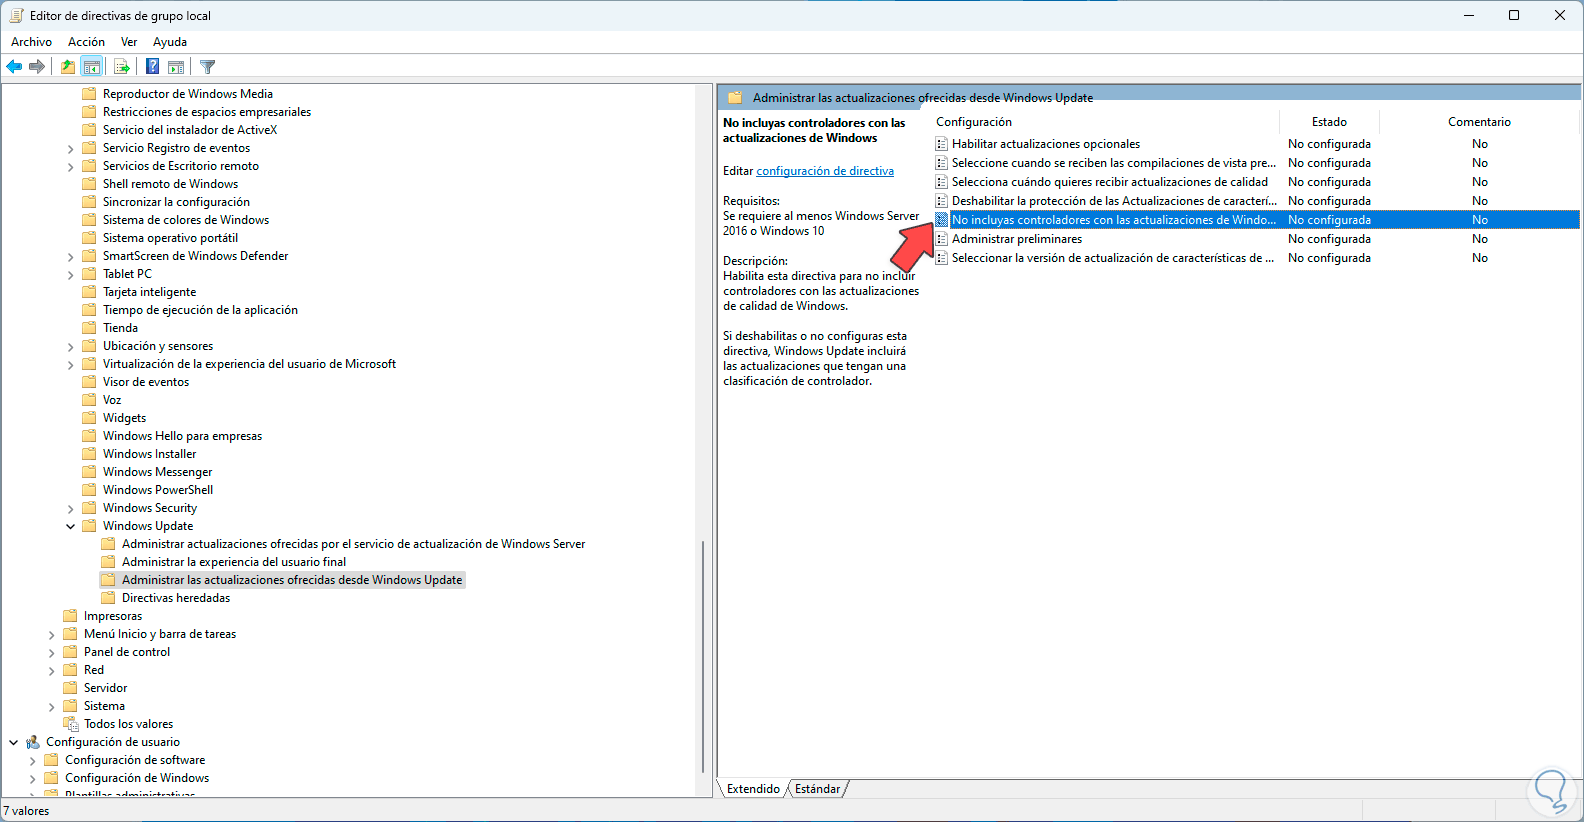
“Computer Configuration – Administrative Templates – Windows Components – Windows Update – Manage updates offered from Windows Update.”
There, we select the policy called “Do not include drivers with Windows updates”:
Step 3
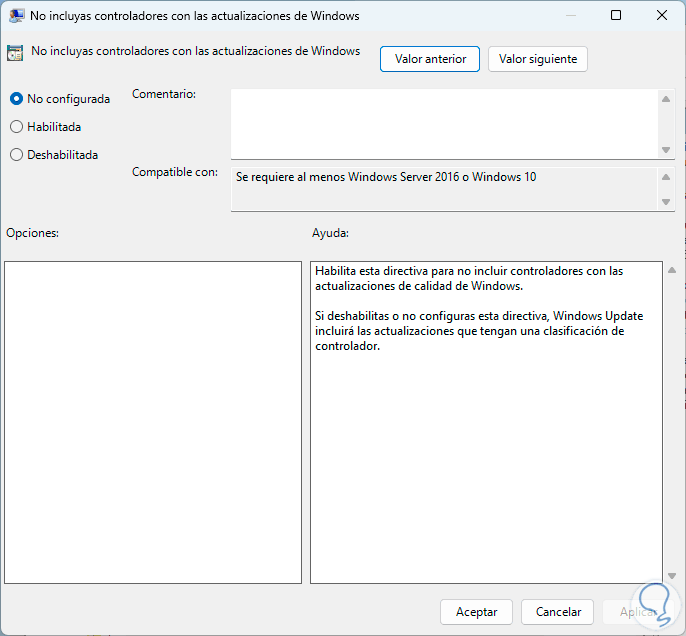
We double click on it to see its properties:
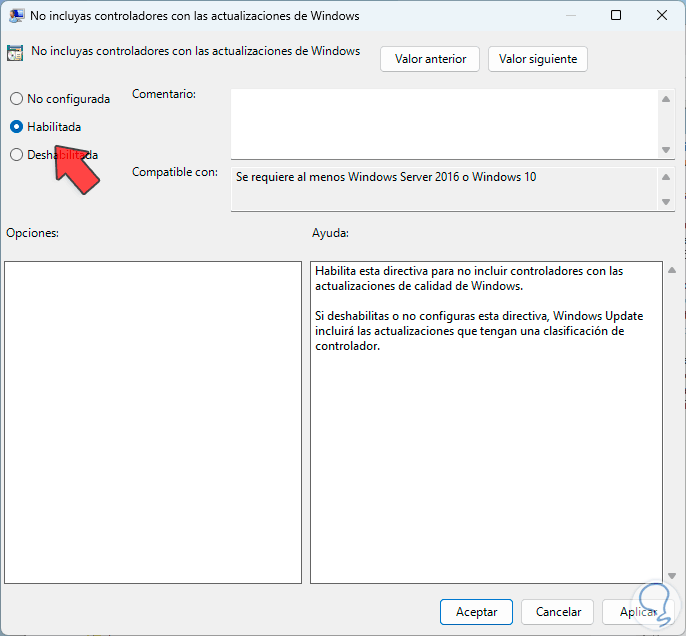
Step 4
We activate the “Enabled” box: We apply the changes.
5 Disable automatic driver updates from Registries
Step 1
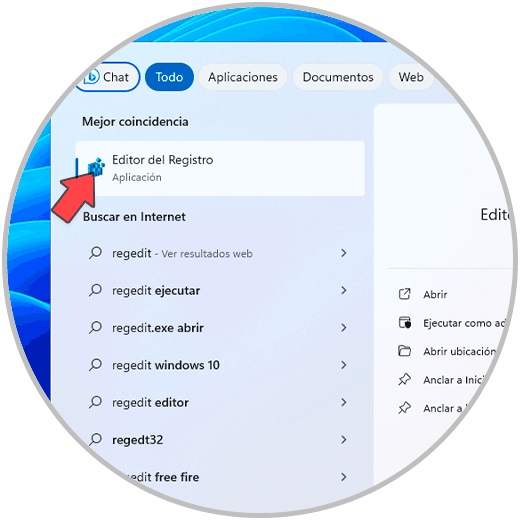
Another option to use is through the registry editor, there we recommend that you always create a backup copy before any modification, in the search engine enter “regedit” to open the Editor:
Step 2
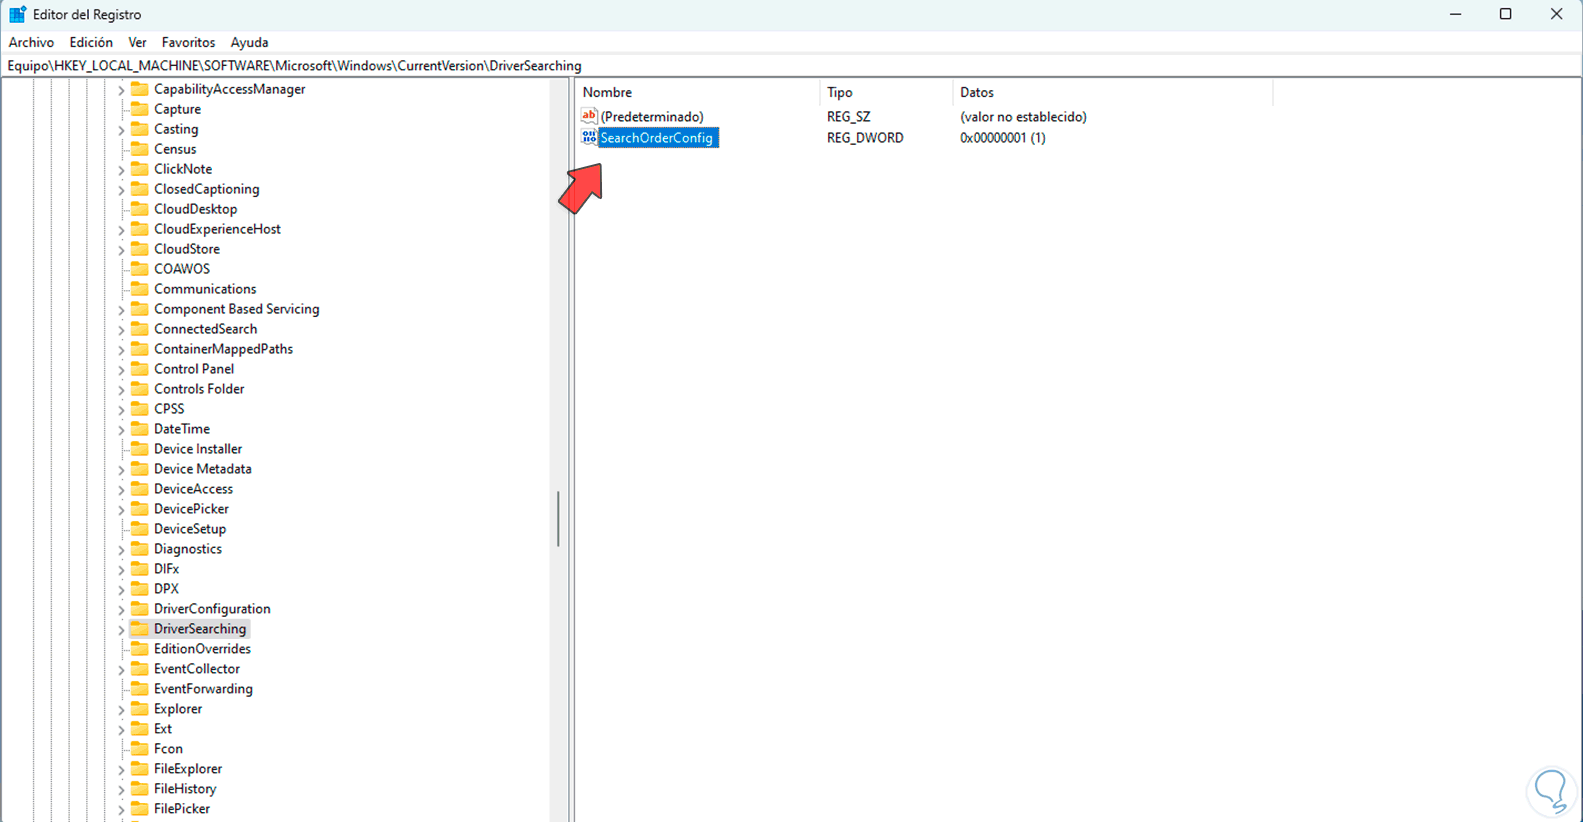
We will go to the route:
HKEY_LOCAL_MACHINE – SOFTWARE – Microsoft – Windows – CurrentVersion – DriverSearching
Step 3
In the central side we select the value called “SearchOrderConfig”:
Step 4
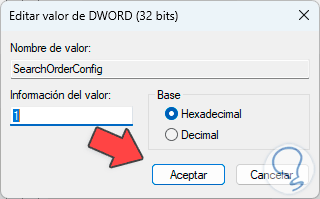
We double click on it to see its properties:
Step 5
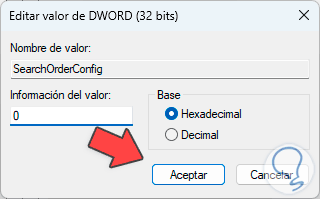
We establish the number zero in the “Value information” field. We apply the changes.
6 Disable automatic driver updates by device ID
Step 1
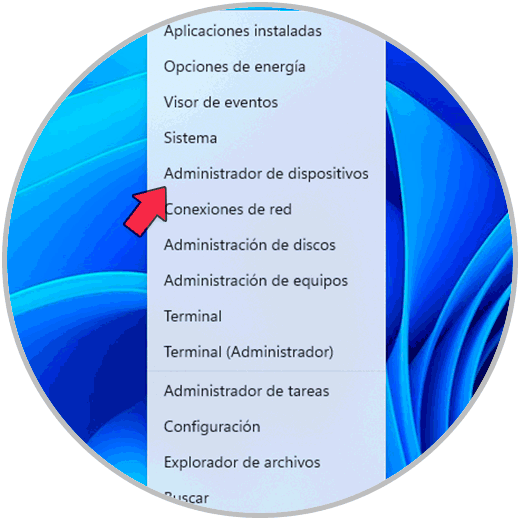
Now, it is possible to restrict updates only to a specific controller, in this case we need to know the ID of that controller, to have access to this information, we open the Device Manager from Start:
Step 2
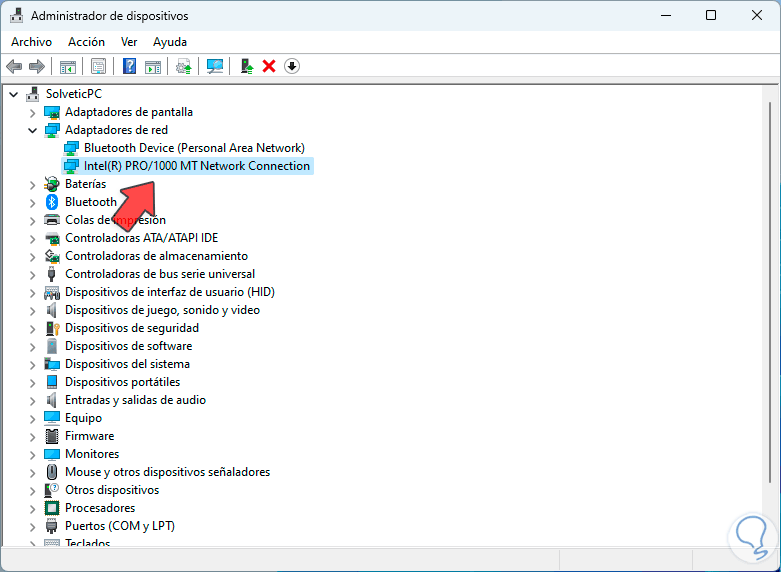
We locate the desired controller:
Step 3
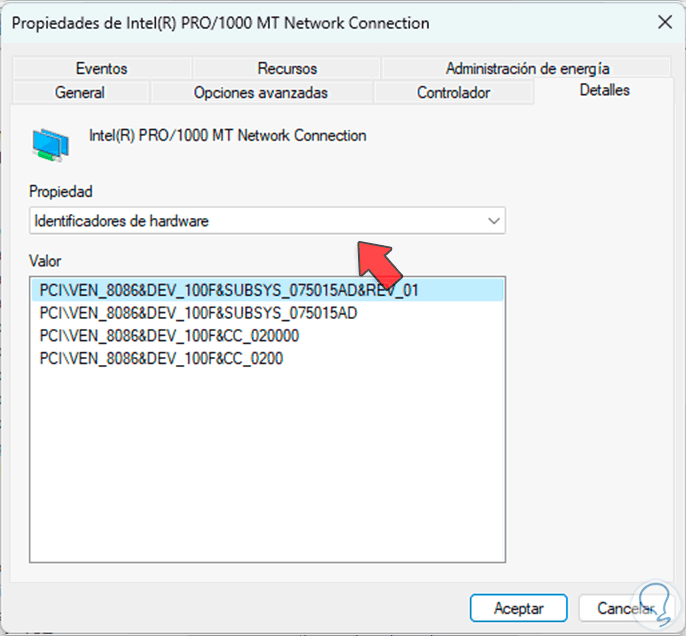
We double click on the controller, then we will go to the “Details” tab, there, in the “Property” field we select the “hardware identifiers” option:
Step 4
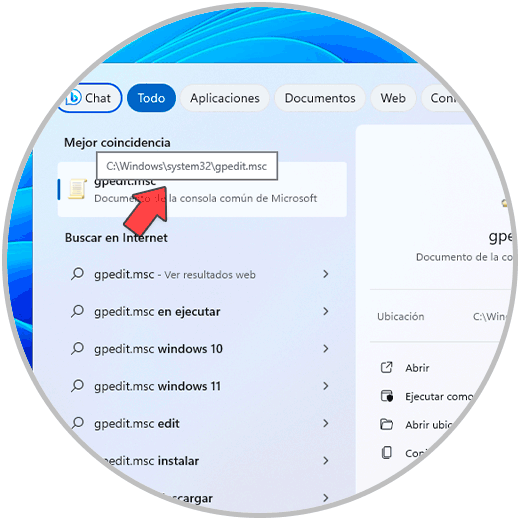
We copy the necessary values and we can close the window. Now, in the search engine we enter “gpedit.msc”, and click on the utility:
Step 5
Now we will go to the route:
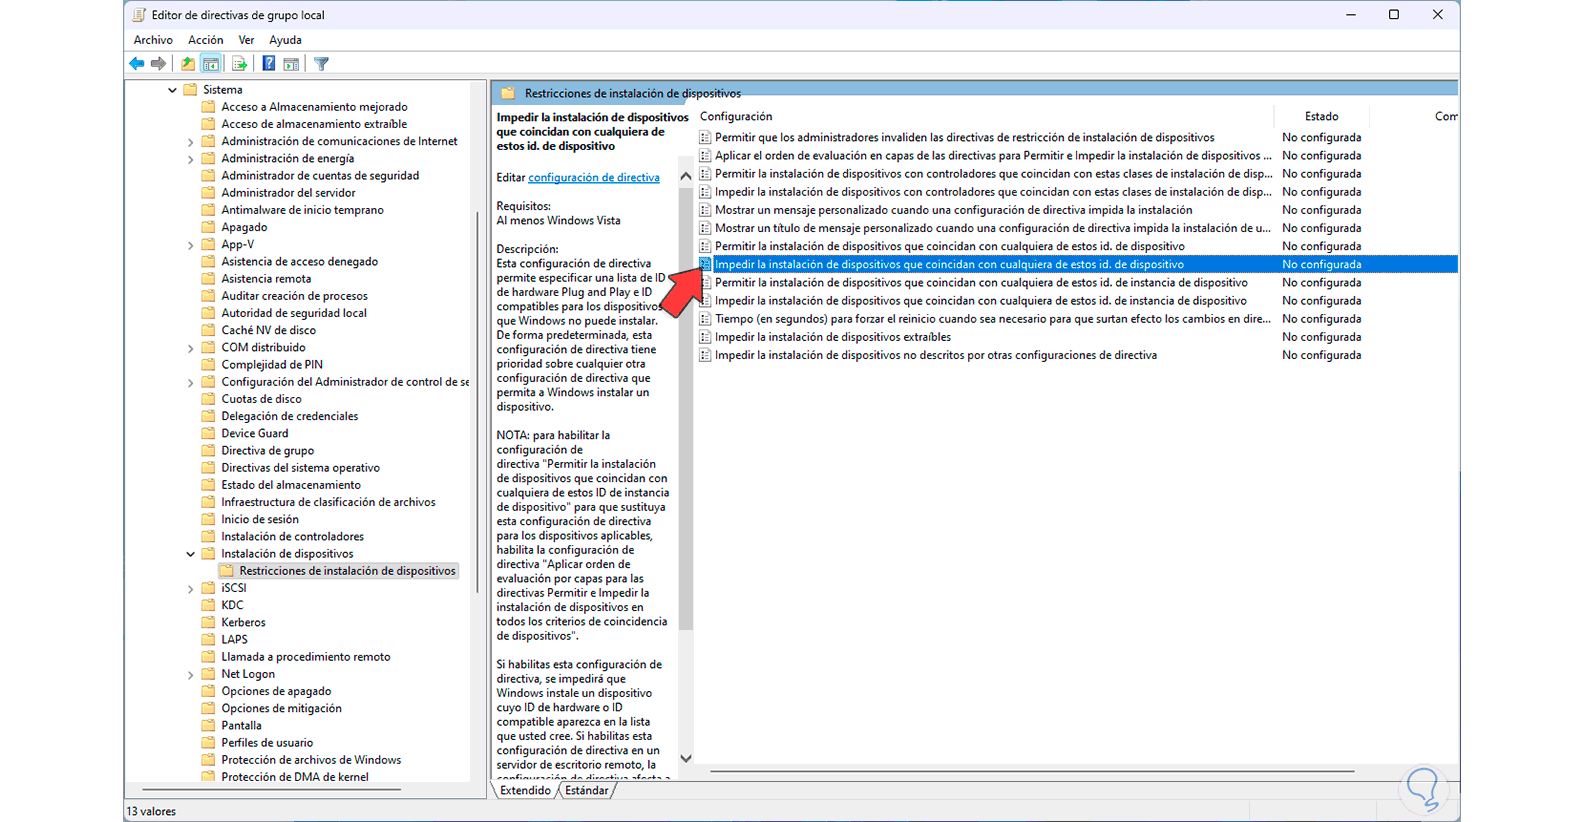
Computer Configuration – Administrative Templates – System – Device Installation – Device Installation Restrictions
Step 6
Then, we select the policy “Prevent the installation of devices that match any of these IDs. “device”:
Step 7
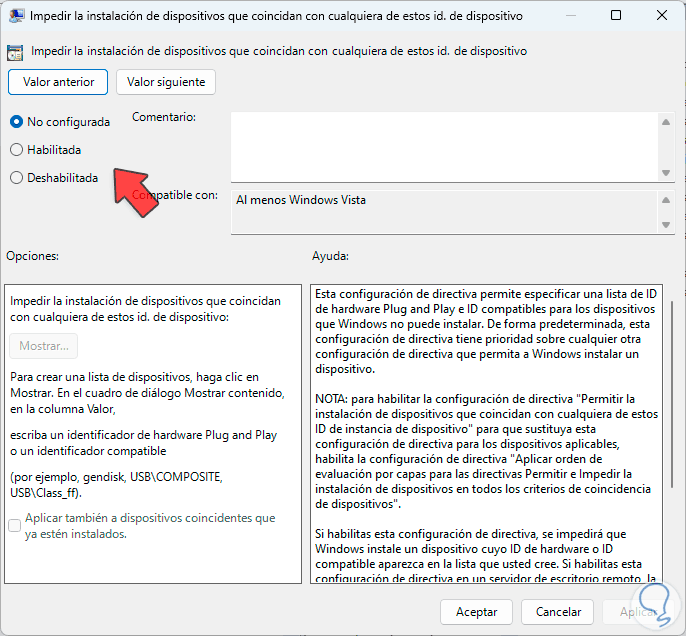
We double click to see its properties:
Step 8
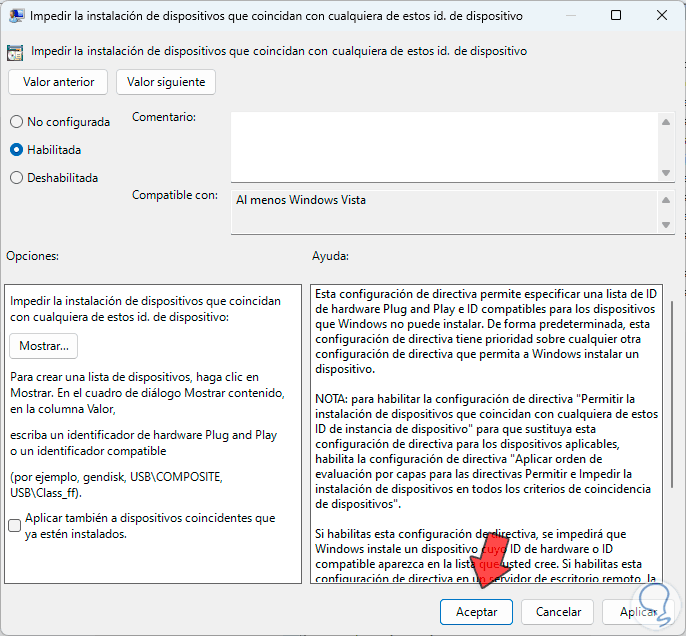
We activate the “Enabled” box:
Step 9
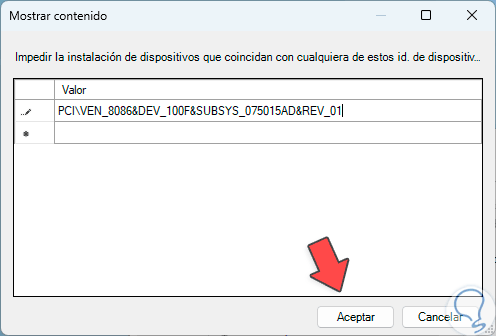
We click on “Show”, then paste the controller identifiers:
Step 10
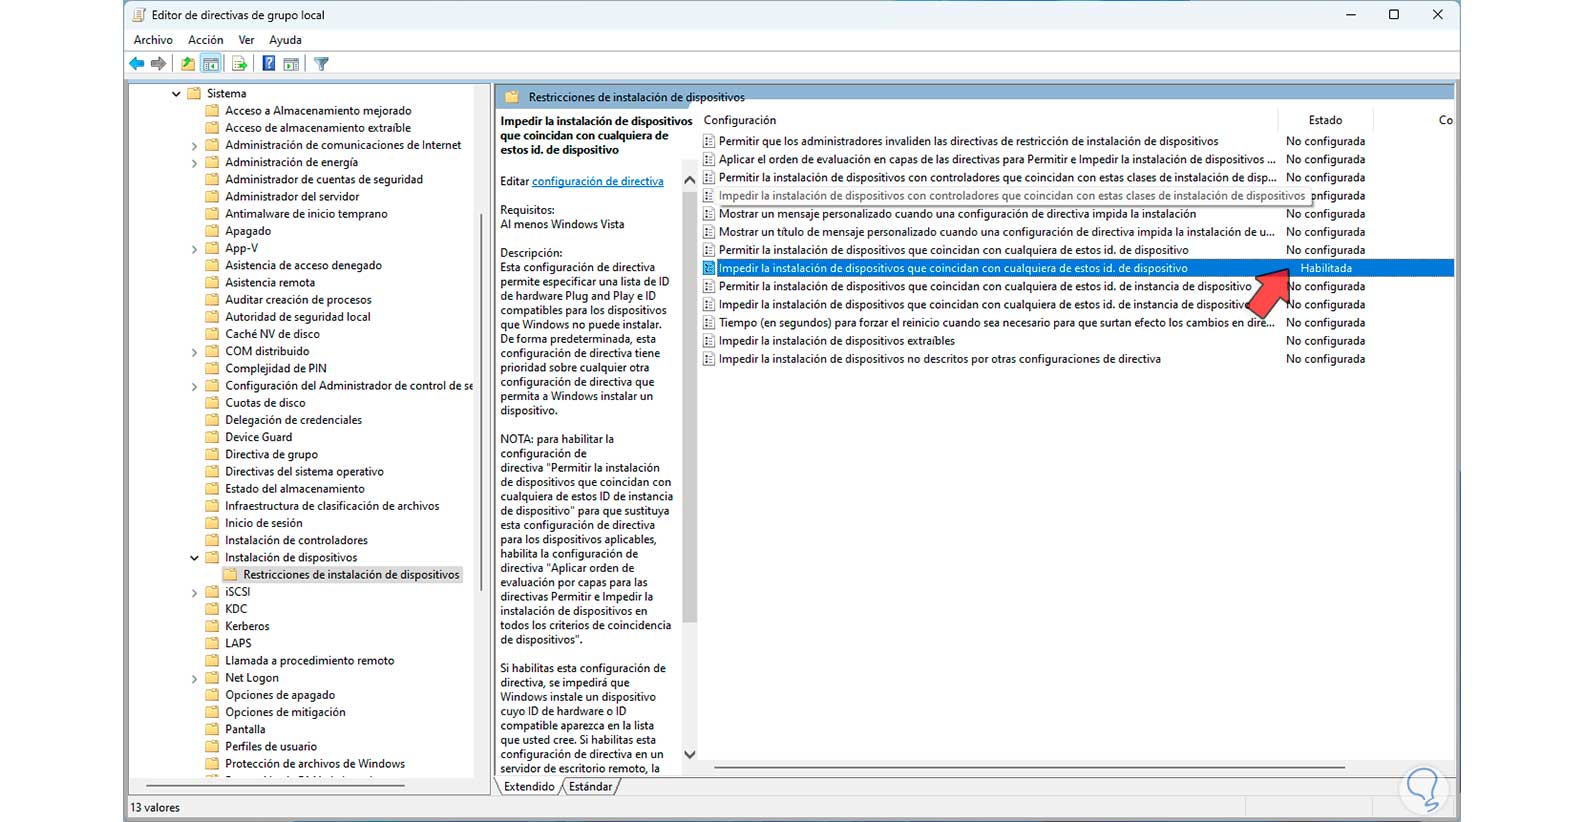
We click on Accept and apply the changes:
These are the ways to prevent automatic driver updates in Windows 11..