To stay up to date, remember to subscribe to our YouTube channel!
SUBSCRIBE ON YOUTUBE
It is ideal and TechnoWikis always reminds you of the importance of updating the system, there are various types of updates both for Windows 11 itself and for the applications and add-ons installed there, but an extreme problem that Microsoft presents is that many of these updates require to restart the computer and worse still this restart will sometimes be done automatically..
It is a bad point since we may be working on a project or spending personal time and the last thing we want is to restart the system, TechnoWikis will teach you some methods to avoid this automatic restart of Windows 11 due to updates.
1 How to disable automatic restart in Windows 11 from Group Policy
Step 1
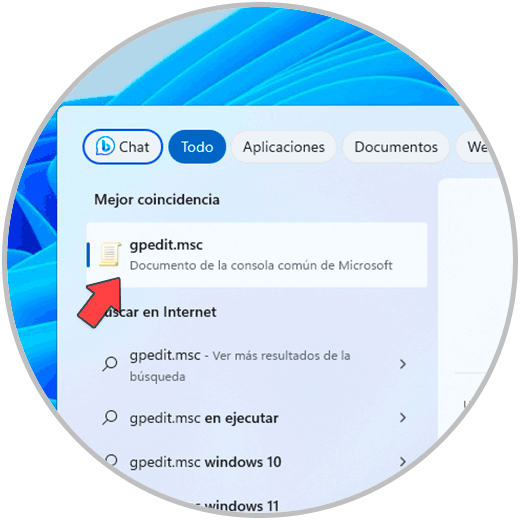
This is a method that applies to Pro and Enterprise versions of Windows, in the search box we enter “gpedit.msc”:
Step 2
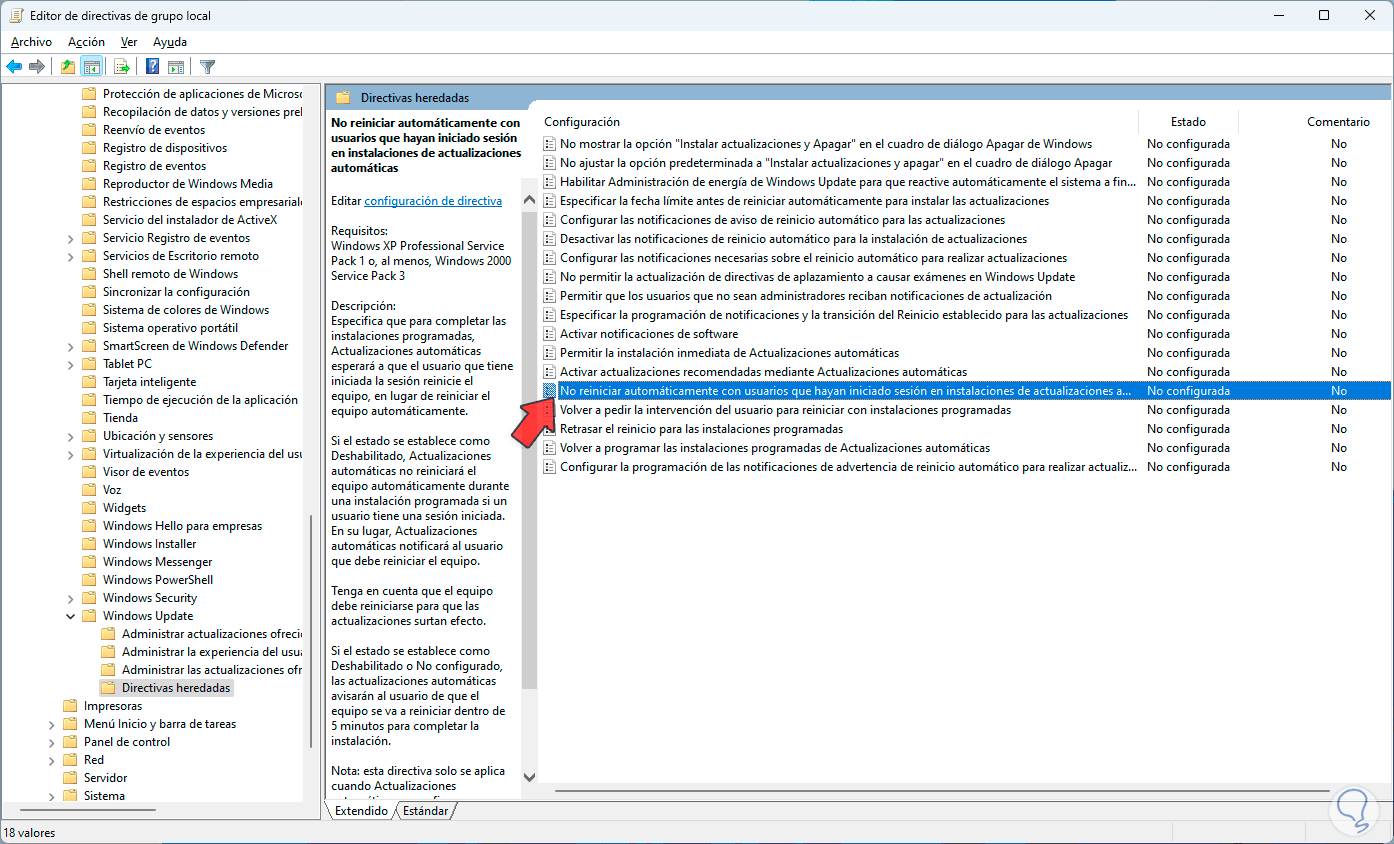
We open the utility and then we will go to the following path:
Step 3
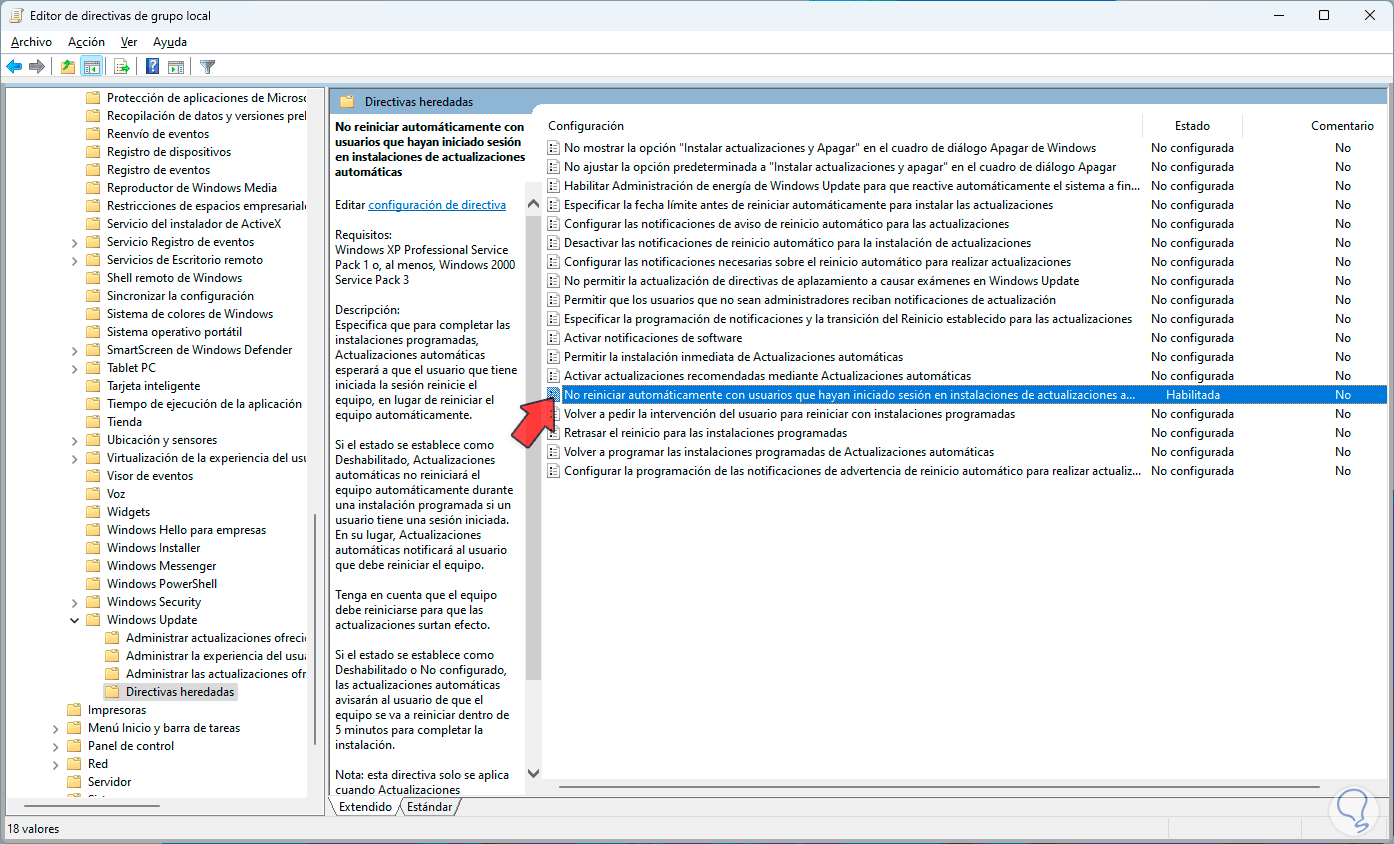
First we are going to select the “Do not automatically restart with users who are logged in to automatic update installations” policy:
Step 4
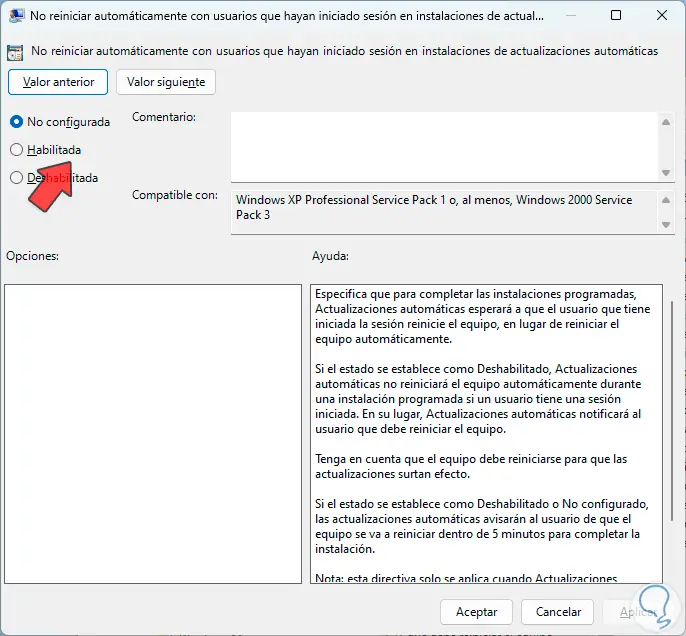
We double click to see their values:
Step 5
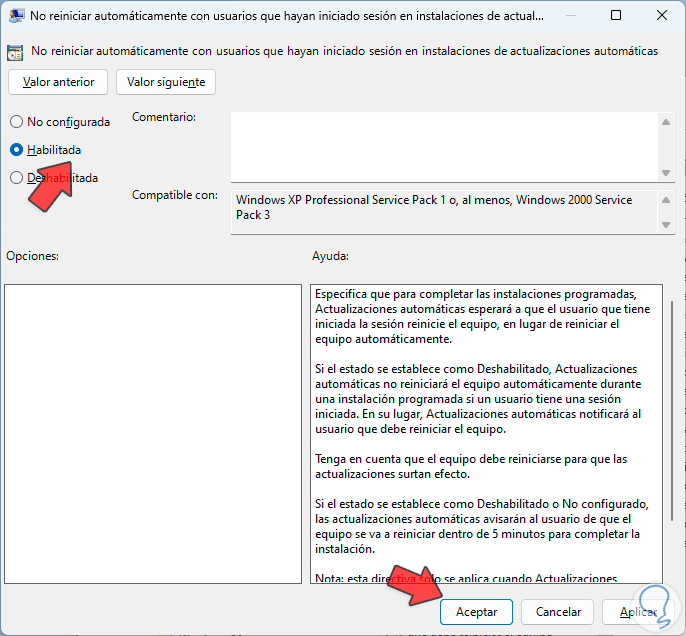
We activate the “Enabled” box. We apply the changes.
Step 6
This policy allows you to indicate that for scheduled installations to complete, automatic updates will wait for the user who is logged in to restart the computer, this will prevent automatic restart.
Step 7
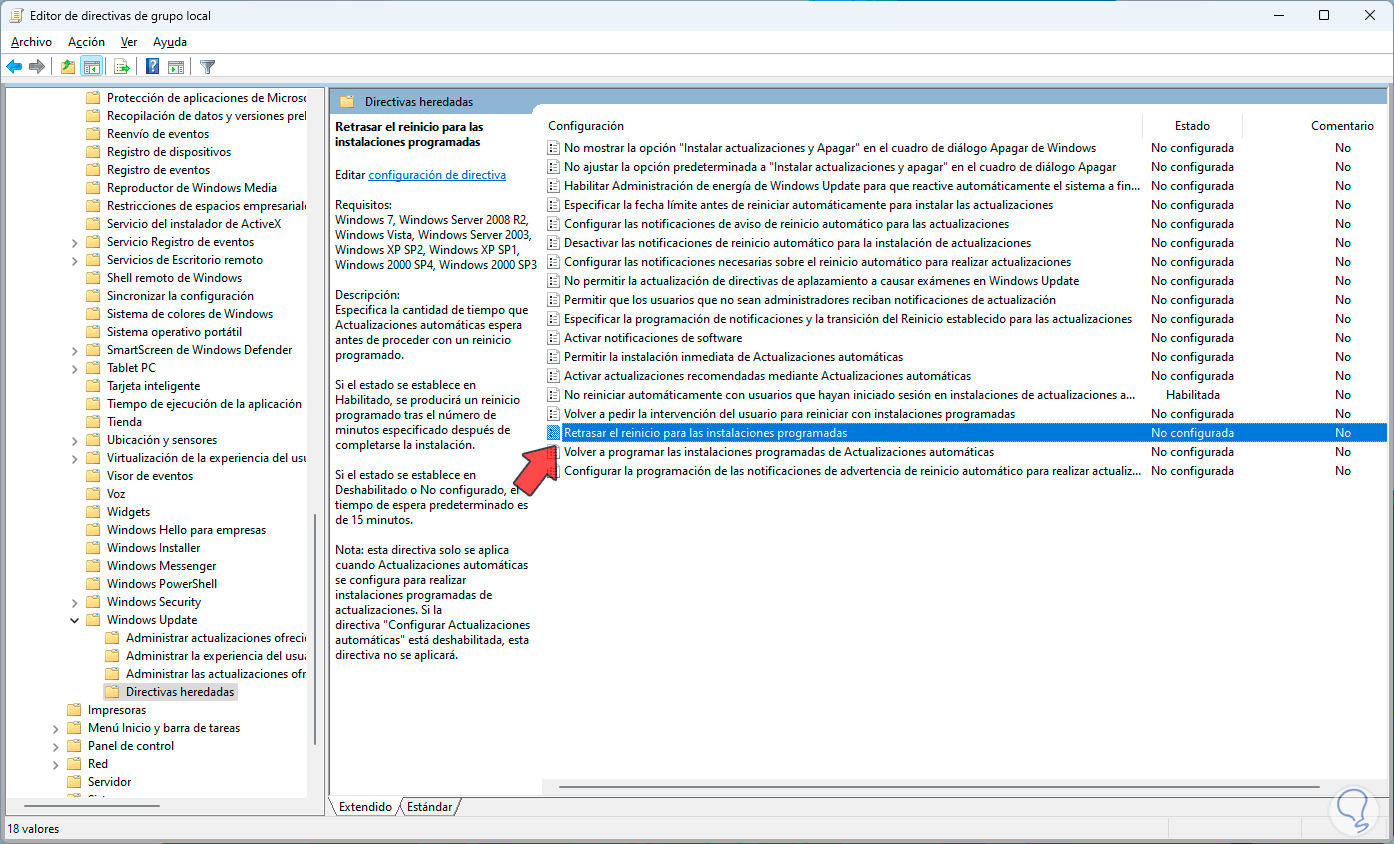
After this, we locate the policy called “Delay restart for scheduled installations”:
Step 8
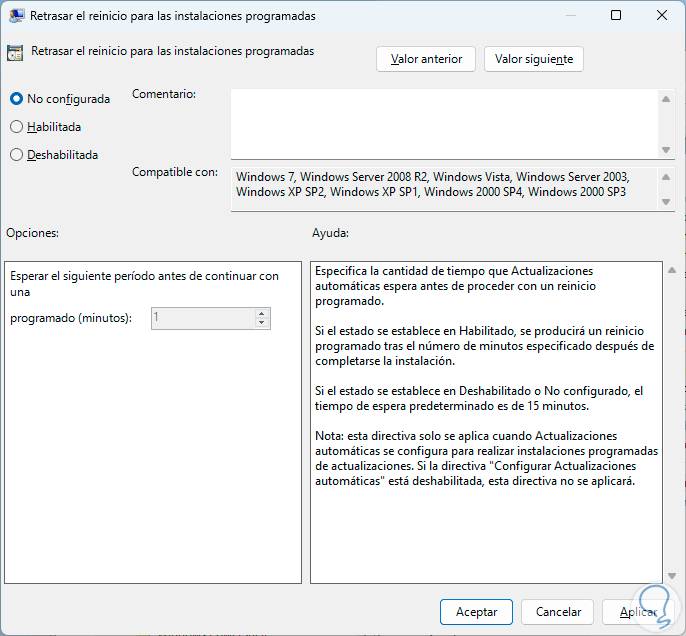
We double click on it to see its status:
Step 9
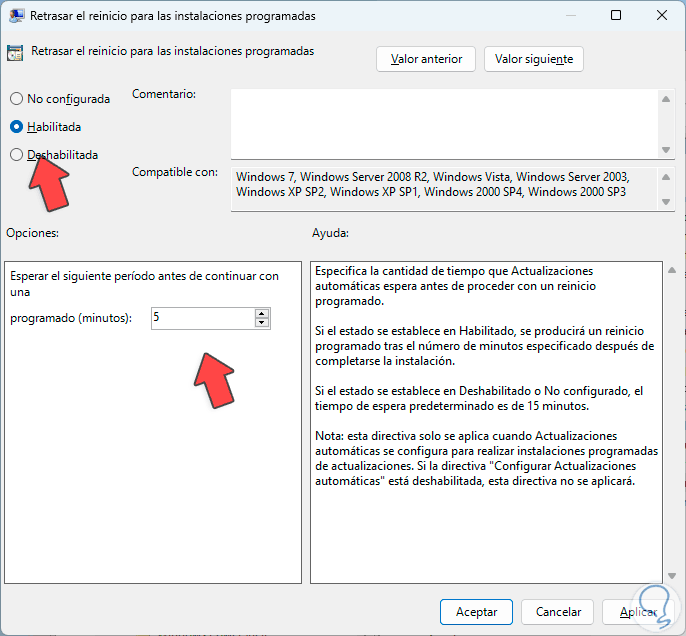
We activate the “Enabled” box and in the “scheduled” field we indicate the value in minutes, by default it is 5:
Step 10
We apply the changes.
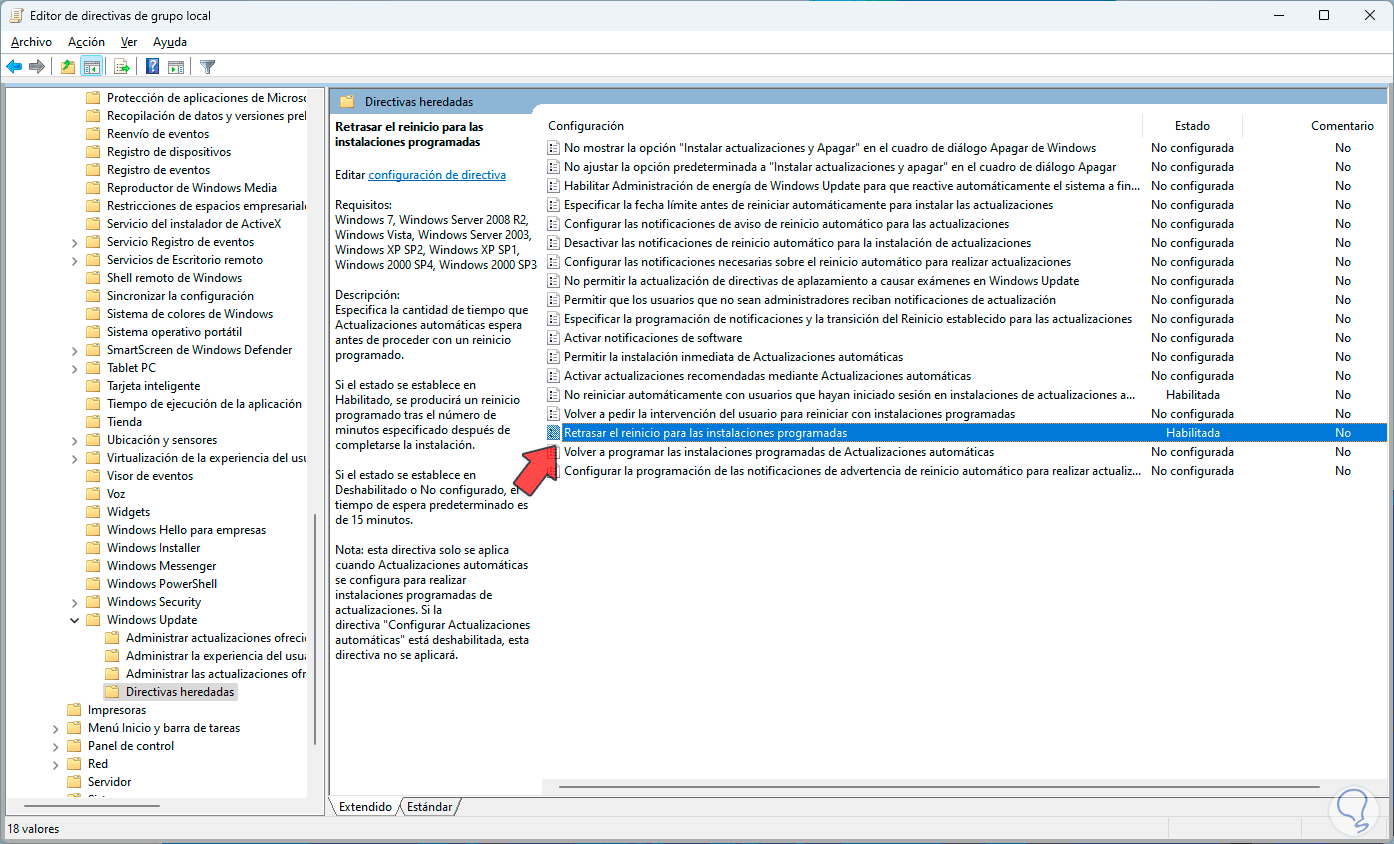
Step 11
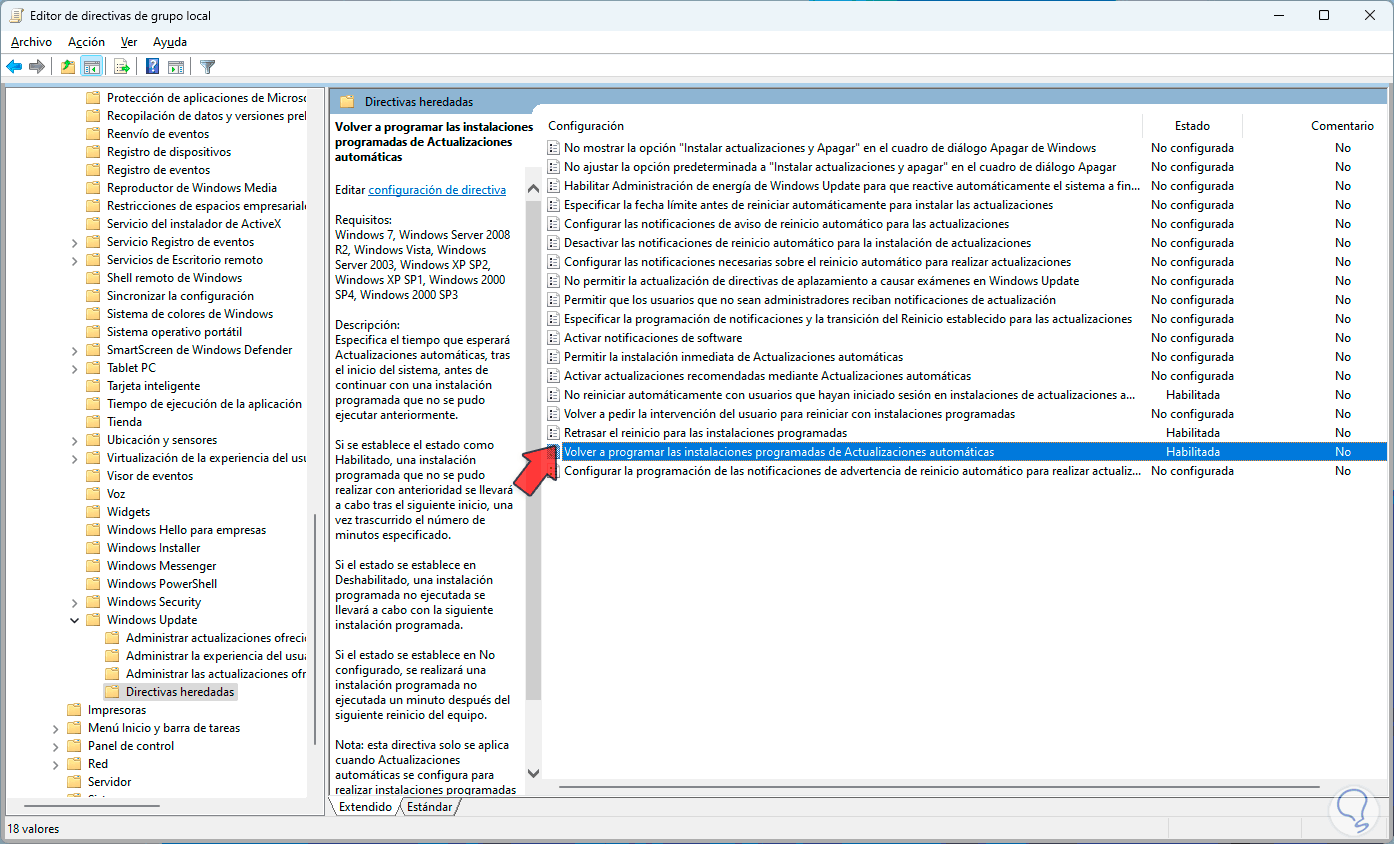
This policy allows you to determine the amount of time that automatic updates can use a scheduled restart. Now, we select the “Reschedule scheduled Automatic Updates installations” policy:
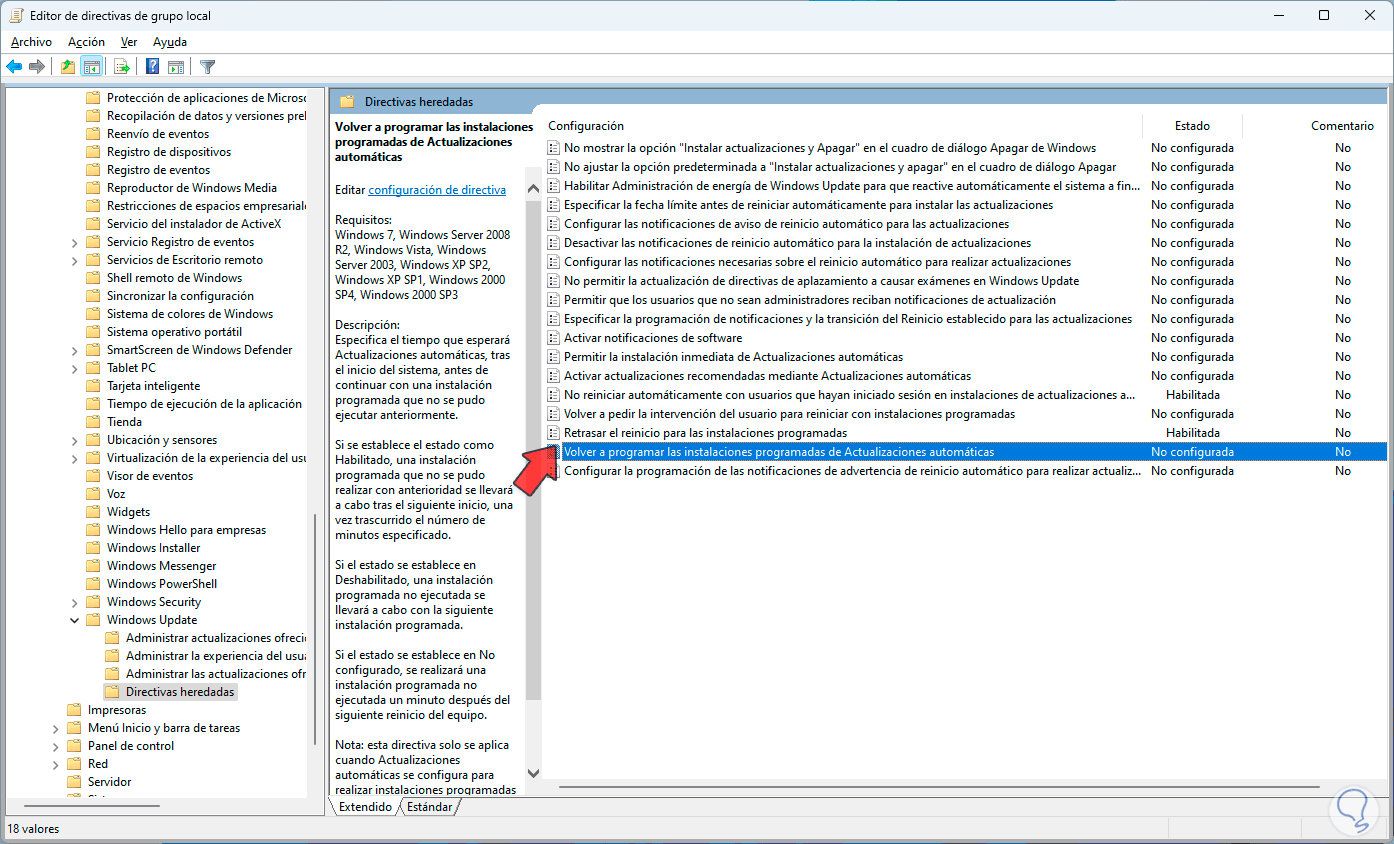
Step 12
We double click to open the policy:
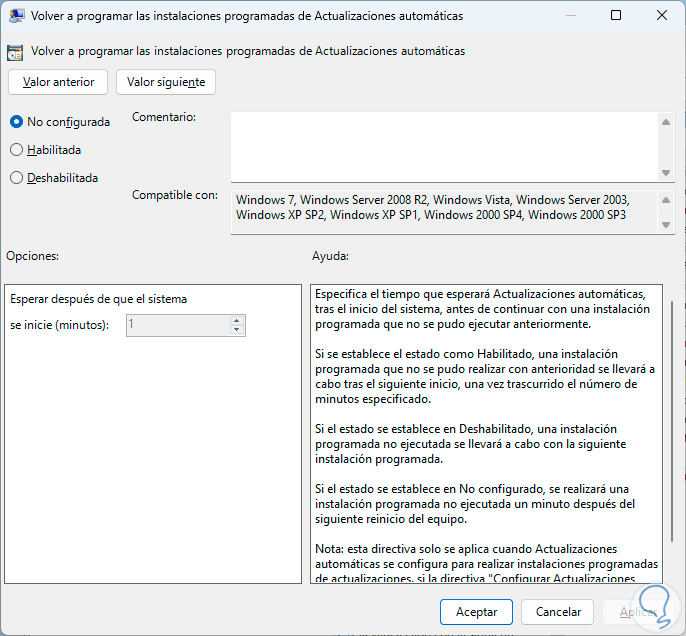
Step 13
We activate the “Enabled” box and set the time in minutes:
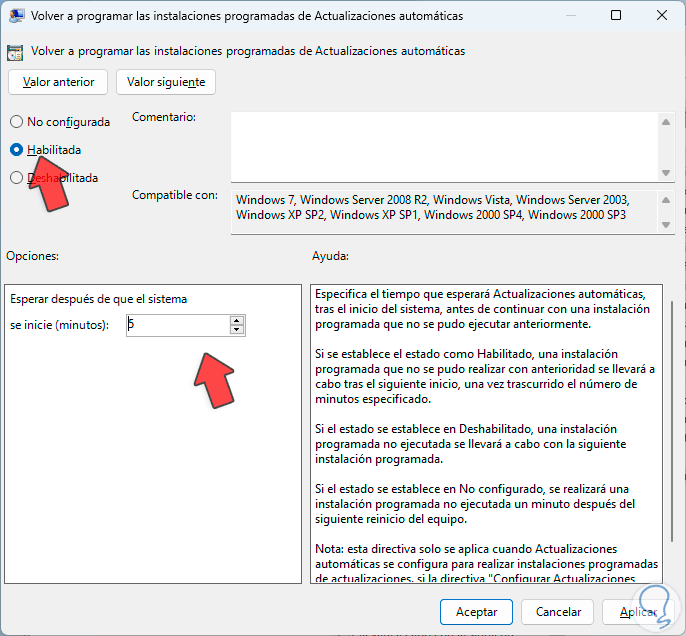
Step 14
We apply these changes:
This policy defines how long automatic updates will wait, after Windows starts, to continue a scheduled installation that could not be completed at a previous time..
2 How to disable automatic restart in Windows 11 from Registry Editor
Step 1
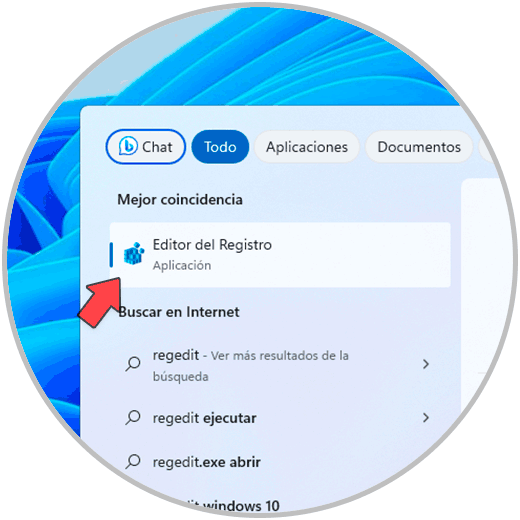
Another option to use is through the system registries, for this in the search box we enter “regedit”:
Step 2
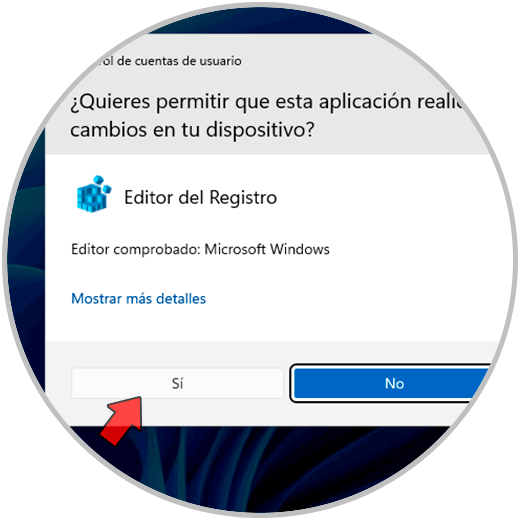
We click on “Registry Editor” and we must click “Yes” to access:
Step 3
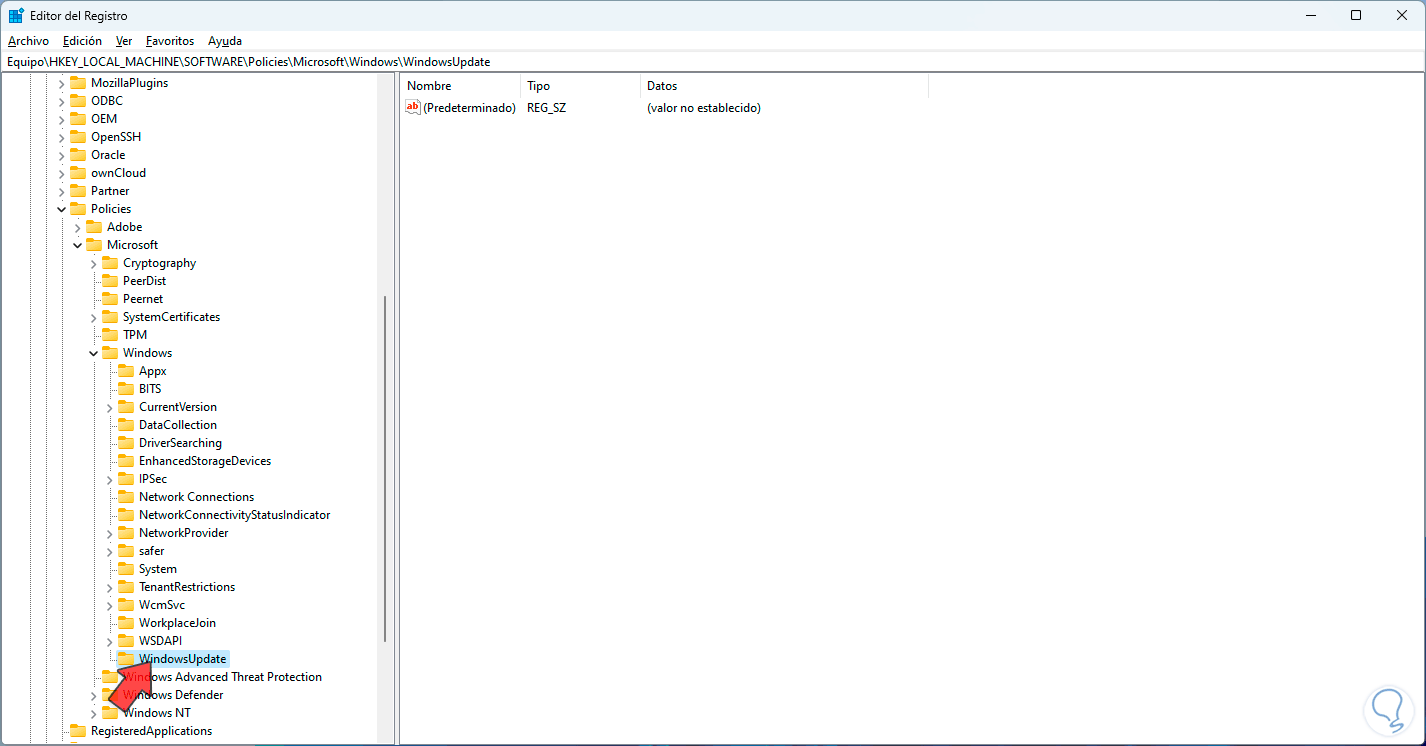
Now we will go to the following route:
HKEY_LOCAL_MACHINE\SOFTWARE\Policies\Microsoft\Windows\WindowsUpdate
Step 4
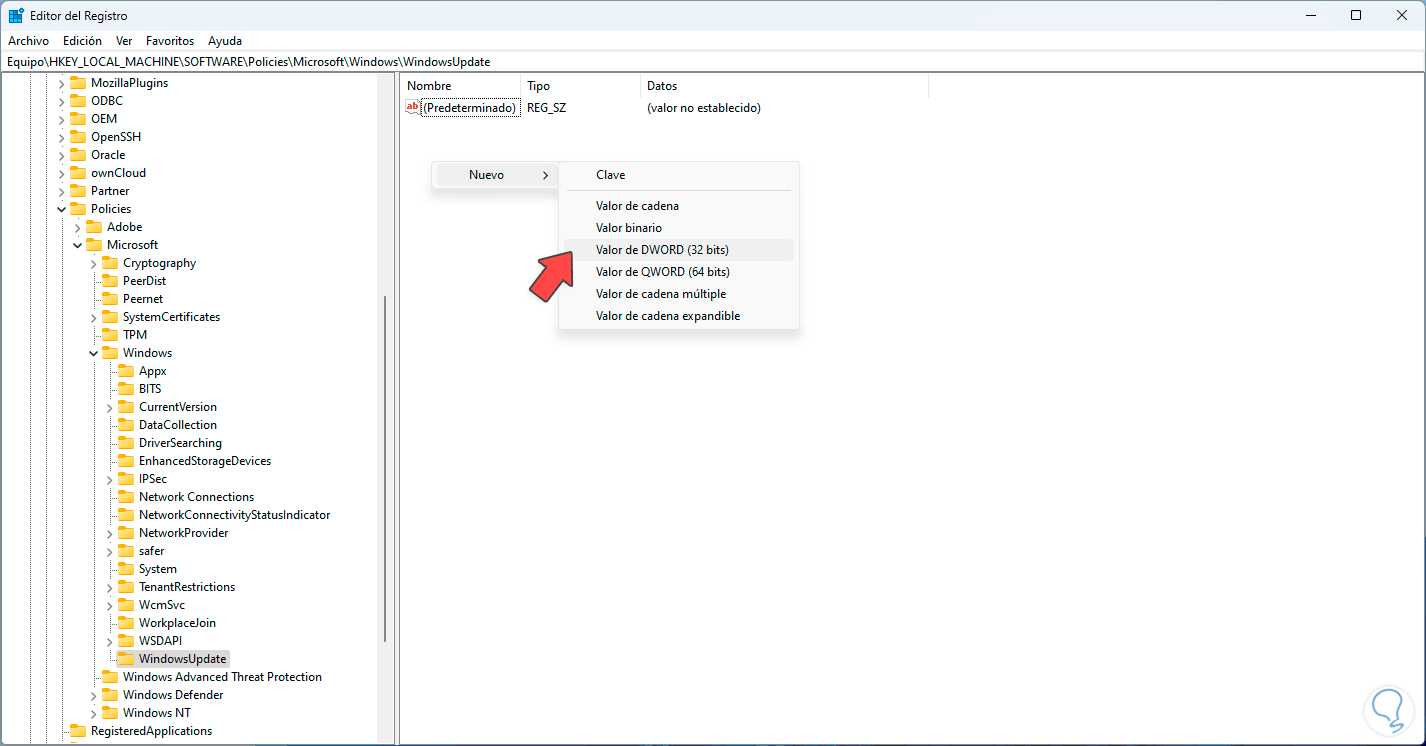
There we click somewhere free and select the option “New – DWORD (32-bit) Value”:
Step 5
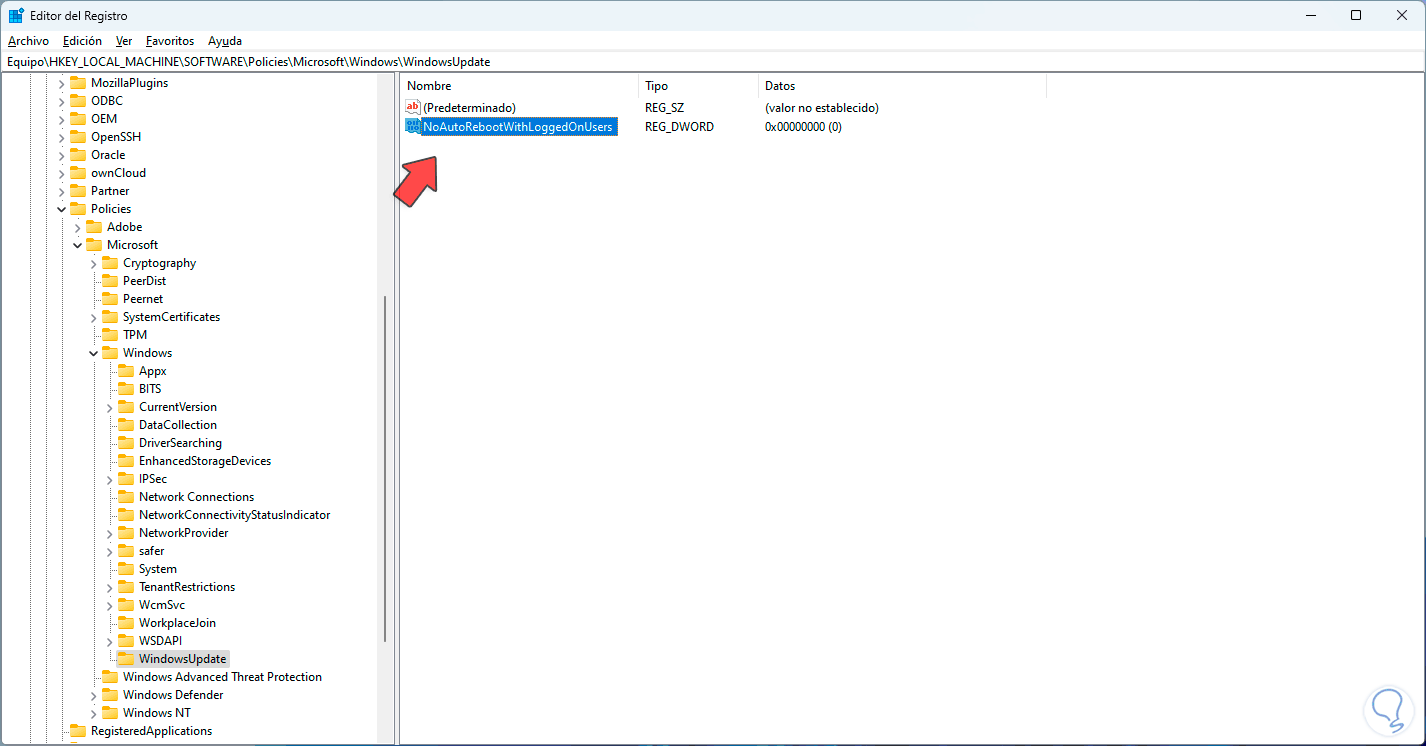
We assign this value the name “NoAutoRebootWithLoggedOnUsers”:
Step 6
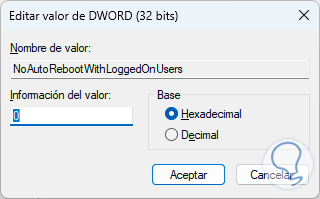
We double click on the value to see its information:
Step 7
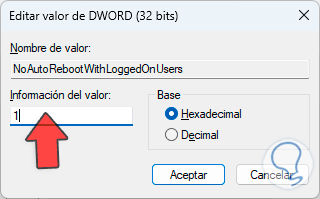
In “Value information” we establish 1. We apply the changes.
3 How to disable automatic restart in Windows 11 from Task Scheduler
Step 1
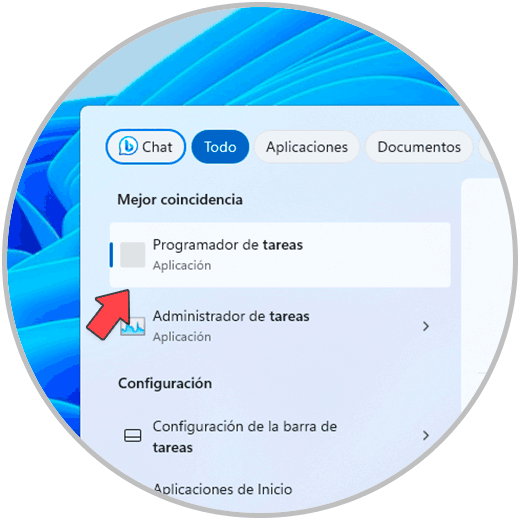
Now we are going to access this Windows function to check the status of automatic restarts, in the search box we enter “tasks” and click on “Task Scheduler”:
Step 2
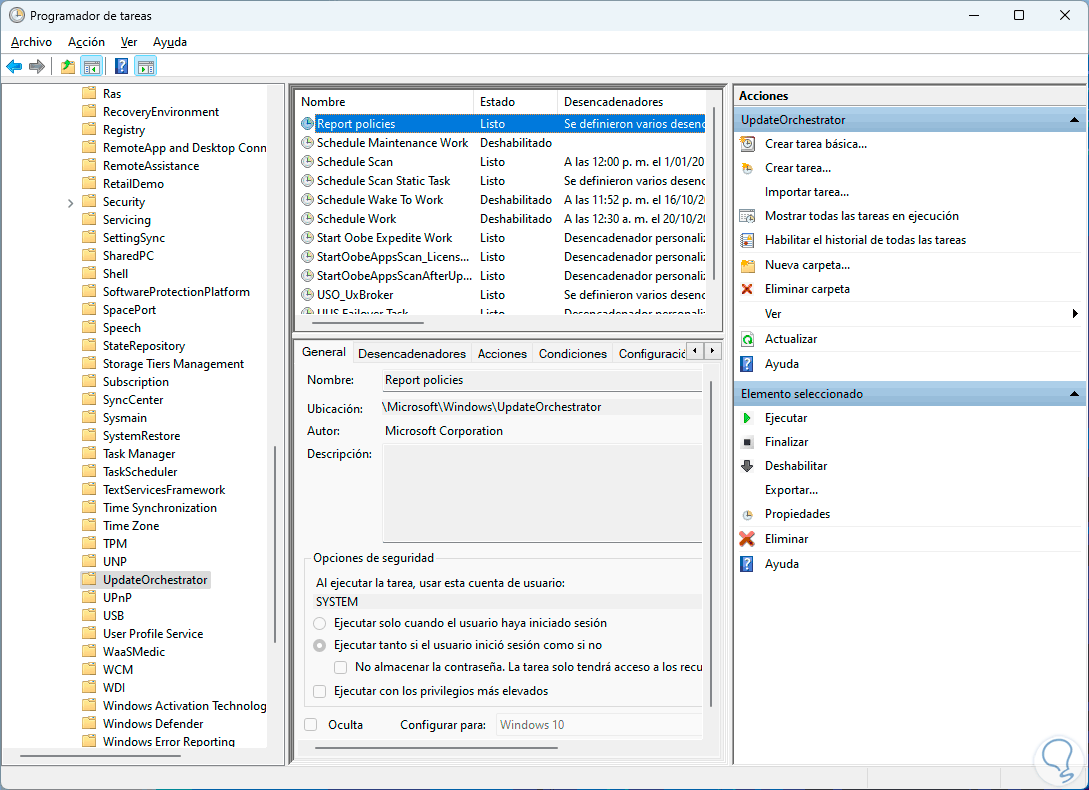
Then, let's go to the route:
Step 3
There, we are going to check that there is no task called “Reboot”:
Step 4
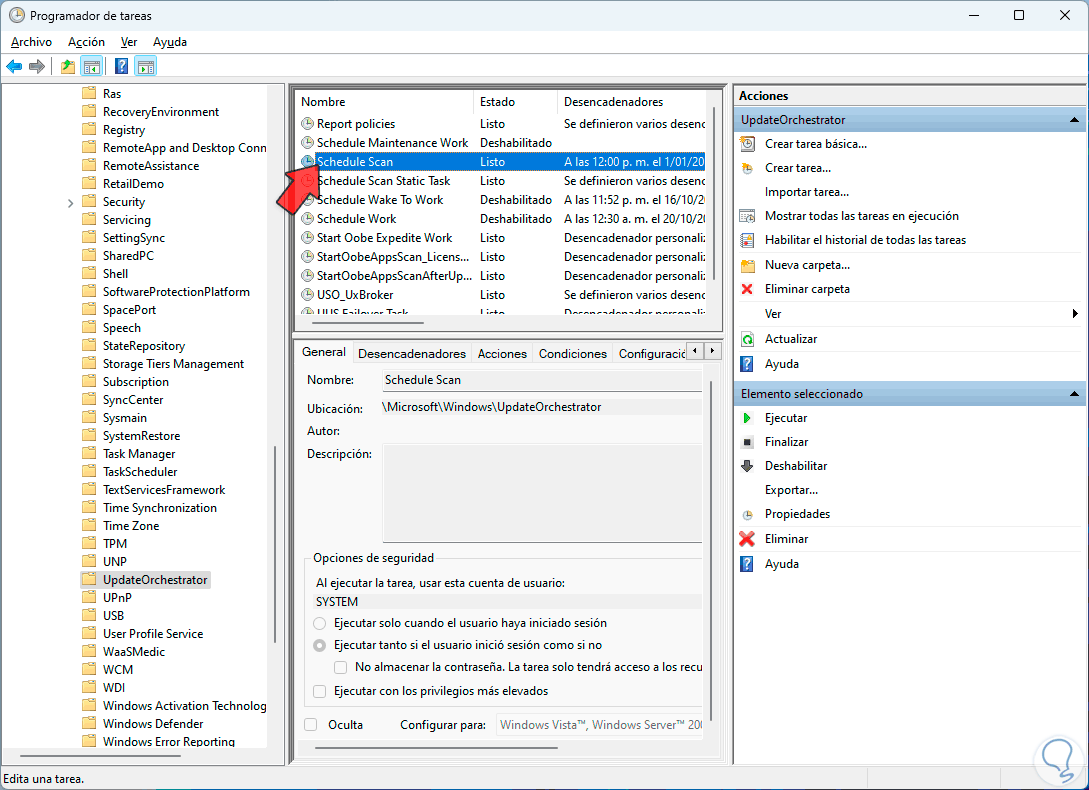
After this, we select “Schedule Scan”:
Step 5
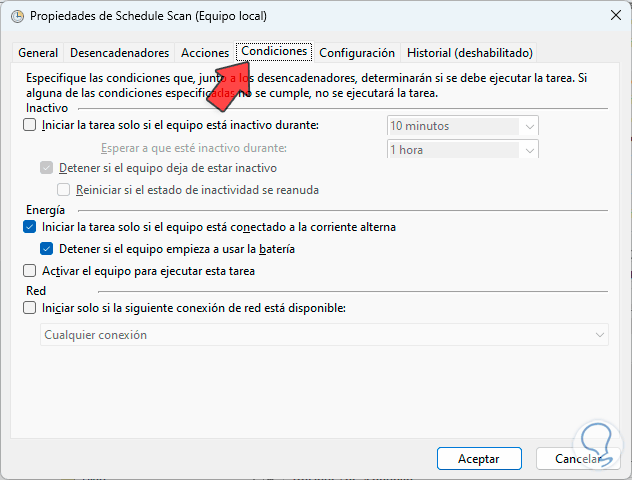
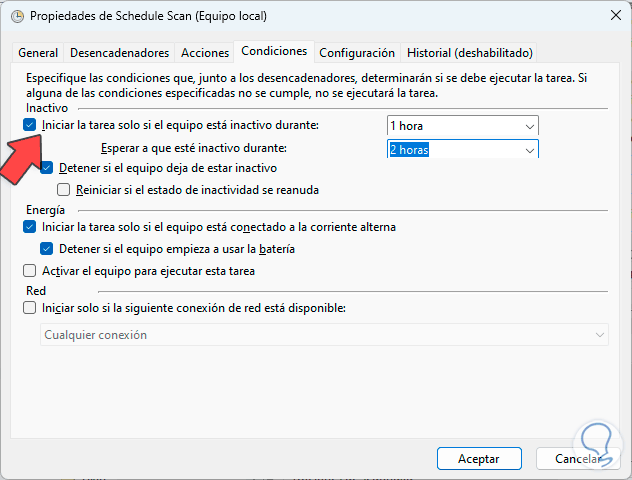
We click on “Properties”, now, in the displayed window we go to the “Conditions” tab:
Step 6
Here we are going to activate the “Start the task only if the computer is inactive during” box and then define the highest values:
Step 7
We apply the changes.
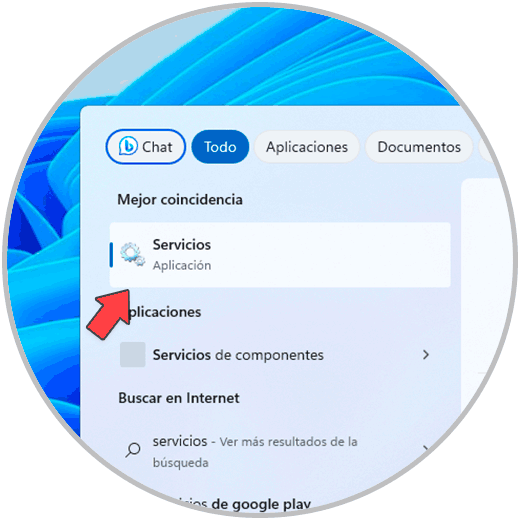
Then, in the search box we enter “services”:
Step 8
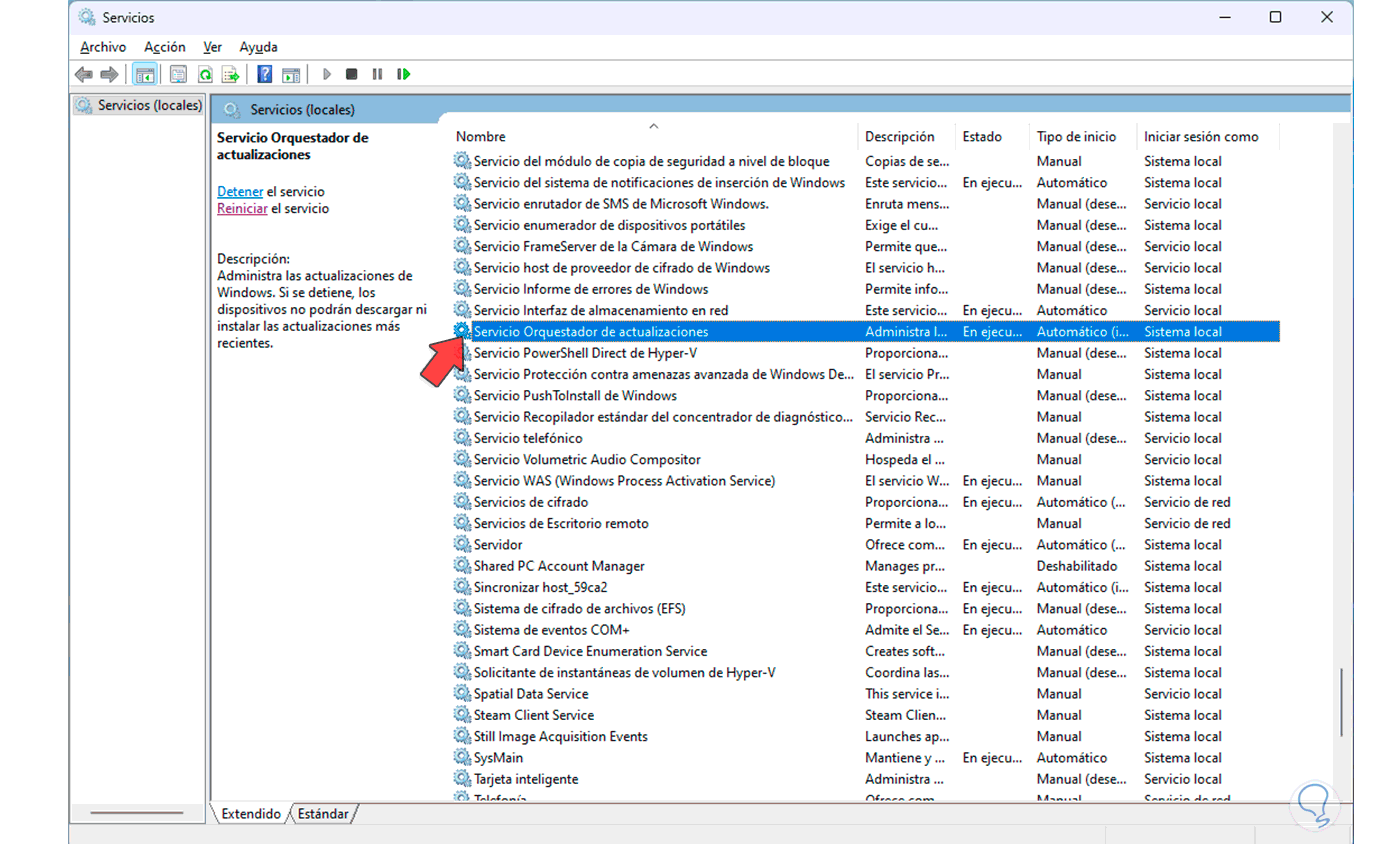
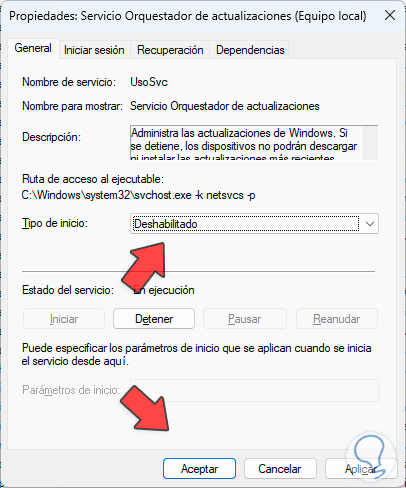
We click on “Services”, there we are going to select “Update orchestration service”:
Step 9
We double click on it:
Step 10
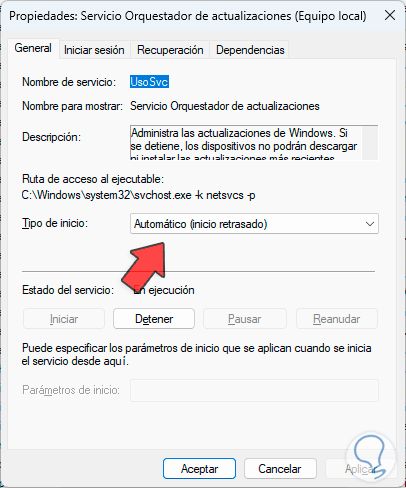
In the “Startup Type” field we select “Disabled”. This service is responsible for managing Windows 11 updates, so by disabling it, we will prevent automatic restart.
4 How to disable automatic restart in Windows 11 from Settings
Step 1
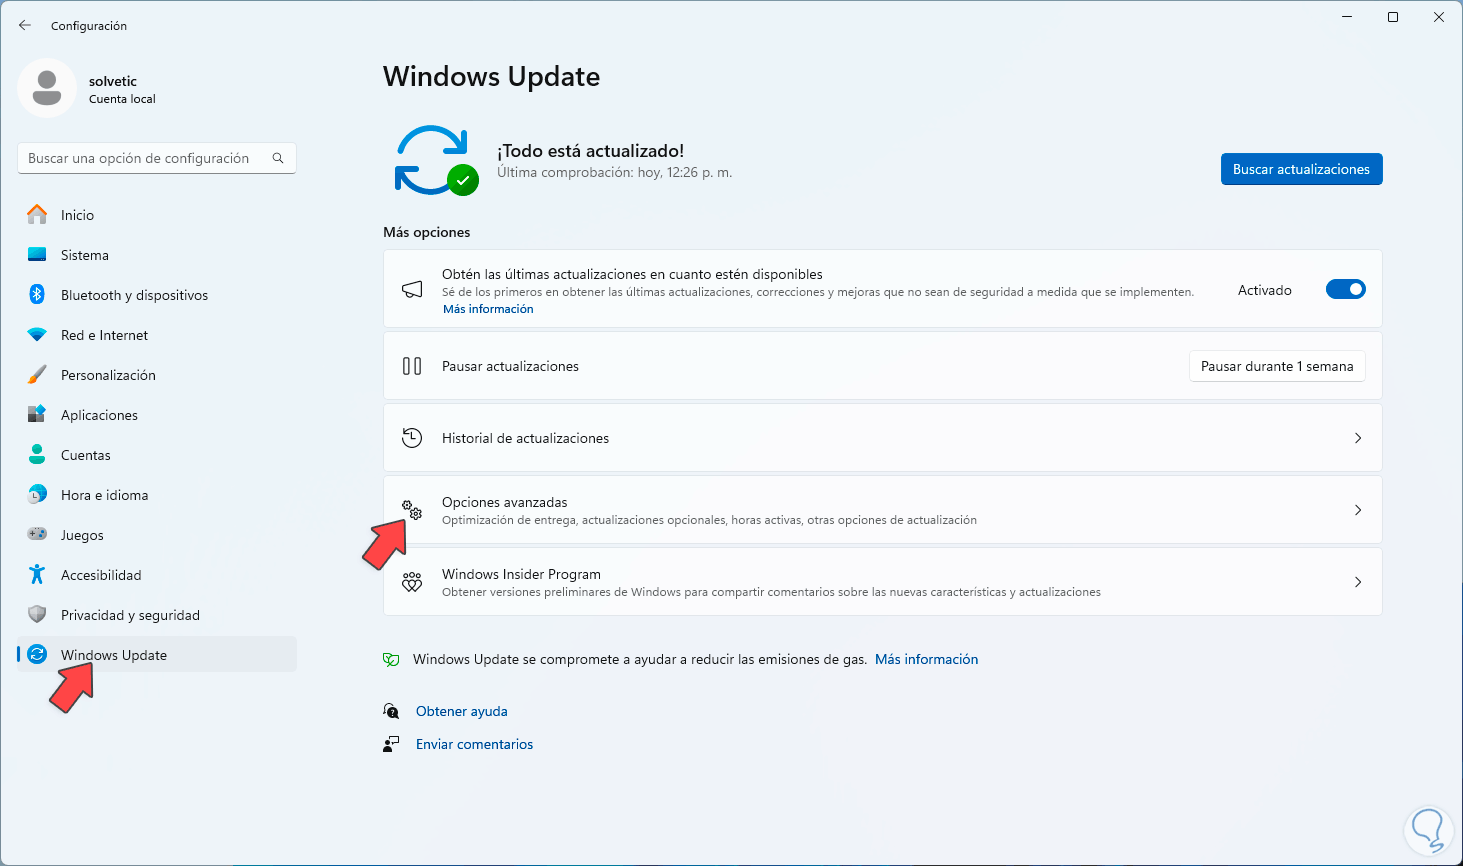
Finally we can make some adjustments from Settings, to do this we go to “Start – Settings – Windows Update”:
We click on “Advanced options” to see the following:
Step 2
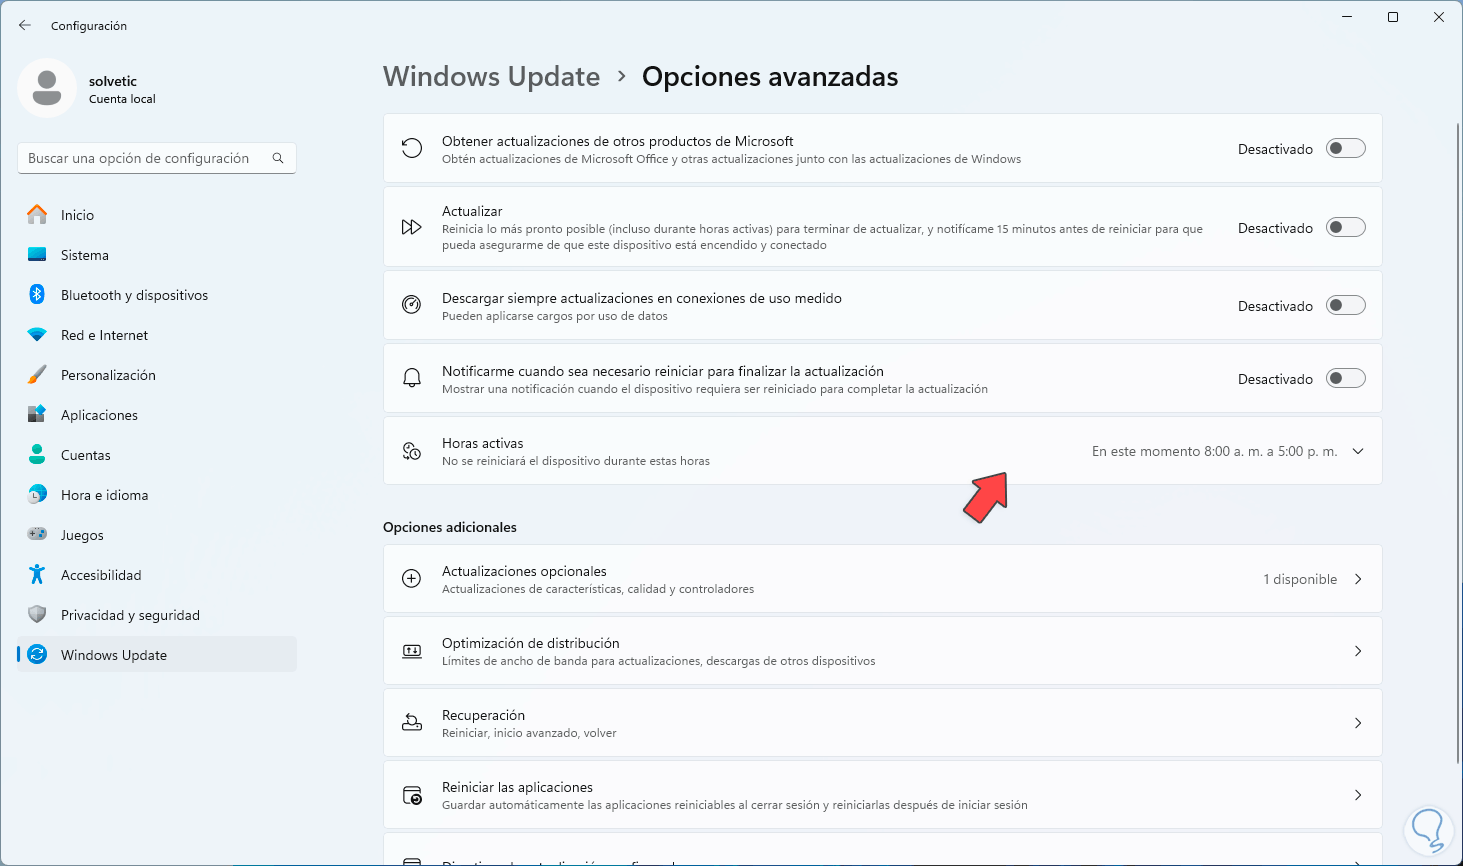
We click on the “Active hours” option and we will see the following:
Step 3
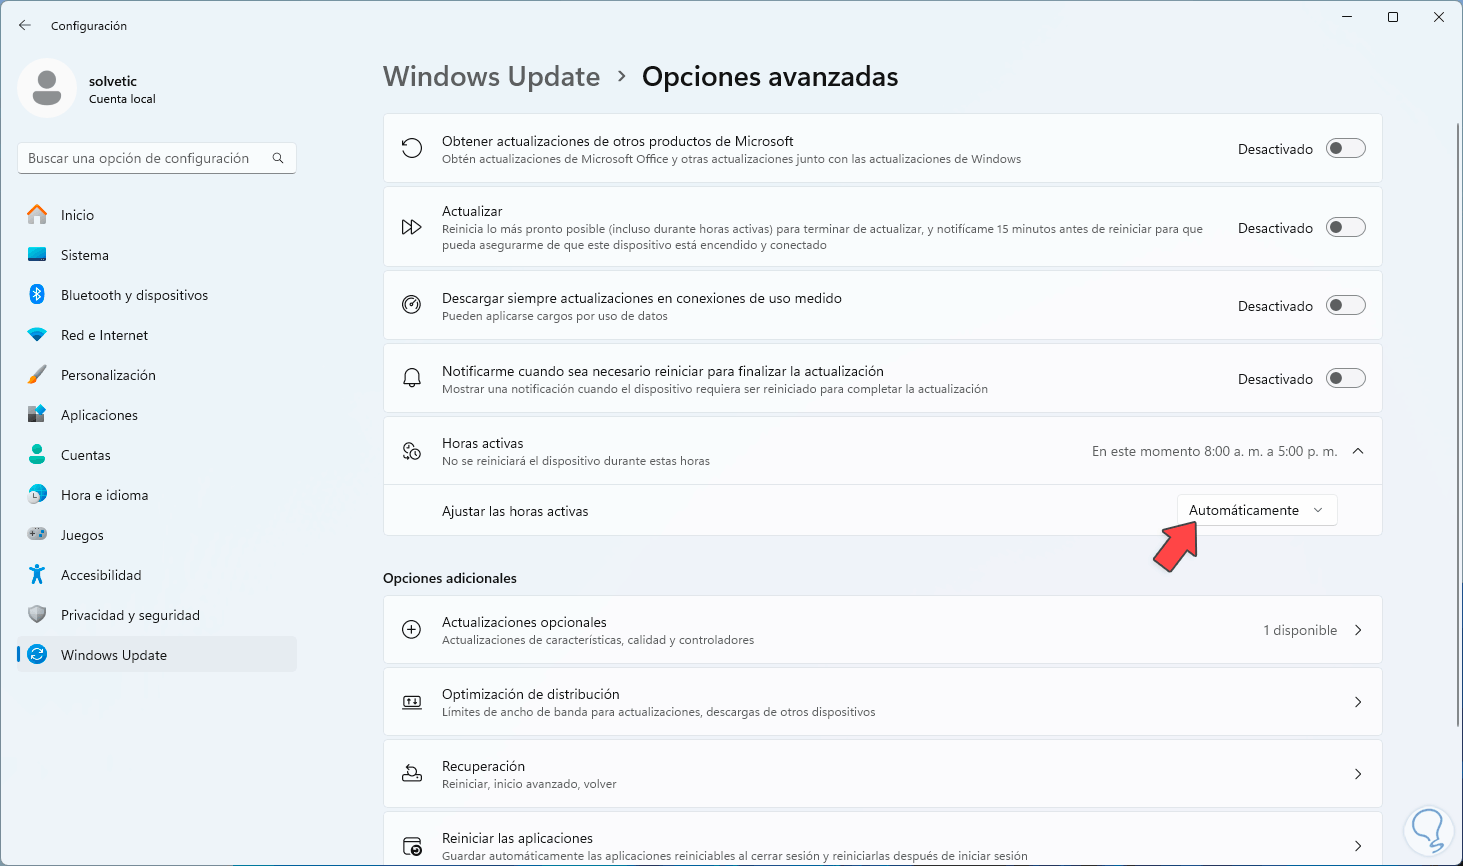
In the “Adjust active hours” section we set “Manually”:
Step 4
There it will be possible to define in what time range the updates can be installed.
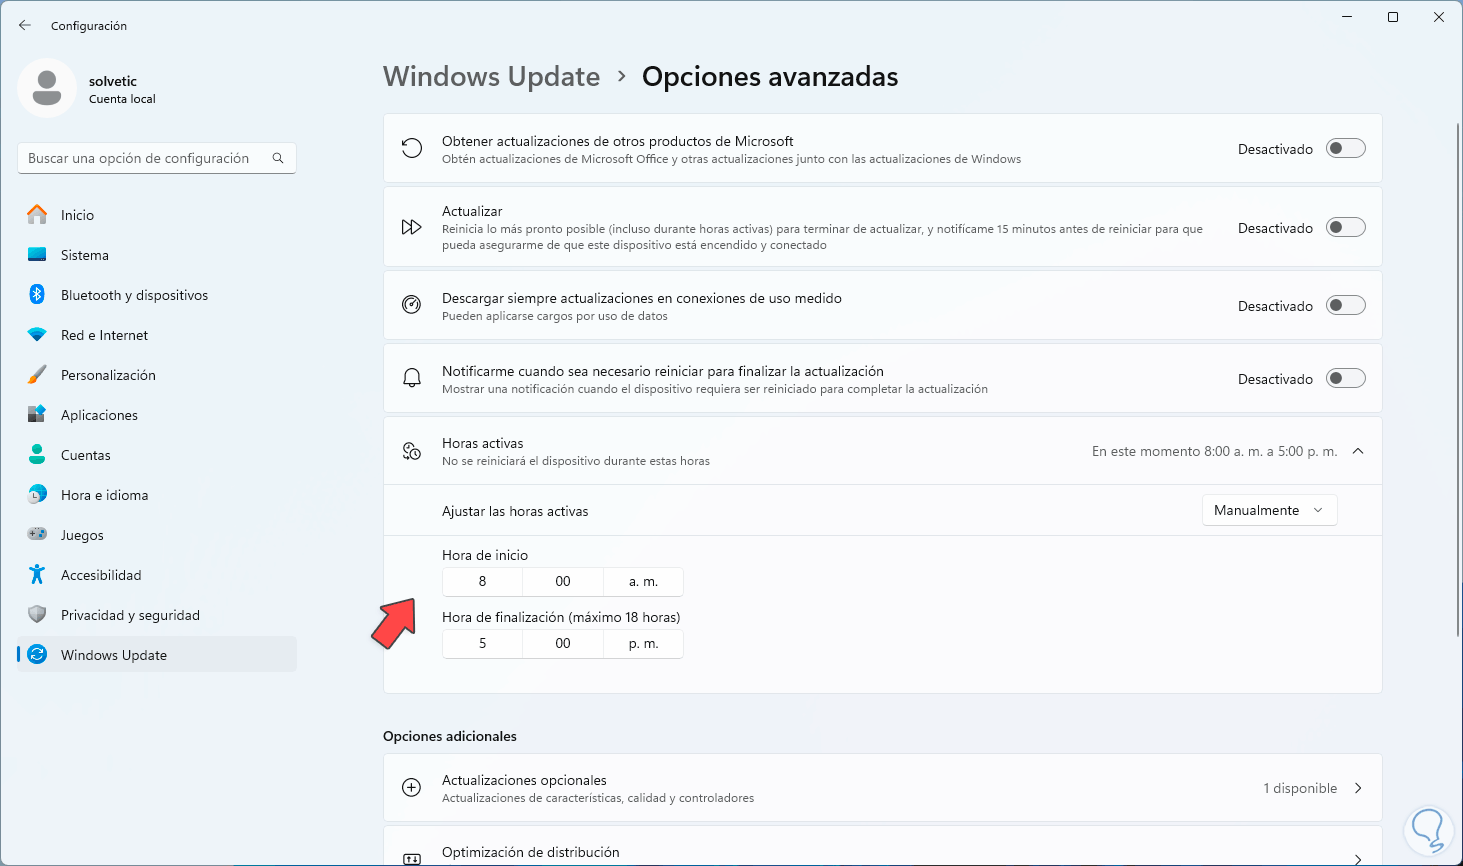
Step 5
Now we go to “System” and there we click on “Concentration”:
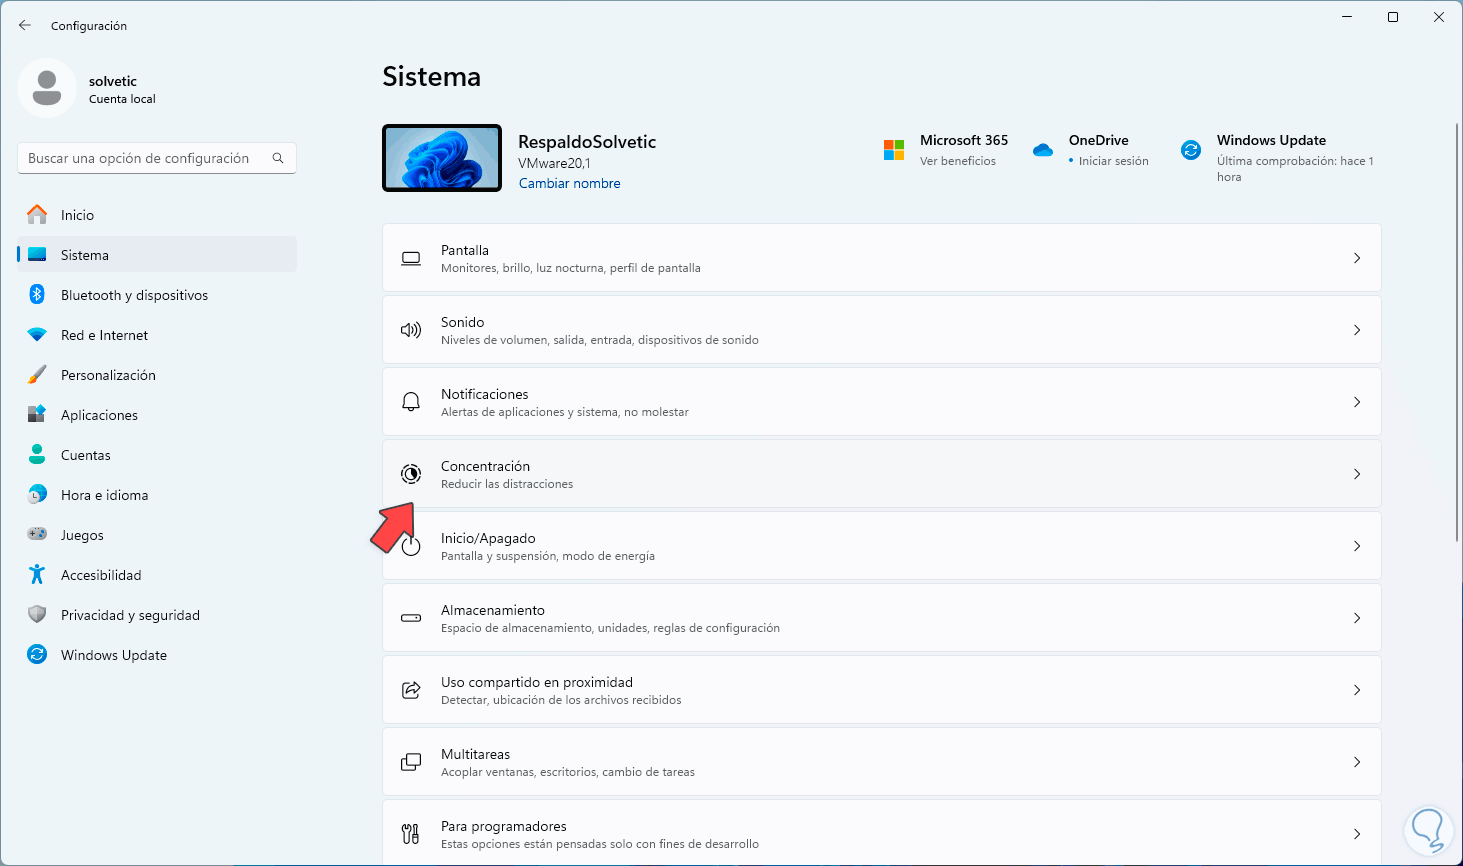
Step 6
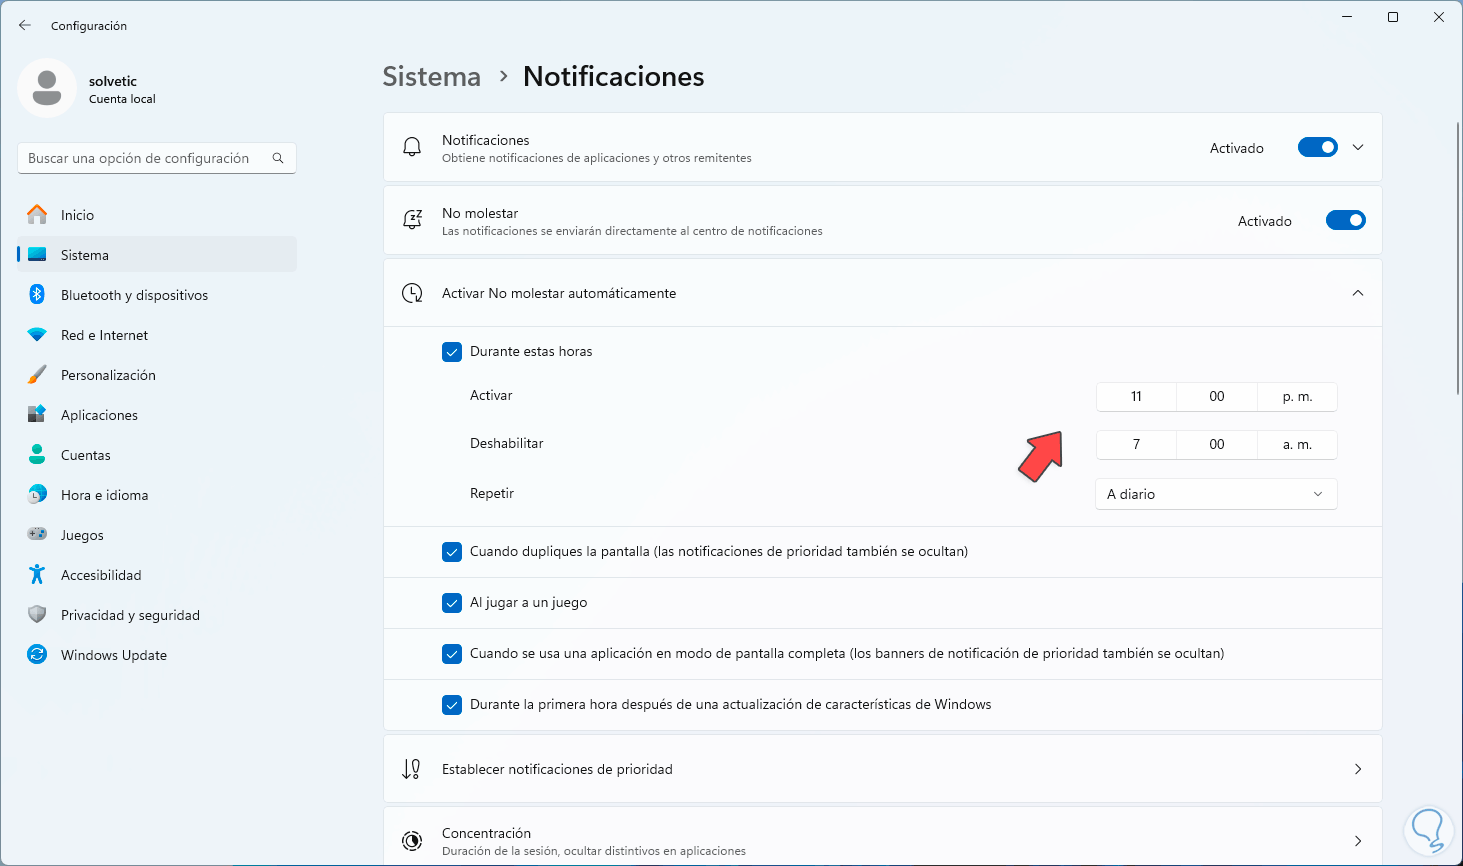
We will see the following options: We click on “Notifications” to have access to the following:
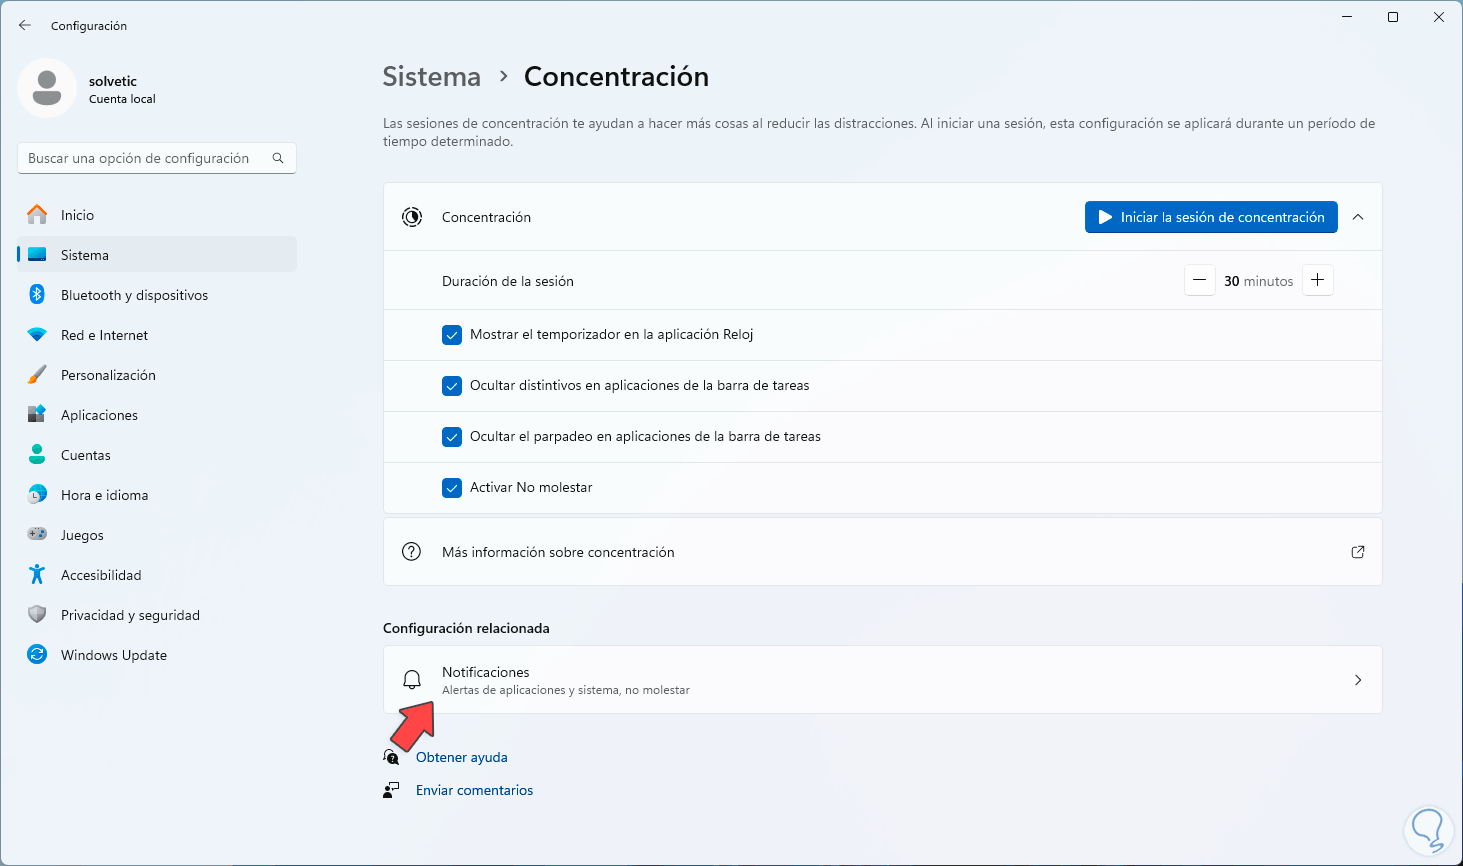
Step 7
We activate the “Do not disturb” switch
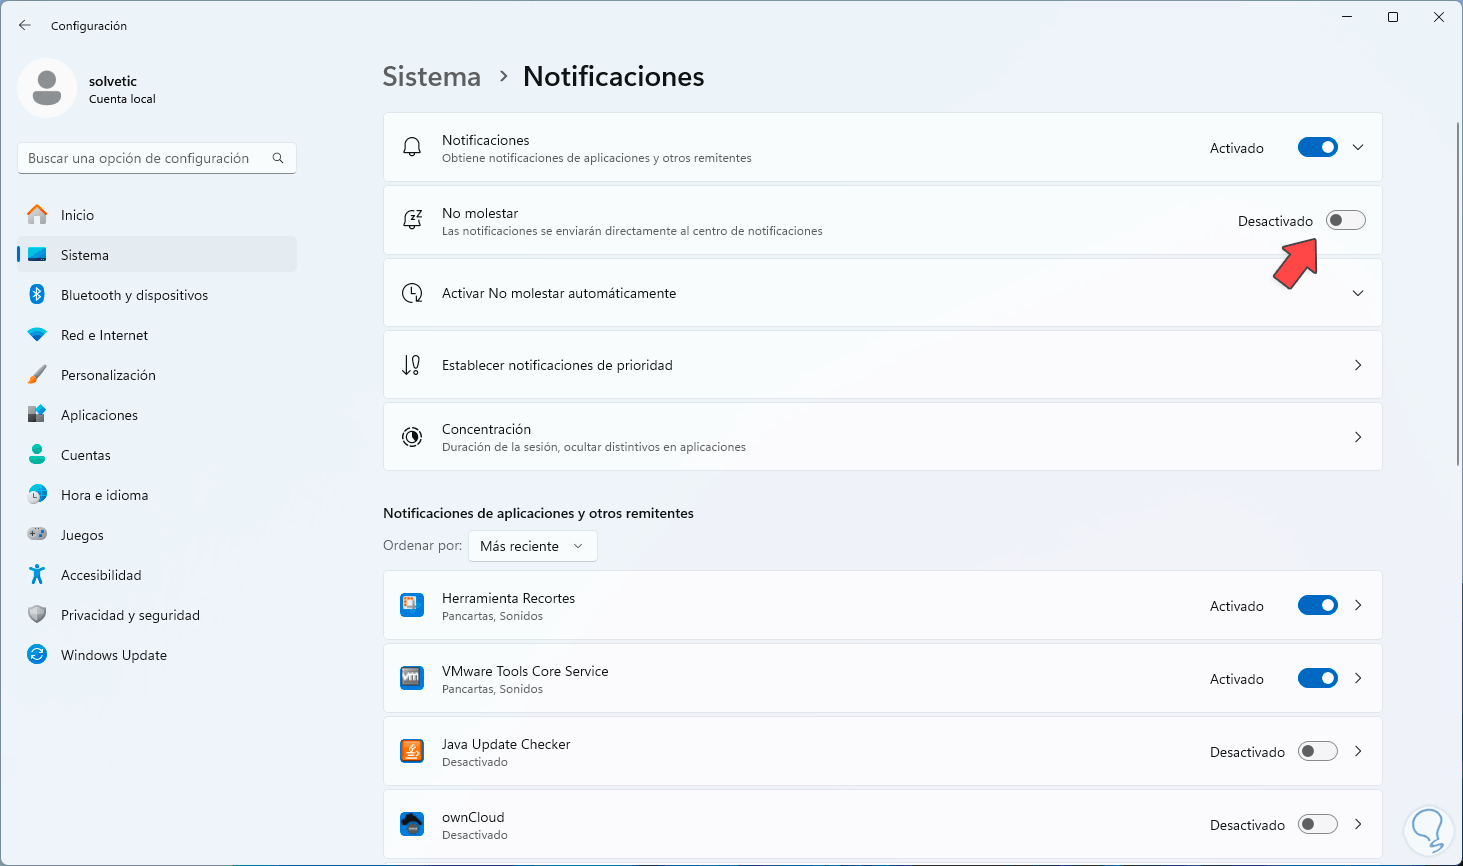
Step 8
It will be possible to adjust the time in which the system cannot apply reboots:
These are the ways available to deactivate the automatic restart of Windows 11 updates and be able to work in a much more complete way without interruptions.