To stay up to date, remember to subscribe to our YouTube channel!
SUBSCRIBE ON YOUTUBE
Connecting to Wi-Fi networks is one of the most common methods we have to establish Internet access not only on laptops but also on PCs thanks to the use of USB Wi-Fi devices. We know well that for the stability of the signal to be optimal, various factors, both internal and specific to the configuration, are required. If there are many obstacles in the place where the router is, for example, this will mean that the general signal may be affected. ..
Now, there are some configurations that we can make in Windows 10 so that the signal of our Wi-Fi network is increased and this means greater stability and more consistency, let's see how to configure these options in Windows 10.
How to increase WiFi signal in Windows 10
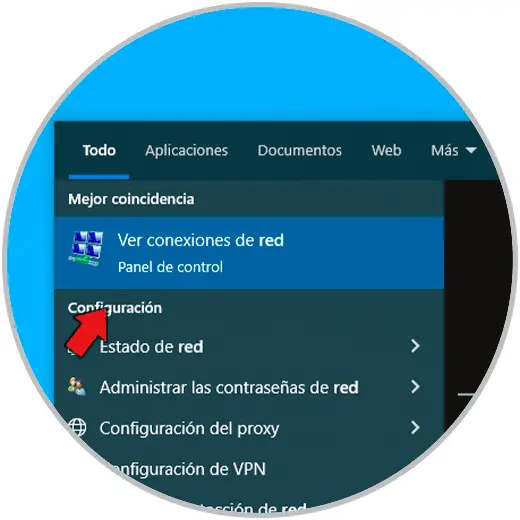
Step 1
To start, in the search engine we enter the word “network”, in the results, click on “See network connections”:
Step 2
This will give us access to the computer's current network adapters:
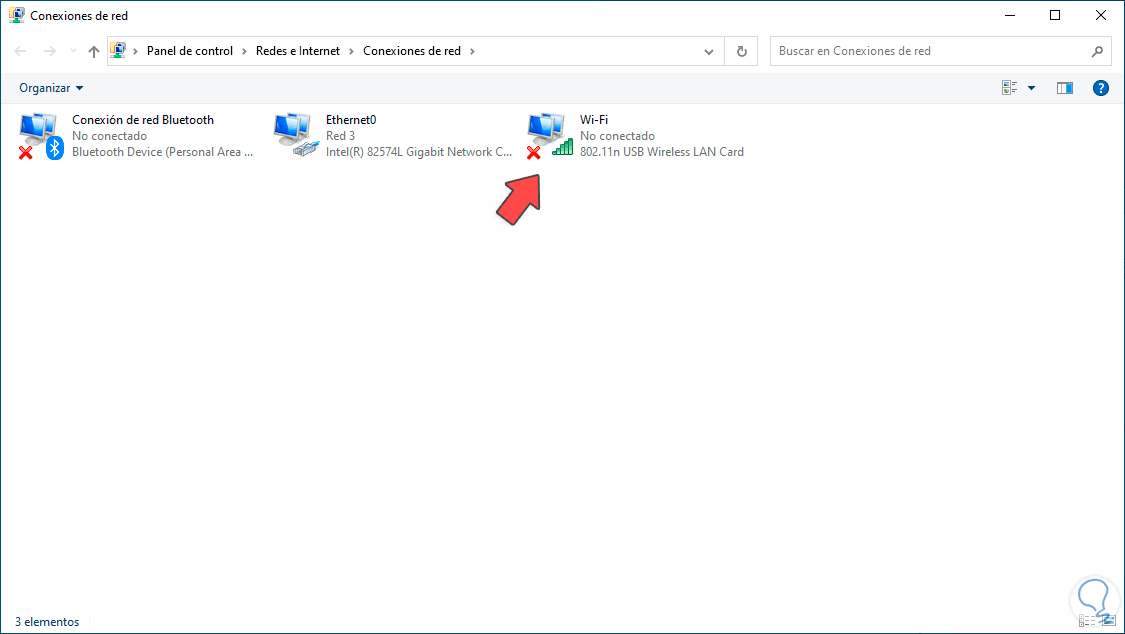
Step 3
We right click on the Wi-Fi adapter, select “Properties”:

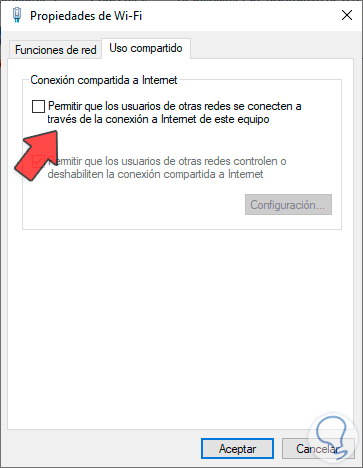
Step 4
In the pop-up window, we will go to the “Sharing” tab.
There we must validate that the “Allow users from other networks to connect through the Internet connection of this computer” box, the reason for this is to prevent other users from connecting to the Internet through our PC, which affects stability, bandwidth and other factors that influence connectivity..
Step 5
Now, let's go back to the “Network Features” tab. There we click on “Configure”
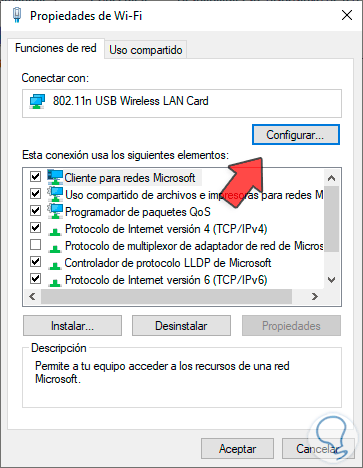
Step 6
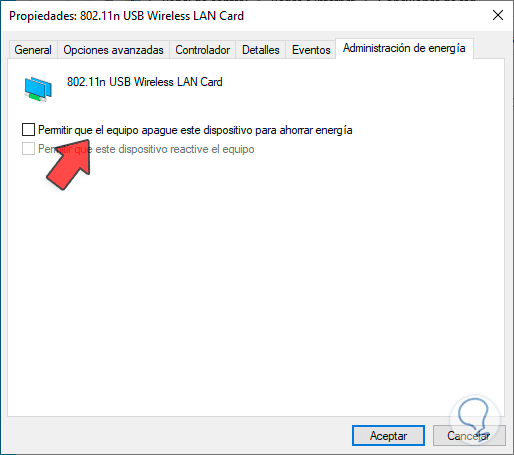
, in the displayed window, we go to the “Power Management” tab:

Step 7
We are going to uncheck the “Allow the computer to turn off this device to save power” box:
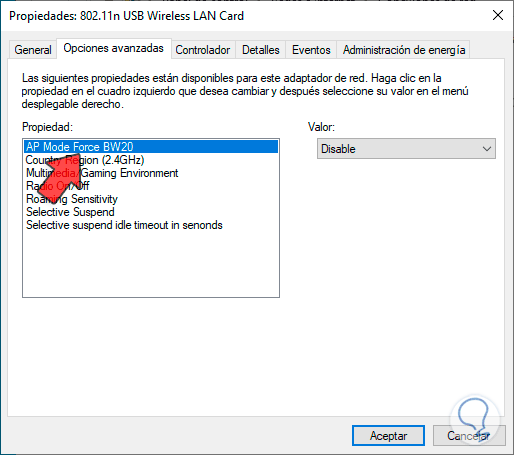
Step 8
Now we go to the “Advanced Options” tab. First of all, in the “AP Mode Force BW20” option we can set enable (enabled) or disable (disabled), this based on the necessary use parameters. This “AP” (Access Point) mode and its bandwidth configuration 20 MHz band is a default value in wireless networks, in this chaos the AP mode indicates the way in which the network device will fulfill the role of access point that allows other devices to connect to the wireless network, which It is more advisable to leave this value disabled.
Step 9
Something extra to keep in mind is that "Force BW20" means "force 20 MHz bandwidth", that is, the network device has been configured to use a 20 MHz frequency band but cannot use a wider band, 40 MHz or 80 MHz.
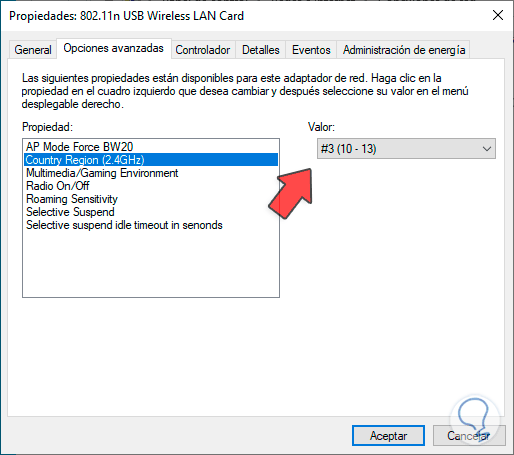
After this, we can select the region to use in the “Country region (2.4 GHz)” field, this is a value that allows us to specify the geographic region in which the wireless network device works, by default the region that it is in is set. configured in Windows 10 and we must be careful with changing this value since each country has its regulations on the frequencies and powers allowed in wireless devices:

Step 10
From the drop-down field we can select some other region:
Step 11
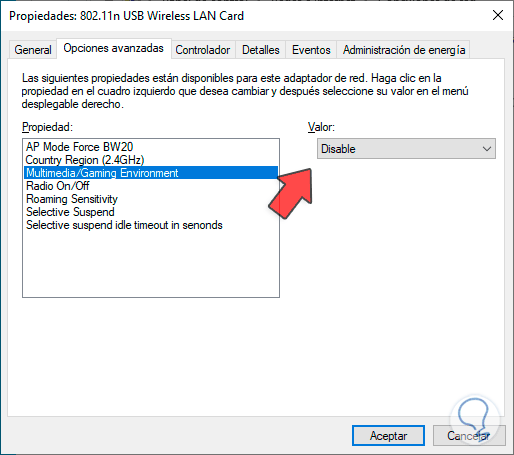
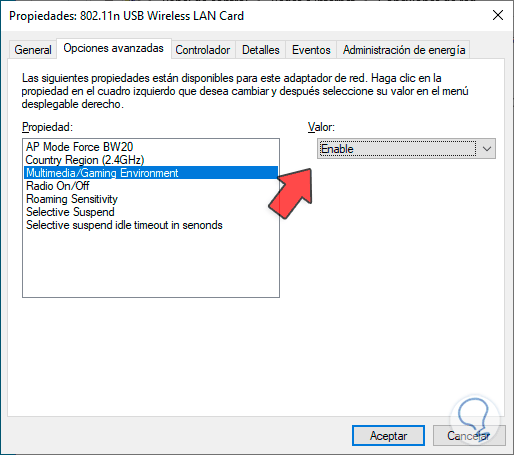
Then, in the “Multimedia/Gaming Environment” field it will be possible to enable or disable this option based on the type of task we perform with the Wi-Fi network. If we are playing or dealing with multimedia issues in a high percentage, this option can be enable so that network settings focus on these options:
Step 12
If we need a standard job, it is best to select the “Disable” option but if games and multimedia are required, we leave it in “Enable”:
Step 13
After this, we find the “Radio On/Off” value, this value allows you to activate or deactivate the wireless connection, especially when accessed in a sleep mode, but if we set it as enabled, it may happen that the connection is deactivated, causing it to not work. Whether we have access to it, we can leave it enabled or not according to the requirements:

Step 14
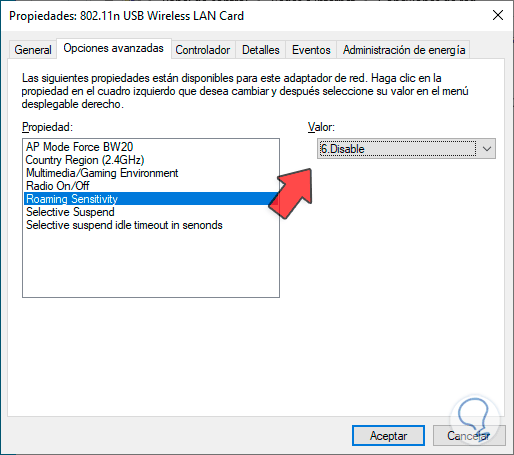
With the “Roaming Sensitivity” option, we have the option to configure the speed with which the device connects or changes from one access point to another when detecting a wireless network. This value determines the roaming sensitivity for see how sensitive the device is to the signal quality of an access point and thereby determine if it is necessary to switch to another access point in case the signal quality decreases.
This option is disabled by default:
Step 15
But we can set other values from high to very low:

Step 16
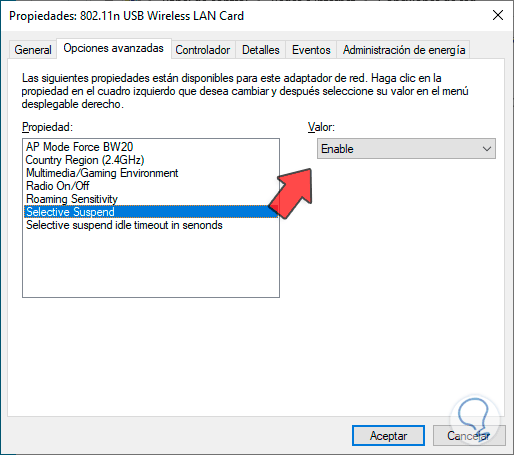
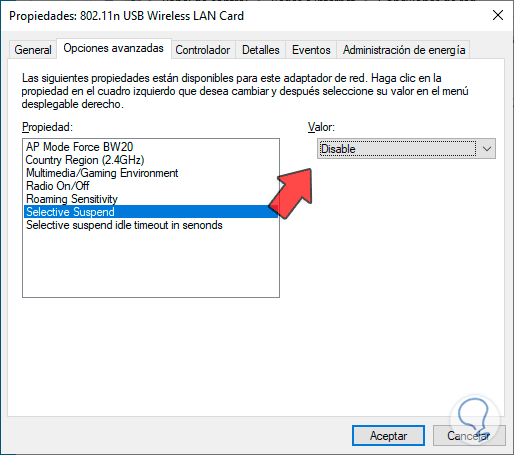
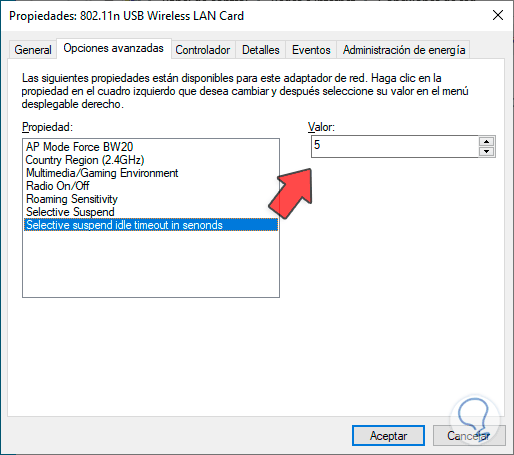
The “Selective Suspend” field is a function with which the Wi-Fi device is allowed to be turned off using low energy consumption. This happens when no use or activity is detected by the device. Logically, if the device is turned off, it will not we will have access to the Wi-Fi network obstructing its signal:
Step 17
We must leave this field with the “Disable” option:
Step 18
By disabling this field, logically the last value “Selective suspend idle timeout in seconds” will not need to be modified since it determines the time, in seconds, in which the device will be turned off:
Step 19
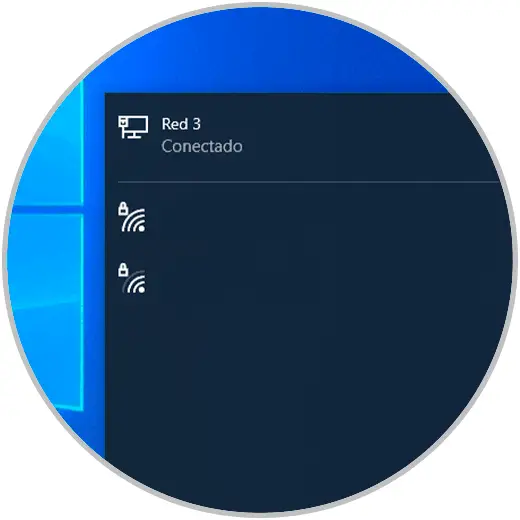
We click “OK” to save the changes. After this it is possible to access the Wi-Fi network and check that the signal is now more powerful and stable:
Step 20
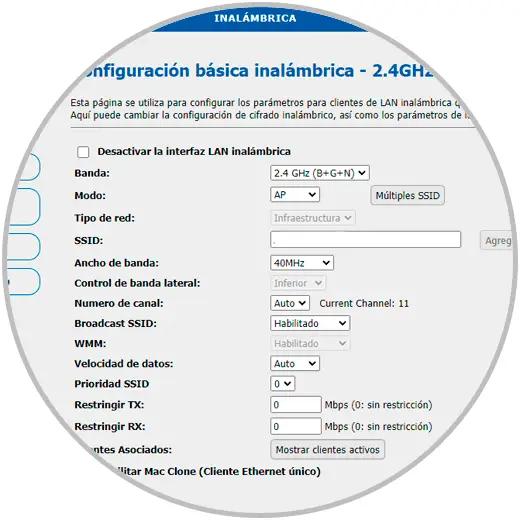
As an extra point, TechnoWikis advises you to make some changes to the network device directly, for this we must access the gateway from any browser and go to the wireless network section there:
Step 21
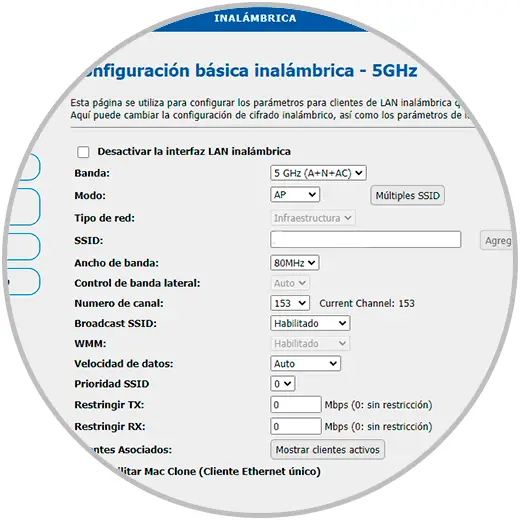
Here in the “General” section it is possible to adjust the channels or frequencies of use, additionally, you can go to the 5G section (if available) and make the same adjustments:
With these steps we will have a much more stable and powerful Wi-Fi network in Windows 10.