Wireless connections are one of the most used connections today by the multitude of devices compatible with this connection (mobile phones, PCs, TVs, etc.) and their growth will continue to increase every day. But in all this there are a number of components that play a role in the correct performance of this technology and one of the most delicate and key is the signal strength which determines the level of connection and performance when using such connectivity..
We clarify that Wi-Fi technology makes use of radio waves that allow a device to connect to the router and then it is distributed in the space so that all the elements detect the network and proceed to connect there, so that the Wi-Fi signal It presents multiple factors that have a direct impact on it such as:
Factors that influence WiFi signal
- Number of connected devices.
- Types of interference in space (walls, windows, electronic equipment and more).
- Natural or environmental aspects and more.
When our Wi-Fi signal fails we usually blame the router hardware, the service provider, etc., but rarely analyze the level and intensity of the signal to define if the problem lies from there, so TechnoWikis will give you A series of essential guidelines to check the status of the Wi-Fi signal in Windows 10 and with this determine if the slow connection originates there.
Tips to improve WiFi intensity
TechnoWikis will give you some extra tips to improve the Wi-Fi signal strength in your place of residence or work:
- Locate the router or modem in spaces where there is no interference.
- Make use, if possible, of Wi-Fi repeaters.
- Make use of software and applications developed to optimize the operation of the Wi-Fi network.
- Correctly position the router antennas (if any).
- Change the band and channel of the modem or router.
As a point to consider the strength of the Wi-Fi signal offers the following icon where its power is measured:

Then we also leave the video tutorial with the necessary steps to see your WiFi signal in different ways:
To keep up, remember to subscribe to our YouTube channel! SUBSCRIBE
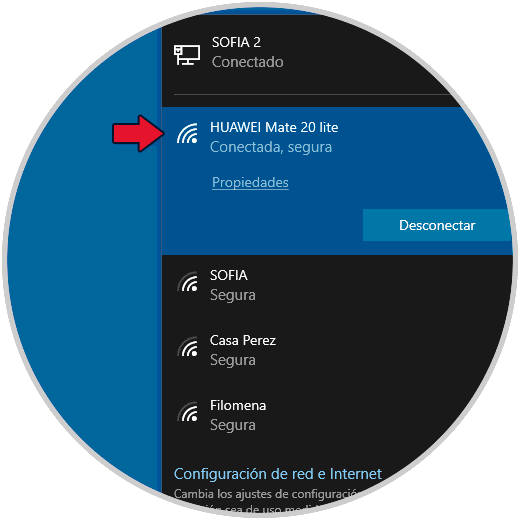
1. View Wi-Fi signal from the taskbar in Windows 10
The first method to see is through the Windows 10 taskbar, it is a simple process that consists of clicking on the network icon and when the connections are deployed we observe the level of intensity of the Wi-Fi signal. There we see the network to which we are connected and check the signal level of it..
2. View Wi-Fi signal strength from Control Panel in Windows 10
Step 1
Another method to verify the strength of the Wi-Fi signal is directly in the Control Panel which when we access you will see the following:
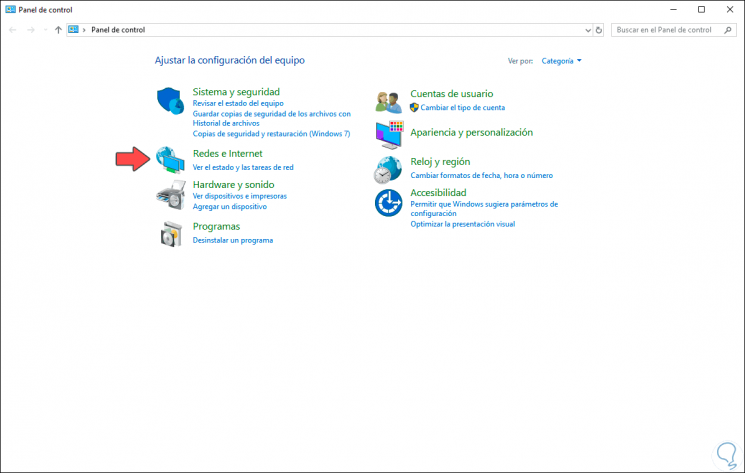
Step 2
There we click on the category “Networks and Internet†and we will see the following:
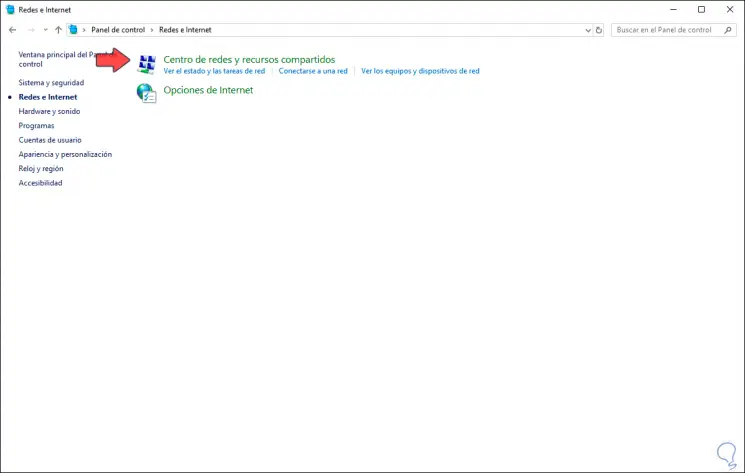
Step 3
We click on the line "Network and Sharing Center" and in the next window we find the signal strength in the name of our Wi-Fi network:
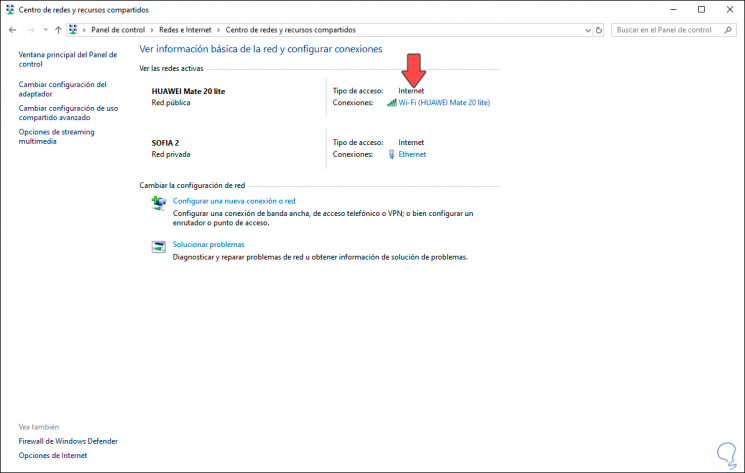
Step 4
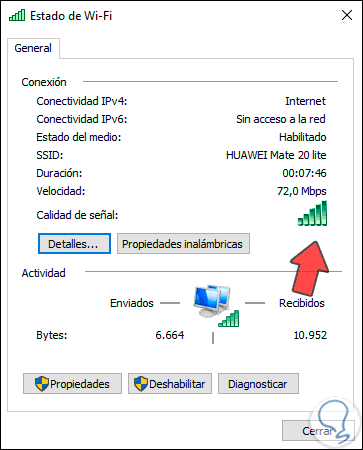
We can click on the Wi-Fi network icon to access its status where we will see details such as:
- IPv4 and IPv6 connections
3. View Wi-Fi signal strength from Utility in Windows 10
Step 1
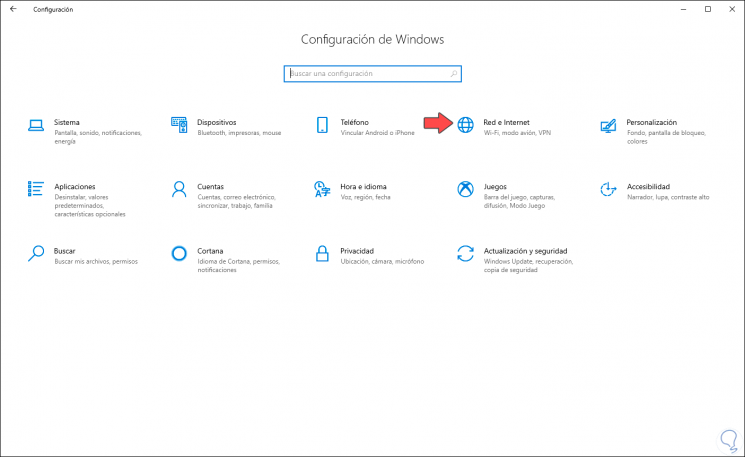
Configuration is another of the central points from where we can manage and see the levels of the Wi-Fi signal, for this we go to the Start menu and there we select “Configurationâ€, we will see the following:
Step 2
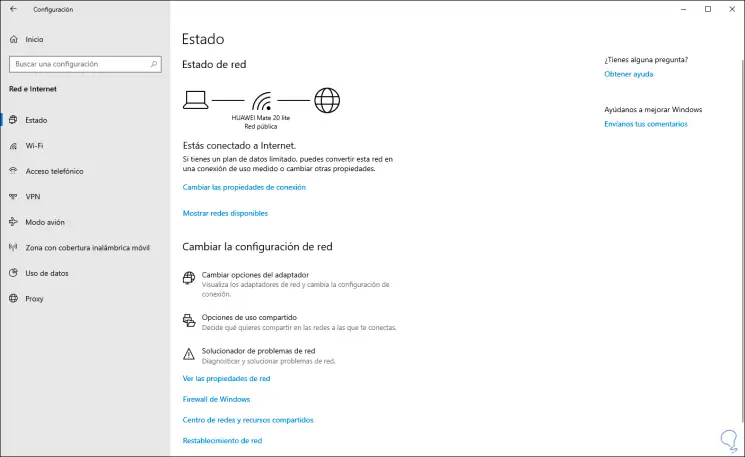
We select the “Network and Internet†category and in the next window we will go to “State†where we check the signal level:
Step 3
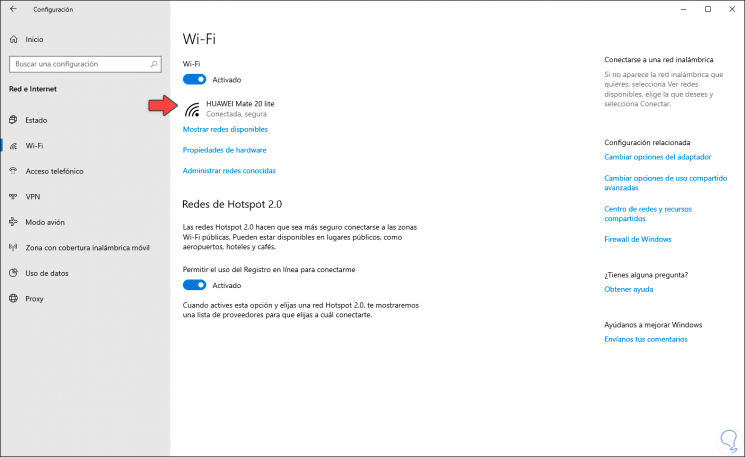
We find the same information if we go to the “Wi-FI†section. There we find the name of the network, as well as the signal strength of it.
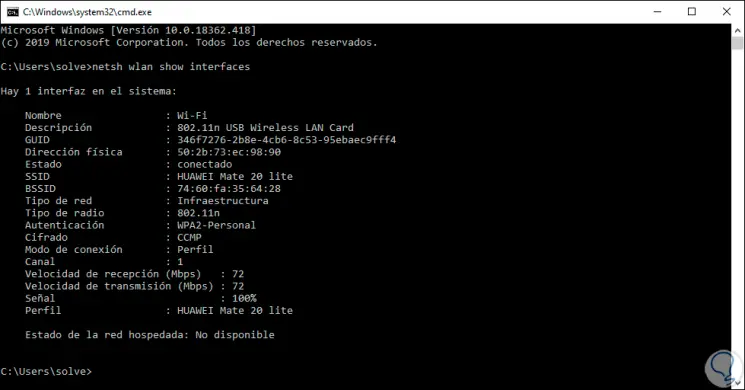
4. See Wi-Fi signal strength from Command Prompt in Windows 10
The command prompt console is another practical option to know the Wi-Fi network signal, for its use we access the console and there we execute the following line.
We can find specific details of the Wi-Fi network and we will pay special attention to the “Signal†line where you can see the percentage of intensity in Windows 10.
netsh wlan show interfaces
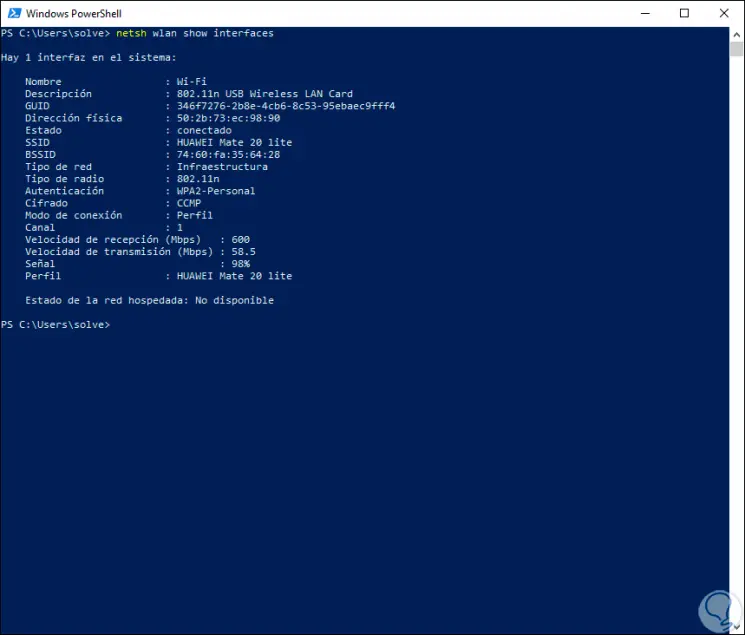
5. View Wi-Fi signal strength from PowerShell in Windows 10
Windows PowerShell is the new management console in Windows 10 which, thanks to its various cmdlets, provides us with the necessary tools for managing various device parameters
Step 1
To know the signal from this method we access Windows PowerShell and execute the following:
netsh wlan show interfaces
Step 2
There we find in the Signal line the current percentage of intensity:
Step 3
If we only want to display the percentage we must execute the following:
(netsh wlan show interfaces) -Match '^ \ s + Signal' -Replace '^ \ s + Signal \ s +: \ s +', ''
With any of these options we can detect the signal strength in Windows 10. With this you will enjoy a Wi-Fi network with the ideal intensity to work naturally.