Excel hides some secrets that are essential to know in order to improve our productivity, and accelerate the learning of Excel. Some tasks that we perform daily, even some tasks that we do not perform because we do not know how to do them, or because we are simply unaware of their existence, can be carried out in a simpler way than we imagine..
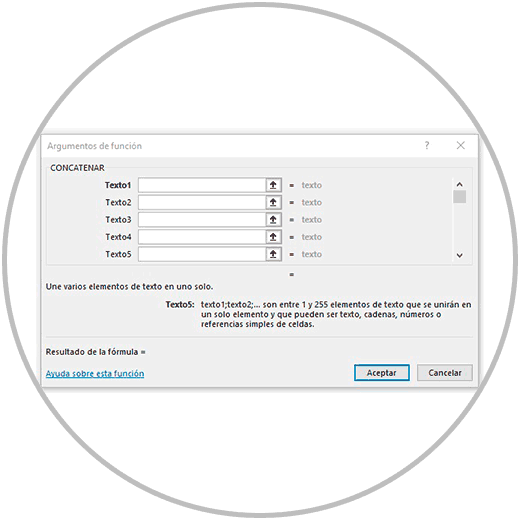
It is something that can happen to us in Excel when we start using the functions. Something that, as we are going to explain to you, can be simplified as much as possible with a function wizard called function arguments , which we can open every time we are going to use a function within a formula in Excel.
The information we enter into a formula, when we are using a function, is called function arguments . Look below at this example image, which would be the arguments of a function:
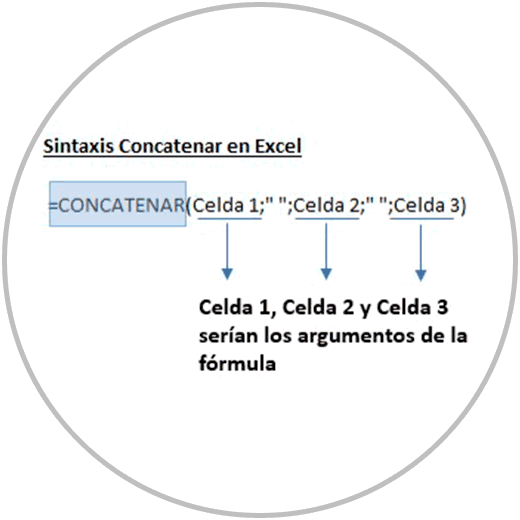
For this reason, the assistant that helps us complete the formula successfully is also called “function arguments” , because as we are going to see, this assistant helps us place the arguments of the function much easier , and tells us in each case, what information does the function need in order to obtain the expected result..
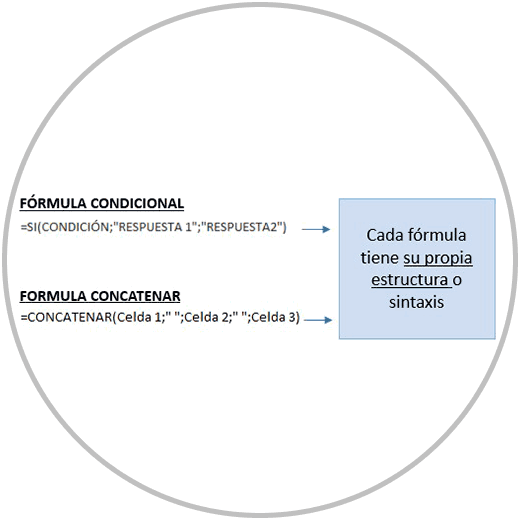
As we already know, each function can have a different structure. The assistant in this case helps us to be able to select and enter the information that is needed.
So in this example image that we just saw, where we see the syntax of a formula that uses the “CONCATENATE” function, we can see how each information that we enter in the formula (Cell 1, Cell 2, and Cell 3) would be the arguments of the function..
Why is the "function arguments" wizard in Excel important?
One of the tasks that may involve the greatest respect or fear when using Excel is precisely the functions. In this sense, the functions are of great help to be able to do complex, simple calculations quickly.
The problem with functions is that many functions have a particular structure, as we explained at the beginning, and this complicates the task in some cases, especially when the formula is long, or when we want to make a formula that uses a lot of information. The result we may encounter is a formula error, because we have not put a separator correctly, we have forgotten to put a parenthesis, or we have made a mistake at any other point.

The structure of the “Concatenate” function, the structure of a conditional function, are not similar, they are not built with the same logic, as you can see in the image below:
This is where the “function arguments” wizard is of great help. Next, we are going to explain what the “function arguments” wizard is, where it is, how you can open “function arguments” and how to use it to create formulas.
1 What is the function arguments wizard?
The function arguments wizard is an Excel resource to be able to build formulas with a function, a window that we can open and that we can fill in with the information that each function needs to be executed.
Since each function needs different information so that we can obtain the expected result, the Function Arguments wizard makes it easy to create formulas when we use a function.
As we are going to see in the example image below, when we use the wizard we do not have to worry about the elements that separate the information within a formula, we do not have to worry about whether or not we have to put a parenthesis, nor whether we have to put quotes or not. The only thing we have to worry about when using the “function arguments” wizard is entering the necessary data, the data that the function needs.
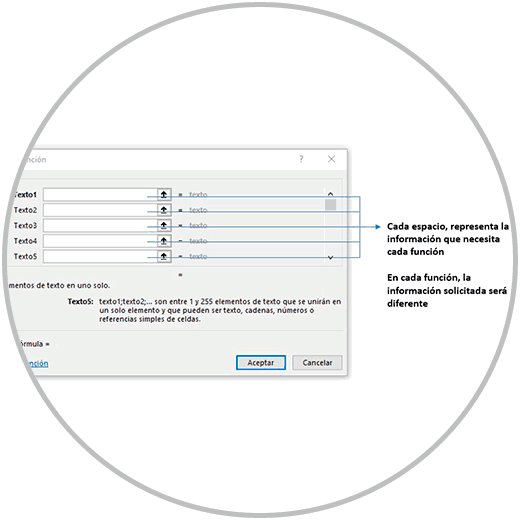
Just as we have seen in the example image, we must provide in each case the information or data that each function requires. In this example case, we have used the “CONCATENATE” function to see what the arguments of the function are.
Important:
The assistant will also help us by giving us an explanation of the function we are using, and the title that we find in front of each box, which indicates in each case what information we must enter.
Furthermore, if we place the mouse pointer on a box and click, below we will find the description of the data required in each of the boxes.
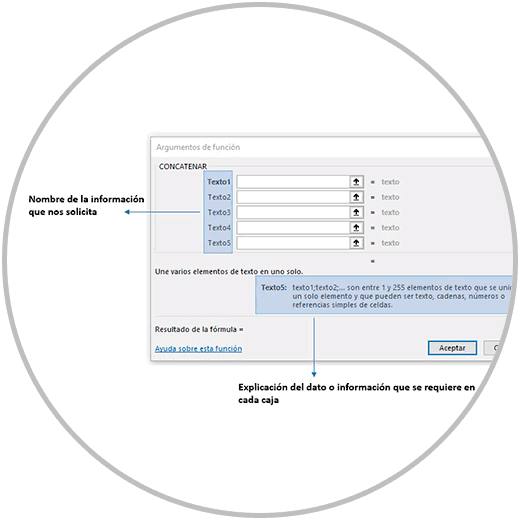
Now that we have seen what the arguments of a function are in Excel, and how the function arguments wizard can help us create a formula, let's see with an example how it works; Let's see where it is and how to open the “function arguments” wizard.
2 How to open function arguments in Excel
In order to open the function arguments assistant, we have to first start in the Excel work area, writing the equal sign (=) in a cell, and then the name of the function to use.
As we already know, when we start writing the name of a function in a cell, “Excel autocomplete” will appear, another assistant that gives us suggestions for formula names that match the text we are writing.
If, for example, we want to use the “CONCATENATE” function, as we write the word find after the equal, Excel will give us the suggestion of the functions that match the written text.
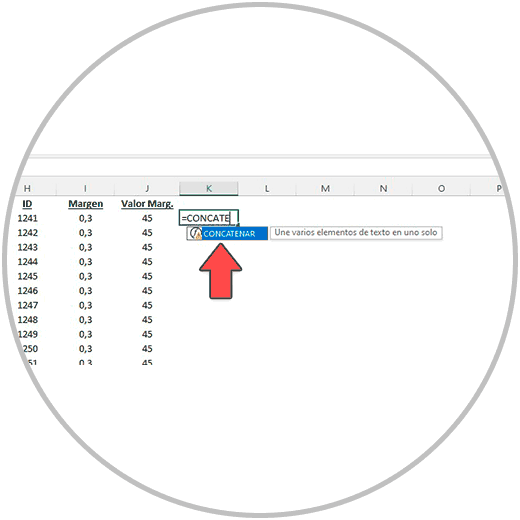
We always recommend using the autocomplete feature because this way we will not fail when writing the name of the function, because we may make a spelling mistake when writing, or we may forget to put a parenthesis.
When we double click on the function suggestion that Excel gives us ( remember to double click ), Excel already gives us the correct name of the function and opens the parenthesis so that we can enter the arguments of the function that we are going to use.
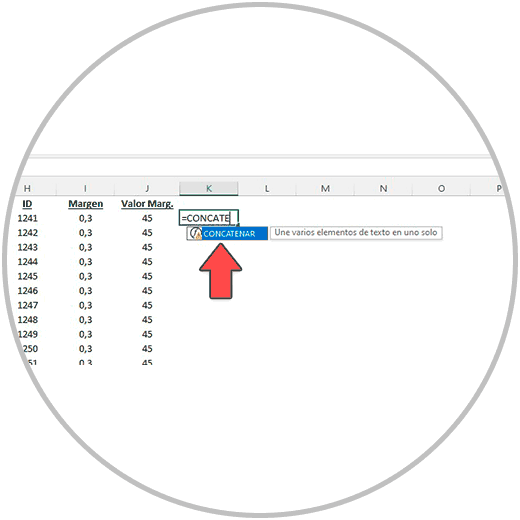
It is precisely at this moment, when we have already entered the name of the function to use, when we have used the Excel autocomplete wizard, when we can open the “function arguments” wizard; Clicking on “FX”, just to the left of where the formula bar is located.
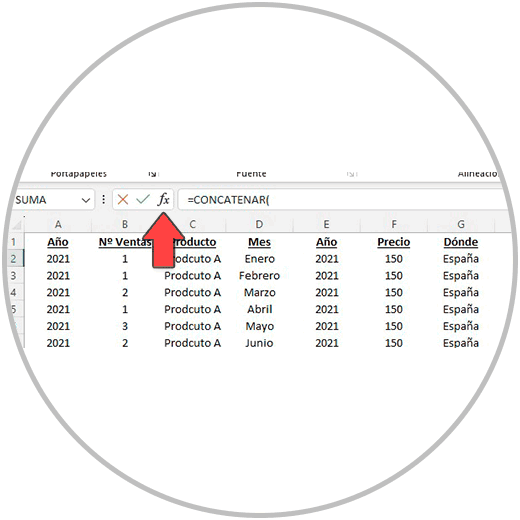
By clicking on “FX” we can see the “function arguments” wizard in a window that opens, and which shows, as we have explained before, several boxes where we must enter the information needed by the function we are using. .
In the example, we are using the “FIND” function, and this is the information it asks for in order to carry out the operation successfully.
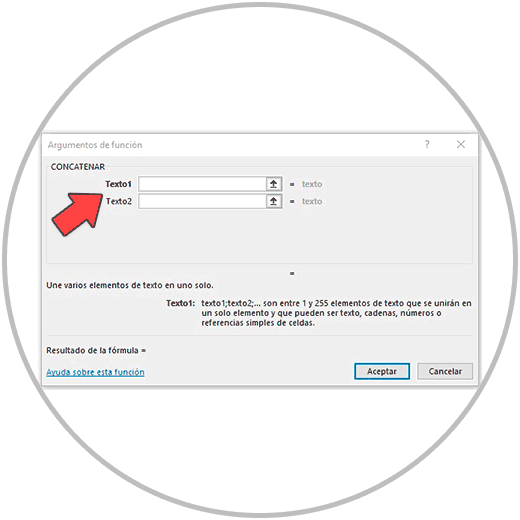
Now, in the boxes that we see in the wizard, we must enter the information that the function needs. As we are using the “CONCATENATE” function as an example, in each box, we must select the information that we want to concatenate.
Inside each box, we can click, and it tells us what information is required.
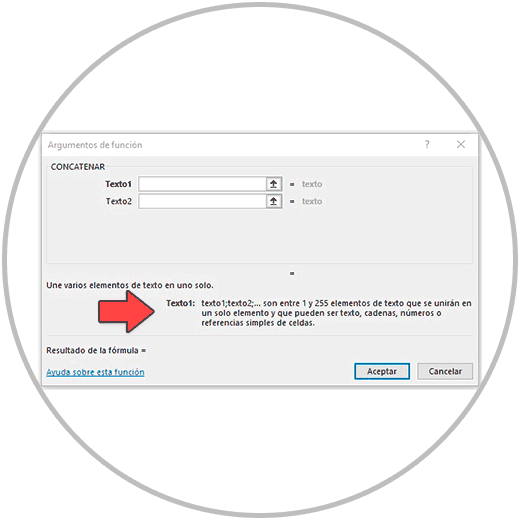
Thus we enter in each box the information that in this example case we want to concatenate.
How to separate the arguments of a function in Excel
Within each box, we can enter the information by clicking in the white space of the box and then selecting with the mouse the cell or cells that we want to include. But let's think about the result we hope to achieve in the end with the use of this formula. In this example case that we are concatenating cells, if we want, for example, that in the final result the information is concatenated with spaces in between, in the wizard we must enter the spaces, as you can see in the image:
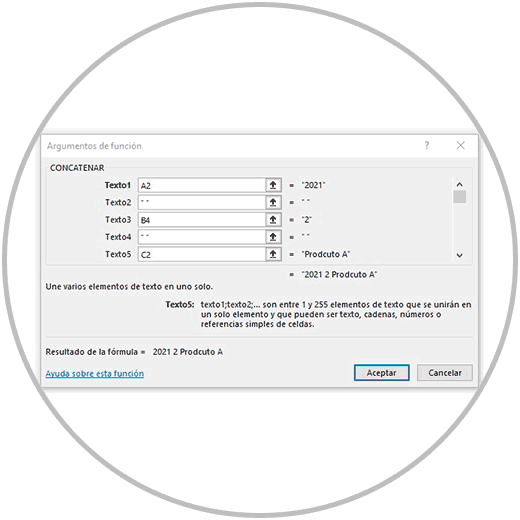
To put a space, or put any other separation sign, in the corresponding box we click and enter the space or sign that we want to use to separate the information. In the image below, you can see how when we put a space in the box, and click on the box below to continue building the formula, the wizard automatically places the space in quotes.
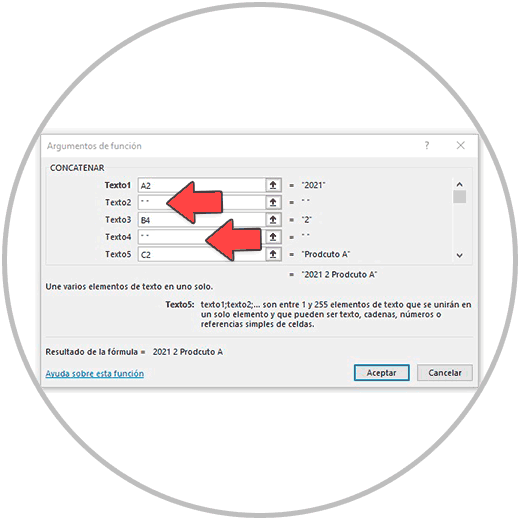
So in the formula that we are building with the concatenate function with the help of the “function arguments” wizard, we can see how in the formula bar (or in the cell itself where we are making the formula), the formula is being created with the information that we are entering in the boxes.
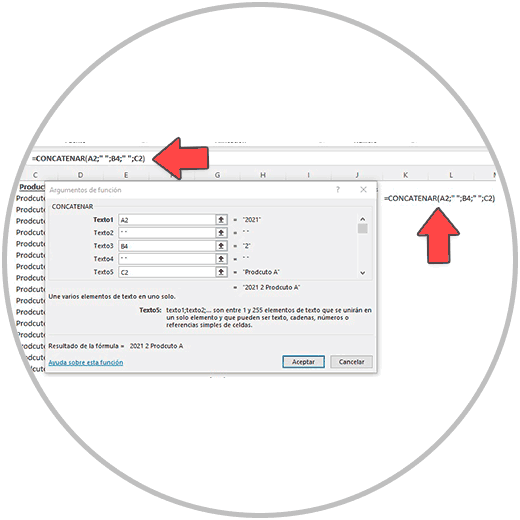
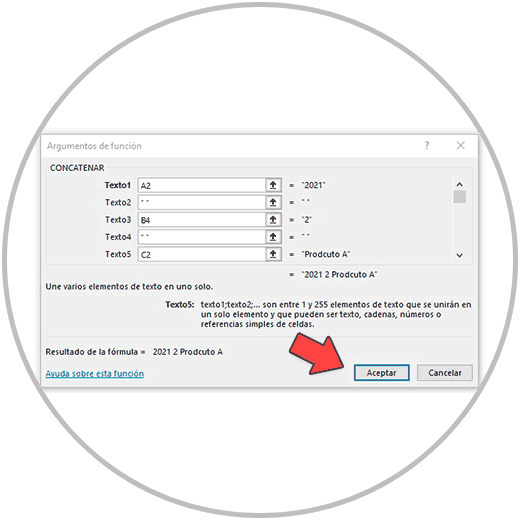
When we have entered all the necessary information in the boxes, we will then click “OK” in the wizard, bottom right.
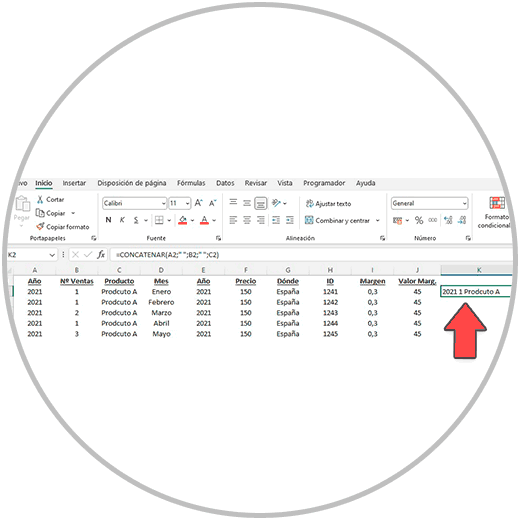
And then we will see the result in the cell, in this case the result after using the “CONCATENATE” function to build a formula that unifies the content of several cells.
Remember that, in the example, we have explained how to use the wizard to be able to add the arguments of the "CONCATENATE" function; But this wizard, and this procedure, is perfectly valid to be able to use it with other functions, to ultimately be able to make any formula that uses a function.
As we always say, the wizard works very well, and we can use it to build our formulas, but also to be able to learn how to build each formula that uses a specific function. As we have seen in the example, as we create the formula with the wizard, it is as if we ourselves were building the formula in the cell or in the Excel formula bar. At all times, we can see how the formula is being completed, and we can see the result at the end.
Remember that:
It is very important to know when to open the wizard, which we must remember always opens right after writing the name of the function in the formula .

Once we have the function well written, with the parenthesis open, we can open the wizard from “FX” (To the left of the Excel formula bar).

And remember, as we always say, it is important to put into practice what we have learned today. Try building different functions that you already know, and see how they work with the wizard.
This way we can reinforce our knowledge in Excel, as well as put into practice some of the resources that Excel hides to be able to work faster and more safely. Also try to perform some functions that you do not master, or that you have not dared to perform yet. Putting into practice and using the wizard can be the help we need to be able to take the next level in Excel, in the creation of formulas and use of functions.