To stay up to date, remember to subscribe to our YouTube channel!
SUBSCRIBE ON YOUTUBE
Windows 11 is a versatile system that is integrated with a wide group of functions and features that seeks to ensure that each user enjoys a unique user experience, but like any operating system, it is never exempt from presenting errors or failures that cause it to present instability, crashes, restarts and more activities that affect the normal use of our equipment..
This applies to both PCs and laptops, which is why in this case the function to reset the equipment is integrated. This offers us various options to complete the process and at TechnoWikis we will explain how to use this function.
How to format Windows 11 laptop
Step 1
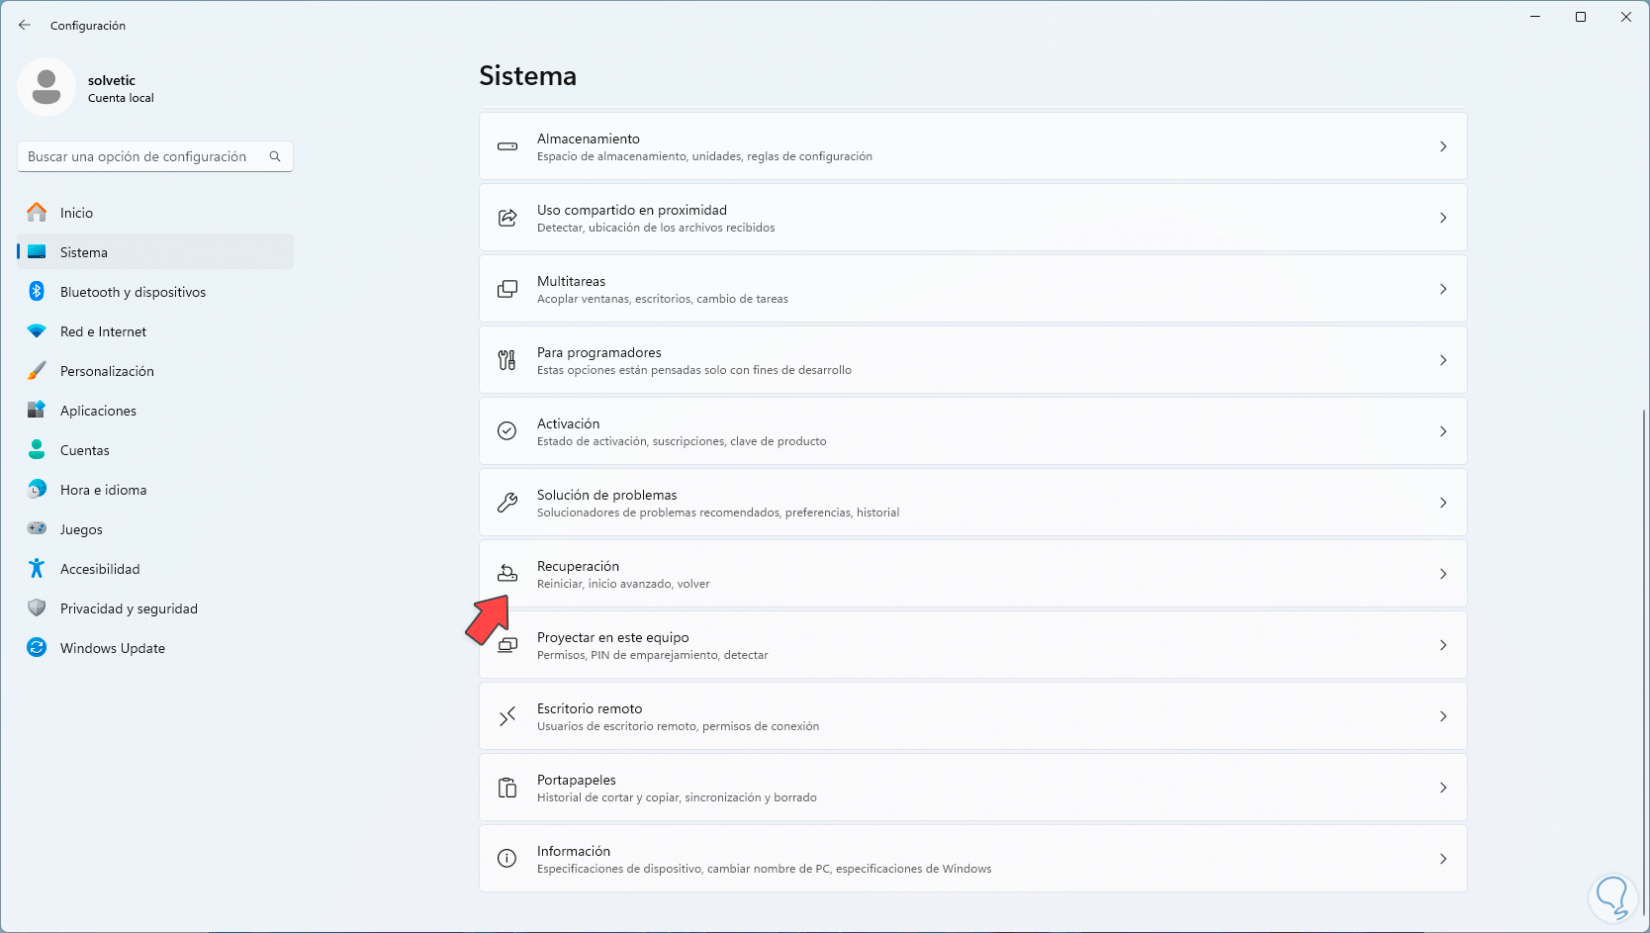
To start this process, we click on the Start menu and then we go to Settings, there in “System”, we click on “Recovery”:
Step 2
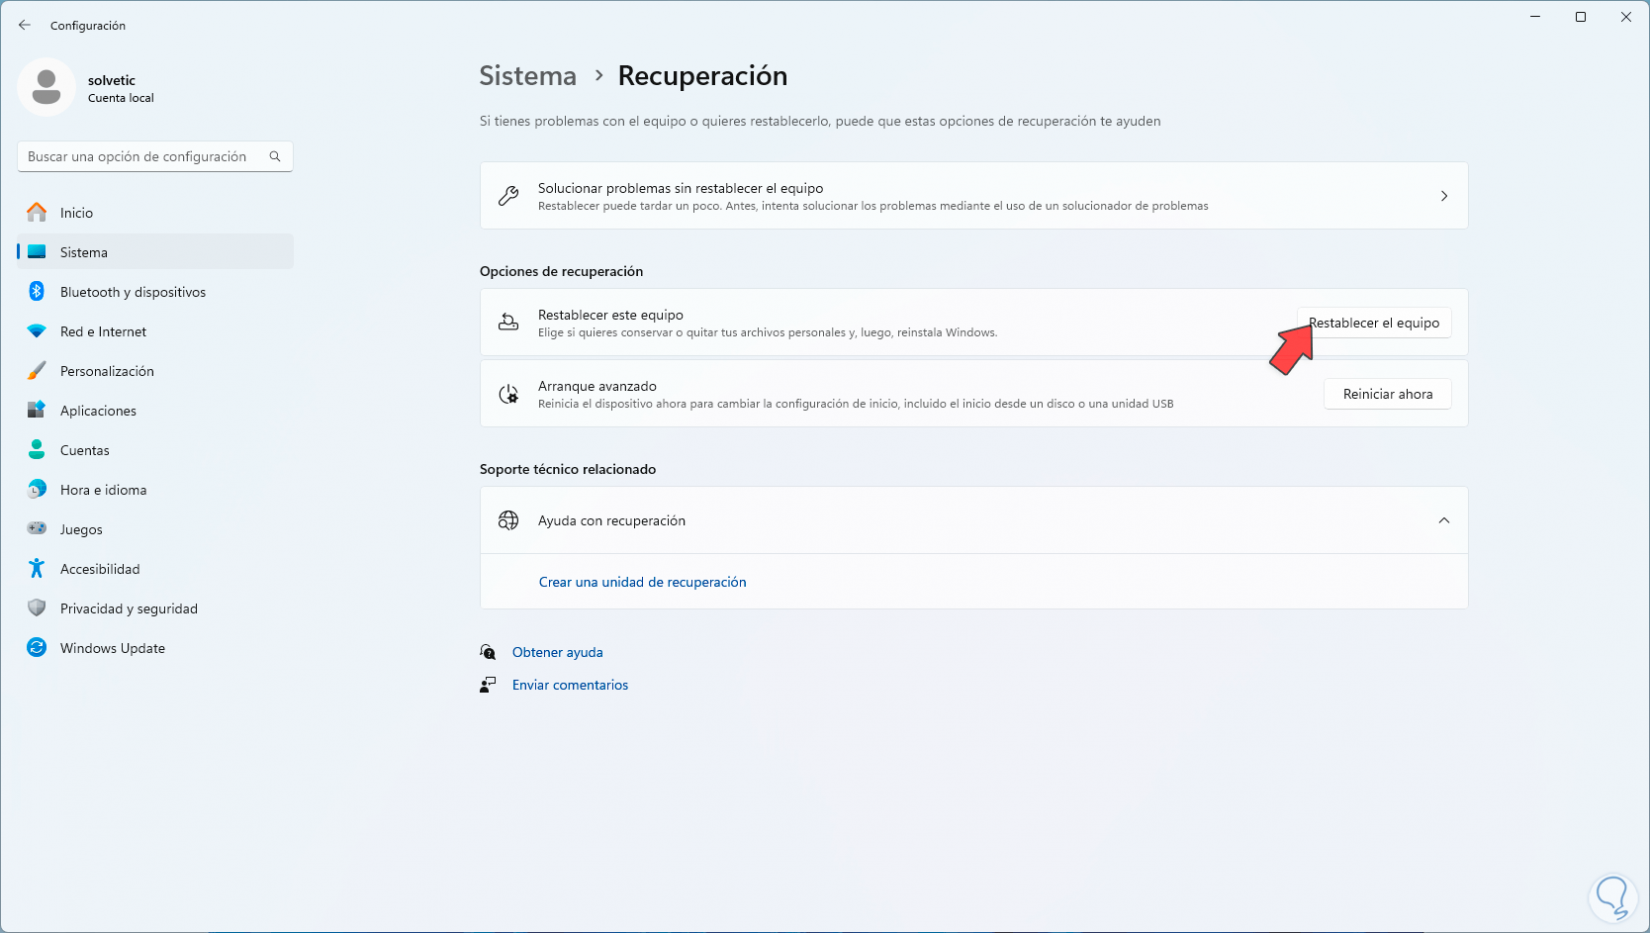
When accessing “Recovery” we will see the following:
Step 3
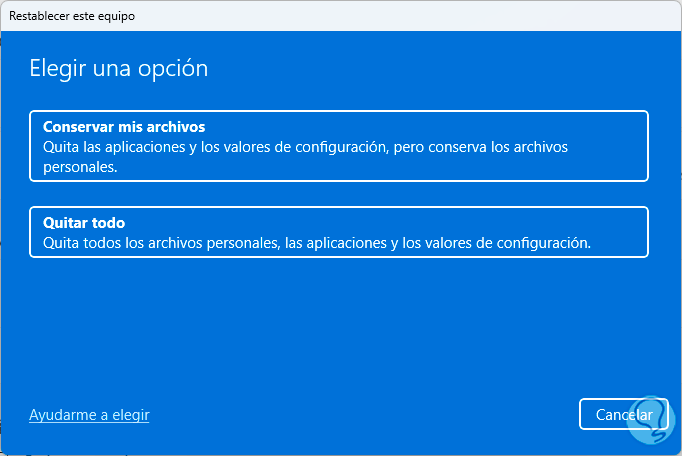
Here we will click on the “Reset your computer” option, the following pop-up window will open:
Step 4
We have the option to remove our files and applications or not, we must take the following into account:
If we select the “Keep my files” option, the following will appear:
- Windows 11 will be reinstalled and our personal files will be preserved
- Installed applications will be removed
- Changes made to the configuration will be deleted
- The applications installed by the PC manufacturer will be restored
If we click on “Remove all” the following will happen:
- Windows 11 will be reinstalled and personal files will be removed.
- Installed applications will be removed.
- Any changes made to the configuration will be deleted.
- All applications installed by the computer manufacturer will be removed.
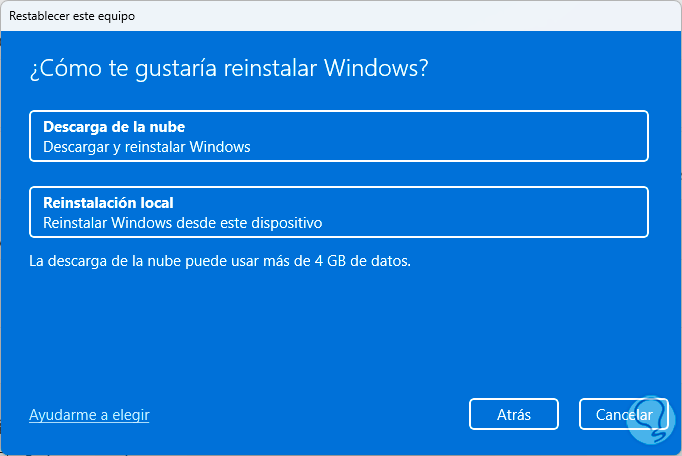
In this example we click on “Remove all”, the following will open:
Step 5
Now it is time to select the type of Windows reinstallation, if we select the “Cloud download” option, more than 4 GB of data will be needed since the image will be downloaded from Microsoft servers, instead, if we select “Local reinstallation”, the local image of the system will be used, it is lighter.
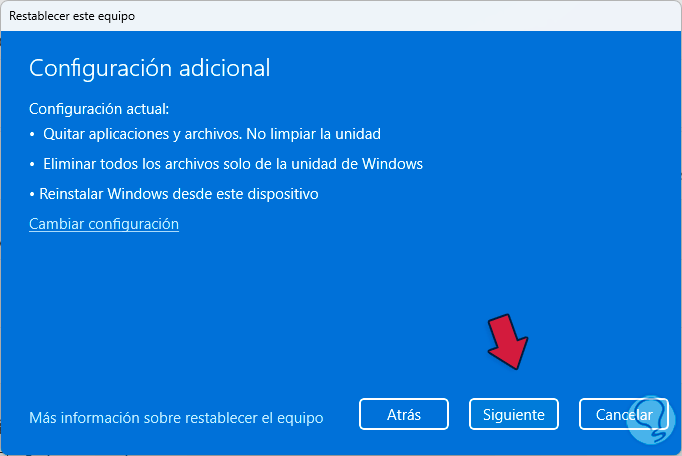
We click on the desired option to see a summary of the task to be performed:
Step 6
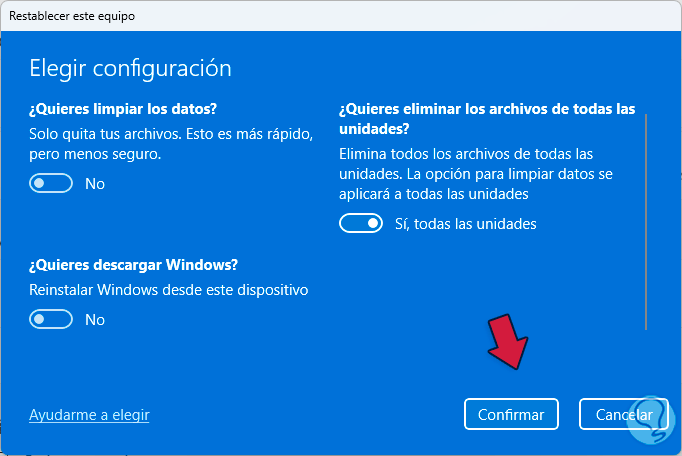
For extra options, click on “Change settings” and the following will open:
Step 7
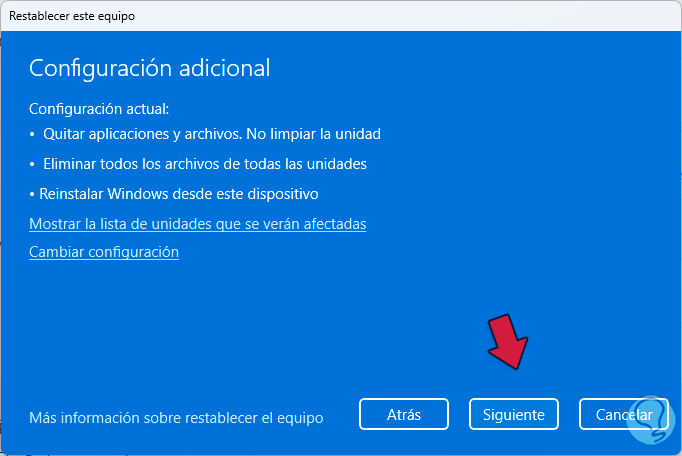
There it will be possible to activate the switches of the options that we consider necessary or that fit our needs. We click on “Confirm” to see the following:
Step 8
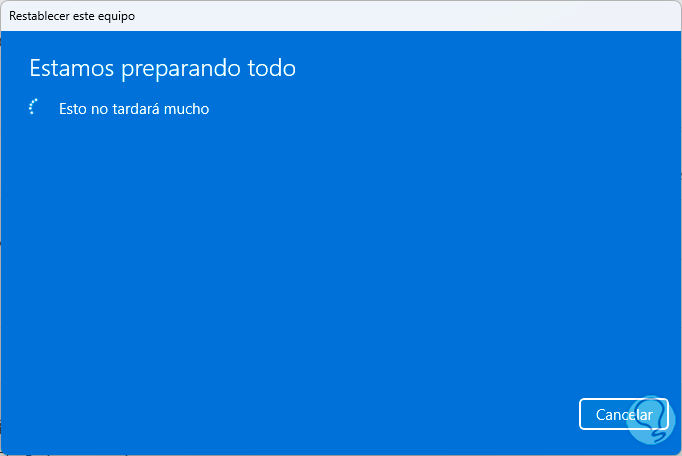
If we are ready, we click on “Next” and the loading phase will begin:
Step 9
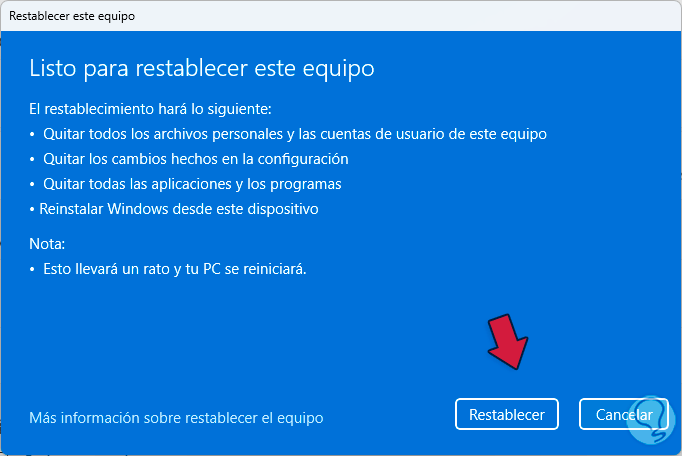
At the end we will see the following:
Step 10
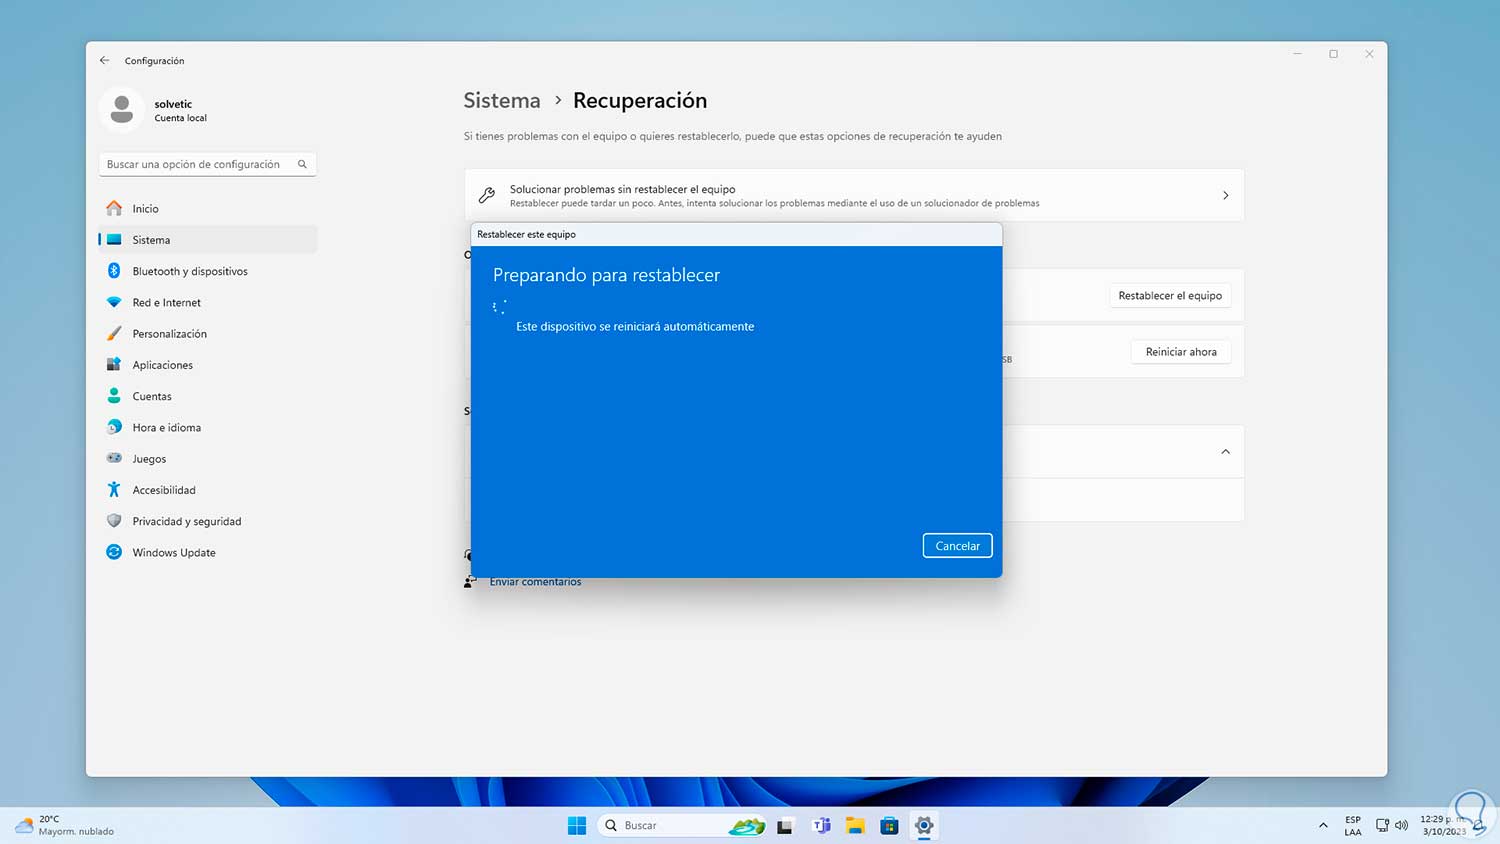
We click on “Reset” to start this process:
Step 11
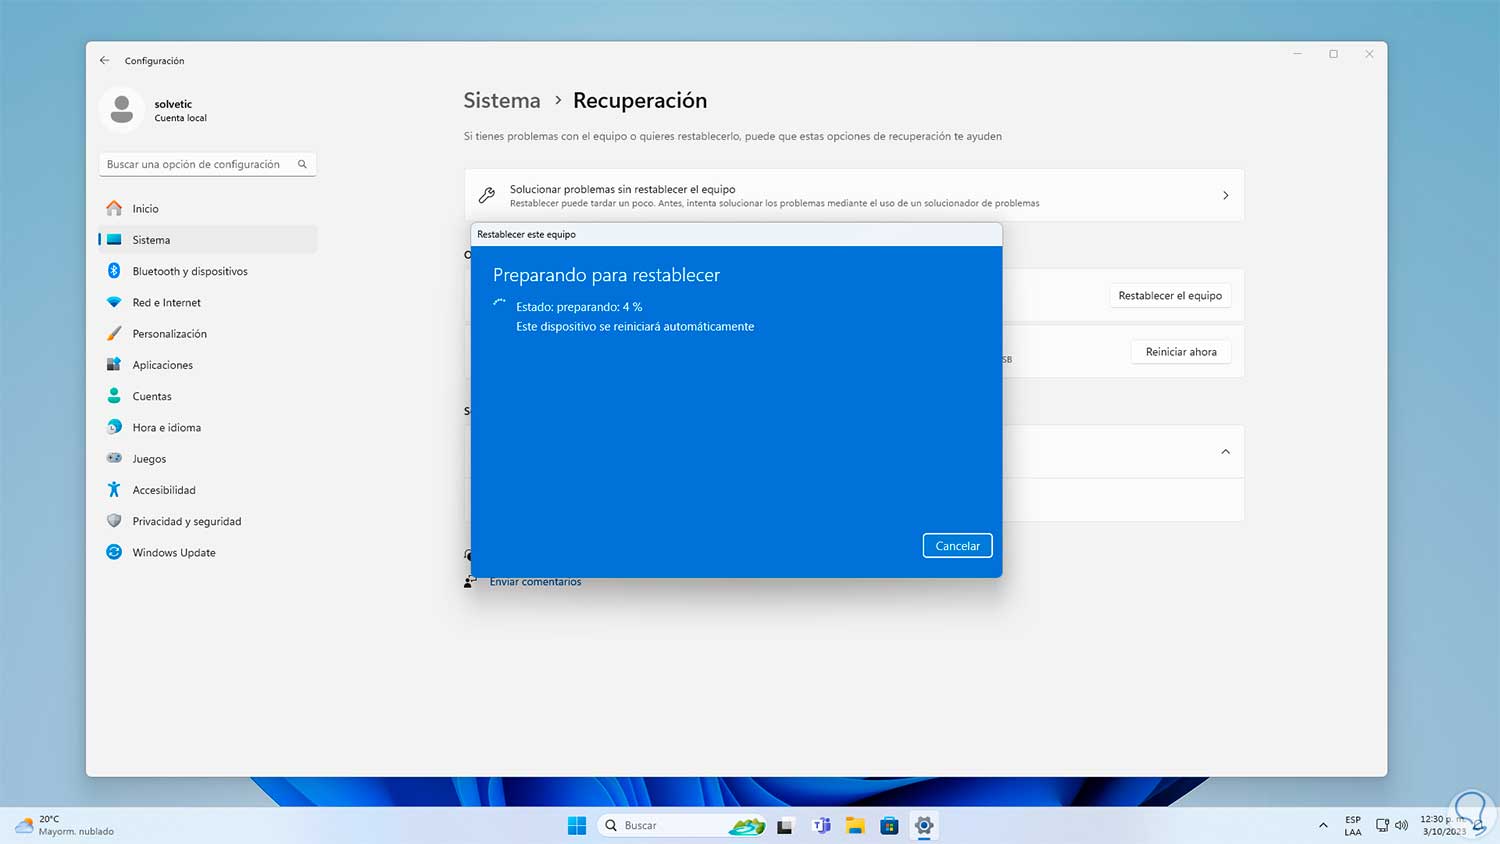
We then wait for each phase to complete:
Let's remember the importance of using this function since it is delicate and we can only use it when the system presents errors that cannot be solved in other ways and thanks to it we will be able to have the initial use and operation of Windows 11..