To stay up to date, remember to subscribe to our YouTube channel!
SUBSCRIBE ON YOUTUBE
A frequent task that we have carried out for many years is the format of our storage devices such as USB, external hard drives, local drives, etc. We do this in situations such as:
Formatting Reasons
- When used on a new computer
- Due to the presence of viruses
- For security and support tasks
TechnoWikis will teach you in this tutorial some ways to apply a format to external hard drives in Windows 11 and you can choose the one that best suits your need..
1 Format external hard drive Windows 11 from Disk Management
It is one of the most used methods to manage everything related to our hard drives.
Step 1
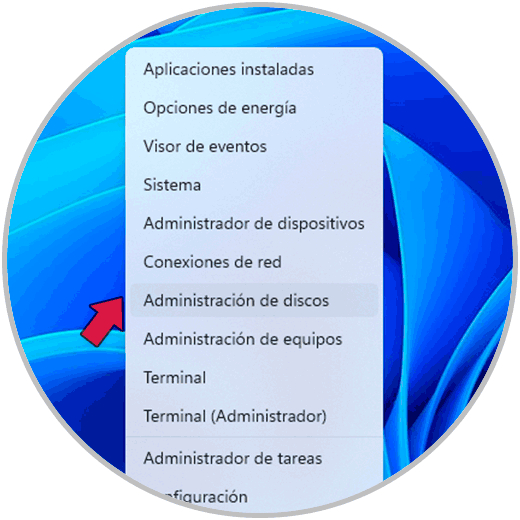
To use this method we right click on the Start menu and there we click on the "Disk Management" option:
Step 2
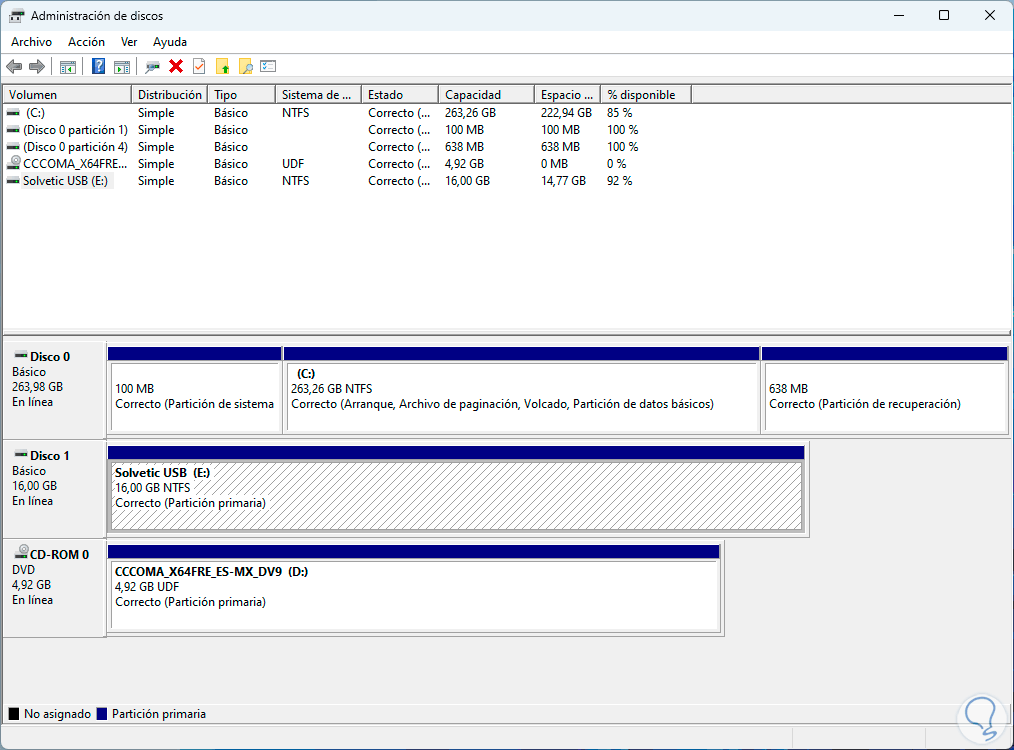
We will have access to the console with all the details of the storage devices:
Step 3
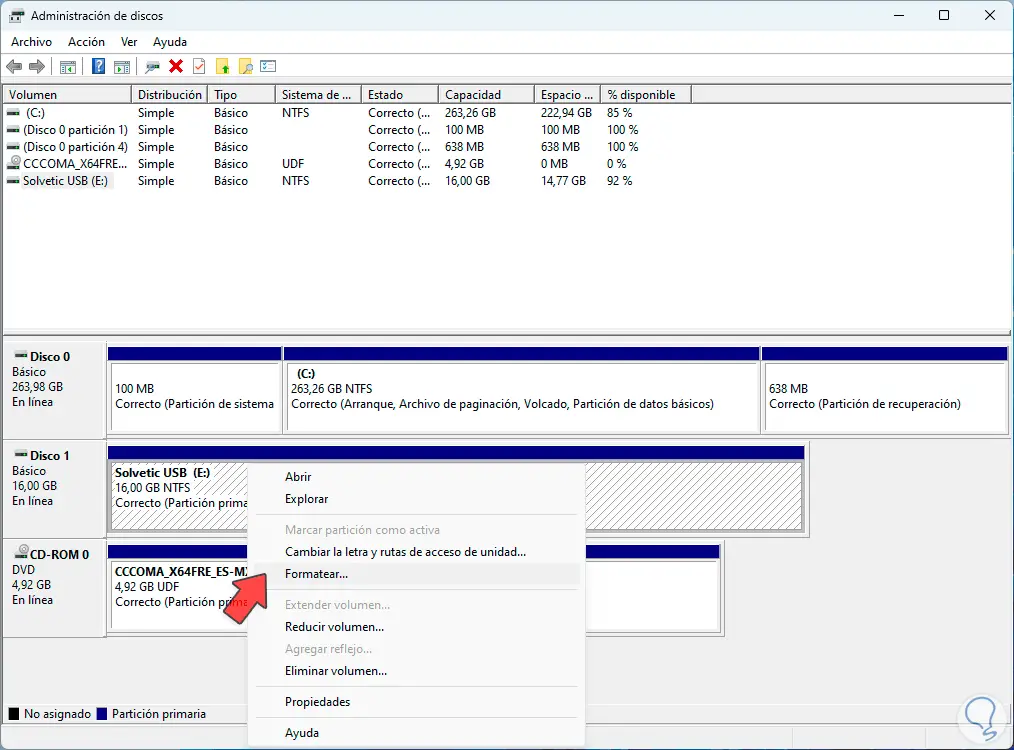
Now we right click on the external hard drive and in the available options we click on "Format":
Step 4
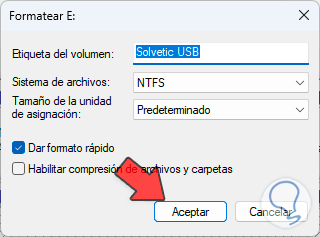
By clicking there we will see the following:
step 5
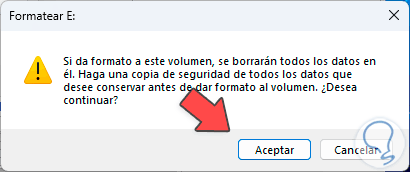
It is possible to adjust the necessary values and then we click "OK", now we must confirm this process to apply the format to the hard disk:
step 6
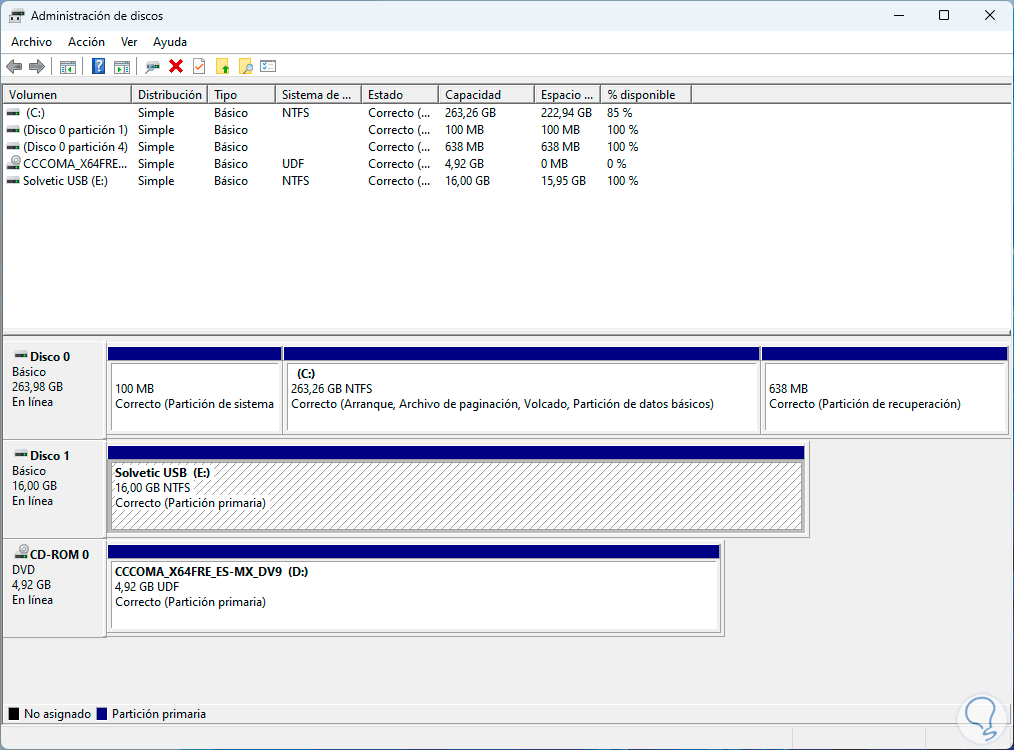
Once the format is applied the hard drive will be ready to be used:
2 Format Windows 11 external hard drive from File Explorer
This is another of the methods that Windows 11 gives us and that many users use to format the hard drive.
Step 1
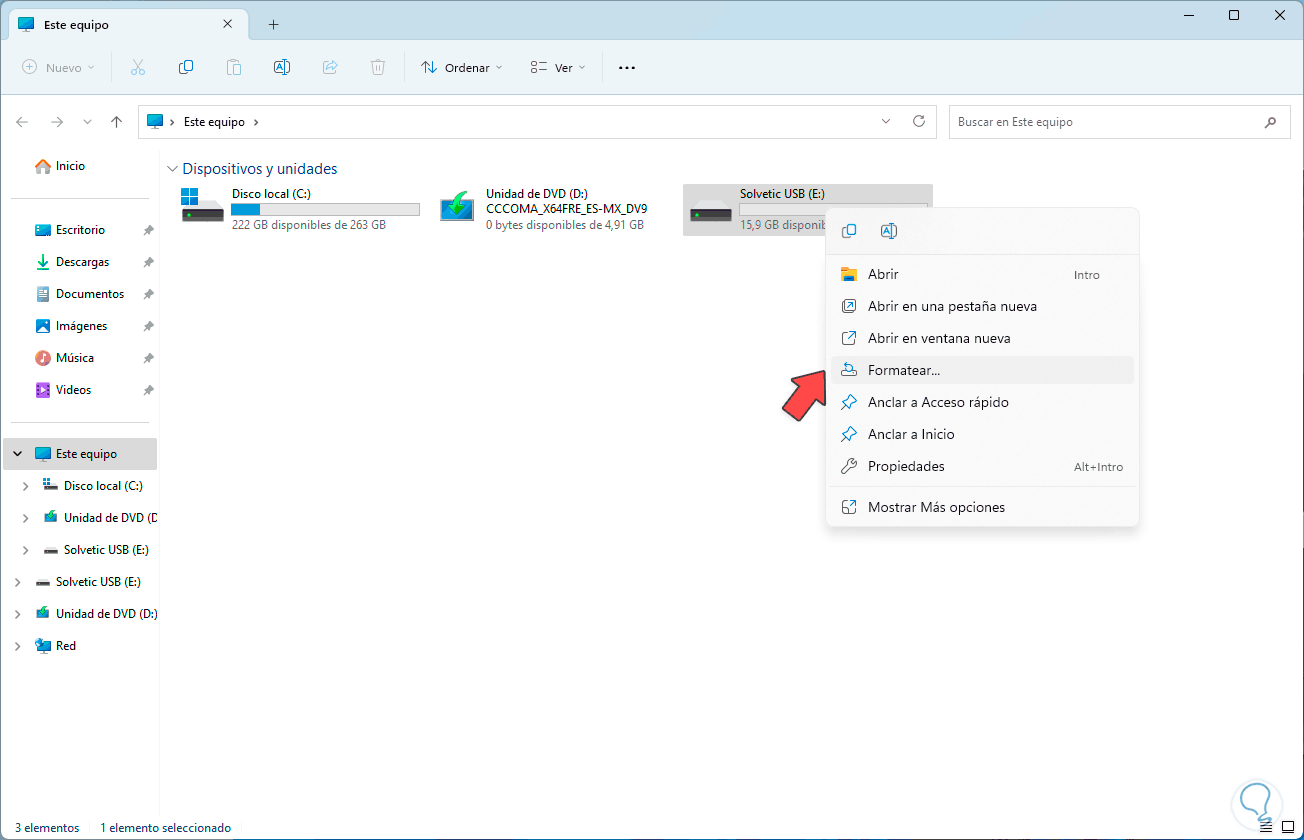
In this case we open the File Explorer and there we right click on the hard drive and then select the "Format" option:
Step 2
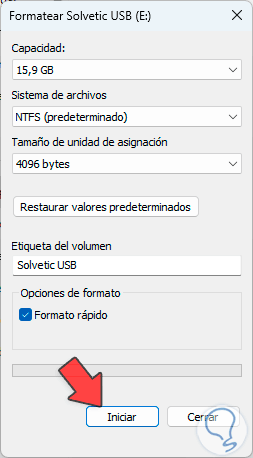
The following will open:
Step 3
We can make the necessary adjustments in terms of name and file system and then click on "Start", it will be necessary to confirm the process:

Step 4
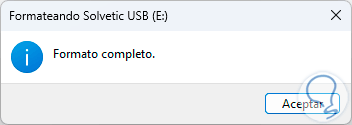
We click OK and wait for the format to be applied:
3 Format Windows 11 external hard drive from Terminal
Finally we have the terminal to be able to apply the format to the hard drive and we will do it using the Diskpart utility.
Step 1
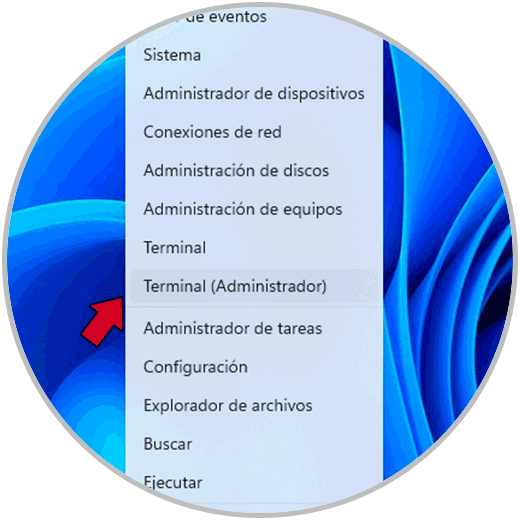
First of all we are going to open the terminal as administrator from the Start menu:
Step 2
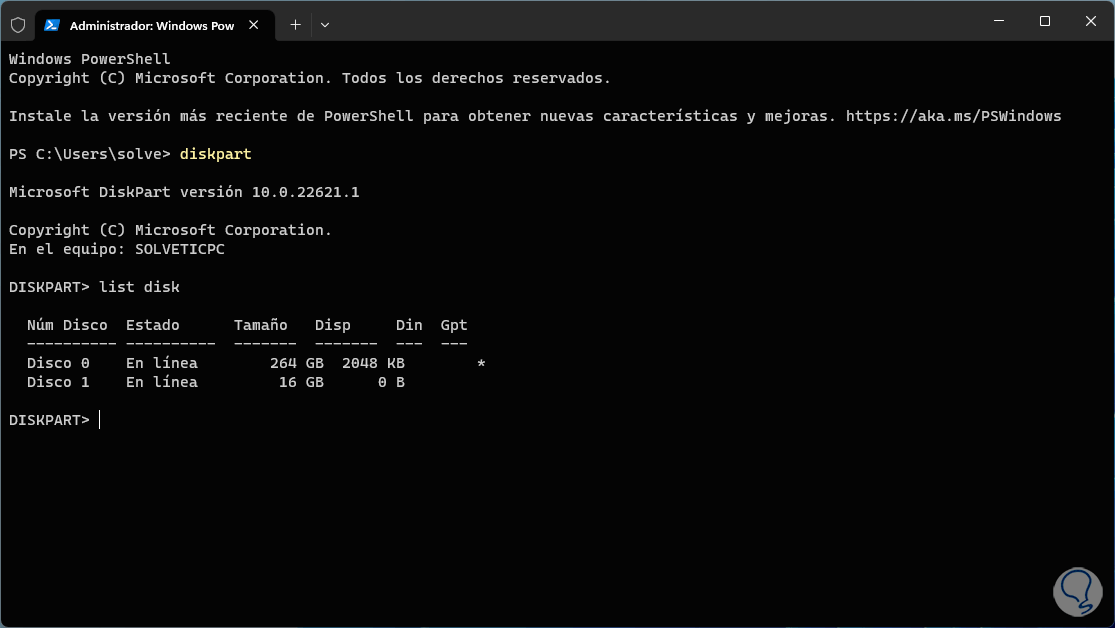
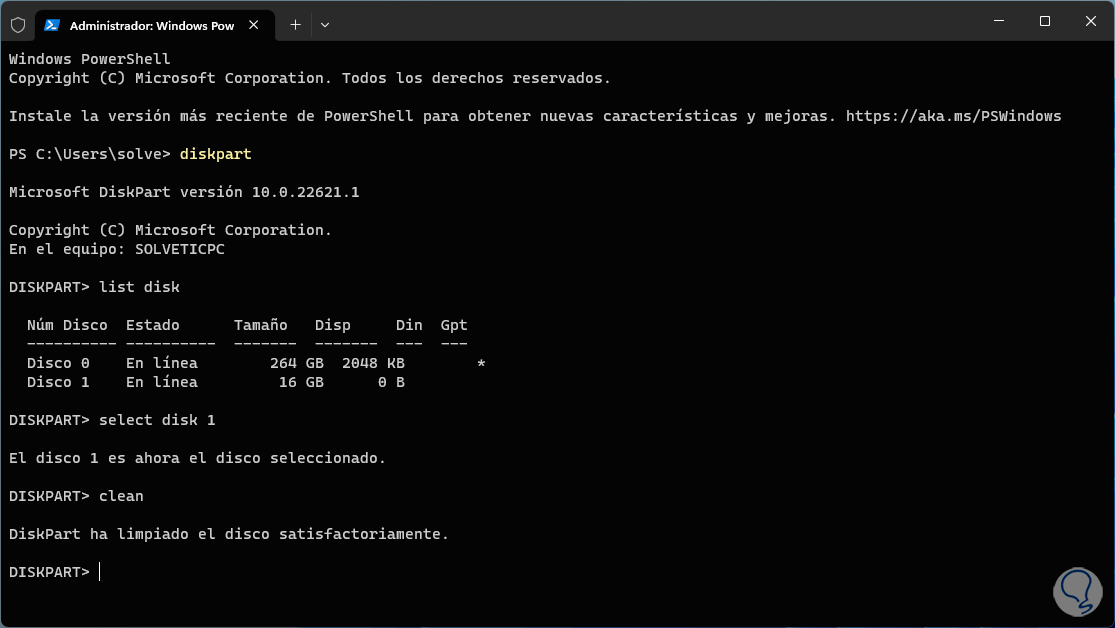
In the console, run the “diskpart” command to access the utility and then we list the disks with the “list disk” command:
diskpart list disk
Step 3
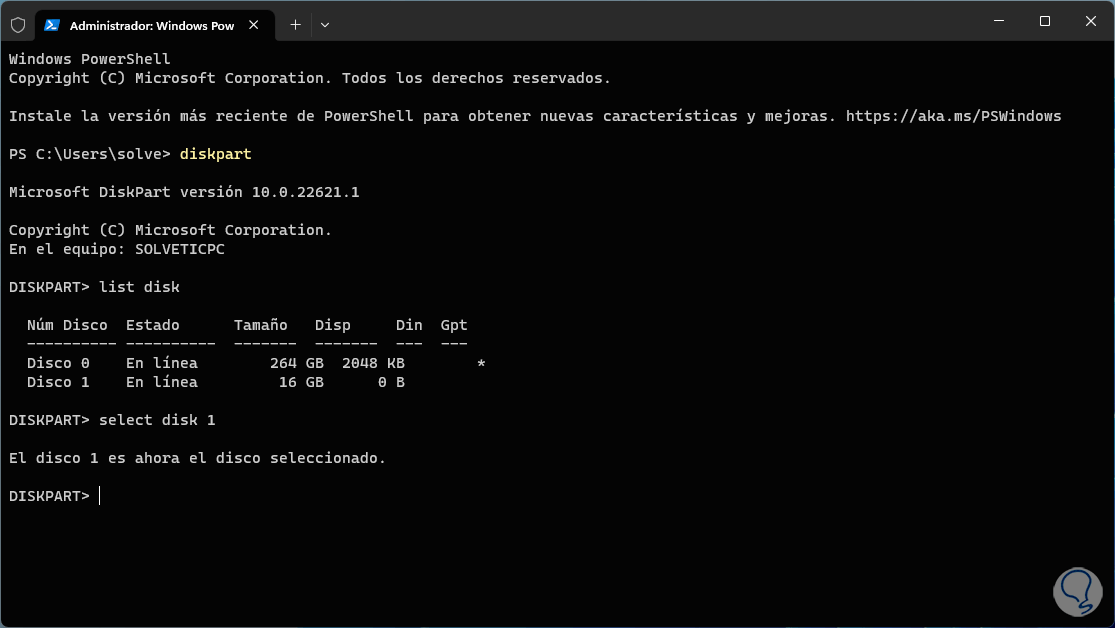
We select the disk to format using the “select disk #” command:
select disk#”
Step 4
Then we clean the disk using the “clean” command:
clean
step 5
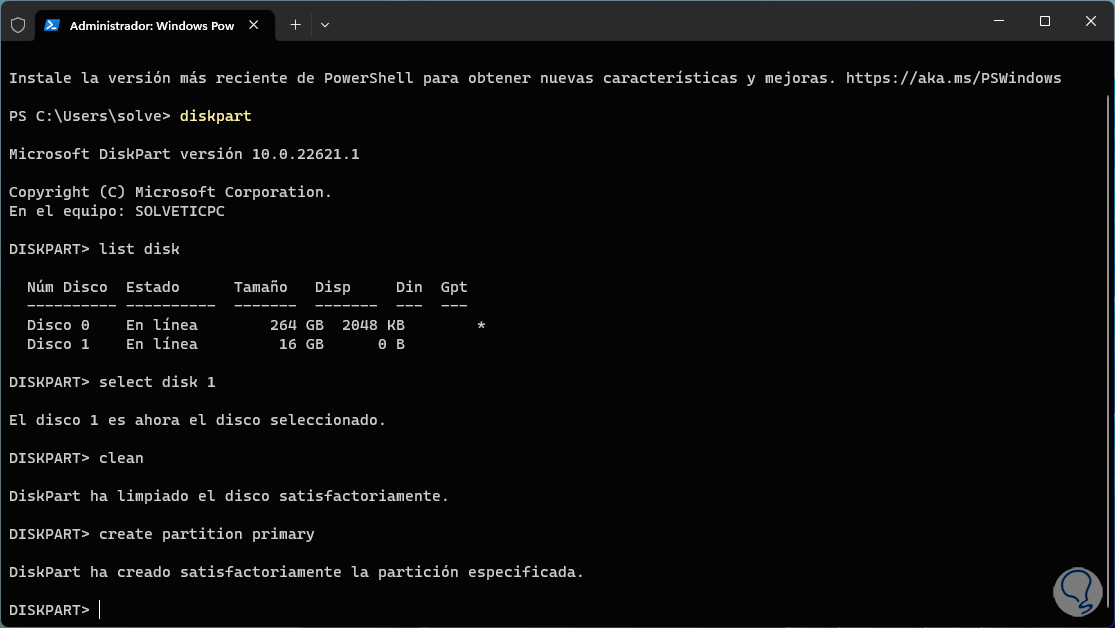
After this we are going to create the partition on the disk with the “create partition primary” command:
create partition primary
step 6
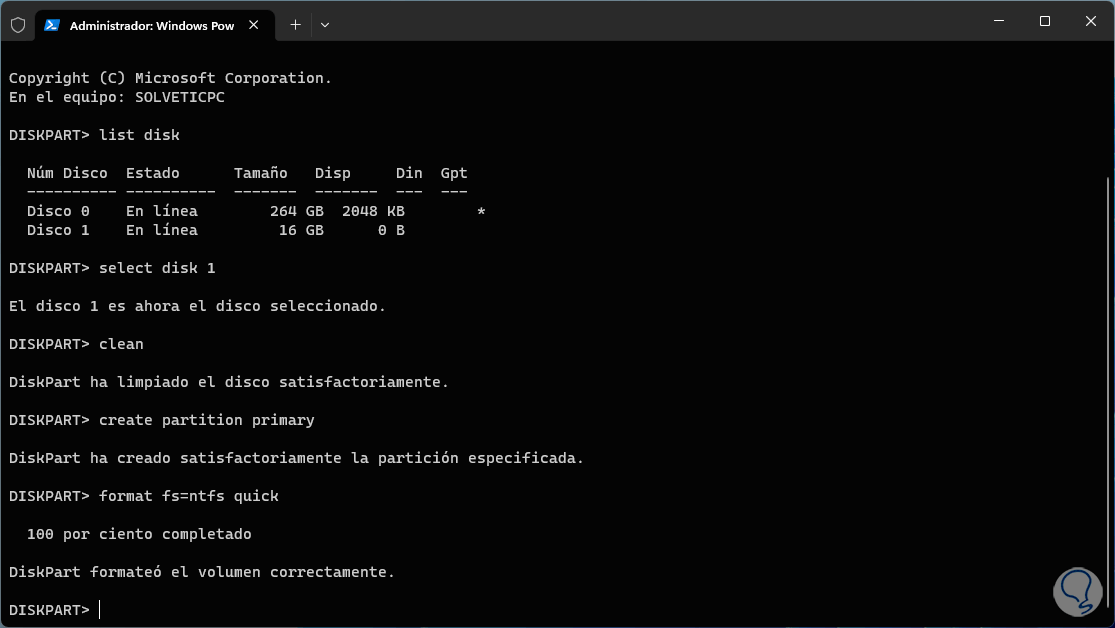
Now we will apply the format with the command “format fs=(File system) quick” and indicating the type of file system to use, the file system options are:
- FAT32 (File Allocation Table 32)
- exFAT (Extended File Allocation Table)
- NTFS (New Technology File System)
Note
the “quick” parameter applies the quick format to the operation.
quick
step 7
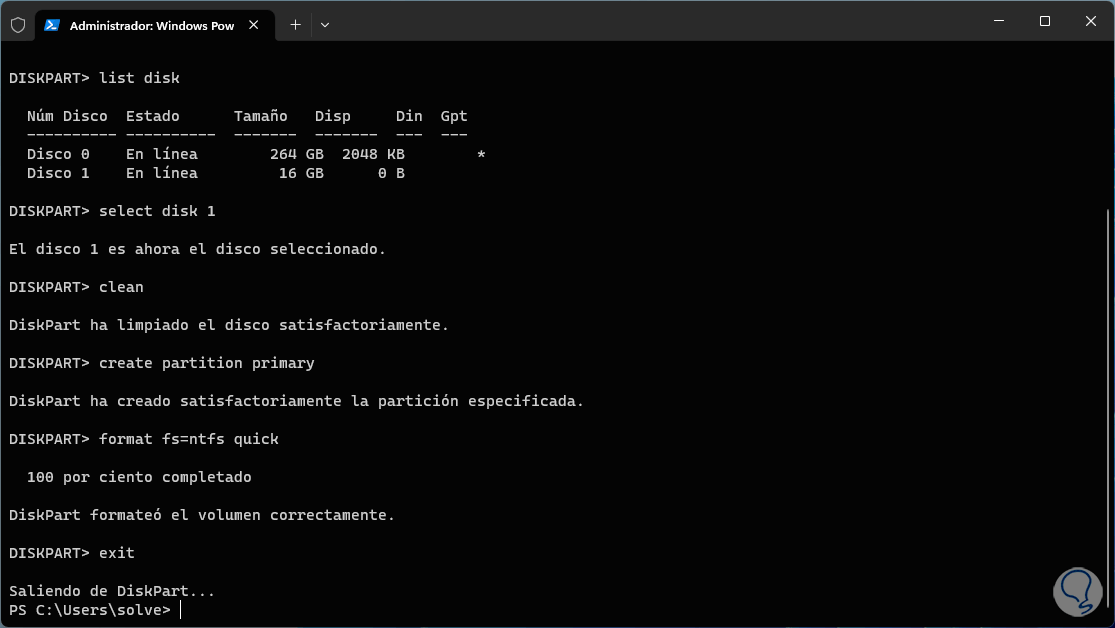
We exit the Diskpart utility with "exit" and we can close the terminal:
step 8
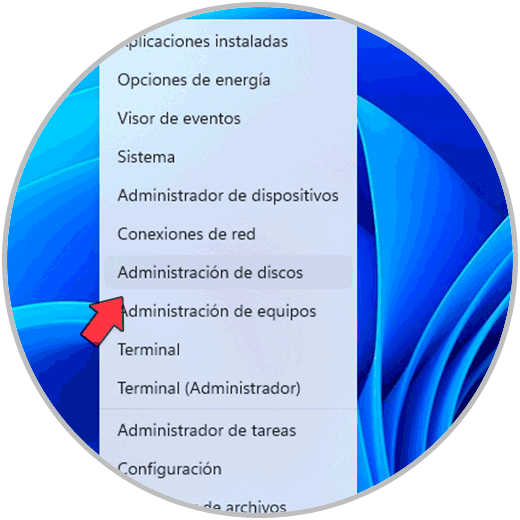
Although the disk has been formatted, it is still not visible in the system, for this we are going to right-click on the Start menu and then click on the "Disk Management" option:
step 9
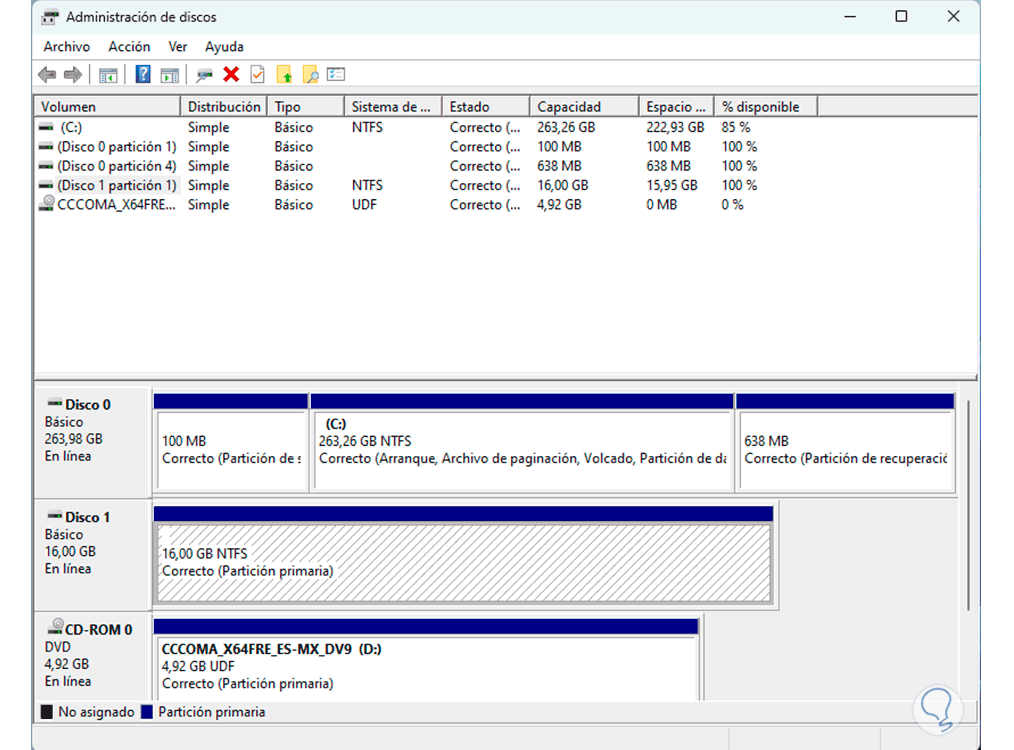
We will see the disk available there:
step 10
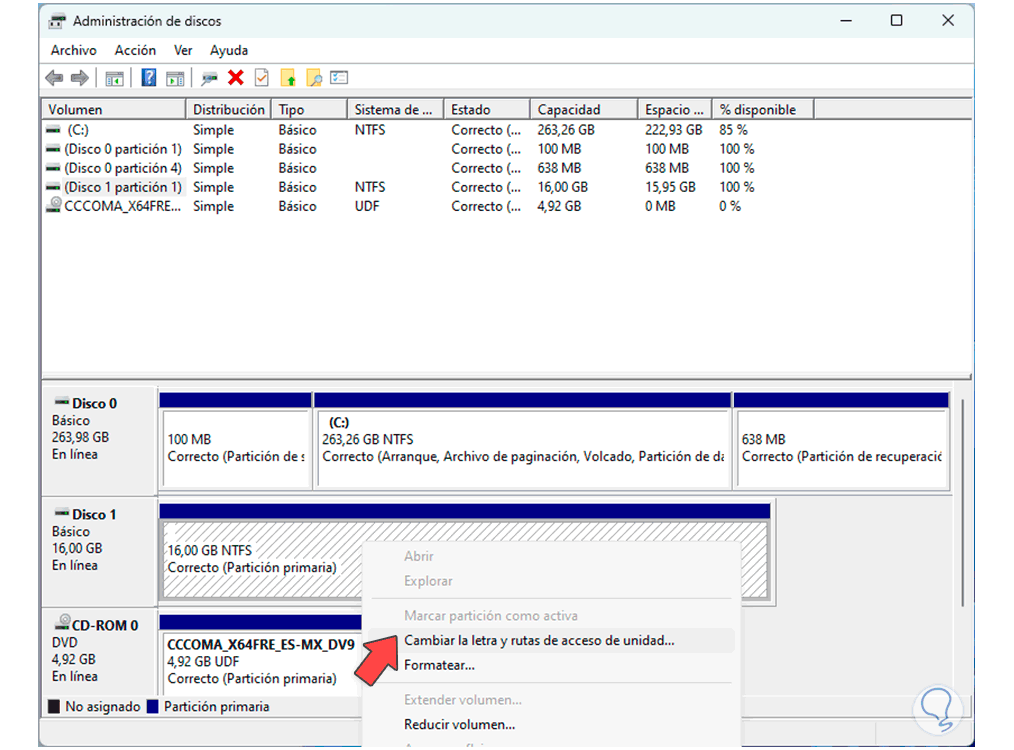
Now we right click on the external hard drive and in the available options we click on "Change drive letter and paths":
step 11
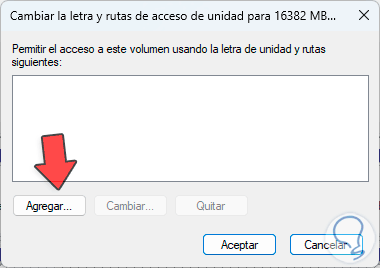
We will see the following:
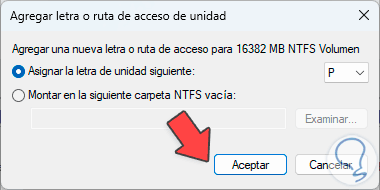
step 12
There we click on "Add" and select the desired letter:
step 13
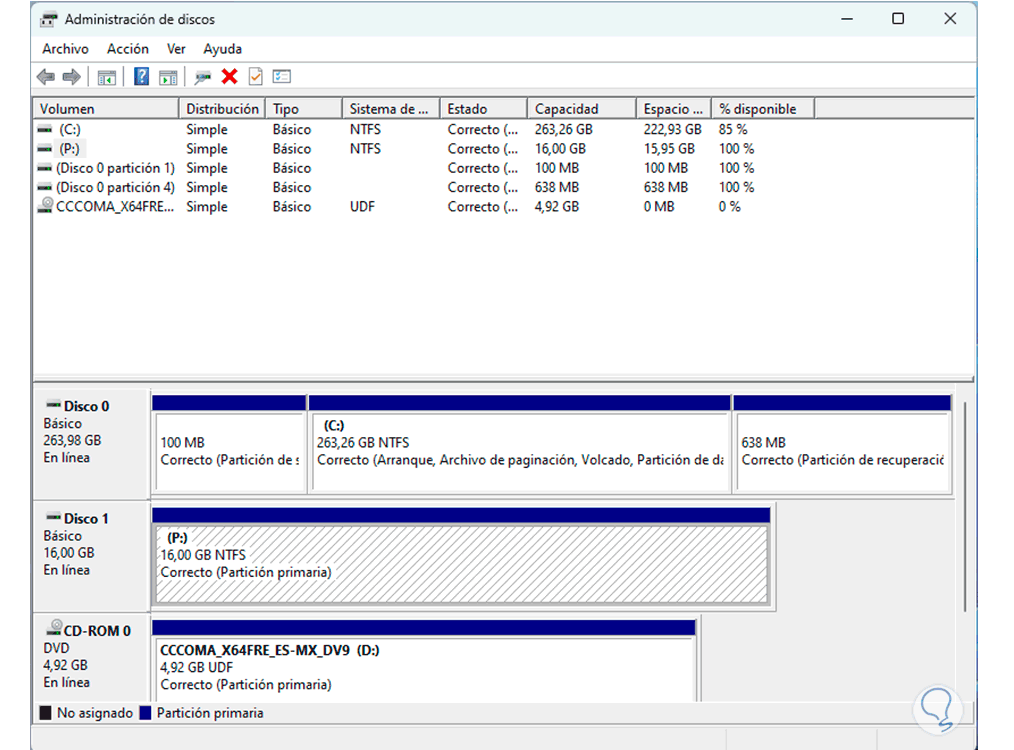
We apply the changes to activate the disk:
step 14
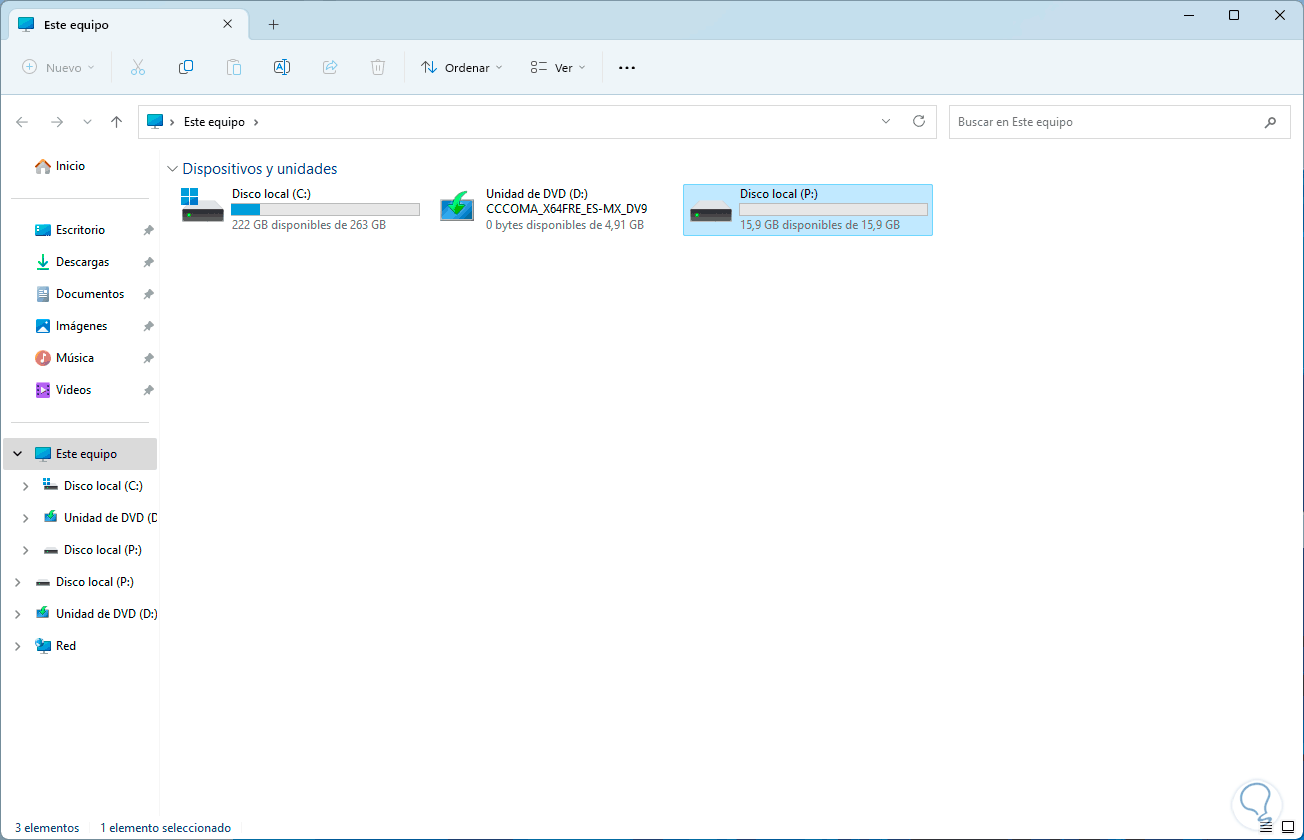
Now we can check that the disk is available in File Explorer:
These methods are functional to format our hard drives in Windows 11.