To stay up to date, remember to subscribe to our YouTube channel!
SUBSCRIBE ON YOUTUBE
The presence of viruses and threats is more latent in the world every day, we know from statistics that every minute new and more modern viruses appear that seek to take over user data, information and computer configuration and in extreme cases they can be "kidnapping" the computer to later ask for money for its accessibility, as users of Windows environments we must be very clear about the care we must take to avoid being on the list of victims, some tips are:
Characteristics
- Keep equipment up to date
- Have security applications, remember that Windows 10/11 integrates the Windows Security application
- Avoid accessing unsafe websites
- Open emails or links from unknown senders and more
Many times we can be working without realizing the presence of viruses on the computer and it is for this reason that at Technological we will teach you how to know if we have viruses on our computer, if so, take the appropriate security measures to avoid future damage. ..
1 How to know if I have a virus on my PC from Task Manager
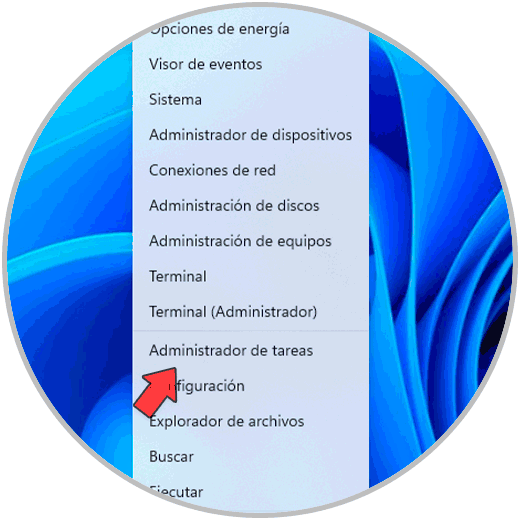
Step 1
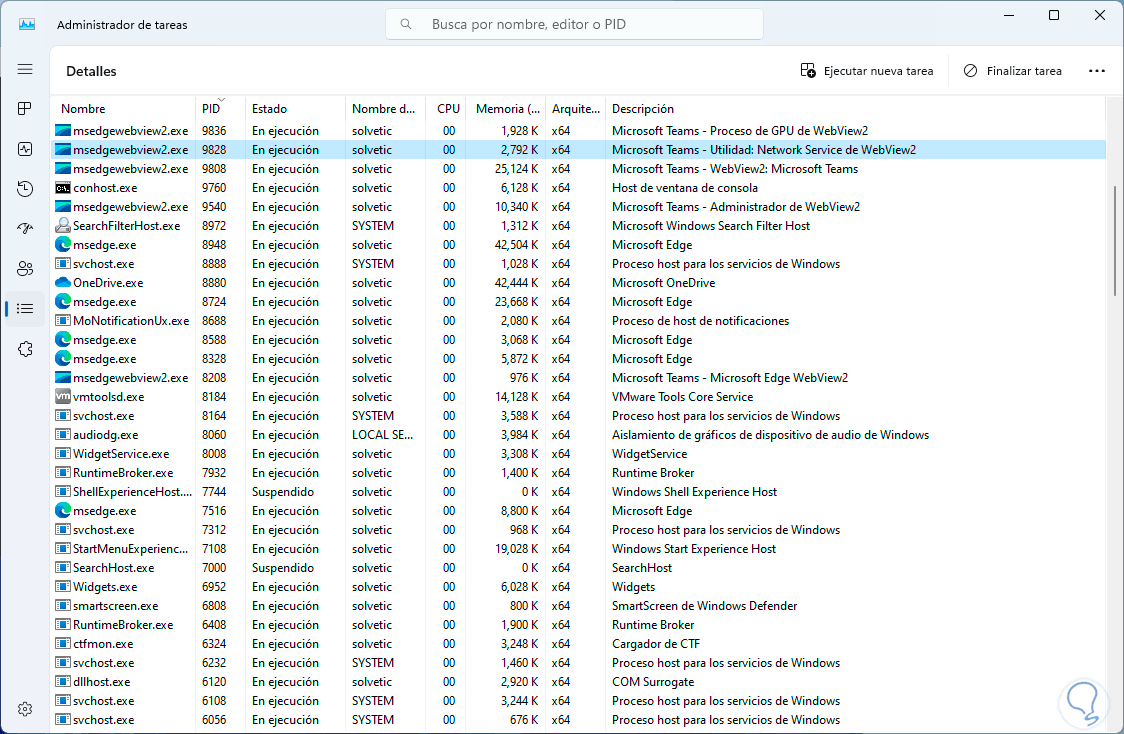
Our first method will be through the Task Manager and is basically to determine any process or service that is not recognized as safe, to use this method, we open the Task Manager from the Start menu:
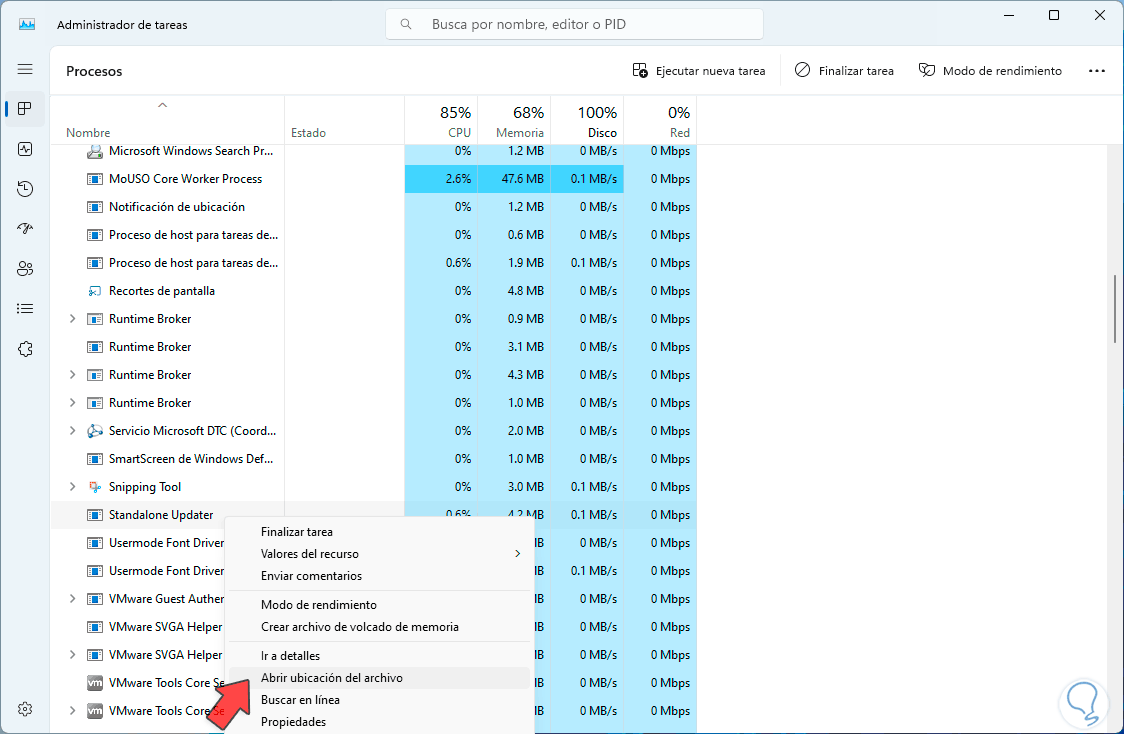
Step 2
When the Administrator opens, we will go to the processes section to look for any that are not detected as trustworthy. If we see one, we right click on it and select the “Open file location” option:
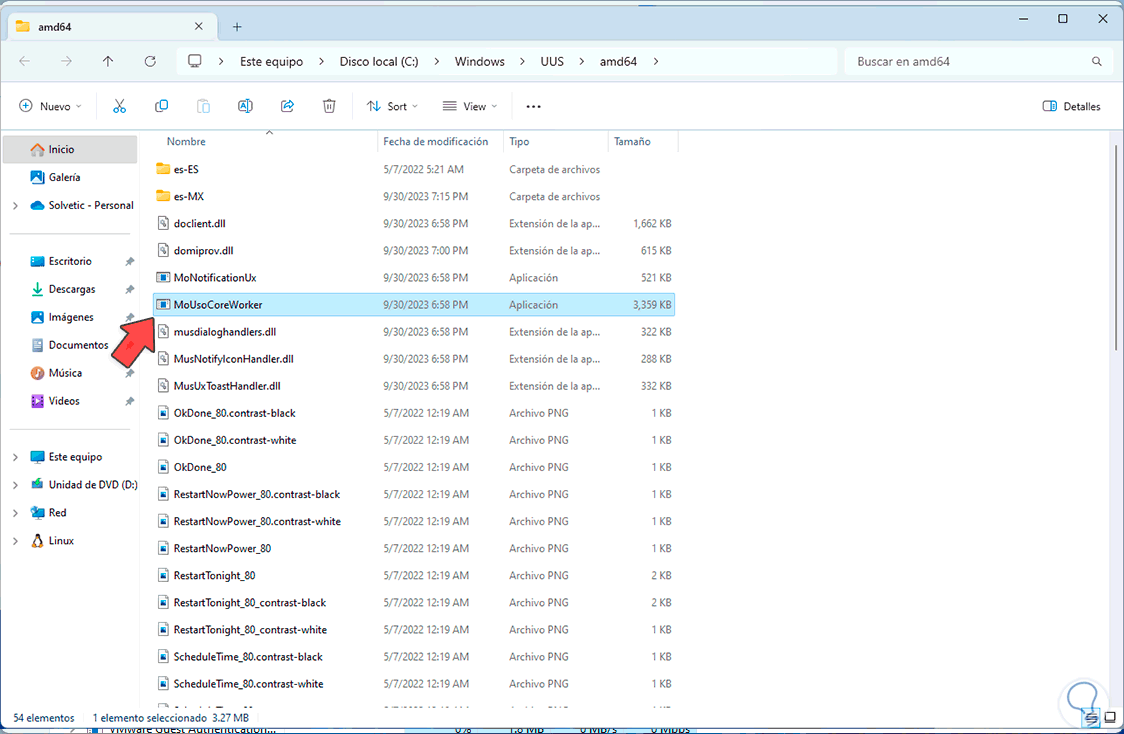
Step 3
This will open File Explorer with the path where this process is located, here we validate if it is a Windows process, usually located in System32, or a process of a known application:
Step 4
If we do not find errors on this side, we will right click on the process again and this time we select the “Properties” option:

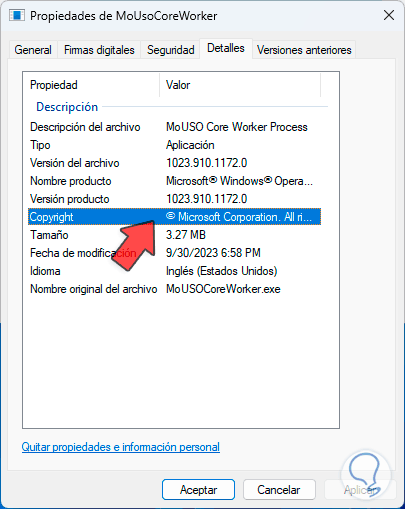
Step 5
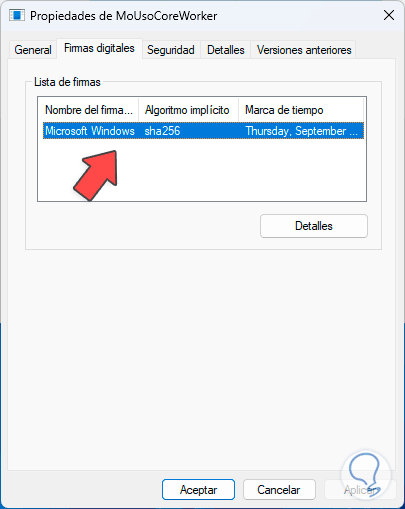
First of all, we will go to the “Details” tab, there in the “Copyright” line we will verify that it is a known owner, usually it is Microsoft but it may be some other recognized company:
Step 6
Then we go to the “Digital Signatures” tab, there we will check both the signer and the algorithm used:
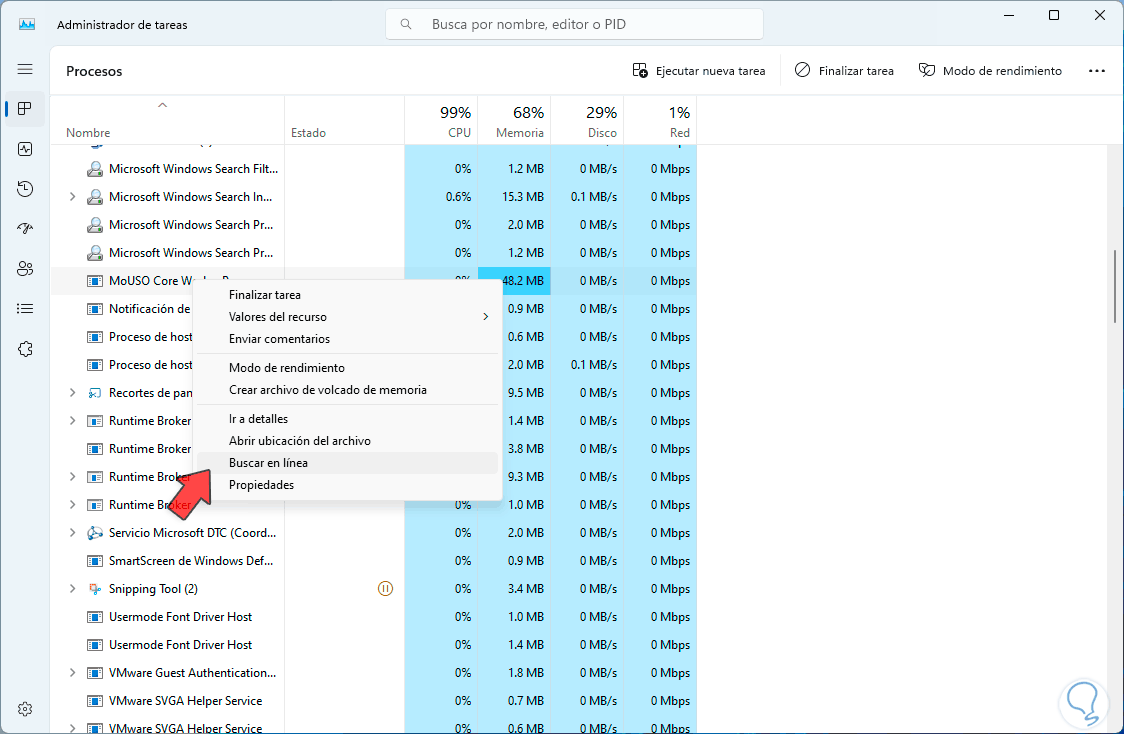
Step 7
We can get out of this window. Finally, for much more complete information, we right click on the process and select “Search online”:
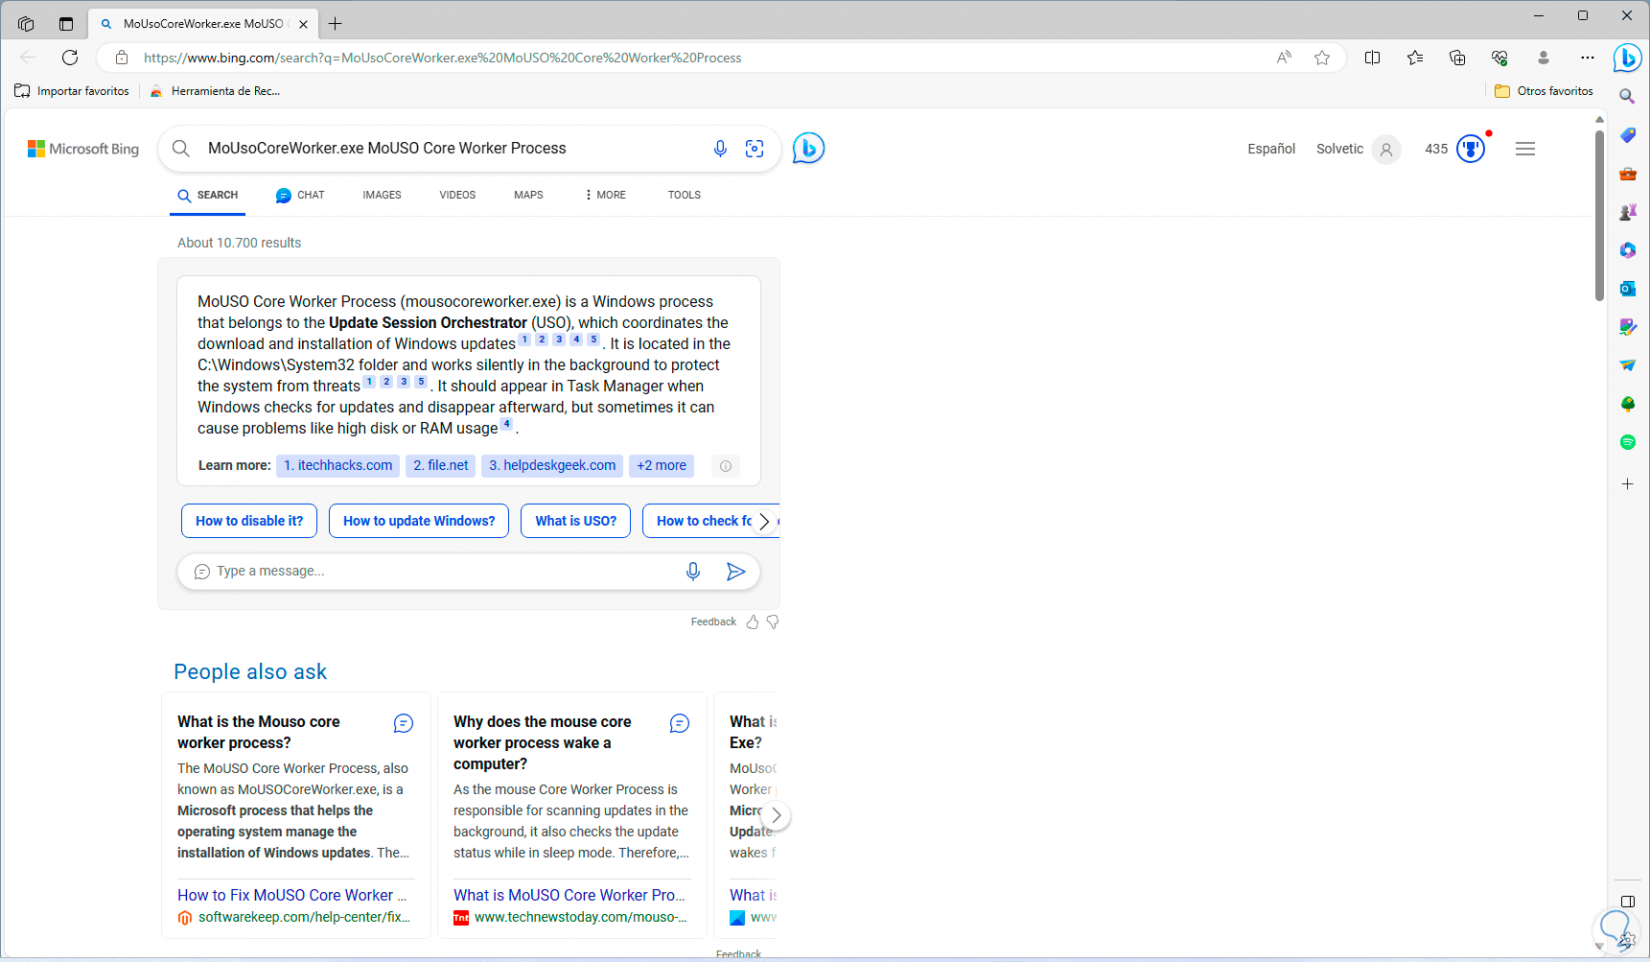
Step 8
This will open the default browser with details about this process, this will help us get an idea of what the process is:
2 How to know if I have a virus on my PC from CMD
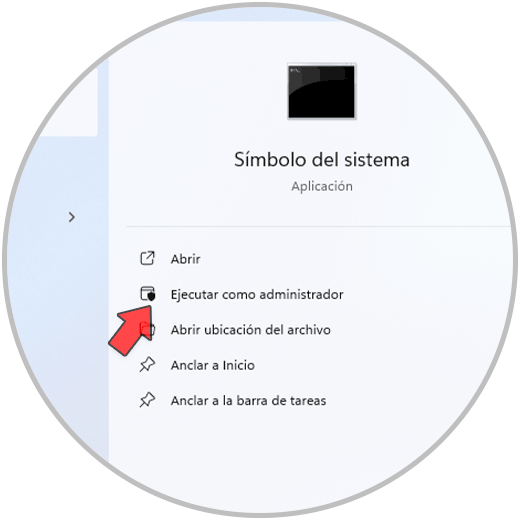
Step 1
Then, we can go to the CMD console to perform certain actions there to detect and delete viruses on our PC, to start, we open the CMD console as administrators:
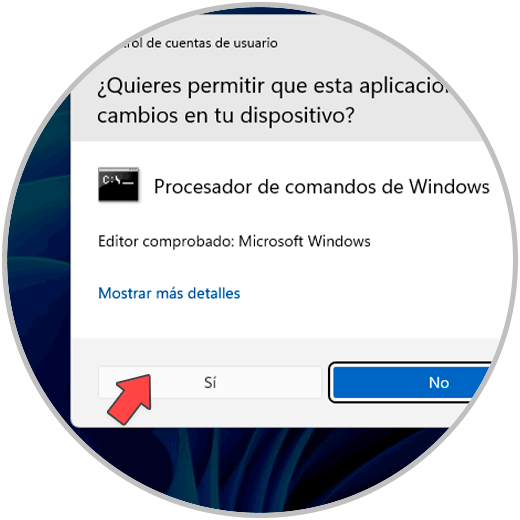
Step 2
In the UAC window we click “Yes” to allow access to the console:
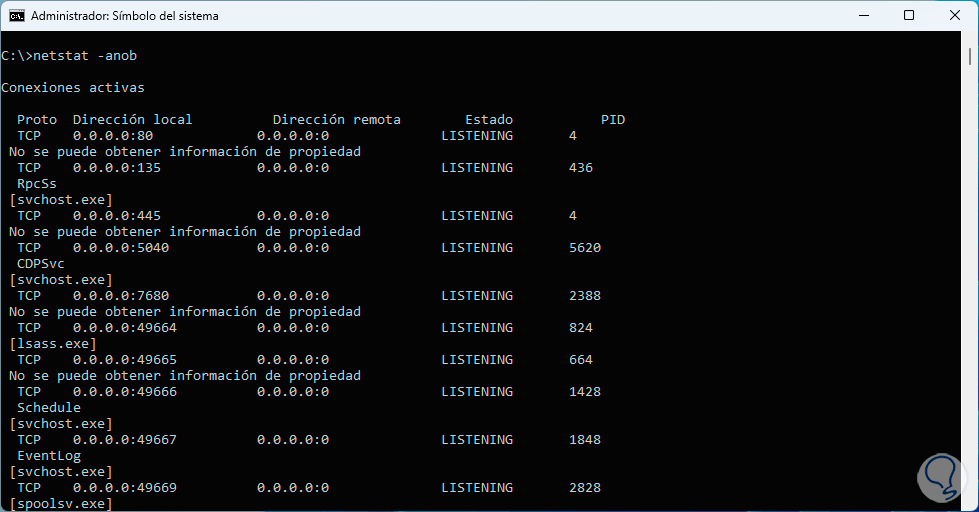
Step 3
Before proceeding, let's talk a little about Netstat so you know what Technological will teach you.
The Netstat command is a command that has been developed to allow us to see the active TCP connections, the ports on which the PC listens, the Ethernet statistics, the routing table(s) of the IP addresses, IPv4 statistics in the IP protocols , ICMP, TCP and UDP as well as IPv6 statistics for the protocols IPv6, ICMPv6, TCP over IPv6 and UDP over IPv6), that is, a complete command to view these connections.
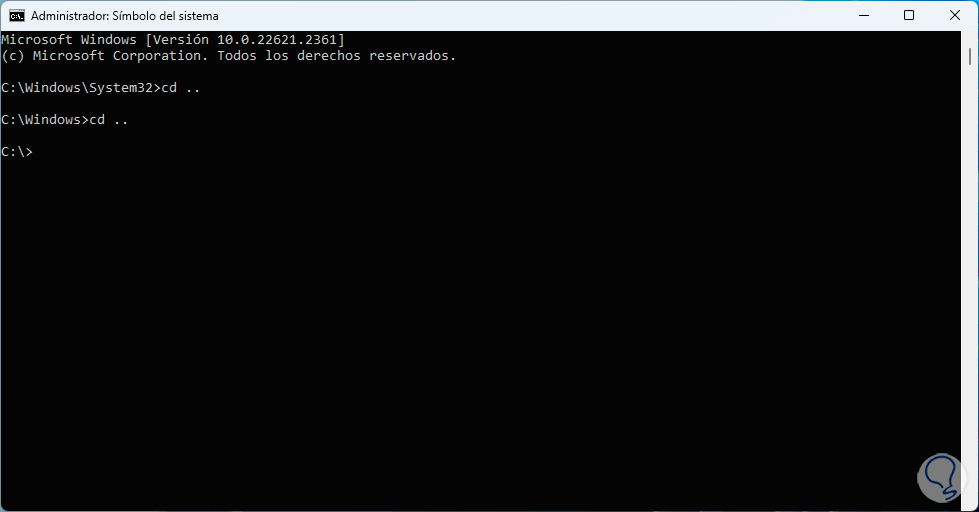
In the console, we are going to use the line “cd..” to get to the root of drive C:
Step 4
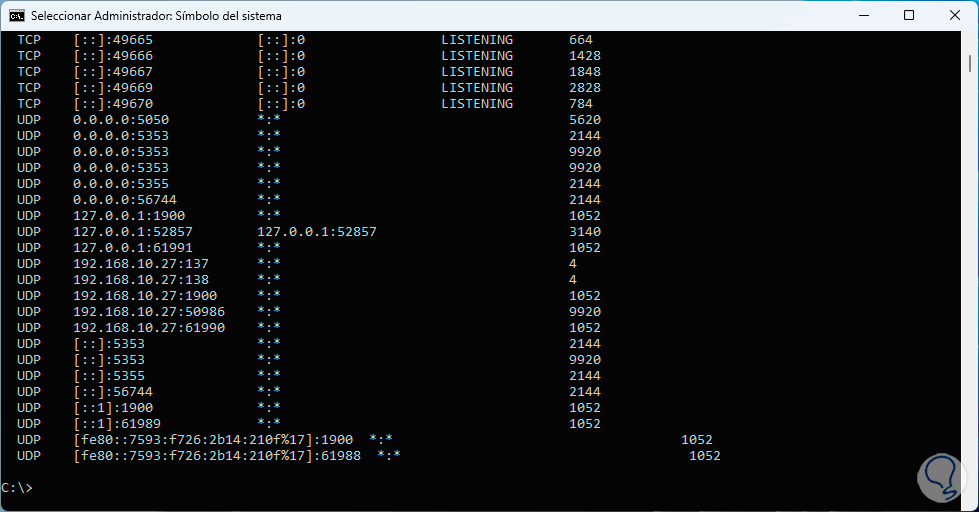
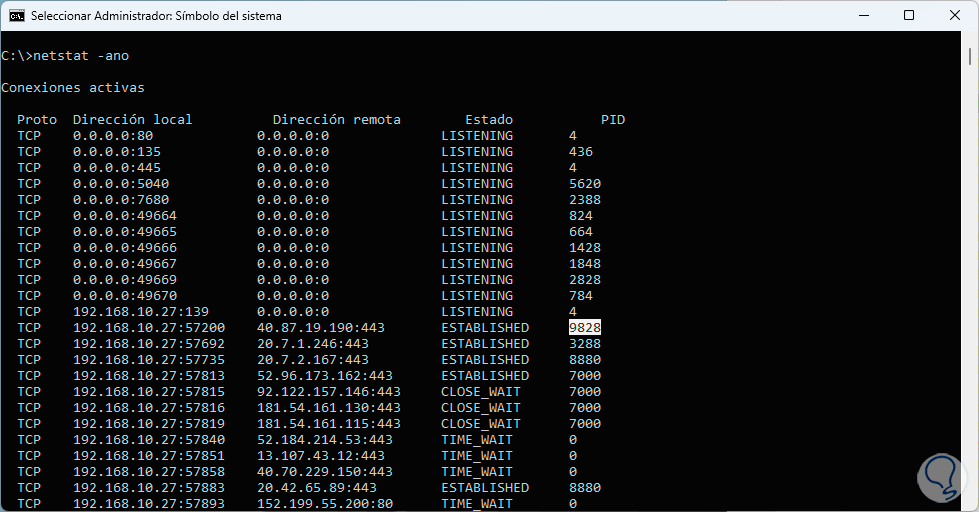
Once there, we are going to list the connections with the following command:
netstat -ano

Parameters
The parameters we have used are:
- -a: allows you to see all active TCP connections as well as the TCP and UDP ports listening to the computer
- -n: allows you to see the active TCP connections, the difference is that we will see the addresses and port numbers in number format but not with their name
- -o: displays active TCP connections by adding the process identifier (PID) of each connection
Extra options
Also, we have some extra options such as:
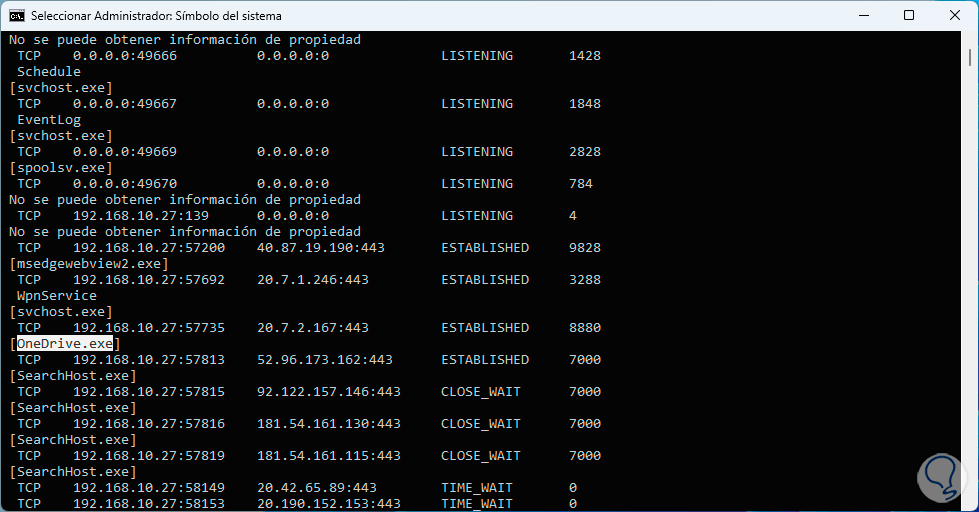
- -b: allows you to see the executable that worked on creating the connection or listening port.
- -E: generates Ethernet statistics, part of them are the number of bytes and packets sent and received.
- -p <Protocol>: display connections for the specified protocol.
- -S: shows statistics per protocol.
- -r: Output the contents of the IP routing table.
Details
We see the various columns with details such as:
- Local and remote addresses.
- Port status (for the presence of viruses we must look at the ESTABLISHED status).
Step 5
Let's go to the bottom to see all the results:
Step 6
For our analysis, we will keep the PID in mind:
Step 7
Then, in the Task Manager, we go to the “Details” section and look for that PID to which application or process it refers:
Step 8
But, if we do not want to open both windows, we can execute the following command in the terminal to also display the name of the app process involved:
netstat -anob
Step 9
We can see the complete details but the name of the associated process has been added, we must take into account the name of the suspicious process:
Step 10
Now, to eliminate the virus associated with this process, we must execute the following syntax.
taskkill /pid (PID)
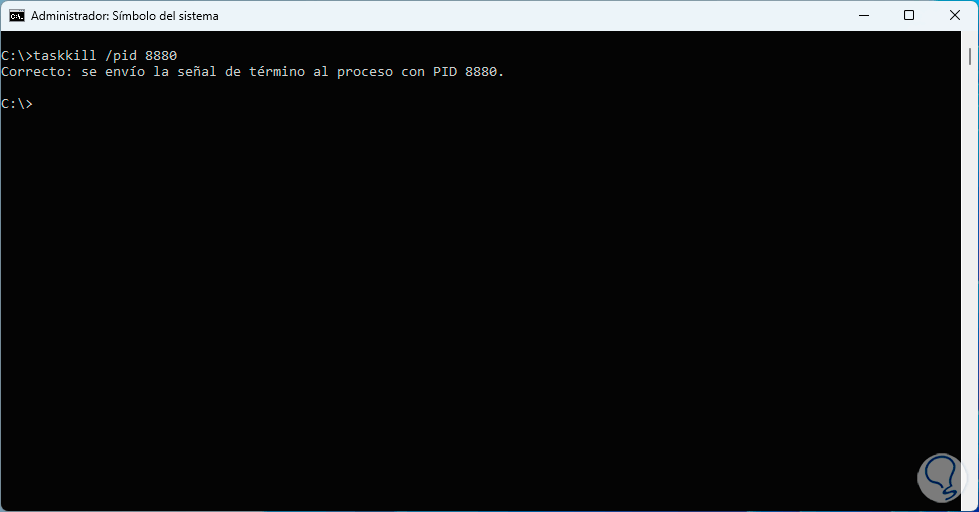
Note
In case we see a message that it is not possible to terminate it because it is in use, we must add the /f option to the end of the command
(taskkill /pid (PID) /f)
Step 11
Now, we access File Explorer:
Step 12
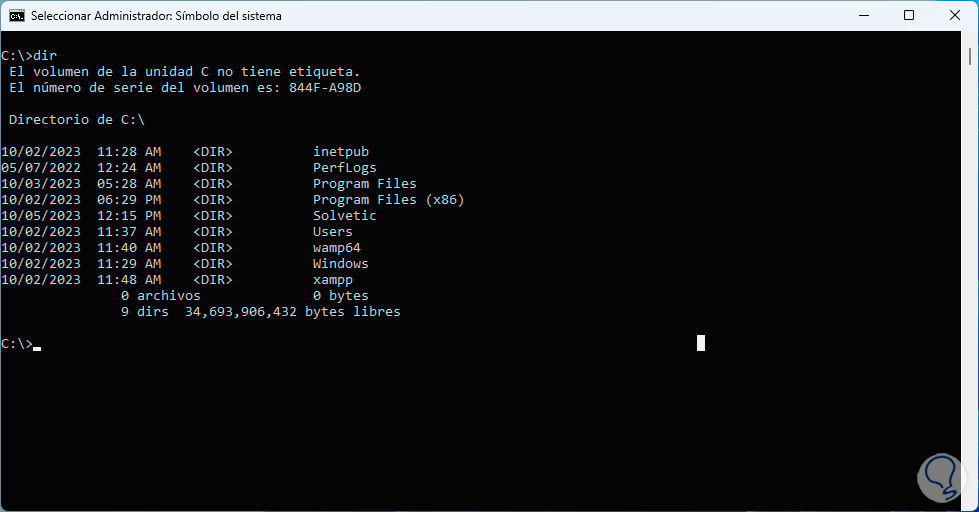
There may be viruses in text format, which may or may not be hidden. We return to the console, and first use the “dir” command to list the directories:
Step 13
In order to see the hidden directories, we execute the command:
will tell
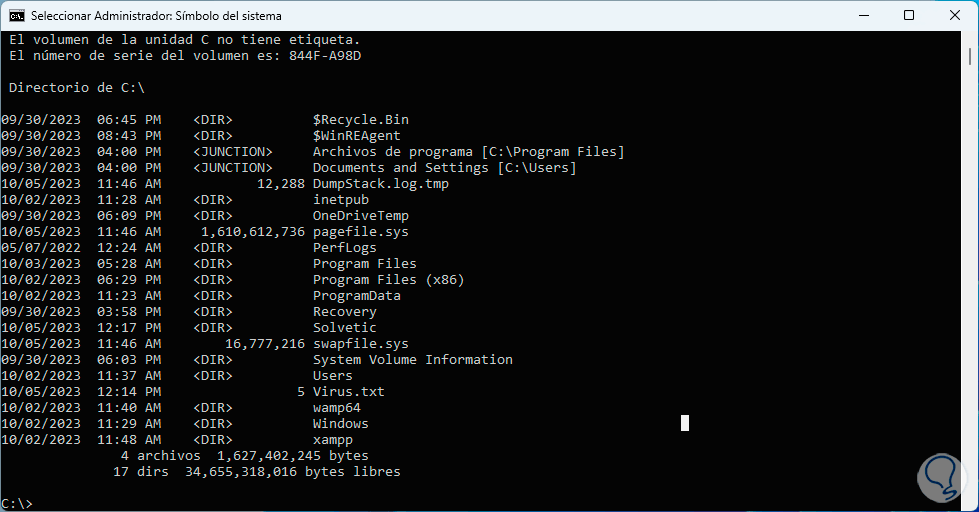
Step 14
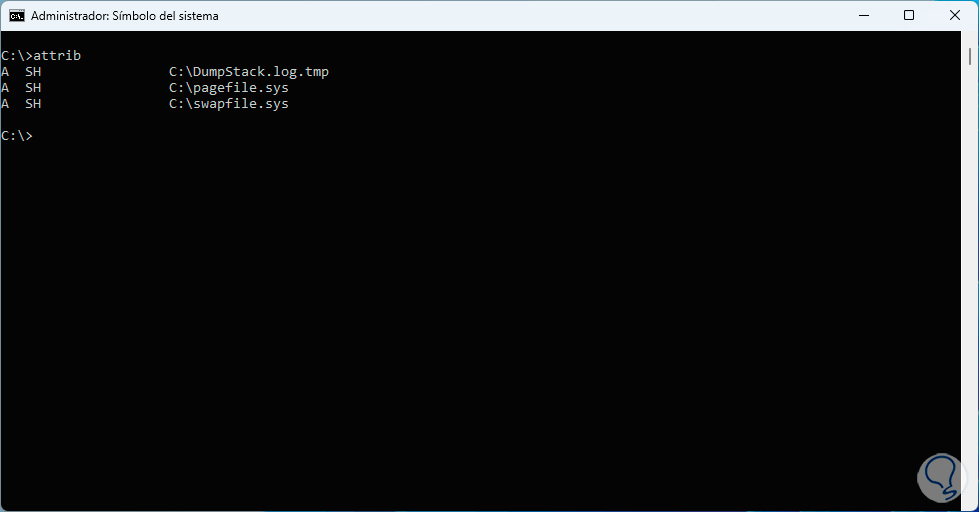
There we find the virus with the name “Virus.txt”, for better visualization, we use the “attrib” command:

Step 15
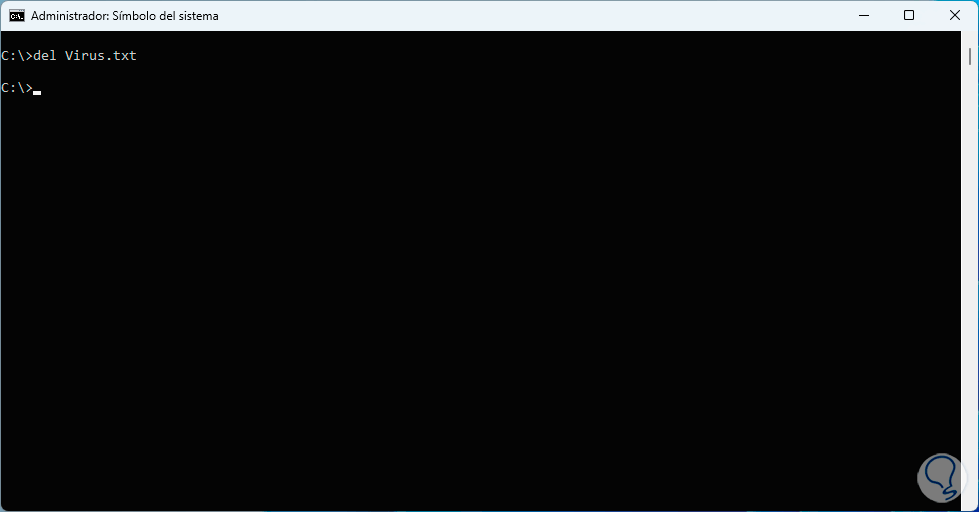
To eliminate this type of virus, we execute the following syntax:
from file_name
Step 16
With the “attrib” command we validate that it has been deleted:
Then we proceed with deleting the file.
Note
If for some reason the file is hidden, we must execute the following syntax:
attrib -h filename
These options are key to detecting the presence of viruses, and logically it never hurts to perform an exam with Windows Defender, and thus determine how we can improve security and privacy on our PCs with Windows 11..